
Hi friends! Today I am sharing a tutorial for the 3D Hot Cocoa Mug Santa (SVG, Silhouette). This little 3D project is a cute treat box that would also make a cute decor piece. I used papers from The Magic of Christmas collection as well as some black, white, and brown cardstock. I also used liquid glue to assemble it.

For the saucer fold all of the score lines in a valley fold. Add glue to the one tab, creating a complete circle with a hexagon shape in the middle.

Add glue to the tabs in the middle of the circle and place the hexagon on top.


On to the mug. With the outside of the cup facing up fold all of the score lines in mountain folds.
All of the panels are the same so it doesn’t matter which one you start with. Add glue to the tabs and using the score lines and the edge of the next panel, line the two panels up together and pinch each tab for a few seconds to secure the glue. Continue around the cup with the same method on all six sides.


Now with the sides all glued together, assemble the Santa on one side of the mug. There are also two shoulders and two beard/hair pieces that attach to the right and the left sides of the Santa. The face is in two layers. The black layer is glued down first then the flesh-colored paper next.

The mustache, pompom, and holly are the finishing touches to Santa.

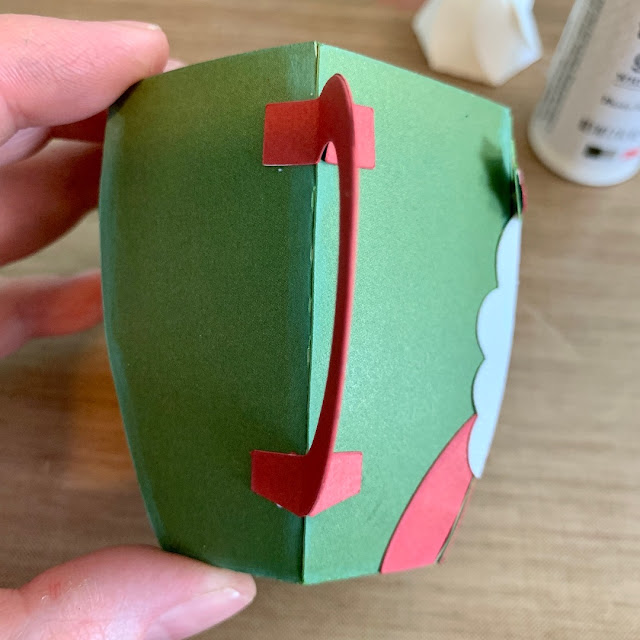
The handle of the mug is two pieces that are glued together. Be sure not to glue the tabs together.

Fold the tabs out and add glue. Attach the handle to the mug with a corner of the cup in the middle of the tabs.

The lid is also in two parts. For the cocoa/brown part, all of the score lines are folded in mountain folds. And the whipped cream is valley folds.

I decided to glue the whipped cream panels together. But I don’t think it is necessary. Either way, glue the whipped cream to the center of the cocoa and the lid is complete. The lid just slides into the mug with the tabs on the inside of the mug.


Now the mug is ready to fill with a yummy treat! Thanks for stopping by!
Brandie