Christmas Money Holders

Happy Thursday friends!  With Christmas only 4 days away, I’ve been looking for fun ways to give cash and gift cards, instead of just handing the kids an envelope.  Lori Whitlock has amazing ideas for gifting projects.  Even though I normally give gift cards, I saw these cute money holders and decided to mix it up this year! Cash for the win!

 
How cute are these??  They are larger than I thought they would be, which makes the presentation even more fun! 
These are SUPER easy to make!  Just group the colors on your “mat” in the software, and add 6×6 squares of paper on the 4 corners of your cutting mat.  I prefer to do this to cut multiple colors/shapes at one time.  It saves paper and time!
 

The cutting file makes this cute little cut out that folds up to hold the money.  The hole is about 1/4″ round so be sure to roll the money tightly to fit through the holes.  I used a thin metal rod (less than 1/4″ thick) to roll my bill. You may be able to tightly roll the money using a pencil or thin straw, etc.  Then just tuck the roll into the holder and your gift is ready!!  SO much cuter than handing the recipient an envelope!  

 
Here are a few more ideas:
 
Punch a hole and tie a ribbon on the top and hang it from the tree!
Tie or tape it to the top of a present for an added cash/gift tag!
Tuck this little cutie into a stocking!
Add it in a Secret Santa bag!
Or you could always mail it, of course 🙂
 
Thanks for stopping by my friends!  I hope you all have a wonderful holiday and enjoy creating throughout the rest of the year! 
 
Cutting files:  

And, the best part is that these money holders are 25% off this week. No coupon coded needed.

Blog * Shop * Facebook * Instagram * Pinterest

Big Tea Towel Bundle Christmas Gifts

Happy Monday everyone! I needed some quick office gifts so I ran to the Dollar Tree for some pot holders and whisks and made these cute little pocket pot holders.
I used Lori’s Big Tea Towel Bundle (SVG) Sillhouette doesn’t have the bundle but the 2 that I used were Whip It (Sillhouette) and Cooking Smoke Alarm (Sillhouette).
I used some gold and silver iron-on material for the images. Don’t forget to mirror your images.


I plopped in a little whisk and some cookie mix for a cute little gift for my co-workers.


Happy Crafting and Merry Christmas!
Chelsea

30% OFF Sale + Friday $5 Village Bundle!

Quick reminder that all SVG files are 30% off until Saturday at midnight with coupon code: DEC2023 in the Lori Whitlock SVG Shop.

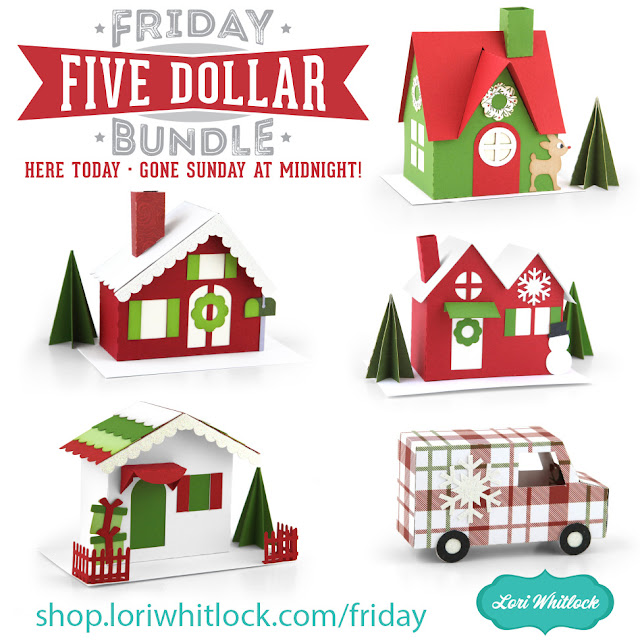
Also, This weekend we have a NEW Friday $5 Bundle which includes the SVG files to make the cutest little Christmas Village for just five bucks. These village pieces are so fun to make for the holidays. Make this project with your kids or teenagers. This deal is only available until Sunday at midnight, so don’t wait! Take a peek…

Be sure to go grab these SVG files while you can. 

** Because Friday $5 Bundles are already heavily discounted they are not eligible for further discounts including monthly, seasonal and flash sales.

Shop Friday $5 Bundle HERE

Thank you for joining us today! Have fun crafting this weekend!!!

~Lori


Lighted Shadowbox Decor Santa Tutorial

 Hello friends, Marcia here. I am sharing a tutorial on the blog today for the new Holiday Lighted Shadowbox Decor pieces. You can purchase a bundle Here that includes a Turkey, Santa, Reindeer, Elf, Snowman, and a Nativity Scene. I made the Santa (SVGSilhouette) and boy is he spectacular!

These are pretty easy to assemble. Let me show you how.

1. Cut out all the pieces from the desired pattern paper or cardstock. Be sure to scroll in Silhouette Studio to see all the pieces. There are 4 inserts, side panels, and a decorated front and back. We will assemble the side and back first Adhere your pattern paper panels to the cardstock back and sides.

2. Glue one side panel in place, adhering it to the tab with the four slits and then each tab working your way around to the other tab with four slits on the opposite side

3. Let’s assemble the front panel. We are going to start with Santa’s face. The white paper goes behind the black. That goes behind the flesh-colored face. Last, attach his eyebrows over each eye.

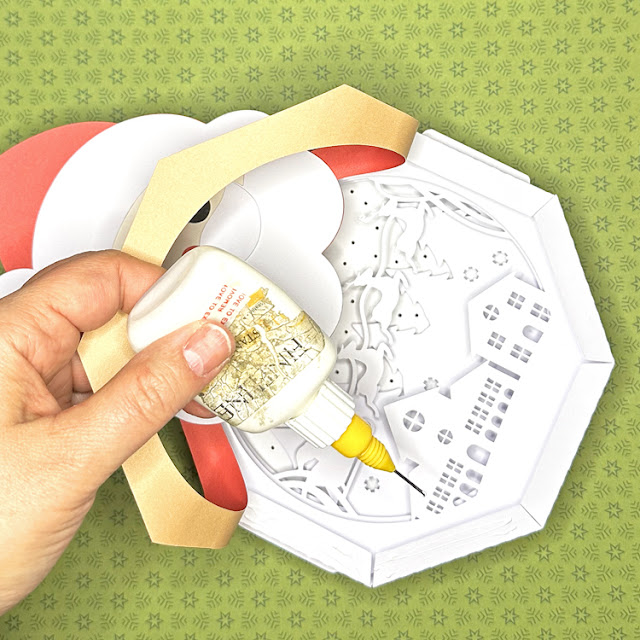
4. Adhere the black belt pieces on each side and the bottom of the beard. This allows you to fit the face piece in just so tucked under the mustache. Once the face is in there, go ahead and adhere the hat brim down along with the white pompom. Lastly, add the mustache.

5. We are ready to assemble the inside of the shadowbox. Take the back panel with the moon and start and slide the tabs through the slit in the back on each side. You want the hole in the back piece to be on the bottom.


6. Repeat with the other inserts.

7. Once the inserts are in place we can adhere the final side in place the same as the other side.


8. Adhere the front Santa panel to the front of the shadowbox. I did this a few tabs at a time. Then your Santa is ready for some lights or if you prefer you can leave it as is.


Thanks so much for stopping by. Be sure to check out all of Lori’s latest designs in her shop.
~Marcia

*** 30% OFF NEW Mug Lighted Shadowboxes! ***

Did you see the NEW Mug Lighted Shadowbox Decor SVG files that I released this week? Last month, the Lighted Shadowboxes were such a hit that I thought we needed another collection. These awesome shadowboxes make great decor items and Christmas gifts. Be sure to watch the YouTube assembly tutorial to learn how to put them together. And, the best part is that they are 30% off until Saturday at midnight with coupon code: DEC2023 in the Lori Whitlock SVG Shop.


Take a peek…


***SHOP HERE***

I hope you have a wonderful day!

Lori