Happy Thanksgiving! I hope your day is filled with great food, friends, family, pie, etc. And if you like shopping this weekend, I hope that you get all the deals you are looking for. I think there are many crafting deals that can be enjoyed right from your home and your favorite internet browser.
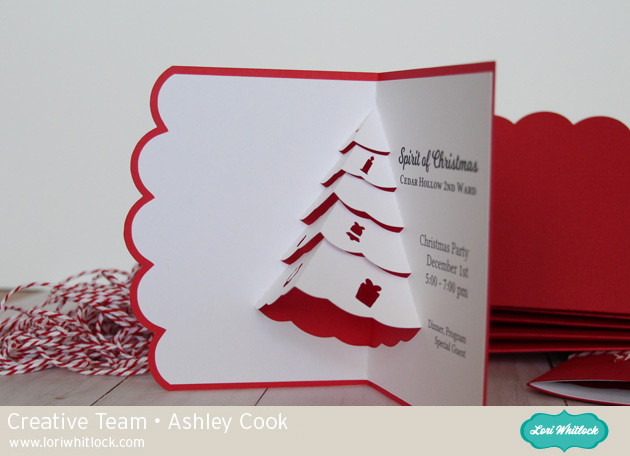
I am helping plan a Christmas Party for our church congregation. We wanted each family to have a special invite. So I searched for a pop-up card that I could make many. I found this great Tree Pop-up (Silhouette, SVG shop).

I decided to do a little editing. Before I un-grouped the card, I resized it just a little so that the outside of the card would fit onto a 8.5 x 11 piece of paper.

Then I did a little point editing. To add points to a design, double click on the shape, and click where you want to add a point. For this project, I chose the point to be a corner, then I manipulated the curves to the shape that I was going for.

At our Christmas Party, we will have a program about some of the symbols of Christmas. I wanted to incorporate that into the card. I used images from Lori’s Dingbat Christmas font (Silhouette, SVG Shop). Since these shapes will just be an outline in the card, I deleted any extra pieces by un-grouping, releasing compound path, and deleting any of the inner pieces.

With all the symbol images placed, I added text. Since my text isn’t too near the cuts, I decided not to do print and cut, so that I could get 2 cards for every piece of cardstock. I saved just the text in the correct format as a PDF and took it to the copy store to print. After printed, I cut 100 cards (well the Cameo did the cutting).

I am tying them up using a cute tag from Lori’s Tag Dingbat font (Silhouette, SVG shop).

I think they are pretty cute. I hope everyone likes the special invites. Now only 99 more to tie :).

Happy Thanksgiving!! And Happy Shopping!

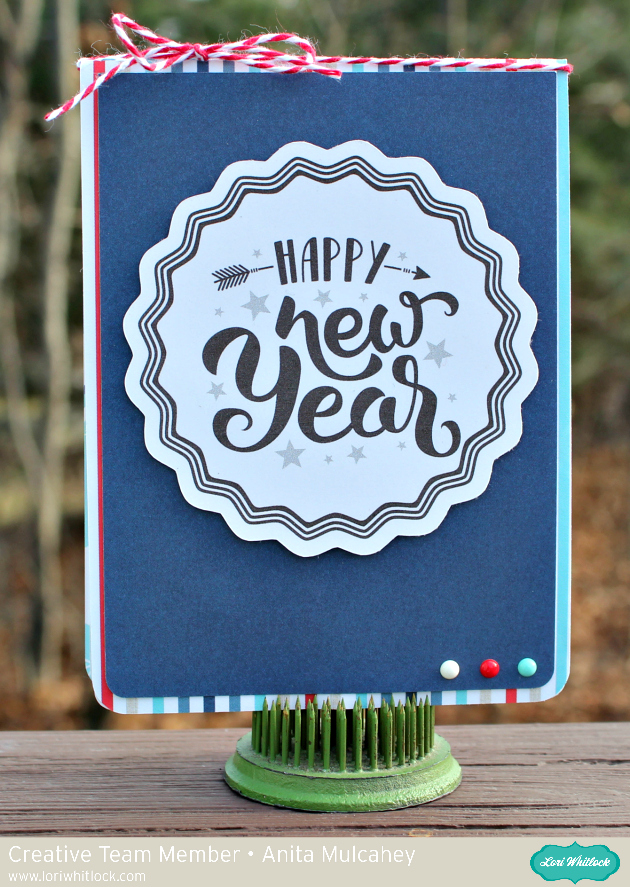 Happy New Year’s Eve everyone. Anita here to share with you this awesome and easy to make twist pop card. I used Lori’s new Echo Park collection
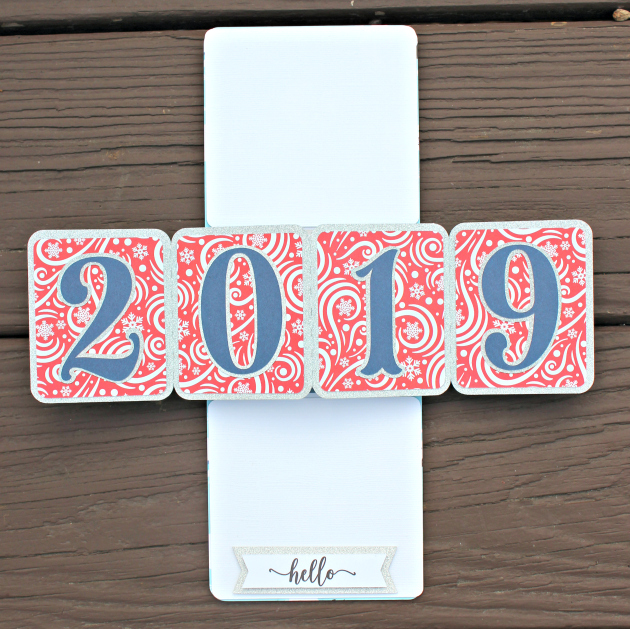 When you open the card the center pops out!
 Here is the view from the top down while the card is open.

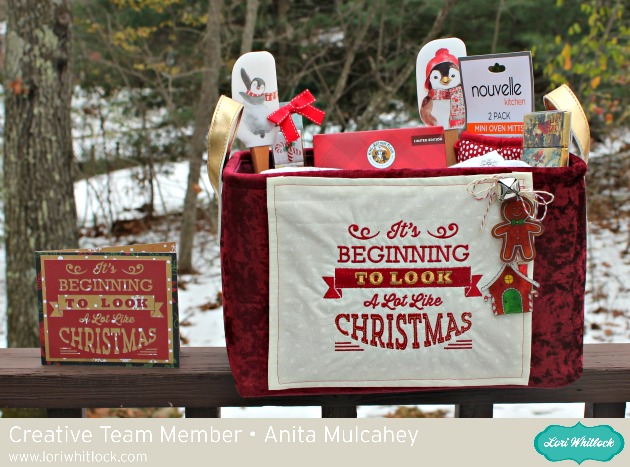 Anita here with a fun tutorial to make this gift set. I love to quilt and embroider as much as I love to paper craft and I was thrilled to recently discover that Lori Whitlock has embroidery files that she has designed, many of which mirror her paper craft SVG files. You can find her gorgeous embroidery files at
  I bought shrink film from Amazon and used Lori’s Print & Cut Stamps Christmas Cookies which you can find
 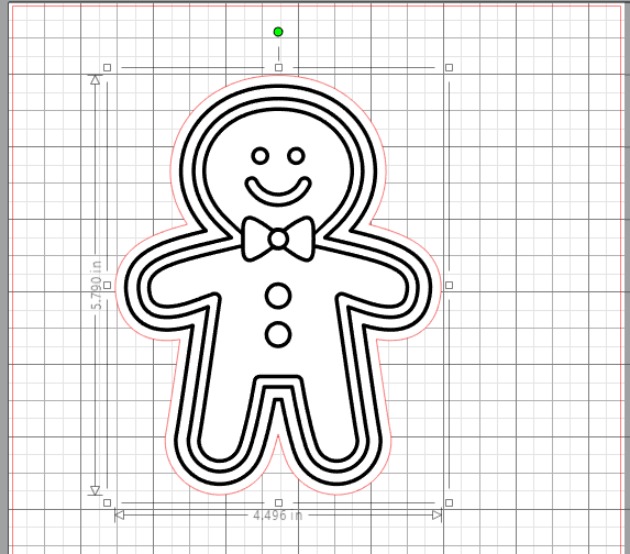 I then used my Copic markers to color the shrink film. I knew that the colors would deepen once I shrunk the image so chose my colors with that in mind. I used R37, E11, G14, G07, E99 for the gingerbread man and Y08, E99, R37, G07 for the Gingerbread house. Be sure to punch a hole in your shrink film before you put it in the oven and remember that the hole shrinks also. The directions say to bake the film on parchment at 300 degrees for 2-3 minutes but I found that my heat gun worked much better as I could control the plastic as it shrank. Below is the before picture.
 Here is the photo of the shrink plastic after it was done.
 I went to Embroidery online and bought the bundle which had all the Christmas embroidery files that I wanted to use for this project. It is called
 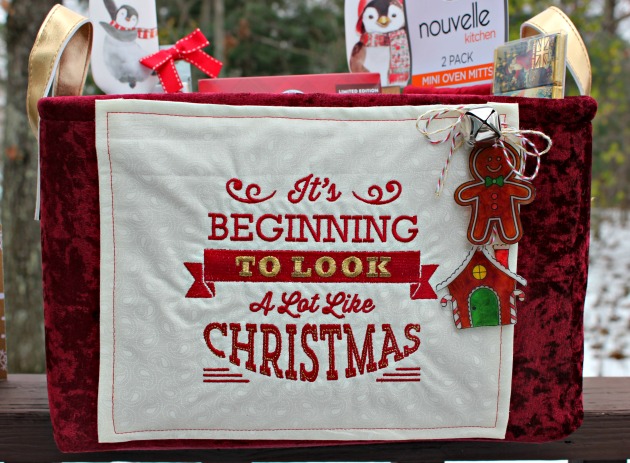 I then strung my two adorable gingerbread embellishments on some yummy twine, added a bell and glued that down as well.
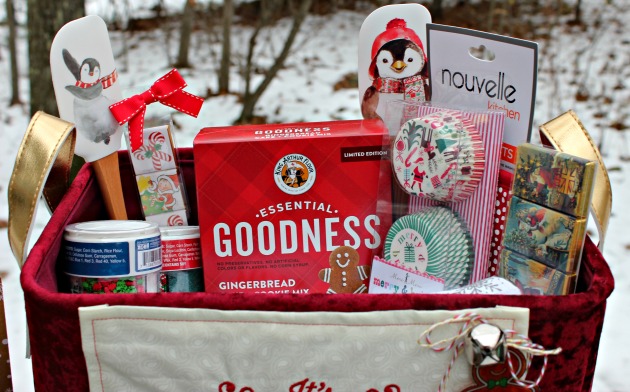 The last thing that I did was made a card that used the SVG cut file which matched the embroidery. I used Lori’s new Christmas collection called Celebrate Christmas. The cut file can be found here in Lori’s store and
  That’s it for me. Hope that you have a wonderful holiday season.