Sweet Little Valentine Chocolate Box

Hello, Crafty Friends!! Mitsyana Wright here… and I’m ready to toss out my winter snowflakes for some heart filled skies because Valentine’s Day is around the corner and February is the month of love.  So what better way to celebrate than with sweet for your sweetie… or sweeties. I have 4 kiddos and a Hunny bunny that would love to receive this sweet little Valentine.For this romantic shabby chic heart box, I used Lori Whitlock’s Valentine Nuggets Heart Box.

You can find this cut file in Lori’s SVG Shop, hereOr in the Silhouette Storehere.

I started by downloading the file onto my computer and extracting the contents of the file.  I opened my Sizzix eclips software and loaded the file. I clicked the “Import” button to open the file into my software.

Once I opened up the file I grouped the images by like shapes and colors. (ex. all the red shapes together, all the scalloped hearts together) and moved them around to fit my virtual mat.

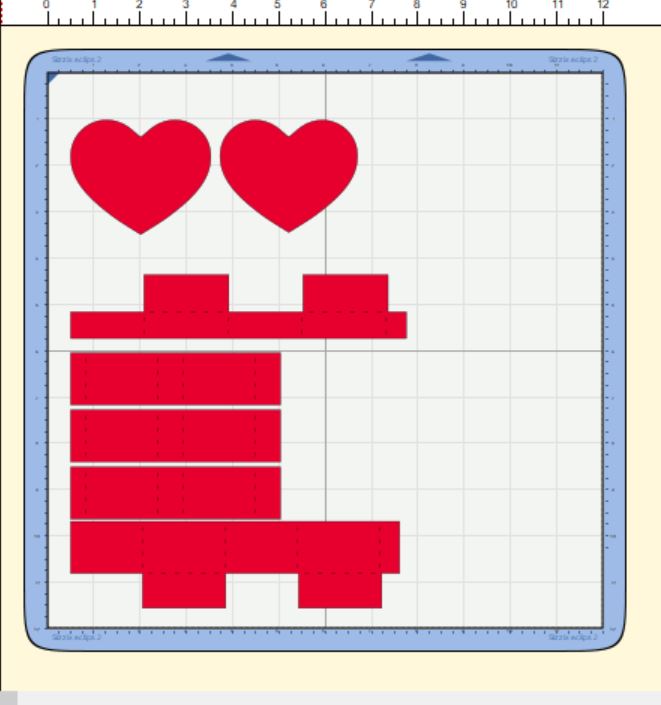
Then, I grouped my “like” items together so I could cut all the shapes of the same paper all at once. I used the gorgeous floral paper to cut the box panels and the basic heart shapes.

Then, I “hid” those box panels and basic hearts…

and die cut just the scalloped hearts from this beautiful fleur de lis paper. Once, the scalloped hearts were cut  I inked the edges using Walnut Stain Distress Ink.

To assemble the TOP box, I folded the panels along the dotted crease lines and folded each piece to form a rectangular shape. Then added glue to the small tab at the end and adhered it to the opposite end.  I pinched the ends together till the glue set and then added more glue to the bottom flaps directly to the bottom or “underside” of one of the scalloped hearts. If you look very closely at the cut, you’ll notice that there are tiny markers cut into it to mark where you need to adhere the boxes… so there’s no guessing where the center of the cut is and your box is properly aligned. I added glue to the box panels bottom flaps and adhered my box in between these markers.

For the Bottom box, I took the other scalloped heart and left it faced up and added glue to the remainder box’s bottom panels… but before attaching it I ran both basic heart shapes through my Xyron Sticker Maker and adhered one the hearts to the remaining scallop heart. Then I attached the remaining box over that.

For the inside panels of the box, the file has these separators. I just folded along the dotted lines and add glue to the small tab and attach to the opposite end so that it resembled a rectangle. Once the glue dried, I inserted all three into the bottom box.

Here is what both the bottom and top pieces should look like…

The top lid should fit snuggly over the bottom box.  I just simply added a sprig of leaves and flower buds onto the cover and topped with a single rose.

Here is my finished box…

This little Valentine treat box is absolutely darling!!

And these delicious Hershey’s Chocolate Nuggets fit perfectly!! But don’t let the name of the file fool you because…

hey, look… these Dove Chocolate hearts fit perfectly too!!

I’m sure you can fit lots of other goodies in here as well. So give it try!!  I love this cute treat box… makes my heart aflutter!!  I hope it makes yours too!!  Thanks for joining me today & I hope you enjoyed my project!!

~Mitsyana Wright

Camera Treat Cup Card Tutorial with Brigit

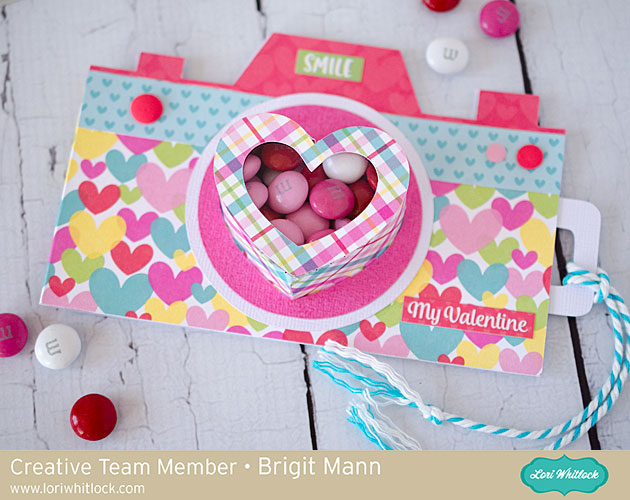
Hello, it’s Brigit here today sharing a Silhouette Studio tutorial on how I made this cute camera treat cup card. It looks like a lot of steps but it’s really super easy to make since it’s just two files put together.

This was such a fun project to make and can be used for any card to add some yummy treats.

I started with the heart shaped box with window from Lori’s shop, you can get it from the Silhouette Design Store here.

I ungrouped and deleted all except these three pieces.

Zooming in real close I aligned these two pieces along the score marks. I wanted one piece instead of two since the heart box will be sized smaller.

Selecting both I replicated and mirrored above and moved the two on the top  a couple of arrow clicks down. Depending on how wide you want the box you can move this as much as you want.

I selected all the pieces, welded and grouped them all together, I then grouped with the heart.

Next, I worked on the camera, I used the one from the travel icons set, you can get it here also from the Silhouette Design Store. I put it together on my mat and resized it to about 5.5″. Two of the pieces I didn’t use so I deleted them.

Now I took the heart box and resized both pieces together so the heart fits inside the circle. I made a duplicate of the heart and ungrouped to just use the bigger layer, this is what I used to make the heart cutout from the camera pieces.

I duplicated the whole camera and did a subtract all, I did this a couple of times deleting what pieces I had already made cutouts from.

As you can see, I ended up with all these pieces. the upper right piece is just a duplicate of the camera with the top cut off, that will go inside the card to hold the slider.

The slider is just a square and two rounded squares welded together. You just have to make sure it covers the heart opening and is smaller than the extra piece that goes inside.

I replicated and mirror left the camera bottom layer with the heart cutout, moved it one arrow click over and welded to create my card base. I did a release to get rid of the heart cutout on the left side which would be the back of the card.

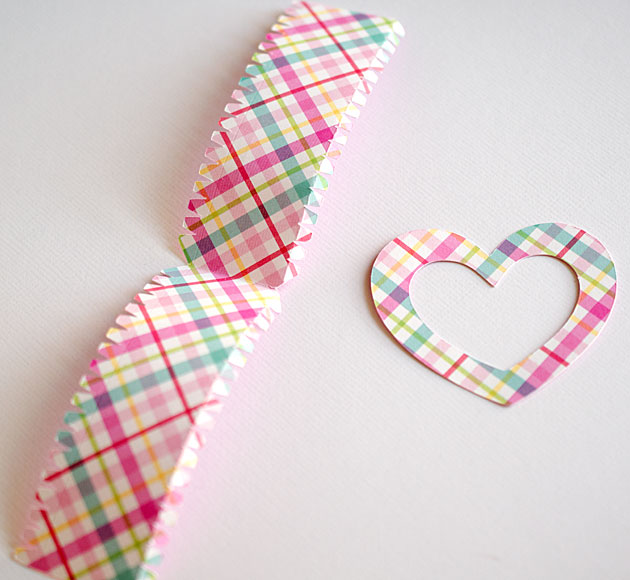
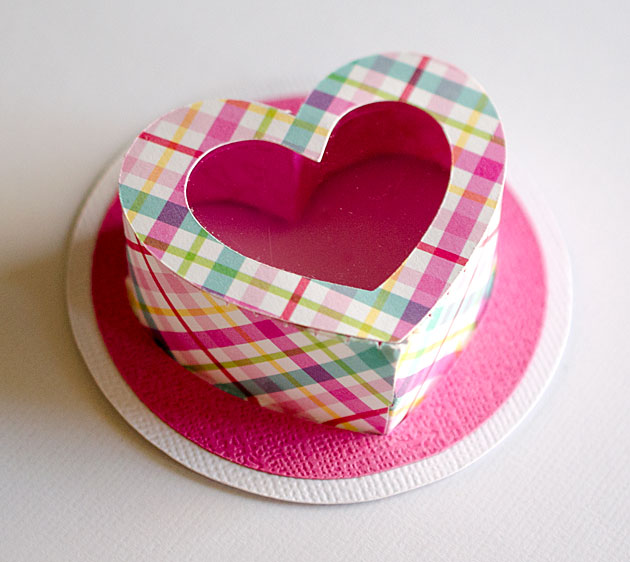
Here’s the box pieces cutout, I molded the side a little and used score tape which made it quick and easy to put together.

The pink and white layers should slide right over and glue to the bottom tabs, just make sure the tabs are going out and not in.

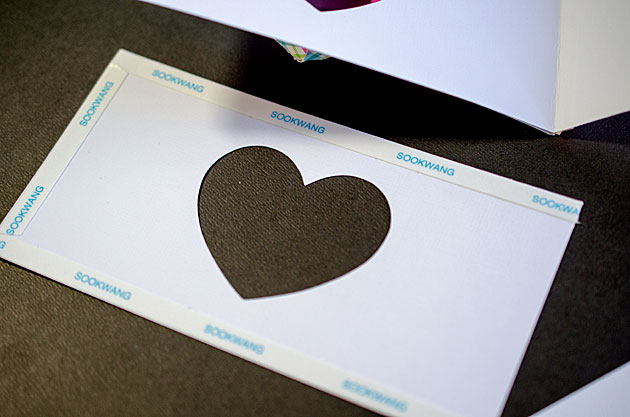
The inside piece for the slider just needs tape around three sides so the slider can move in and out.

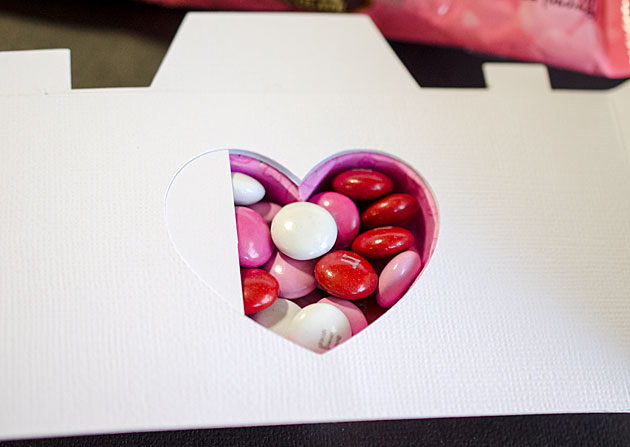
As you can see I filled the cup with m&m’s and pushed the slider in.

Here’s a closer look at the card, it’s a little front heavy so it doesn’t stand very well with the candy inside but it’s super cute. Paper used is Doodlebug’s Cream & Sugar.
Hope you enjoyed this tutorial, thanks for stopping by and have a wonderful day!!

Christmas Card Mini Album with Brandie


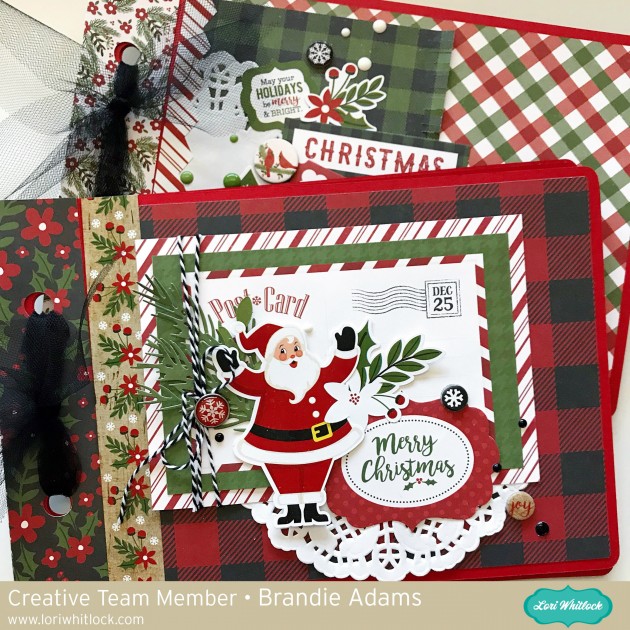
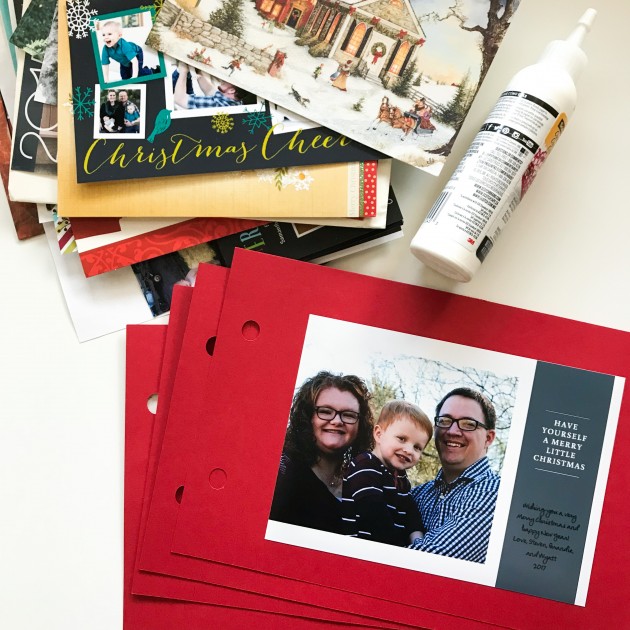
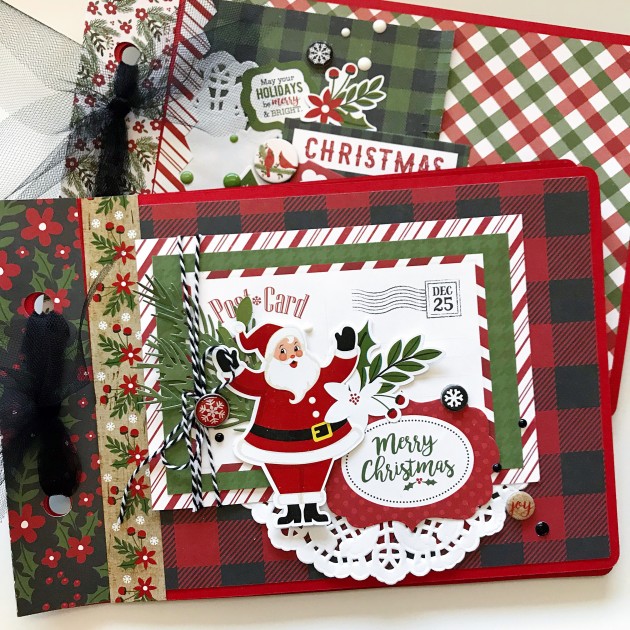
Hi there! Brandie here with a tutorial on how I made this mini album for my Christmas cards. I have been wanting a cute way to display the Christmas cards I get every year and this little album will do the trick. I used the Mini Album Rounded Corners file you can find it here in Loris shop and here in the Silhouette Store.

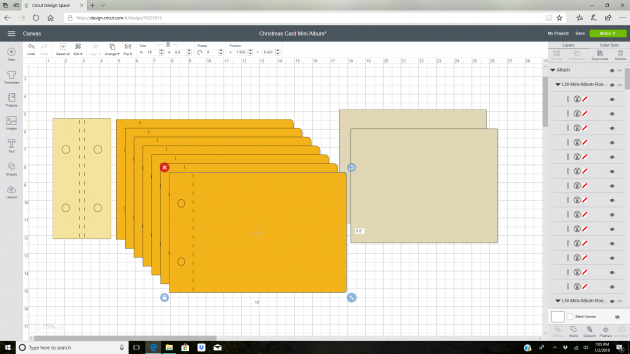
After I uploaded the file to Cricut Design Space I resized everything so that my largest cards would fit. For this album it is 6.8 inches tall by 10 inches wide. To get the correct proportions for all the pieces select all then use the arrow corner to enlarge everything.

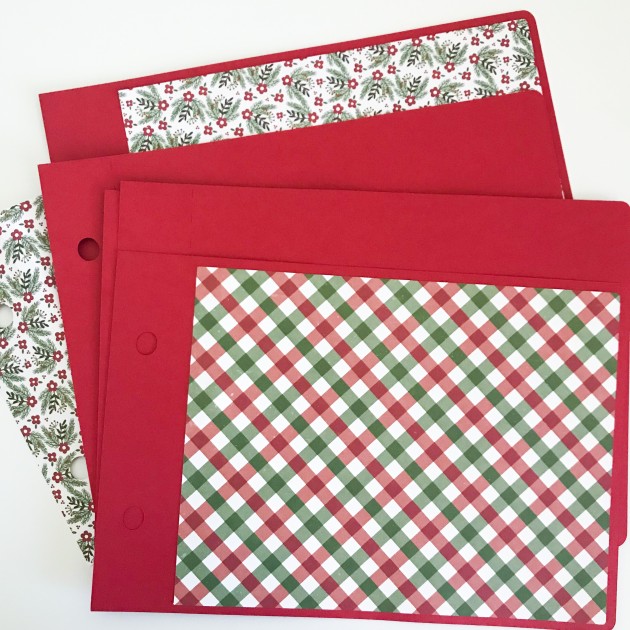
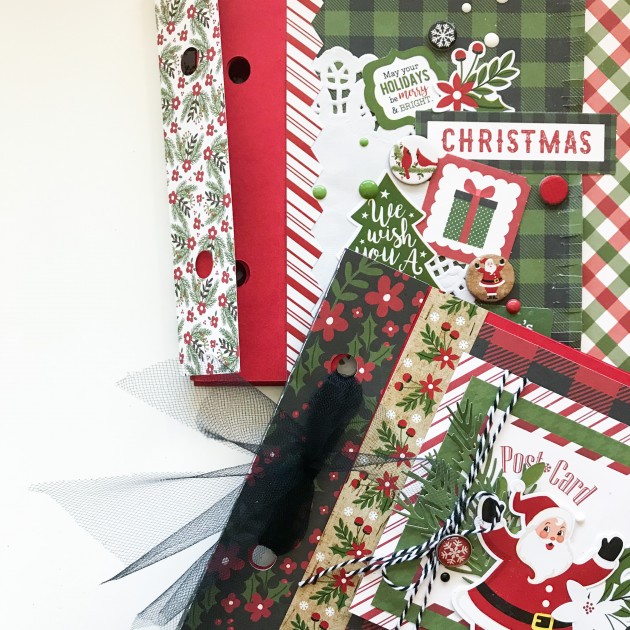
Once I had everything cut I added my decorative panels. I also decorated the fronts of my albums with the papers and embellishments from Echo Park’s A Perfect Christmas collection.

Then I glued my Christmas cards to the pages.

I placed the binding cover and tied them with tulle.

Now every Christmas I can pull them out and look back to see how family and friends have changed over the year as the new cards come in.

Thanks for stopping by!

Brandie

Snowman Gift Box with Kathy

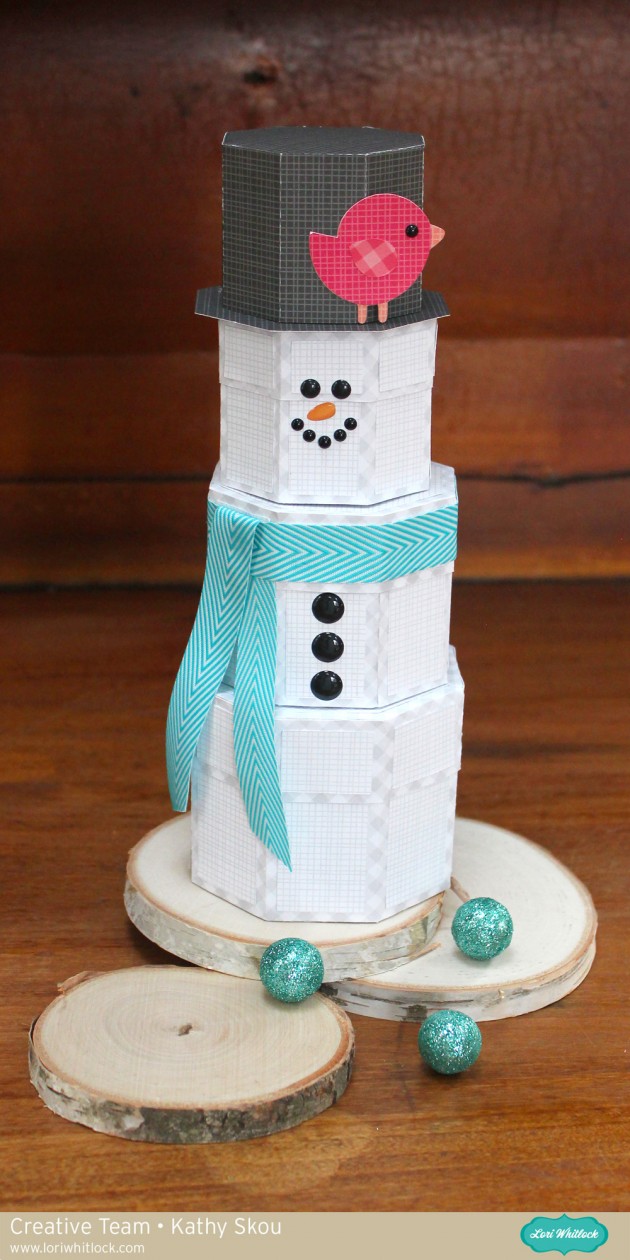
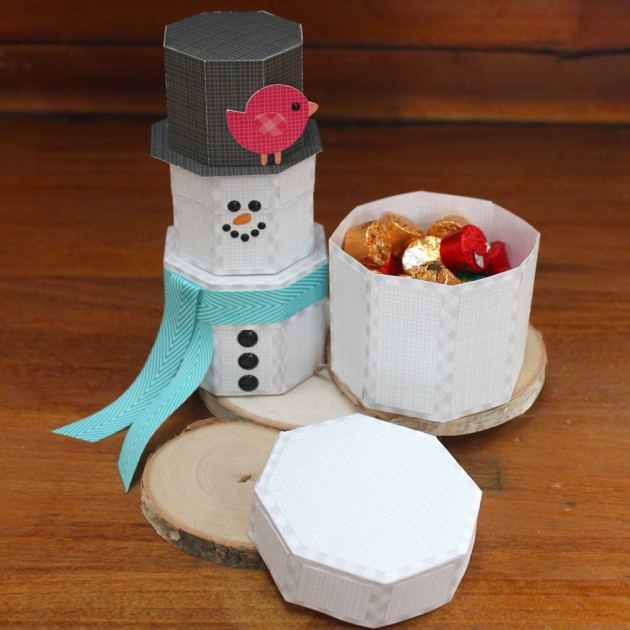
Hi Everyone, and Happy New Year!  I don’t know about where you are but we are covered with snow here in the Boston Area!  I’m not a fan of the cold, but I do love snowmen!  I decided to make my own little snowman gift box using Lori’s new Polygon Box – 8 Sides. (here in the Silhouette store).

This little collection of boxes is the perfect way to package up a treat or small gifts!   It was really easy to put together.  I started by loading the box into Silhouette.  I then copied the box two more times to make up the 3 segments of the snowman’s body.  I resized each box so that they were graduated in size.  Widths are 11.75, 10.25 and 8.75.  Be sure to resize proportionately.

I cut the boxes, and glued the decorative panels to each piece before I set to assembling them.

These boxes are very easy to assemble.  To start, I folded the score lines on the tabs and then along the side panel.  Then you simply glue each section of the side to it’s corresponding tab to form the base.

To finish, just glue the remaining side section to both the tab on the side and the tab on the bottom piece.

The top and the bottom of the box are assembled in the same manner.  Once I had all three boxes assembled, I decided to make a hat for the snowman.  I sized the bottom half of the box as shown below and then made a “brim” for the hat by re-sizing one of the decorative cover panels.

The rest is as easy as building a snowman!  I stacked the boxes and added a face & buttons using enamel dots.  The scarf is a piece of ribbon glued to the sides of the cover on the middle box.  I used a removable glue dot to hold the pieces together.  And of course I had to add the cute little birdie, (SVG here in Lori’s Shop) which is this week’s free file in the Lori Whitlock SVG Shop!

And each box opens to reveal a treat inside!

That’s it for me today,  thanks for stopping by to peek!

Gingerbread House Gift Box Tutorial with Michelle

Christmas is almost here! It’s time to add your those personal touches to your holiday preparations. If you are like me, Michelle, you’re going to need an extra box or two! Today I would like to share a tutorial for Lori’s Gingerbread House Box.

This is quite possibly the cutest gift box ever!

This little box is the perfect size for a generous helping of candy and cookie treats, a fuzzy pair of winter socks, or a gorgeous handmade ornament. Whatever your gift is, you’ll receive lots of “oohs!” and “aahs!” when they see this box!

You can find the SVG files to make your Gingerbread House Box at the Silhouette Design Store, or at the Lori Whitlock SVG Shop.

Open your files and get ready to cut! When you prepare your files for cutting, I like to group them all together by color. For this project, I used plain cardstock, but patterned paper would be cute too!

Now that you’ve cut out all of the pieces, it’s time to get creative! This is a good time to add glitter, inking, stamping or other elements to your decorative pieces.

Here’s a tip: Add glitter to your pieces AFTER they are cut. It’s much easier to cut cardstock then it is to cut glitter paper, and it will make your blade last a little longer too! Don’t forget to slow your machine way down to cut intricate details.

For some “icing”, I used a glittered 3d puffy paint. If you want to do this, you’ll have to allow extra drying time before handling. Don’t forget to make certain that your icing scallops are all going the same direction.

Now that your decorative pieces are ready, let’s assemble the box! Starting with the box shape, glue the side tabs pieces to the straight pieces.

Set the assembled box aside, and let’s make the lid, or roof of the box. I added the decorative pieces to my roof first. Apply glue to the tabs and the lid will go together easily.

To add the shingle strips to the lid, start at the bottom. There will be a small overlap, so space the shingle strips ends approximately 1/2″ apart as shown.

Working from the bottom up, glue your strips. When you get to the top piece, add the white “frosting strip.”

It’s adorable already and we are not even done yet! Add the rest of the decorative elements to the box base using the finished photos as a guide. It’s as much fun as decorating a real gingerbread house! Tip: Place the lid on the box before adding the decorative elements. This way, you can be certain that your lid will not cover the cute candy pieces.

You can use enamel dots, glitter glue, ribbon…anything! Be creative and have fun with it!

I hope that my tutorial has inspired you to make your own Gingerbread House Box.

Merry Christmas and Happy Holidays to you all!

~Michelle