3D Pumpkin Tutorial

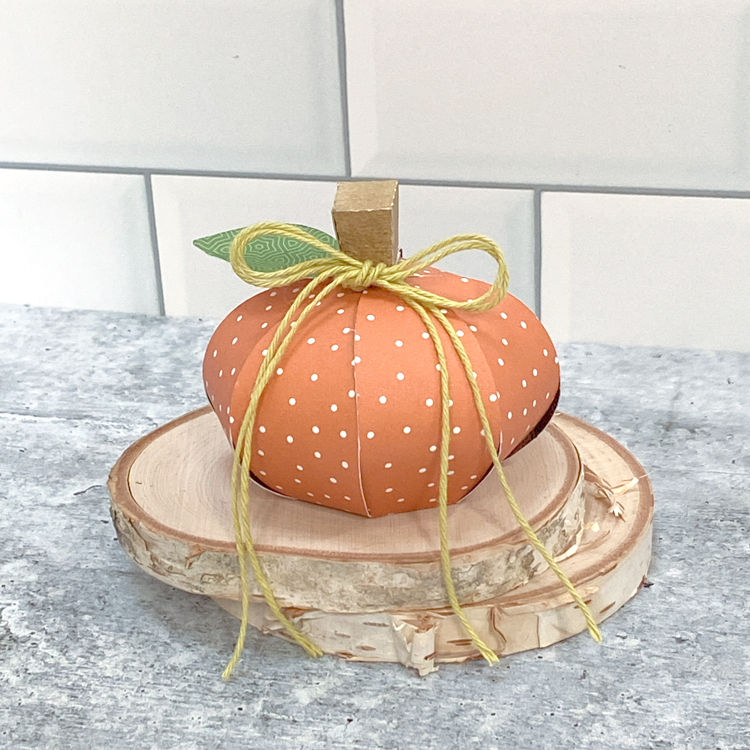
I wish I could say fall is in the air… not quite yet in New England… so I’m making my own “fall” today!  This adorable 3D Pumpkin (SVG, Silhouette) was the perfect little project to make me feel more autumn-like!  It’s such a cute little decoration, you could fill it with a treat or use it as part of your seasonal tiered tray décor!  Take a peek…

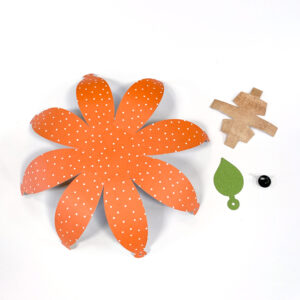
I put together a quick assembly tutorial for this file… it’s really pretty simple….  I started by cutting my pieces. I curled the pumpkin sides using a pencil.  I also went to my stash to find a brad.  It really does not matter what color brad, it gets covered up. A smaller brad would be best.   Next, I folded the score lines of the stem piece all in the same direction. I maneuvered the pieces to create the stem shape and glued it together.

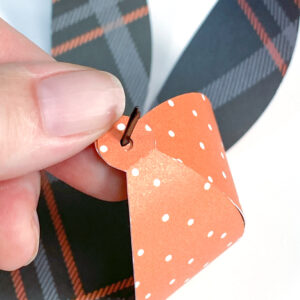
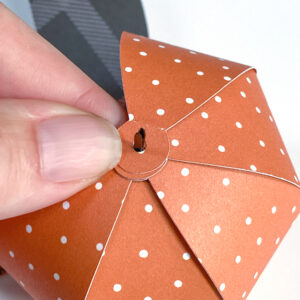
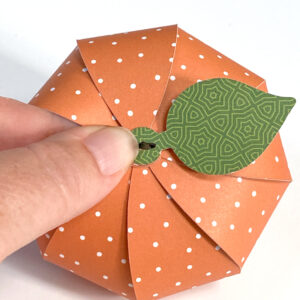
Next I gathered up the pumpkin sides to form the round pumpkin shape.  I chose to place my brad on the inside and have the prongs on the outside.  I found that easier.  You could always do it the other way.  I started bringing up each side, and sliding it over the brad tongs to keep it in place.

When I got to the last few sides, I gently stuck my hand into the pumpkin between 2 of the sides and then folded over the last piece.  If you are going to add a small treat to your pumpkin you will want to add it before you bring over the last side.

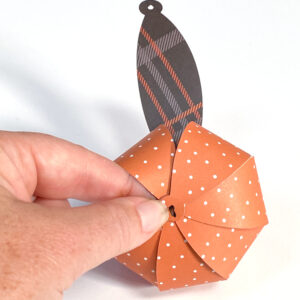
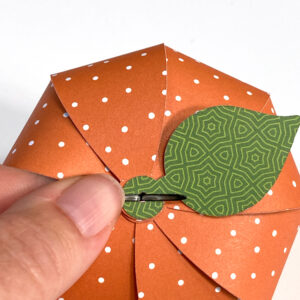
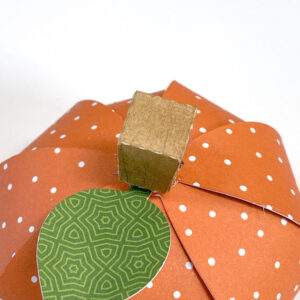
Once I had the last side in place, I then added the leaf.  I folded out the prongs of the brad to hold it all in place.  I then glued the stem on top of the brad to cover.  I did have to snip the ends of my brad, but if you used a smaller brad you might not have to.  I only had a large one.

All that was left was to add some fun twine!

That’s it for me today, thanks for stopping by to peek!

BLOG | INSTAGRAM

Bakery Box Card Assembly Tutorial

Hi friends! I’m stopping by today to share a tutorial for the Box Card Bakery (SVG, Silhouette). This card is so darling and would make a fun birthday, get well soon, thank you, or just because card.
I cut out all of pieces in various shades of cardstock and then inked around the edges of most of the pieces in matching colors to give them a little depth.  The bakery sentiment was done using the print and cut function of my machine.
This card does have several small images and for me the easiest way to assemble them is using a sticker maker. The adhesive is strong with no mess or glue seepage that can happen with wet glue.
First, I folded all of the score lines into mountain folds. Then glued the white panel on what will be the inside of the card. This panel is to cover the holes for the door and window.

I then assembled the bakery sign, and awning. Dry fit the white pieces before gluing into place. Each little piece has a correct place on the awning. The image cuts the stripes in the right order. If you are careful when taking them off of your mat and keeping them in order, you won’t have a hard time assembling them.  Or if you are like me and go willy-nilly pulling everything off the sticky mat it isn’t too hard to figure out the correct placement.

I attached the door and window frame first. Then added the awning, the top trim piece, then centered and the bakery sign. I also added the smallest bread loaf, donut, and cookie to the window display.

For the insert I added the pretzel and largest loaf first then added the donut.

Now it’s time to assemble the box card. Flip the card base over so that the inside is face down on the table. With the insert face up, valley fold the tabs, and add glue to the right tab only. Glue down on the card base. (I added the X to show where to glue.)

Line up the tab with the top of the card base and to the left of the score line.

For the left tab, valley fold the tab, and add glue. Then fold over the left side of the card base. (Aiming for the spot where I have drawn the X.)

Hold until the glue sets.

The box card is ready to be closed up. Add glue to the last tab on the left then fold the right side of the card over. making sure everything is lined up.

Now it is ready to be sent off to someone special. Thanks for stopping by today!

Brandie

Flower Tag Tutorial

Today I’m going to share a tutorial for the Flower Tag (SVG, Silhouette). This is a fun tag that can be added to a treat or a gift.

To start, cut out all the pieces.  I then inked the edges and also used a marker to curl the edges of the flower pieces to give the pieces more dimension.

To assemble, I first used adhesive to glue the leaf on the tag. Next I layered each piece of the flower.  I applied liquid adhesive to the center of each piece and stacked the pieces one at a time.

Now the tag is all ready to be added to a gift!  You could make these in a variety of colors for the seasons or to match your wrapping!

Have a great day!

~ Ashley

Box Card Coconut Drink… with a Twist!

Where is the summer going?  I can hardly believe that we are in the second week of August.   I fell in love with Lori’s Box Card Coconut Drink (SVGSilhouette).  I used some of Lori’s Echo Park Paper collections including Wish Upon a Star and Endless Summer. For my “twist”,  I used a bendy straw and two-sided tape on the straw to adhere the twine.  Next, I glued the bent straw to the straw outline on card SVG.  It worked perfectly !  There are so many ways to kick your creations up a notch and I was happy to share this one with you today.  Here is a photo of the card flat and ready for mailing.

And don’t forget, Lori is having a sale in her SVG shop through Saturday.  Get 30% off All SVGs, Fonts, Pattern Fills and Commercial Licenses when you use code AUG2022 at checkout!

That’s it for me today.  Enjoy the rest of your summer!

Hugs,

Anita

Gingerbread Man Christmas Present Box Card Tutorial

Hello everyone! Marcia here today. Since it is July and Lori just came out with some new Christmas box cards, I thought I would get a jump on making my Christmas cards. Do you start making Christmas projects in July? My mother-in-law loves gingerbread, so I thought the Gingerbread Man Christmas Present Box Card (SVG, Silhouette) would be perfect for her. There are similar new Christmas Present Box Cards with Santa, Reindeer, Snowman, etc…

Let me show you how easy these box cards are to make.

Step 1.  Decide on cardstock colors and/or pattern papers and cut out all pieces. I like to match the base cardstock as close as possible to the pattern paper I am using. The cut file comes with a tag and three different sentiments. You can use the print and cut feature of your machine to create the tag. Otherwise, a stamped sentiment works well too. Before assembling, I ink the edges of my papers to give the shapes dimension. Here I have the pieces roughly arranged in layers.

Step 2.  Adhere the Flower together, the Mug, and the Gingerbread Man. To get the eyes and mouth just perfect, save the negative piece and use it as a guide. You’ll never again have eyes too wide apart or a crooked smile ever again! Adhere the ribbon and bow paper pieces onto the card base.

Step 3.  Cut a piece of twine and attach to the tag. Using a sharp pick, poke holes in the bow using the dots as a guide. Thread the ends of the twine through so you can tie it off in a knot in the back of the bow. I secured the tag in place with foam tape. (Optionally, you could thread the twine through before adhering the bow front the the bow back.) Glue the side tab to the opposite side to form the card base. Using foam tape, add the flower to the front.

Step 4. Adhere the inserts into the card base placing the mug in front of the gingerbread man.

These cards do fold flat for mailing in a 5×7 envelope. Lori has lots of Christmas card ideas in her shop. Go check them all out and have some fun making your own cards!

Thanks so much for stopping by.
~Marcia