
Hello everyone and Happy National Button Day! Traci here and yep … there’s actually a day that celebrates these little fasteners. I wanted to incorporate them into my project and I knew Lori would have something wonderful. I found a cutting file for an embellishment called Shaker Mason Jar and I turned it into a cute holiday card. Here’s a quick tutorial on how I made it …
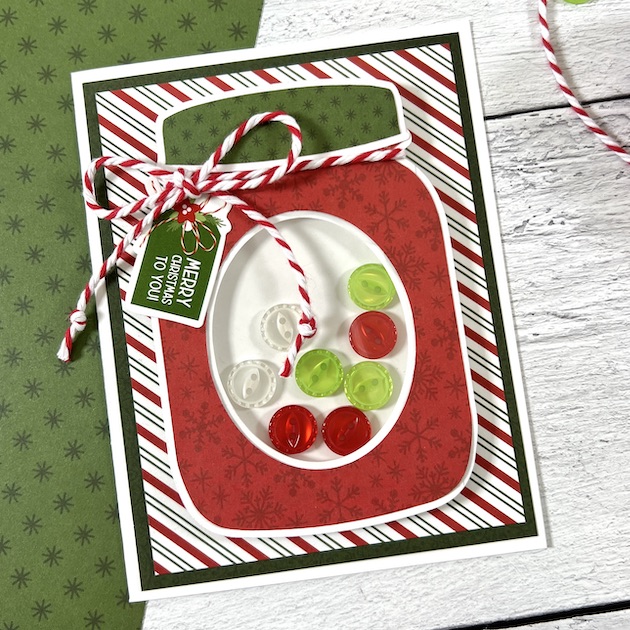
For supplies, I used the Shaker Mason Jar cutting file (SVG, Silhouette) and Echo Park’s beautiful holiday collection called Magic of Christmas (also designed by Lori). I used the 6×6 paper, the 12×12 sticker sheet, white card stock, buttons and twine.

To create the A2 size card, I cut out a piece of white card stock measuring 8.5”x 5.5” and scored it at 4.25”.
Then using the file and my Silhouette Cameo machine, I cut out all the other pieces. I chose the red snowflake print called Poinsettias & Pine for the jar and the green dot from the 3×4 journaling cards for the lid.

To make the shaker part, I cut out the ovals and glued them together until I had enough to make a frame thick enough to allow my buttons to move around.
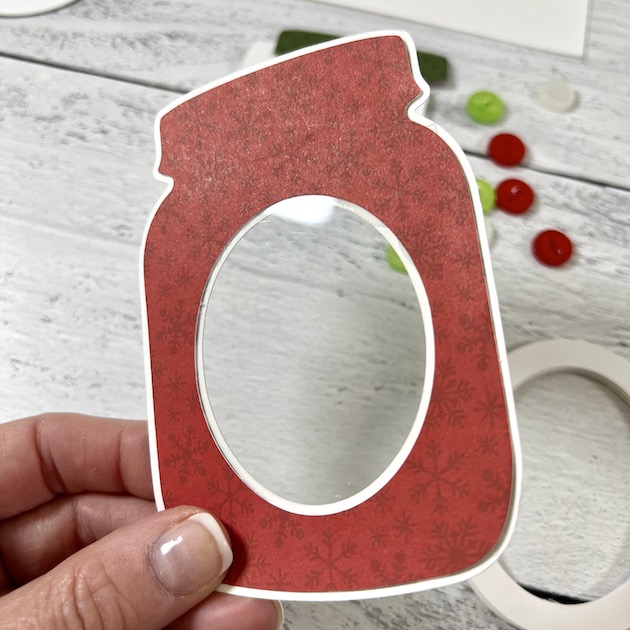
I sandwiched a piece of 2.5” x 3.25” clear acetate in between my white jar base and the red inset piece I cut from the 6×6 paper.

I glued the oval frame to the back of the jar pieces, added my buttons, then glued the solid white oval piece on top to keep the buttons in.

Next, I took my white card base and layered 2 sheets of 6×6 paper in dark green and stripe on top and added the jar shaped shaker. I wrapped the lid with chunky red twine and included a cute sentiment sticker to finish it off. It’s the perfect card for someone special and I just love it!
Thanks for stopping by and I hope you’ll visit Lori’s shop for more amazing craft ideas!
