
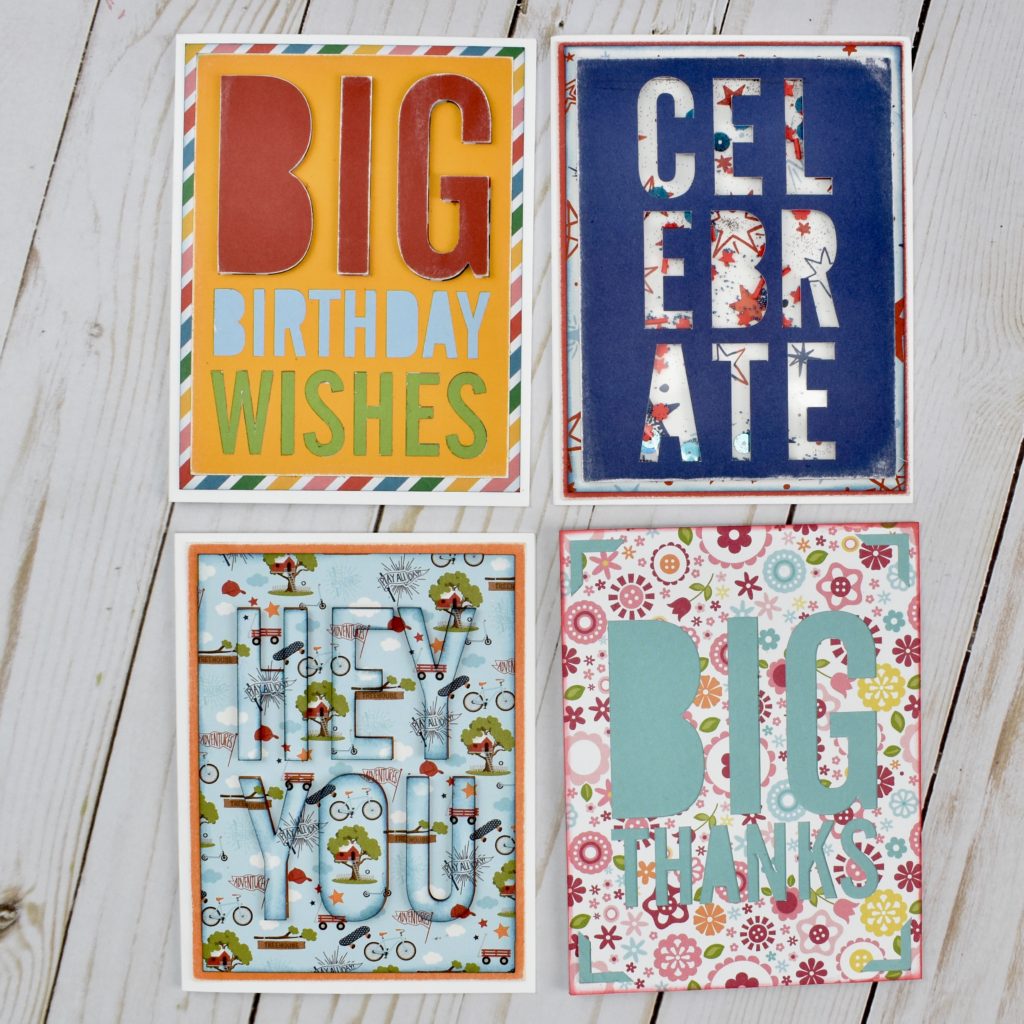
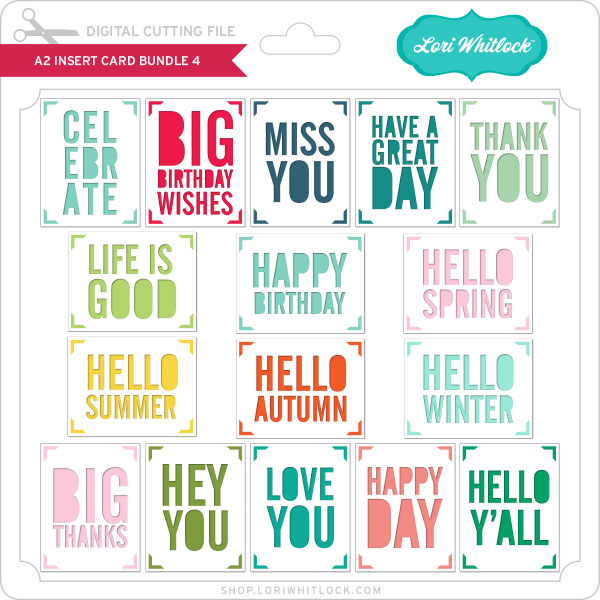
Hi there paper crafting friends! It’s Michelle Starcher, aka the Bookish Designer, popping in on the blog today to show you four cards I made using the A2 Insert Card Bundle 4. When I saw this card bundle debut last week, I knew I had to have it. It contains 14 different designs for several different occasions. Each design is available individually in my SVG Shop and the Silhouette Store as well.
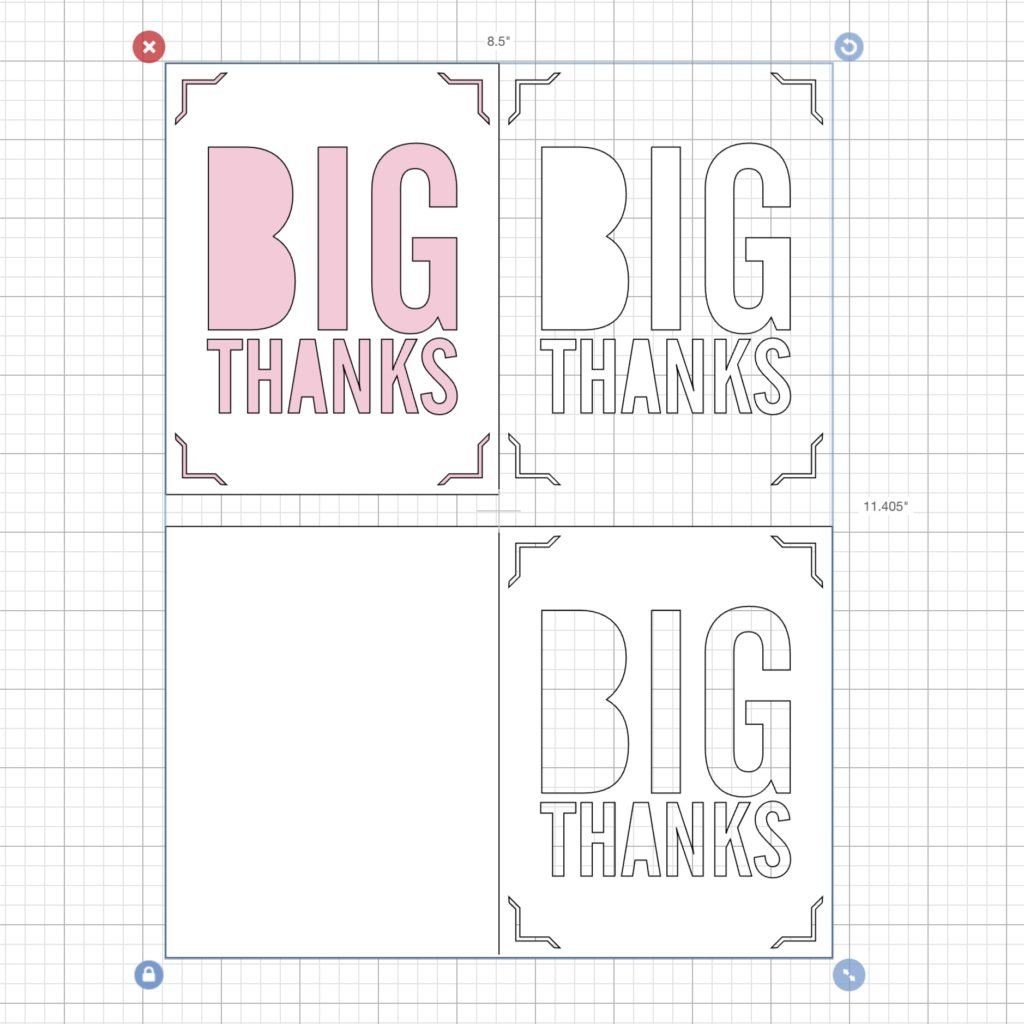
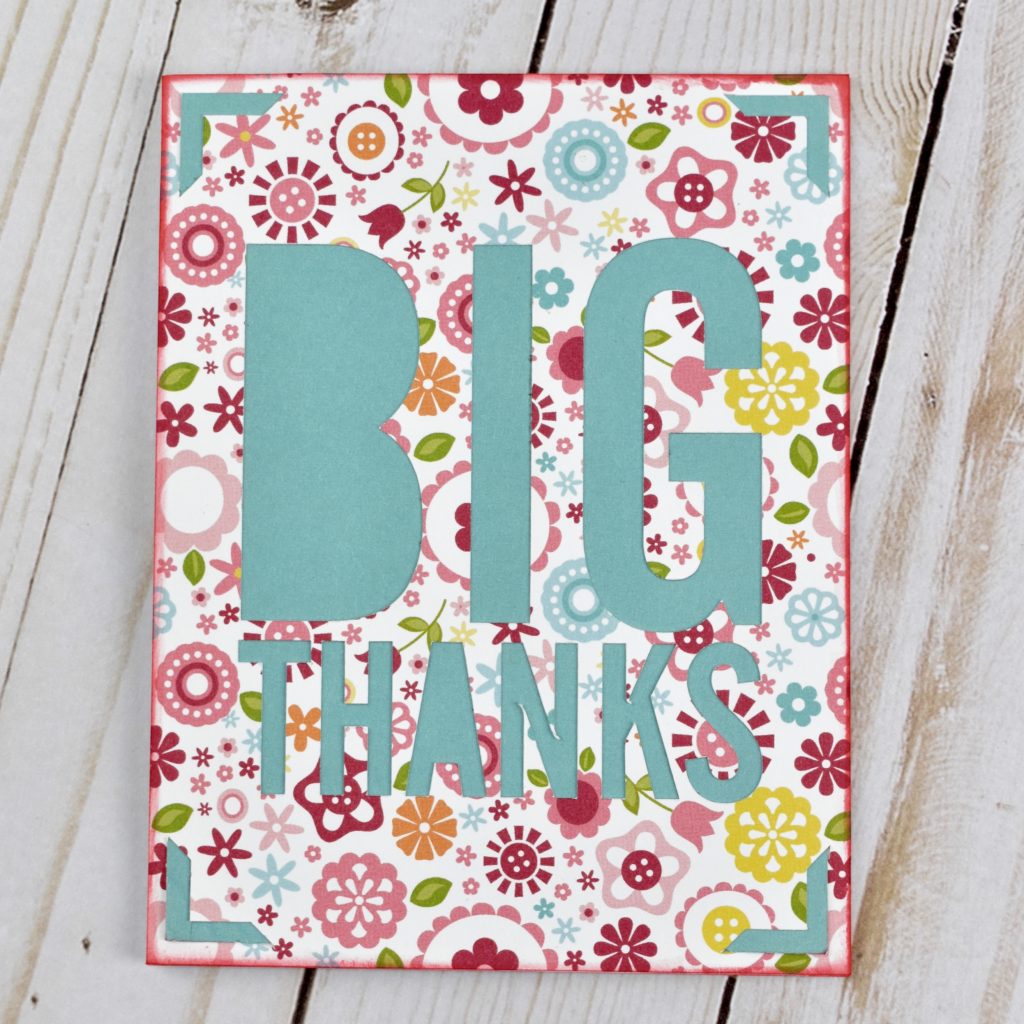
For my first card, the A2 Insert Card Big Thanks (SVG, Silhouette) I went pretty traditional and used the file as intended. When opening any of the SVG files in Cricut Design Studio, there are three different options for cutting the sentiment. One option is to cut the sentiment as a part of the card (bottom). The other two options are to cut just a card front (top-left) and to cut the words only (top-right). Each file includes an insert that can be used with any of the sentiment options (pink).
For the majority of the cards, I used only the card front because I knew I was going to have multiple layers for my card fronts. I ungrouped the elements in the file and deleted the sentiment options I wasn’t going to use. For this first card, I stayed pretty simple in my design. I used patterned paper for the sentiment and a contrasting solid for the insert. I inked up the edges of the pattern paper a bit, and adhered the pieces to a white, cardstock card. (Both the patterned paper and the cardstock are from Lori’s All-Girl collection from Echo Park Paper Co. )
The next card I made was the CELEBRATE shaker featuring Lori’s America collection from Echo Park Paper Co. For this card, I cut the A2 Insert Card Celebrate (SVG, Silhouette) card front and trimmed the card front down to remove the insert tabs. Next I trimmed a photo flip to the same size as the CELEBRATE sentiment card front. I used foam adhesive tape along the edges to create my shaker. After adding glitter, sequins, etc., I closed up the shaker by adhering it to the layered card front.

For the A2 Insert Card Big Wishes (SVG, Silhouette), I used double-sided cardstock. This allowed me to cut multiple card fronts at the same time. Once again, I ungrouped the files elements and left only the card front. For this card, I made a duplicate copy of the file and flipped it horizontally, so that I had a mirror image. This allowed me to get two different colored card fronts from one piece of double sided cardstock.
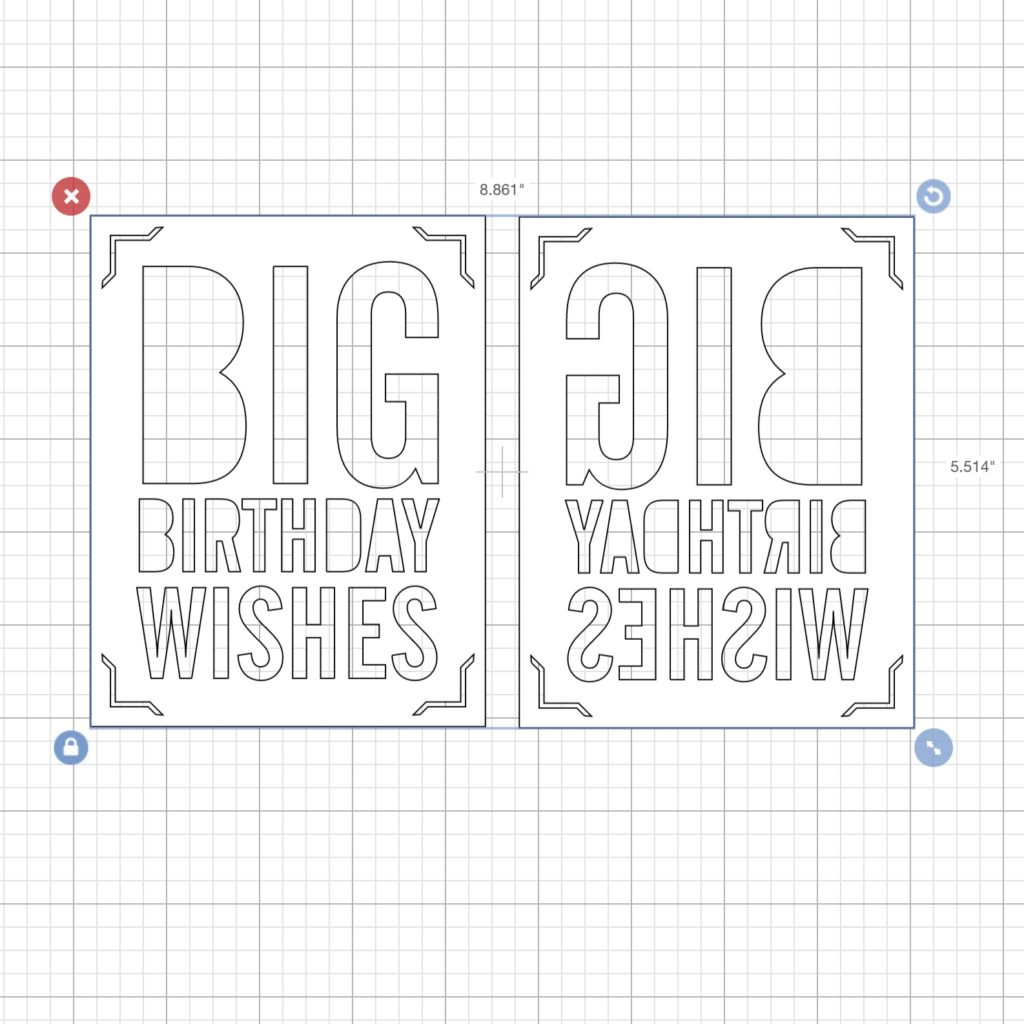
I did this twice with two different pieces of double-sided cardstock to have the yellow, red, blue, and green you see on the card. Again, I trimmed the insert pieces and layered the yellow front on a piece of patterned paper and adhered to a white, cardstock card. I used foam tape to adhere the BIG letters to the card and my Xyron sticker maker to adhere the birthday wishes letters to the card. I have enough pieces to make four cards just like this one.

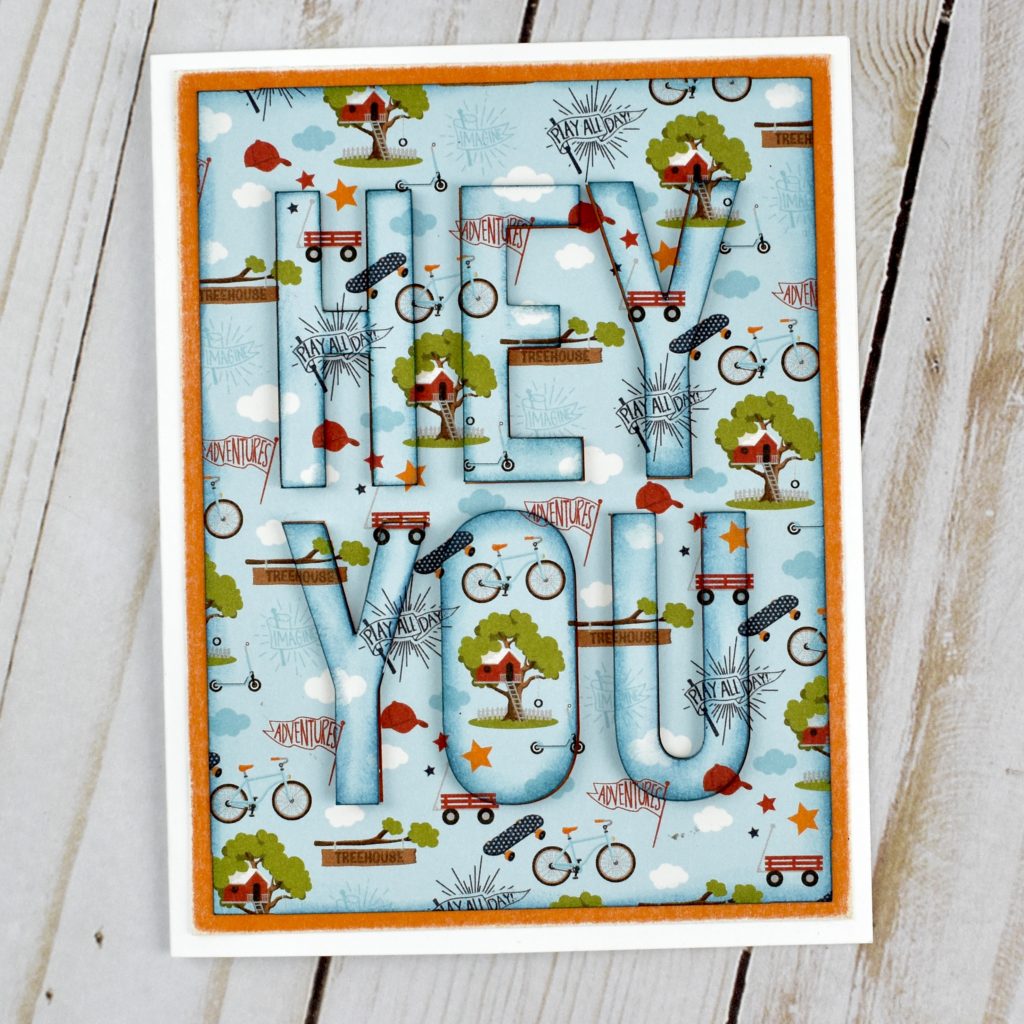
For my final card today, I create a camouflaged sentiment by layering the letters cut from the card front. I inked the edges and used foam adhesive, so that the A2 Insert Card Hey You (SVG, Silhouette) sentiment would stand out a little bit from the background. This card features Lori’s All-Boy collection from Echo Park Paper Co.
I really love the versatility of the A2 Insert Card Bundle 4 , and I can’t wait to get back into my craft room to make more cards using this set.
Until next time,
Michelle, aka the Bookish Designer
Your cards are wonderful! What’s a photo flip that you used on the shaker card? Thank you!
Hi Marty, a photo flip is a sleeve you can insert a picture into. It’s similar to a page protector but just for a single photo.