Birthday Gum Ball Card

Have you ever seen a design that immediately made the creative side of your brain start sparking?  That happened to me the minute I saw Lori’s cute birthday gumball machine (SVG, Silhouette) and I thought — shaker card! For some reason, the thought of buttons flying around in the middle of this card just made me happy!  So here’s a quick tutorial on what I did … 


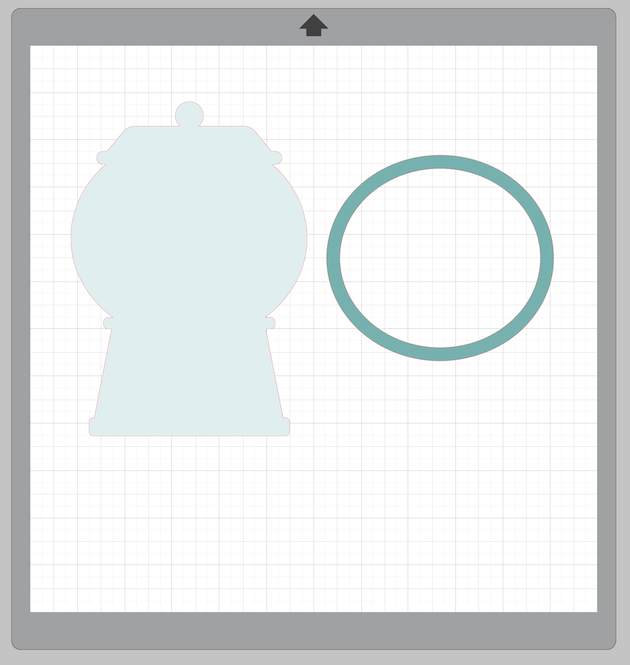
First, I cut out all of the pieces as they were in Lori’s file.  Then, I used the shape tool to create an oval.  I hovered the oval over the gumball machine to get the right size, and then I did an offset of the oval to create a frame.  


Once I had my frame shape, I cut it out 5 times from white card stock, and once from the light blue dot paper (Echo Park, First Responders, Emergency Vehicles paper).  The 5 layers of white card stock ovals will give the frame thickness and dimension so that the buttons can move freely underneath.


I layered the five card stock ovals, added small foam adhesive as shown, and traced the shape onto a piece of clear acetate.  Clearly, you don’t need to be accurate about this because you’re going to use scissors to cut inside the lines in order for your acetate to sit within the border of the oval frame.  I used a thin line of liquid glue to adhere the acetate to the top of my white oval frame.
I adhered the light blue dot oval over the acetate and then adhered everything together.  I layered the folded white card base, then the plain white template placed the buttons on the template, then added the oval over the template/buttons.  Finally, I added the red top and bottom pieces (also paper from the Echo Park First Responders collection) with more foam tape and finished the card with the sentiment and remaining cut file pieces.  The stripe is just a piece of scrap cut to 1/4″ thick to add along the bottom if desired.


Inside, the finishing touch was a cute little phrase that comes with the cutting file.


Thanks for stopping by Lori’s blog today! I hope this card will inspire you to think outside the box and create something fun with Lori’s wonderful cutting files!  Until next time, happy crafting my friends!

$5 Bundle Ends at Midnight!

This awesome Friday $5 Bundle is available until midnight and when it’s gone it’s gone.  These SVG files can be used with Cricut Explore, Silhouette Studio (with the Designer Edition upgrade), Scan N Cut, and any other cutter that will work with SVG files. Help spread the word by telling your friends and announcing it on social media!

Be sure to pick up this Christmas Project Bundle including 5 SVG files for just $5**!!

The cost of this bundle is $5, for $10.95 worth of SVG files, over a 54% savings! These files are perfect for fall crafting! But don’t wait, this bundle will only be around until midnight!
** Because Friday $5 Bundles are already heavily discounted they are not eligible for further discounts including monthly, seasonal and flash sales.

Have a great day!

Friday $5 Bundle!

Hi Everyone! Today we are bringing back another bundle!  A couple of Fridays a month, we bring back a Friday $5 Bundle!  It’s a great chance to get a bundle you may have missed!  It will ONLY be available until Midnight Sunday and when it’s gone it’s gone. These SVG files can be used with Cricut Explore, Silhouette Studio (with the Designer Edition upgrade), Scan N Cut, and any other cutter that will work with SVG files. Help spread the word by telling your friends and announcing it on social media! Now through Sunday, you can pick up this Christmas Project Bundle including 5 SVG files for just $5**!

The cost of this bundle is $5, for $10.95 worth of SVG files, over a 54% savings! These files are perfect for fall crafting! But don’t wait, this bundle will only be around until Sunday at midnight!

 
** Because Friday $5 Bundles are already heavily discounted they are not eligible for further discounts including monthly, seasonal and flash sales.
 

Have a great day!

Christmas Shaker Card Tutorial

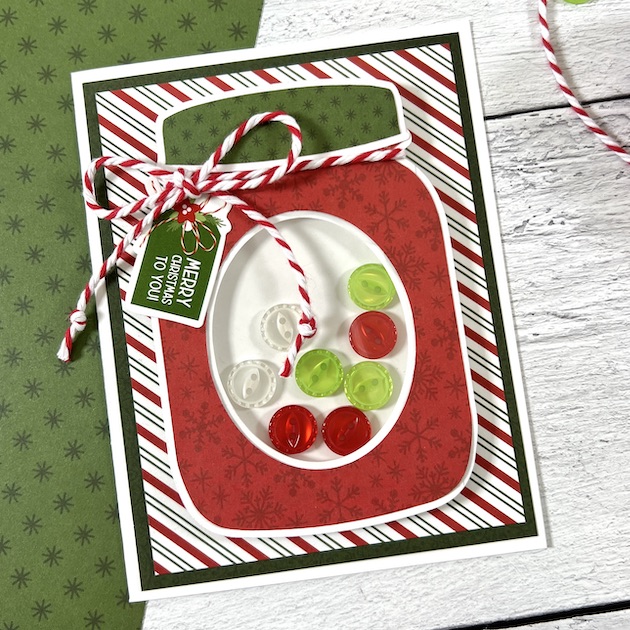
Hello everyone and Happy National Button Day! Traci here and yep … there’s actually a day that celebrates these little fasteners. I wanted to incorporate them into my project and I knew Lori would have something wonderful. I found a cutting file for an embellishment called Shaker Mason Jar and I turned it into a cute holiday card. Here’s a quick tutorial on how I made it …

For supplies, I used the Shaker Mason Jar cutting file (SVG, Silhouette) and Echo Park’s beautiful holiday collection called Magic of Christmas (also designed by Lori). I used the 6×6 paper, the 12×12 sticker sheet, white card stock, buttons and twine.

To create the A2 size card, I cut out a piece of white card stock measuring 8.5”x 5.5” and scored it at 4.25”.  

Then using the file and my Silhouette Cameo machine, I cut out all the other pieces. I chose the red snowflake print called Poinsettias & Pine for the jar and the green dot from the 3×4 journaling cards for the lid.

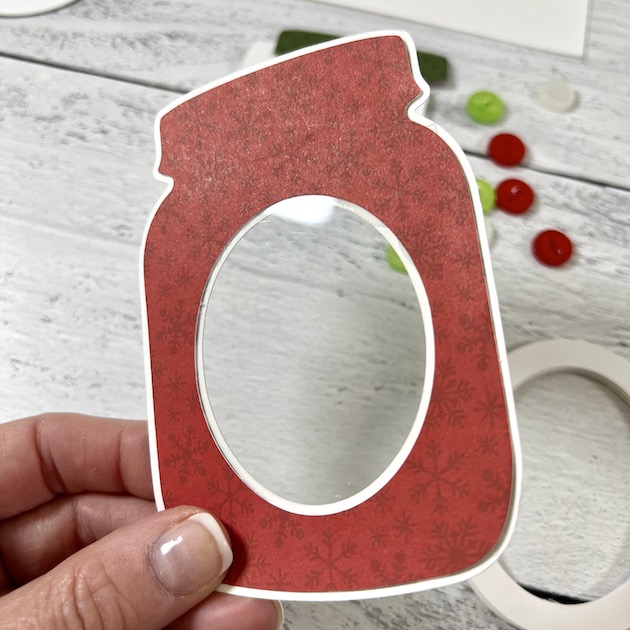
To make the shaker part, I cut out the ovals and glued them together until I had enough to make a frame thick enough to allow my buttons to move around.

I sandwiched a piece of 2.5” x 3.25” clear acetate in between my white jar base and the red inset piece I cut from the 6×6 paper.

I glued the oval frame to the back of the jar pieces, added my buttons, then glued the solid white oval piece on top to keep the buttons in.

Next, I took my white card base and layered 2 sheets of 6×6 paper in dark green and stripe on top and added the jar shaped shaker. I wrapped the lid with chunky red twine and included a cute sentiment sticker to finish it off. It’s the perfect card for someone special and I just love it! 

Thanks for stopping by and I hope you’ll visit Lori’s shop for more amazing craft ideas!


Blog * Facebook * Instagram * Pinterest

Halloween Mixer Fun

It’s almost Halloween and it’s my favorite time of year to paper craft with all the fun colors.  I also love to bake this time of year too.  This year I created these fun little mixer shaker cards to go along with my baked goods.  I used Lori’s Mixer Shaped Card (SVG, Silhouette) and just added a shaker to the mixing bowl.

I created the shaker on my Silhouette by offsetting the mixing bowling by .125 and cutting just the frame of the bowl.  I then cut the regular bowl shape our of acetate.  Next, I added dimensional foam to create the shaker window and added fun little Halloween Shaker bits for more mixing fun!  I love how these turned out and they will be the perfect addition to my Halloween baking!

Have a great day!

~Cathy