Fold and Tuck Lantern Tutorial with Michelle

Can you believe that it’s November already? I love November! I love that I can craft Fall projects, as well as Holiday projects. Today I would like to share a tutorial for the Hexagon Fold and Tuck Lantern Found in the Lori Whitlock SVG Shop as well as the Silhouette Design Store. It’s my first Holiday project of the season!
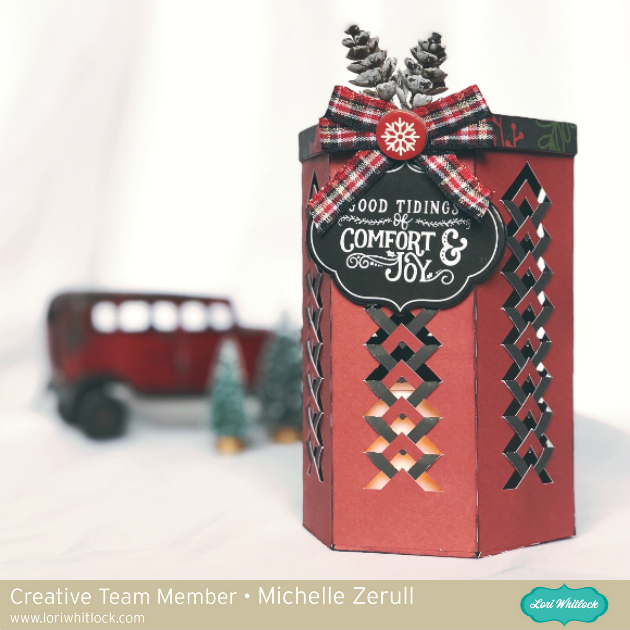
Hexagon Fold and Tuck Paper Christmas LanternThis is such a fun project. The lantern looks difficult, but it’s not. It is an easy project. Let me show you step by step, how to put it together.


  1. Using your electronic cutting machine, cut all three paper elements. Double sided paper looks wonderful with this project since you will be seeing the underside.
  2. Using the main large piece, the body of the lantern, carefully lift the chevron elements to a vertical position, as shown. I like to do one row at a time.
  3. Take the last vertical chevron piece and tuck the arrow portion under the empty piece behind it as shown in the photo. Continue tucking the chevron arrows until you complete the row.
  4. Repeat steps 2 and 3 until all rows are completed. Doesn’t that look awesome?
  5. Fold along all score lines. There is a large glue tab at the end. Apply your adhesive along that tab and glue the ends together to form a tube. Sit the tube aside to dry completely.
  6. Now you will form your lid. Fold along all score line. Apply a small dot of glue to one of the triangle tabs and glue it to the lip of the lid as shown. Continue gluing the triangles one at a time until the hexagon lid is formed. Sit the lid aside to dry completely.
  7. Now it is time to attach the base to the bottom of the lantern. Fold along all score lines. Place the inside color up facing you. Working quickly, apply a bit of glue to all tabs.
  8. Take the hexagon body tube and place it right over the base as shown from the top view.
  9. Using a pencil or bone folder, make sure the tabs are securely attached to the inside of the base as shown.
  10. Allow your lantern to dry completely before decorating.

Now that’s finished, you can have fun decorating it! Using hot glue, I added a tiny spray of pinecones and chipboard elements from the Echo Park Paper Celebrate Christmas collection. I also put a battery-operated LED light inside. It makes a beautiful display of light and shadows! Remember to never use a real candle. The paper will burn!

Hexagon Fold and Tuck Lantern

Thanks for visiting today. Don’t forget to share your own Hexagon Fold and Tuck Lantern with us on the Lori Whitlock Facebook page or post it on Instagram and hashtag it #loriwhitlock so we can see what you’ve made.

Have a great day!

Michelle

Very, Very Not-So-Scary Autumn Paper Houses with Michelle

Thank you for joining me, Michelle, in sharing some Autumn crafting with Echo Park Paper’s Celebrate Autumn collection. Autumn is my favorite time of year to craft. I love all of the colors and textures of the Season.

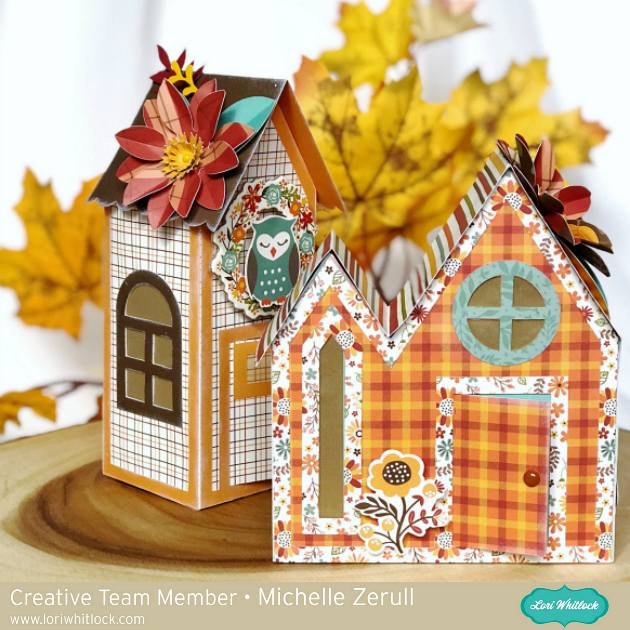
Autumn Paper Houses

To make my Celebrate Autumn houses, I used Haunted House Smaller and Haunted House Tall svg files. As you can see, my houses aren’t scary at all! I just snipped the cobwebs of with my scissors.

Lori Has a great assembly video where she explains step by step how to put them together. You can find the files for the Haunted House Smaller at the Lori Whitlock SVG Shop, or at the Silhouette Design Store.

You can also  find the files to make Haunted House Tall at the Lori Whitlock SVG Shop or at the Silhouette Design Store.

There’s a total of five houses in the series, so you can craft an entire village!

Have a crafty day!

Michelle

<3

Make Your Own Party with Michelle

Recently, I found myself without a handmade card for a special birthday. No Card? I felt horrible! knew that I needed to step up my game, and keep a few special cards on hand. Lori has some adorable pop up cards in the shop and everyone loves a Pop Up Card!

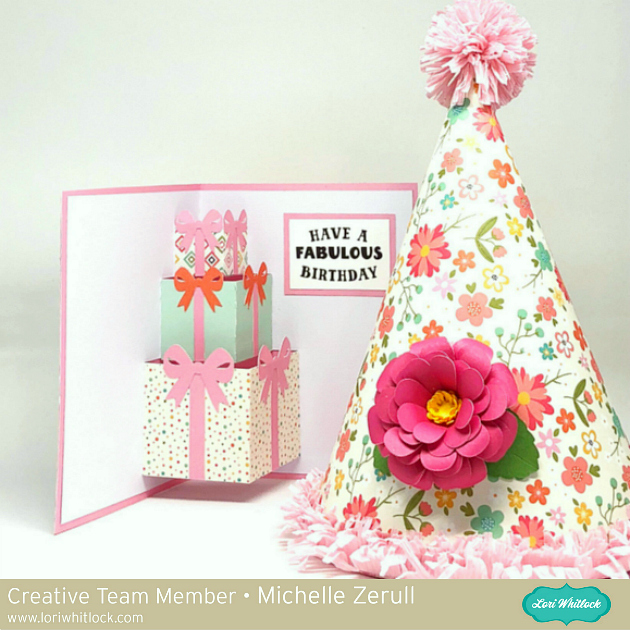
Paper Birthday Hat and Pop Up Card

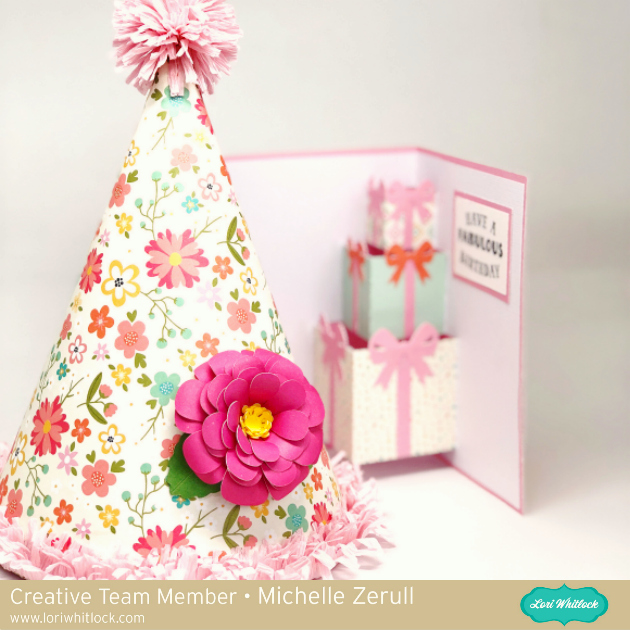
For this set, I used the Pop Up Birthday Card Presents file that can be found in the Lori Whitlock SVG Shop or at the Silhouette Design Store. Just for fun, I made a coordinating Party Hat from the A2 Princess Party Hat file at the Lori Whitlock SVG Shop or the Silhouette Design Store. To make the hat extra special, I added a bit of crepe paper embellishing and a cute paper flower. The file for the flower is also found at the Lori Whitlock SVG Shop and the Silhouette Design Store. All of the pretty papers came from the I’d Rather Be Crafting line of papers and embellishments by Echo Park Paper.

I’m pleased with how cute they turned out as well as how easy they were to make. I also feel good knowing that I have a cute birthday card ready when I need it.

Paper Birthday Hat and Pop Up Card

Have a Creative Day!

Michelle

<3

Paper Flower Shadow Box Tutorial with Michelle

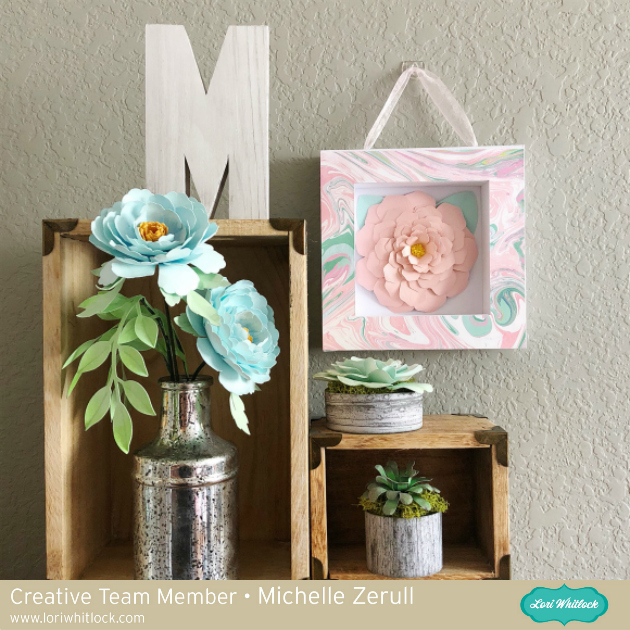
Hello Friends! Paper Flowers are so popular and they are so fun to decorate with. Today I would like to share an easy tutorial for this cute home decor project featuring one of Lori’s latest flower files.

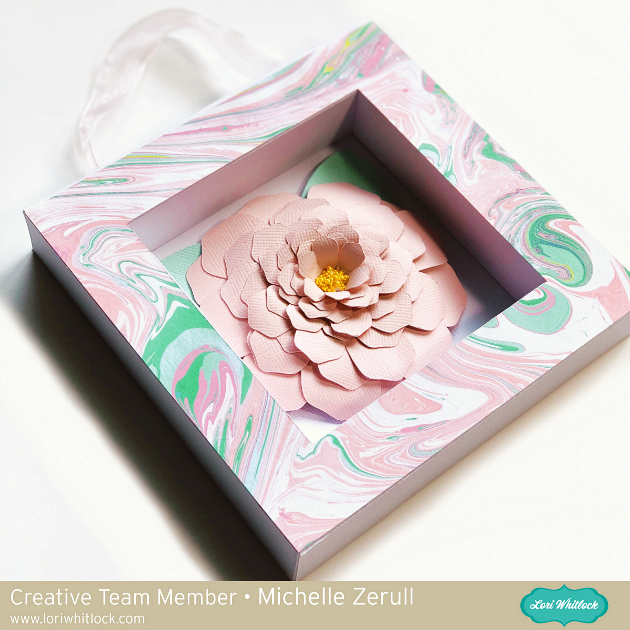
Paper Flower Shadow Box Tutorial

This is such a quick project to make. The flower only takes about five minutes to put together. When cut at normal size, the flower fits perfectly in this 4×4 Shadowbox Frame. The Shadow Box Frames are one of Lori’s classic designs. There’s an excellent Youtube Video showing how to assemble the frame. It’s so easy to make, and looks so professional. I love it! You can find the file for the 4×4 Frame at the Lori Whitlock SVG Shop, or at the Silhouette Design Store. You’ll also need the 3D Flower File. You can find the file at the Lori Whitlock SVG Shop and also at the Silhouette Design Store.

Photo Tutorial for 3D Paper Flower

Materials Needed to make the Flower:

  • fast drying glue or hot glue
  • a kitchen bamboo skewer or other end of a thin paint brush
  • white craft glue
  • yellow Prills or small beads for the flower center
  • a piece of craft foam or mouse pad
  • a stylus with ball on the end or the end of a clean pencil eraser.
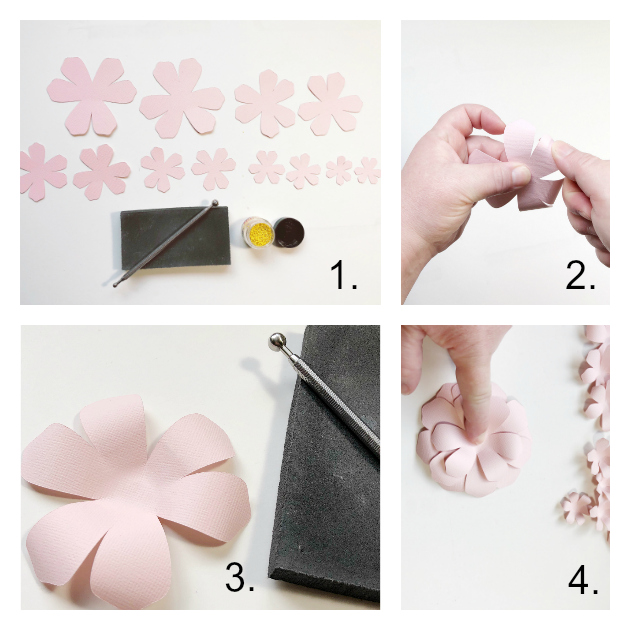
  1. Curl petals away from you using your wooden kitchen skewer. This is the same motion that you would use to curl birthday ribbon.
  2. with petals facing down, place the petal piece on the foam and using a circular motion, roll your stylus around in the center until the petal begin “lifting” and a depression is formed in the center. Repeat Steps 2 & 3 for all petal pieces.
  3. Begin building your flower from the outside (Larger petal) towards the center. Use a small amount of fast drying glue or hot glue and hold in place until the glue is dry before moving to the next piece, then continue building the flower up one layer at a time. Note: Allow each one to dry first so that your flower doesn’t shift. When you get to the last smallest piece, add a drop of white craft glue to the center and add small beads or Prills to mimic a flower center. Flocking or yellow powder such as tumeric makes a fun center too.

While your flower center is drying, complete the shadow box as described in Lori’s Video. Any pretty papers from a 6×6 pad will look lovely on the front of the frame. I used a paper from Echo Park Paper and a piece of 10-inch ribbon (optional) to complete the look.

The great thing about making paper flowers is that there isn’t a right or wrong way. Try different curling variations for different looks. If you like, you can add inks or chalks for additional color variations. Each flower is unique and will be beautiful when you are finished.

I’m so pleased with how this came out. It really brightens up a corner of my craft room, don’t you think?

Paper Flower Display

Have a creative day!

Michelle

<3

Back to School Backpack with Michelle

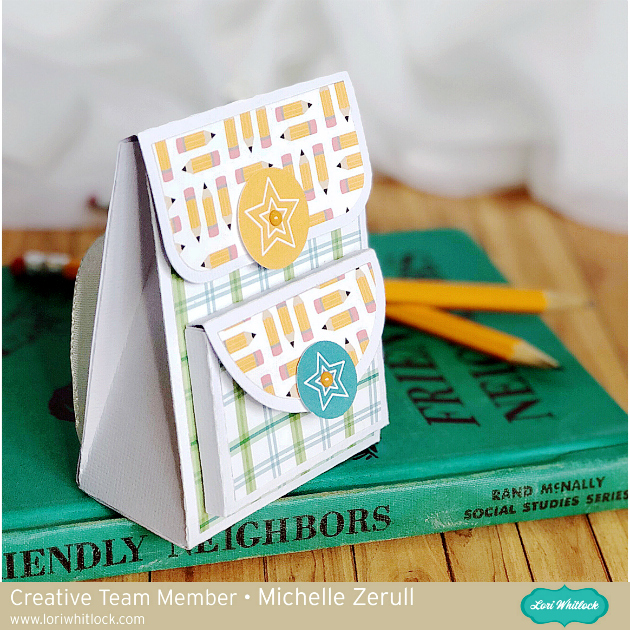
Soon the school buses will be packed with children heading back to school. Make their first day special with this adorable Backpack treat bag.

Backpack Treat Bag

You can find the files to make this at the Silhouette Design Store, or right here at the Lori Whitlock SVG Shop. When combined with the “Back To School” Collection from Echo Park Paper Co., you’re certain to get an A+ and start the school year with fun!

Have a crafty day!

Michelle