Cut it Out! Tips and Tricks with Michelle

When using our electronic cutting machines, we often forget that our most valuable tool is our scissors. Hello crafty friends! Michelle Zerull here today to share some simple ideas to stretch your SVG files even farther.

3D Paper Spring Shed House with SVG files by Lori Whitlock

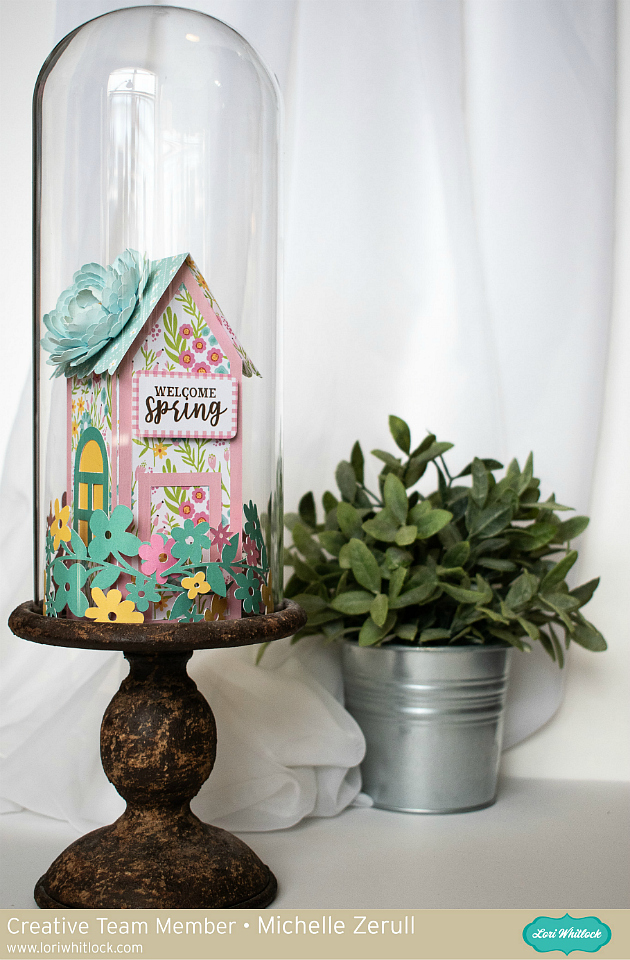
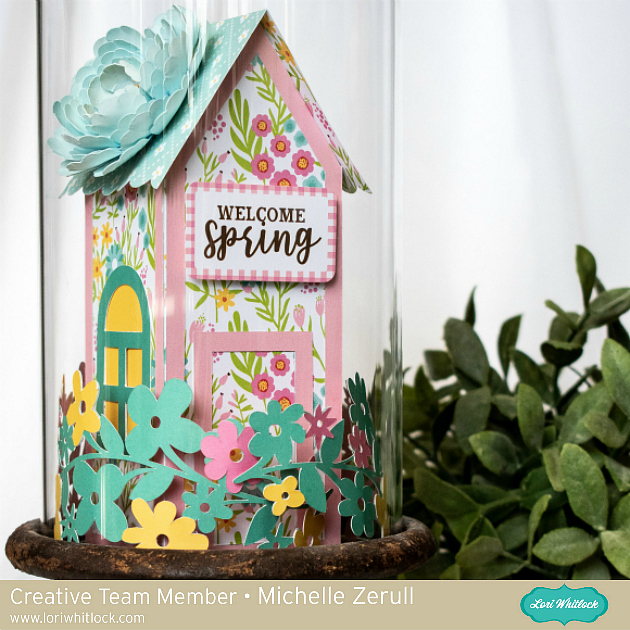
A few years ago my husband bought me this cloche for my Birthday. I love making little seasonal things to fit inside, but it is an odd size. If you recall, Lori designed the cutest set of Haunted Houses, “Haunted House Tall” was perfect for this project.  (you can find the file in Silhouette Design Store or at the Lori Whitlock SVG Shop)

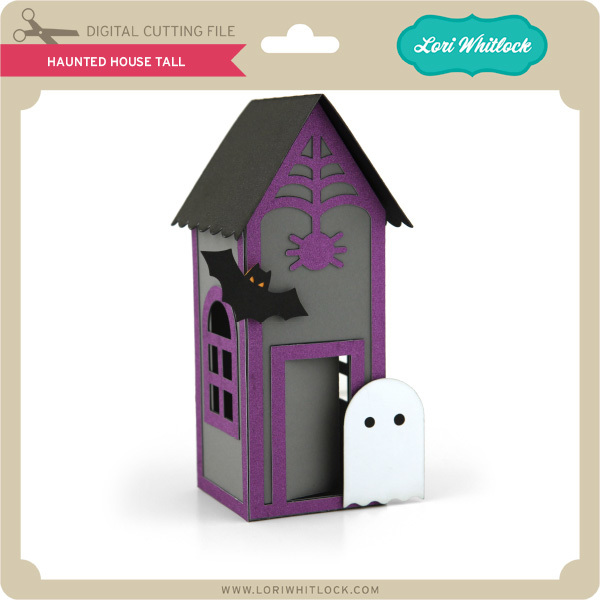
I love the tall, skinny shape, but I can do without the spider for Spring.

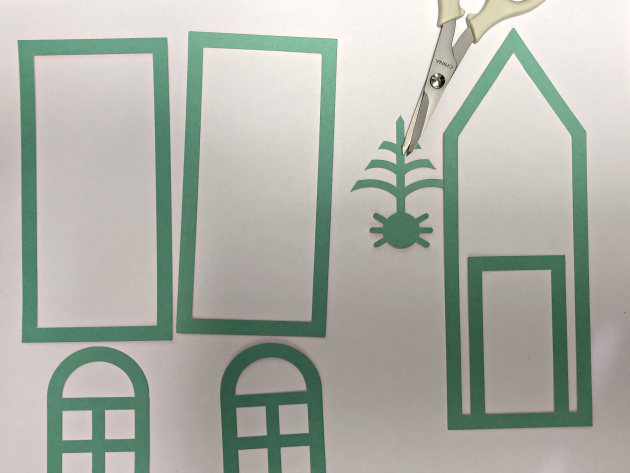
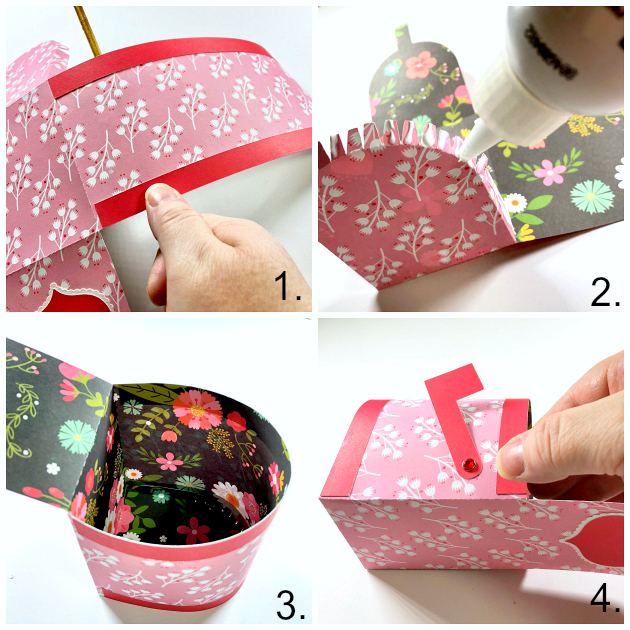
A few quick snips to the details after they were cut on my Cameo. Voila! No more spider! It was super easy!

I also used my scissors on the 1 Piece Flower Cluster Border. (found in the Silhouette Design Store)

Flower Cluster Border

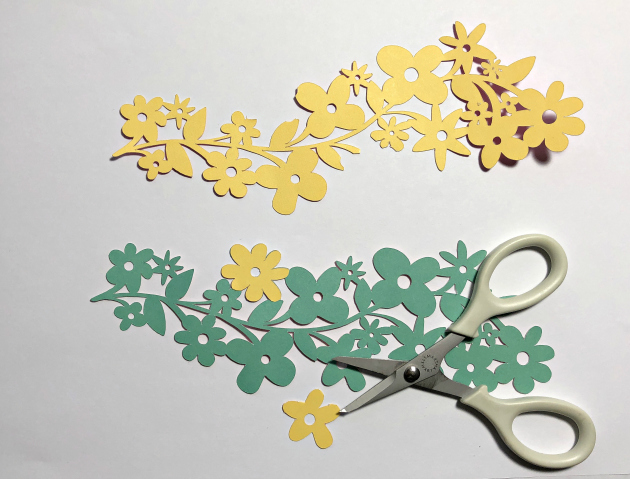
Isolating the individual flowers and cutting them out with my machine would’ve taken forever!

So it appears that cutting with scissors, a skill we all learned in Kindergarten, really is a great way to stretch our SVG’s even farther. I added an accent from Lori’s “Spring Fling” line by Echo Park Paper and a cute 3D flower (found in the Lori Whitlock SVG Shop and the Silhouette Design Store) and my cloche is ready for Spring!

Keep those scissors handy!

Michelle

Paper Teapot with Michelle

It’s cold outside! It seems as if everyone I know is coughing, sneezing, or has some other Winter ailment. Michelle Zerull here today to share a sweet paper teapot. It won’t cure a cold, but it will make your day a more cheerful one.

Paper Teapot with Lori Whitlock SVG Files and Echo Park Paper Easter Wishes

You can find this 3D Teapot 2 in the Lori Whitlock SVG Shop, or at the Silhouette Design Store. It’s one of Lori’s classic designs.

Paper Teapot with Lori Whitlock SVG Files and Echo Park Paper Easter Wishes

The lid comes off so that you can insert a small gift. It would be a great place to to tuck a small package of tea or soup packets to give to a sick friend.

I made panels for my teapot from Lori’s newest paper collection, Easter Wishes by Echo Park Paper. All of the papers in this collection have such lovely prints!

Paper Teapot with Lori Whitlock SVG Files and Echo Park Paper Easter Wishes

Thank you for visiting today. Happy Crafting!

Michelle

<3

Mini Mailbox Tutorial with Michelle

Happy New Year! Now that we’ve said goodbye to 2018, it’s time for me, Michelle, to start my 2019 Valentine crafts. Today I would like to share a tutorial for one of Lori’s Mini Mailboxes. It’s a classic! You can find the SVG files at the Silhouette Design Store, or at the Lori Whitlock SVG Shop.

Mini Paper Mailbox using I HEART Crafting by Lori Whitlock for Echo Park Paper

The file is adorable and so easy to put together. It would be great as a treat box or a fun place for children to leave little notes. It would be a fun snow day activity too. The possibilities are endless, so let’s get started!

Mini Mailbox Pieces cut from SVG Files

First, cut out your pieces. I used the Lori Whitlock I HEART CRAFTING line by Echo Park Paper. It’s not Valentine or Love themed paper, but the pinks and reds are perfect for both! Tip: It’s easier to glue down your embellishments while it is still flat. The paper will curve easier if you use a dry adhesive, like a tape runner or double sided tape for your embellishments. 

Photo Tutorial For Paper Mini Mailbox Assembly

Here are the steps to assemble the mailbox:

  1. Using a kitchen skewer or dowel rod, gentle train the paper to curve as shown.
  2. Fold all glue tabs inwards and apply adhesive. I used a quick dry liquid glue.
  3. Turn the box on its end and place your hand inside to push down against the table. This will give you a flat surface to push against and make sure that the glue tabs are all attached to the inside.
  4. Attach the mailbox flag to the base with a brad. Tip: Using a brad will allow the flag to move, but if you don’t have any, it will still be cute! Try gluing a button for another fun look!

The cute little postage stamps shown in the photo are also from Lori’s SVG files. You can find them at the Lori Whitlock SVG Shop, or at the Silhouette Design Store. The other decorative elements I cut from some of Lori’s other various files.

Mini Paper Mailbox using SVG Files by Lori Whitlock for Cricut or Silhouette

The little pull tab at the top allows the mailbox to open easily. Especially for little fingers!

Mini Paper St Valentines Day Mailbox made with I HEART CRAFTING Papers by Lori Whitlock 630

Thanks for visiting today. Happy Crafting!

Love,

Michelle

Pink Gingerbread House with Michelle

I’m excited to share one of my favorite Holiday crafting projects. My Pink Paper Gingerbread House has holiday sweetness, as well as crafting fun!

Pink Paper Gingerbread House

Lori has made a step by step assembly video to explain how to put it together. Don’t worry, it’s easier than you might think. Her video has lots of tips.

Pink Gingerbread Man closeup

You can purchase the SVG file for the Gingerbread House at the Silhouette Design Store as well as at the Lori Whitlock SVG Shop. The cute gingerbread people are included in the file too. Isn’t he adorable?

Pink Paper Gingerbread House

I hope that I’ve inspired you to hang up your apron and craft your own paper Gingerbread House. Make one for yourself and another one for a gift that will be treasured!

Have a creative day!

Michelle