Ice Cream Cone Treat Box: Michelle’s Favorite Three Ways to Embellish Die Cuts

I have found the perfect Summer Treat Box. It’s Lori’s Ice Cream Cone Box! The box, which can be found in the Lori Whitlock SVG Shop, or in the Silhouette Design Store, is easy enough for a beginning paper crafter, and fast enough to mass produce for a group. It’s so much fun to embellish! I’d like to show you how I put this together and share my tips and tricks for my favorite three ways to embellish my die cuts.
Ice Cream Gift Box

Lori’s SVG files are so easy to use. She groups them together to make them easy to move around. If using a Silhouette Cameo or Curio, simply click “Ungroup” to put your desired colors on the map.

I really liked the colors that Lori Used, so that made grouping my pieces easy. Plus, I had a really pretty raspberry colored glitter, which unfortunately did not photograph well. Even with bad photos, using glitter is still one of my favorite ways to embellish my die cut pieces.  It’s more economical to glitter my cuts after cutting and it saves the wear and tear and on my blade that glitter paper causes.

Tips for using Glitter on your cuts:

  • All glitter is not the same. Glitter comes in many different types as well as many different colors. Most craft glitter is made from a polyester blend. Glass glitter is also commonly found. It’s not a good idea to use glass glitter on any projects that will be handled by children, or that may come into contact with food. Glass glitter can do serious harm if ingested. Fine Glitter works well for small cut pieces. Chunky Glitter works best for larger projects. All glitter is wonderful for holiday decor!
  • When applying glitter, it’s best to choose a glitter that will closely match your paper. This way, if any glitter flakes off, it will be less noticeable. Use a sheer glue and apply a thin, even coat. Pour or sprinkle the glitter directly onto the paper and tap off the excess. Once completely dried, it is okay to apply a clear coat of glue or varnish to keep the glue in place. This works especially well with polyester or craft glitters. Applying a top coat is not recommended for glass glitter as it dulls the shine.
  • When adding two or more colors of glitter to your project, always apply the dark color first. This will keep your light colors looking fresh. If you get light colored glitter on your dark colored glitter, it will not be noticeable. However, getting dark colored glitter on top of your light colors will be quite apparent.
  • Many people do not like using glitter because they believe that it is messy. When applying your glitter, work over a clean piece of paper or paper plate. Pour any excess back into the glitter container. To make clean-up a breeze, use a lint roller. Lint rollers will pick up any stray glitter from your work area.
  • Keep in mind that glitter is difficult to photograph.

Tips for Embellishing Die Cuts

Another favorite way to embellish my cuts is to use ink. Inks can add depth and can completely change the way a cut piece looks.

Tips for using Ink on your cuts:

  •  Most inks are either Pigment Inks or Dye Inks. Pigment Inks are generally thicker, like paint, and have more saturated color. A good way to remember this is, “P” is for “Pigment” as well as “Paint.” Pigment Inks take longer to dry than Dye Inks, but their color makes it worth the wait! Most Pigment Inks are permanent and are less apt to fade. Pigment Inks do not work well on slick or shiny surfaces. They will not dry on slick surfaces without being heat set. There are pros and cons to all inks and they are really a matter of preference.
  • By adding ink to the edge of a cut, you can create different effects. By adding ink to just one edge, you can create the illusion of a shadow. By adding ink to all of the edges, you can create a worn or aged look. You can also use inks to highlight embossed or raised areas.
  • You will also find hybrid inks on the craft aisle. Some hybrid inks are a combination of both pigment and dye inks. Distress and Oxide Inks are water based inks, which is why they react with water. Both Distress Inks and Oxide Inks are popular, but they are not permanent and will fade over time.
  • Inks can be used for stenciling on your cuts.
  • Don’t forget the pens! Markers and gel pens are another great way to add additional ink color to your cuts.

Tips to Embellish your Die Cuts

My favorite way to embellish a cut is to use embossing folders. Embossing Folders are a fast and affordable way to add texture to the paper.

Tips for Using Embossing Folders with your cuts:

  • Embossing Folders are used with a manual die cutting machine such as Sizzix, Cuttlebug, or Spellbinders. Generally speaking, the machines themselves are expensive. The folders, however, are relatively cheap and will last forever. Each machine operates a bit differently, so read the instructions before using them. I have heard of some people who have had success using a rolling pin and heavy pressure to achieve texture to their paper, although I myself have not been successful with this method.
  • When embossing, you will have an “embossed” side as well as a “debossed” side of the paper. Often this yields a new and different look, so try both sides!
  • It is much easier to easier to cut the paper into the desired shape and then emboss it.

Now that your pieces are embellished, it’s time to glue them together and finish the box. When constructing my box, I found it easier to glue my pieces down while the box is flat. Keep in mind however, that part of the ice cream swirl sticks out beyond the box.

Ice Cream Treat Box
There are many other fun ways to embellish your projects; Ribbons, Twine, Buttons, Enamel Dots…the possibilities are endless! I added a “Sweet” sentiment from the Shaped Pineapple Card in the Lori Whitlock SVG Shop and in the Silhouette Design Store to finish off my box.

Ice Cream Cone Gift Box using Lori Whitlock SVG Files


Thanks so much for visiting today!

Michelle

<3

The Sweetest 3D Gift Box with Michelle

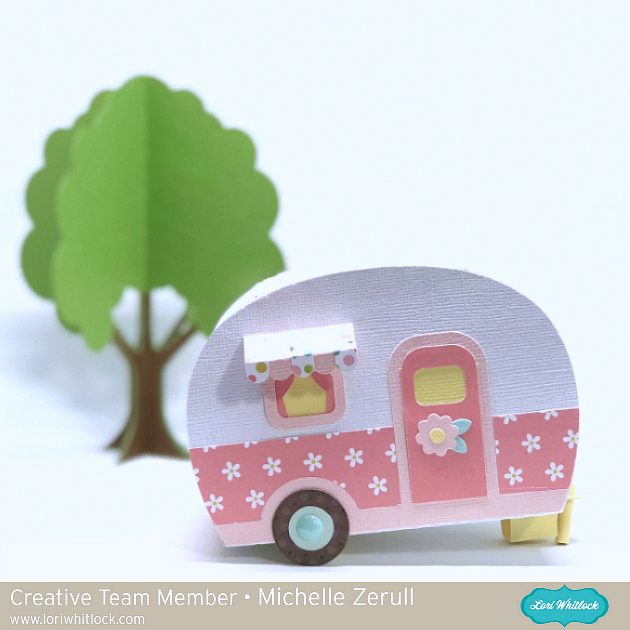
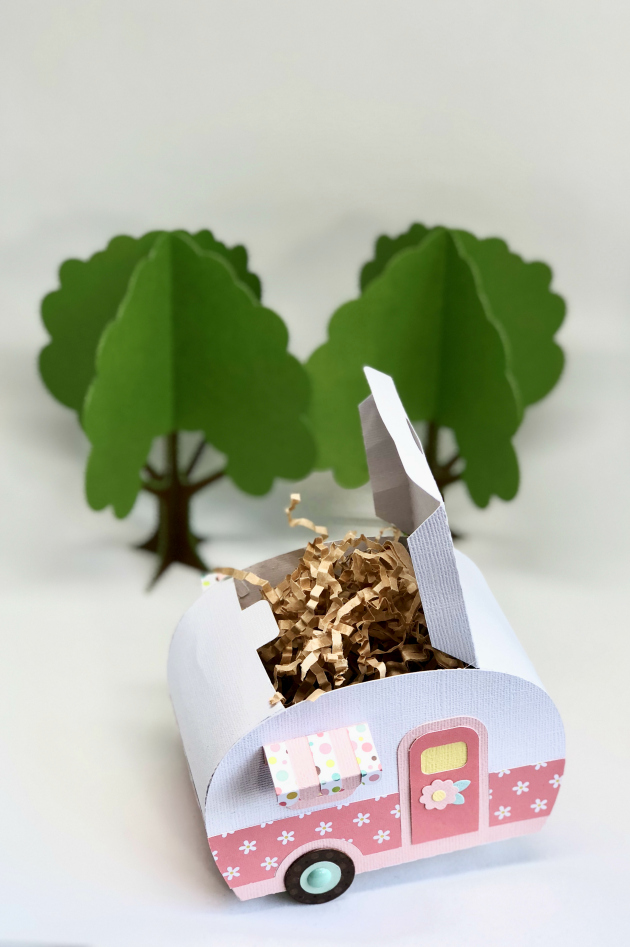
Hello! Michelle here today to share the sweetest little 3D Camper that’s also a clever little gift box!

You can find SVG files to make this 3D Camper at the Lori Whitlock SVG Shop or at the Silhouette Design Store. I used papers from the Sweet Baby Girl line by Echo Park Papers, but I’m certain that this would look great with any papers for any occasion. Lori has a video tutorial that makes this so fun and easy to put together. It’s my new favorite project!  (the 3D Tree is also available here in the Lori Whitlock SVG Shop and at the Silhouette Design Store)

3D Camper Trailer Gift box

There’s so much room the box. Perfectly sized to hold candy and gift cards, or jewelry and small toys. It would also be great for Birthday Party favors. Lori also has a larger 3D Camper that would make a great centerpiece for the party table. That would be such fun party decor! Its so fun to make little things that you know everyone will love.

Thanks for letting me share today.

Happy Crafting!

-Michelle


A2 Pop Up Round Cake Card Tutorial with Michelle

Hello! Michelle here today to share a fun, interactive birthday card that will impress all of your family and friends. Birthday cards are a staple for every card maker, but with busy lives, they are often made at the last minute. This pop up card can be made quickly, but no one else will know that. They’ll think you spent days working on it! Let me give you some hints and tricks and show you how easy it is to make.

A2 Round Cake Pop Up Birthday Card

  1. To make this pop up card, you’ll need to download the A2 Pop Up Round Cake Card files from the Lori Whitlock SVG Shop or the Silhouette Design Store and cut out your pieces. (Note: The Semicircle pieces I later cut from brown instead)  Layer and glue your letters and semi circle pieces together as shown in the finished card photo and set the pieces aside.

2. Take the large piece with scallops and fold it in half on the score lines. The other side, or back side of the paper will now be facing up. We will be shaping the piece from it’s backside.

Use two hands to help “train” the cake piece in to its desired shape. Assuming that you’re right handed, place your right hand on the paper near the score folds to hold the paper in place. Using your left hand, hold on to the scalloped edge and gently nudge the paper towards your right hand. The paper will begin to fold itself. Some the edges may need assistance and need to be folded individually. Now turn the paper over and repeat this process on the other side.

3. When you turn the paper right side up, you will see that it still lays flat, but has a gentle “lift” to it. At this time, layer the semi circles to the front as shown and glue in place. (hint: Use dry adhesive to avoid your pop up from warping and losing its shape.) Now you should only have two pieces left.

4. It’s now time to glue your scalloped cake to your card base. We are only going to glue one half at a time. Fold your scalloped cake piece in half as shown below. Add adhesive to only the scalloped piece and glue as close to the line as possible without going over the center folded line. I found that it was easier to find the center scored line if I held it at a 90-degree angle as shown in the photo.

Now you need to add adhesive and glue the other side (the side facing you) to the card base too. (Important Reminder: Do not add adhesive to any other area. Only the scalloped edge) Simply close the card so the adhesive on the scalloped piece will adhere to the base. Open the card and Viola! Your cake pops up when the base is flat! (Notice that in the photo below, the scallops were glued close to the center fold, but not touching the center fold line.)

5. Now you can embellish your card as desired. The card has enough of a “Wow” factor that it really doesn’t need much embellishment. I chose to use the “Sweet Baby Girl” line by  Echo Park Paper. The line was designed for a baby, but I think that it works for little girls too. Since the inside is so awesome, I left the outside fairly simple. I made a crepe paper fringe and used the “Birthday Girl” round sentiment for embellishment. You can find that sentiment file at the Silhouette Design Store and at Lori Whitlock SVG Shop. I really like that the Round Sentiment echos sentiment on the pop up, but no matter how you embellish your card, it’s going to look fabulous.

I truly believe that this A2 Pop Up Round Cake Card is going to be one of my “go to” cards. I’m anxious to make a masculine version in dark colors. Won’t that be great? If you make this pop up card, share it with us on social media using the #loriwhitlock hashtag.

A2 Round Cake Pop Up Card


Thanks for reading my tutorial. I hope that you have a creative day!

Michelle


Center Box Card with Michelle

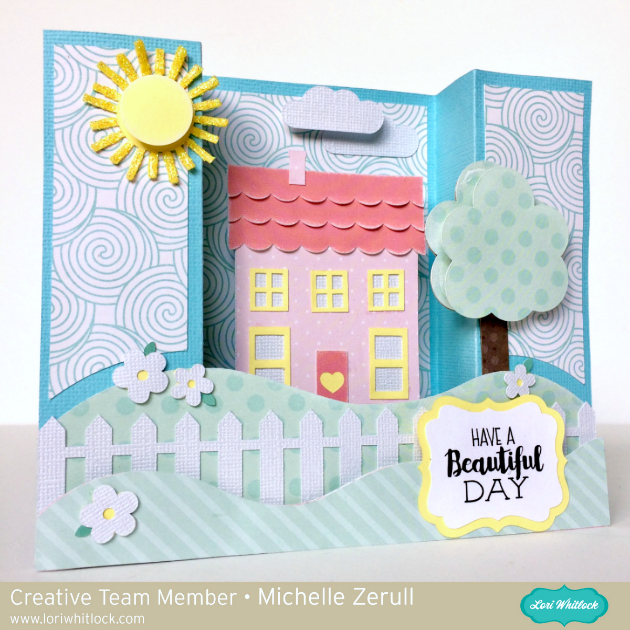
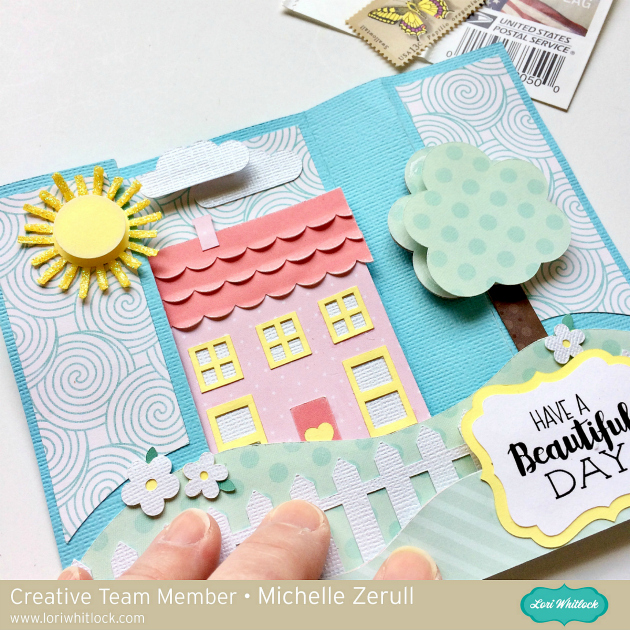
One of my favorite reasons to send a card is for no reason at all. An unexpected card is certain to bring a smile. I, Michelle, would like to share a Center Box Card that I made with my Silhouette Cameo and SVG files from the Lori Whitlock SVG Shop. You can also find the Beautiful Day file at the Silhouette Design Store.

Center Box Card Beautiful Day

Although it wasn’t needed, I made a few slight variations to the design using my Silhouette Designer Edition Software. (which can also be found here at Lori’s shop) This was the first time that I had made one of these cards and I thoroughly enjoyed it. Lori has a YouTube Video that shows how to assemble these cards step by step. So easy! I also love that this card is 3-D, yet it lays flat for mailing. I even made my own coordinating envelope, which is a FREE file at the Lori Whitlock SVG Shop.

Lori Whitlock Center Card Folds Flat for Mailing


Thanks for letting me share and I hope that you have a beautiful day!

~Michelle

Mini Wreath Place Setting Tutorial with Michelle

With family so far away, our Easter Dinner is a quiet gathering where we use our everyday plates. This year, I (Michelle) decided to make dinner fun with some Mini Paper Wreaths.

Lori Whitlock Easter Rabbit Place Setting Svg

Making the mini wreaths was fairly easy with my Silhouette Cameo, but I have a couple hints and tricks to make it really easy! I started with Lori’s Circle Monogram Frame (Silhouette Design Store or Lori Whitlock SVG Shop) to make the wreath. This is possibly my favorite SVG file. The wreath is actually 6 seperate pieces. Since I am making a small wreath, I’m going to release the compound path and make all of the leaves filled in, which is easier for me to cut.

Release Compound Path

I’m also going to cut a 5-inch circle to fit my plate. (Hint: When making a circle hold down the shift key and your circle will be perfect each time.) I recommend cutting three or four monogram wreaths to make your mini wreath nice and full.

Next, I cut some BRAND NEW Bunnies. This Easter Bunny Silhouette is absolutely darling! I love his little tail cut-out. He’s new in the shops and you can find him in the Lori Whitlock SVG Shop and the Silhouette Design Store. I cut two 4-inches bunnies and glued them back to back, but one would’ve been enough. I wanted to add a cute sentiment, and I found exactly what I was looking for in the Bunny Dingbats Font. You can find this in the Silhouette Design Store and the Lori Whitlock SVG Shop. You will find additional bunny silhouettes in the font. They would be cute too. With the bunnies so small, I had trouble getting the sentiment cut cleanly with paper, so I used vinyl instead. It came out perfect the first time!

Lori Whitlock custom vinyl SVG sticker on paper

Yes! Paper crafters can use vinyl too! I love how it came out.

I topped off my wreath with a cute paper bow found in the Silhouette Design Store or at the Lori Whitlock SVG Shop and my project was finished. This would be a great project to try new techniques such as releasing the compound path and using vinyl. if you would like even more information, I would encourage you to check out Lori’s class on Craftsy. With the class, Lori explains numerous techniques for getting the most out of your Silhouette Cameo.

I hope that you’ve enjoyed my Mini Wreath Tutorial. Happy Easter!

Michelle