

I’m so happy to formally introduce you to our newest Creative Team member, Michelle Starcher! Michelle is an educator and a crafter who comes to us from the great state of Texas! She has a keen eye for coordinating patterns and designing! We are excited to see what she brings to the Lori Whitlock Team! You can find Michelle on her blog the Bookish Designer, Facebook, Instagram, and YouTube.
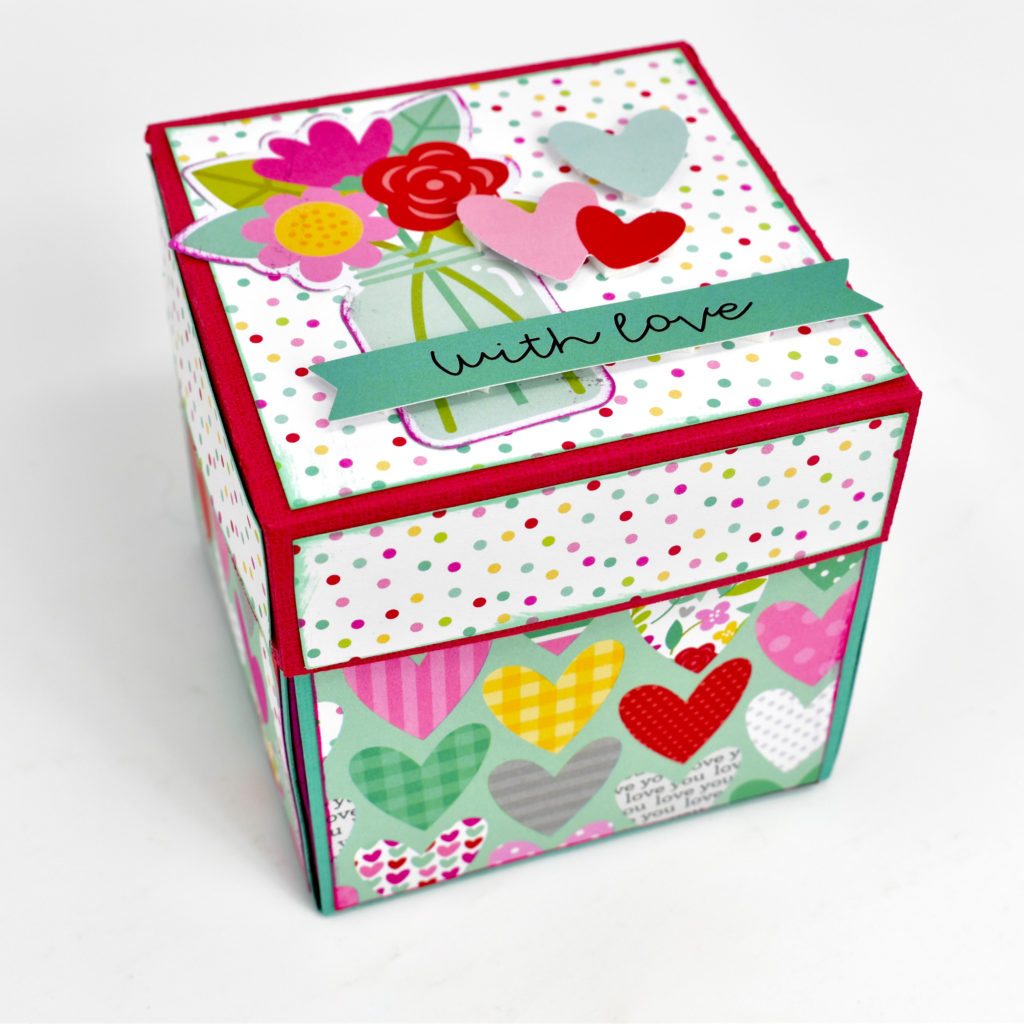
Hello, my crafty friends! Michelle Starcher here today to walk you through the steps to create Lori’s Explosion Box 4 Gift Boxes (SVG, Silhouette). In this photo tutorial, I will break down the steps to create this fun project. I created this explosion box for Valentine’s Day, but this project is so versatile. You can use it for any occasion!
To build Explosion Box 4 Gift Boxes, follow these steps…
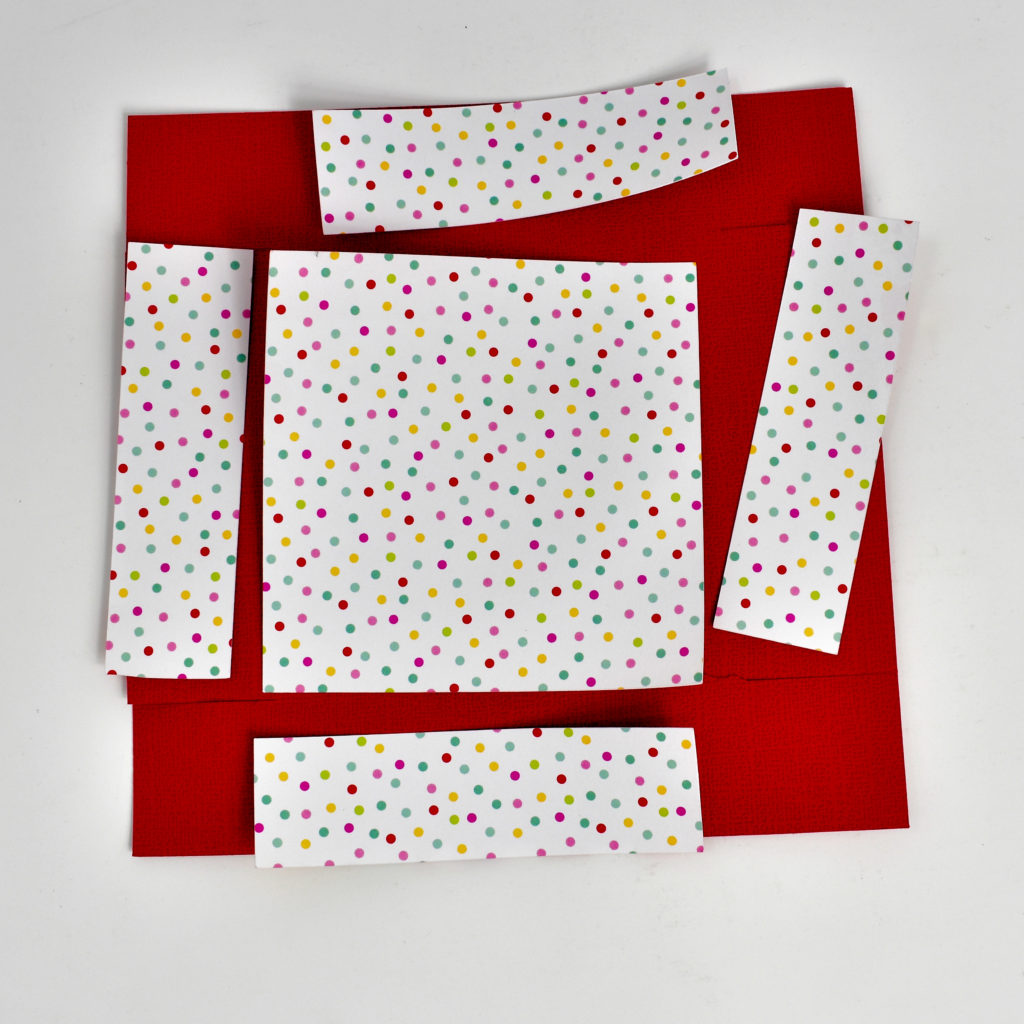
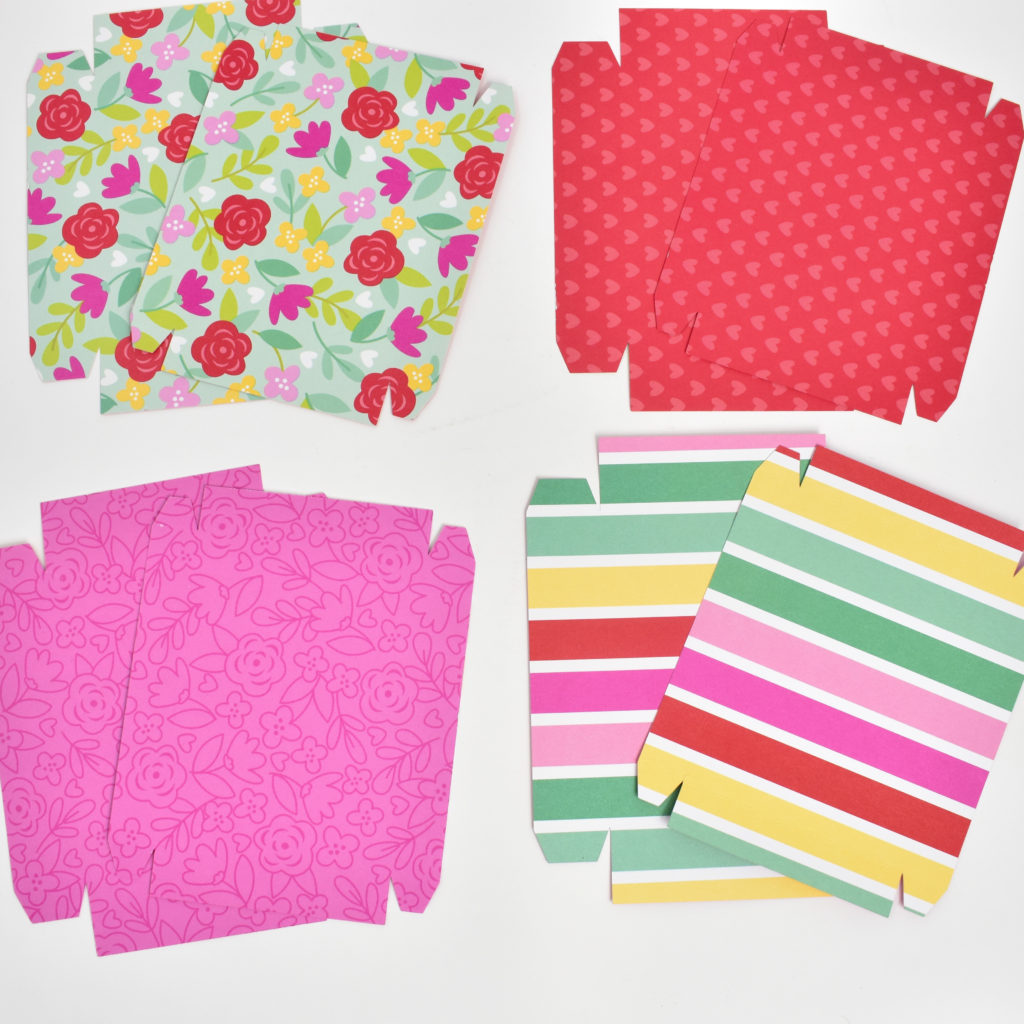
Start by cutting and folding all the pieces. Make sure you cut 4 each of the inside box pieces and the outside cover panels. I used double-sided patterned paper for this, so that I could mix and match my inside boxes.
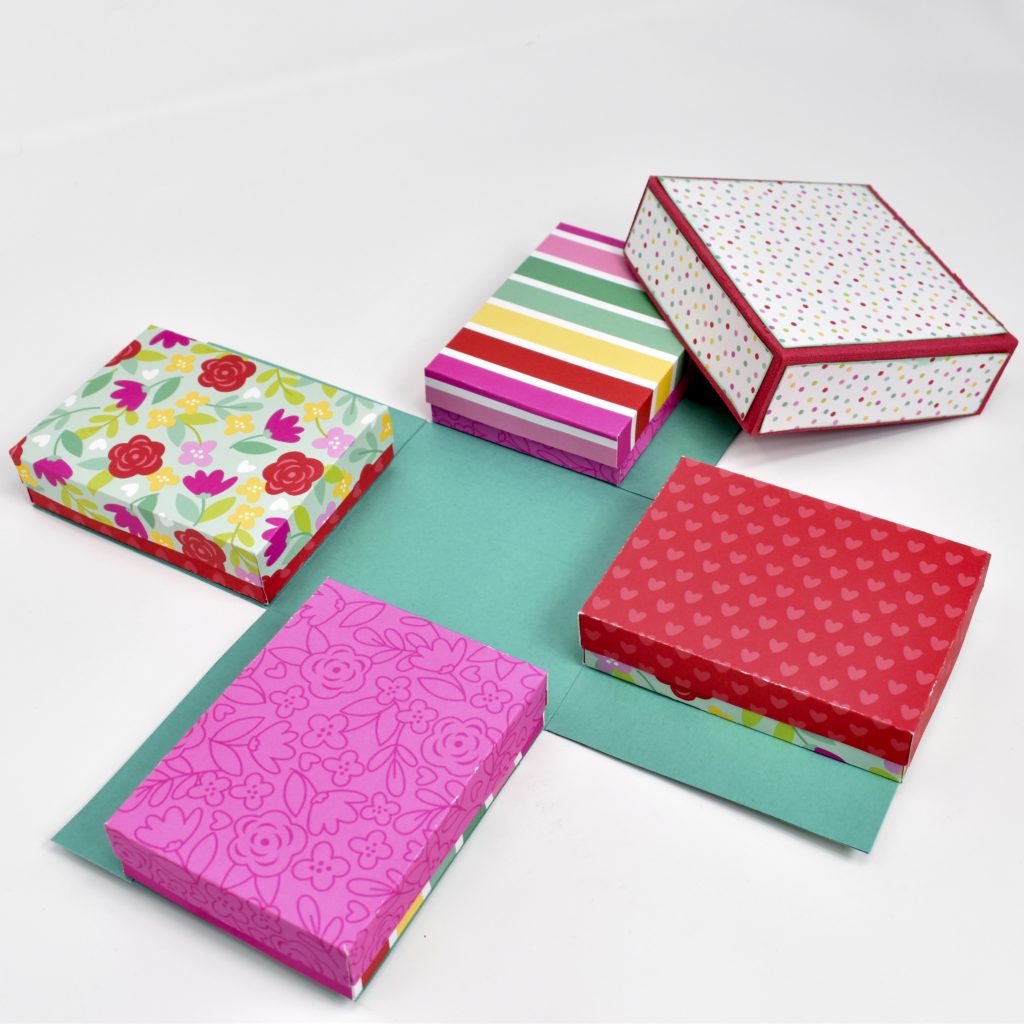
Next, adhere the outside cover panels to the large cross. This will create the base for your explosion box. (I inked the edges of my cover panels before adding adhesive. This creates a little texture to the project.) You will repeat this same process for the lid of the box.
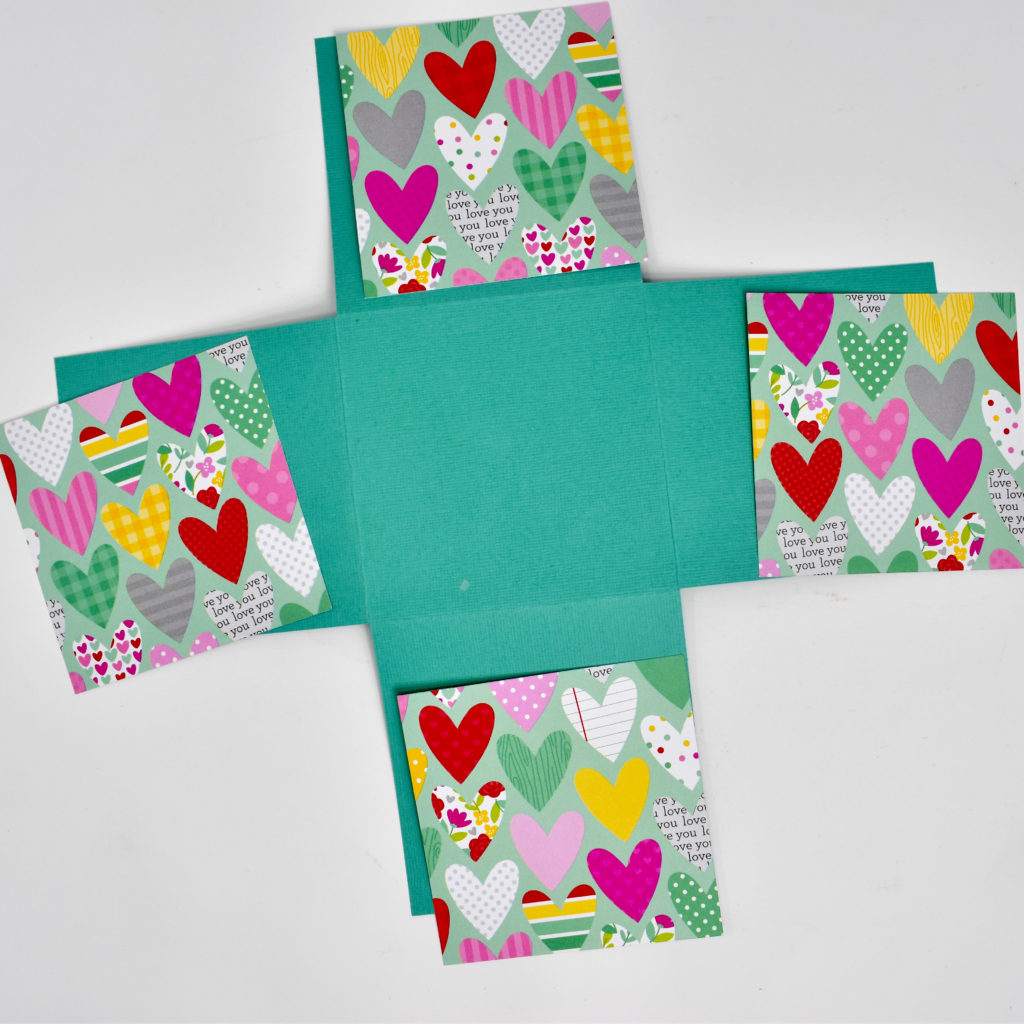
Your next step is to build the 4 boxes that will go inside the explosion box. Since I used double-sided paper, my boxes had a different pattern on the lid and the bottom of the box. This allowed me to have 4 different looks for my inside boxes. Of course, you can stick with one pattern or color for your inside boxes. Either way, the explosion box looks great!
Once all of your boxes are assembled, you are going to adhere them to the inside of the bottom base. For this particular explosion box, you will want the inside boxes to be flush against the right edge of the bottom base. (As I added each box, I folded up the sides of the bottom base to make sure the inside boxes were in alignment.)
The final step is to decorate the box as desired.

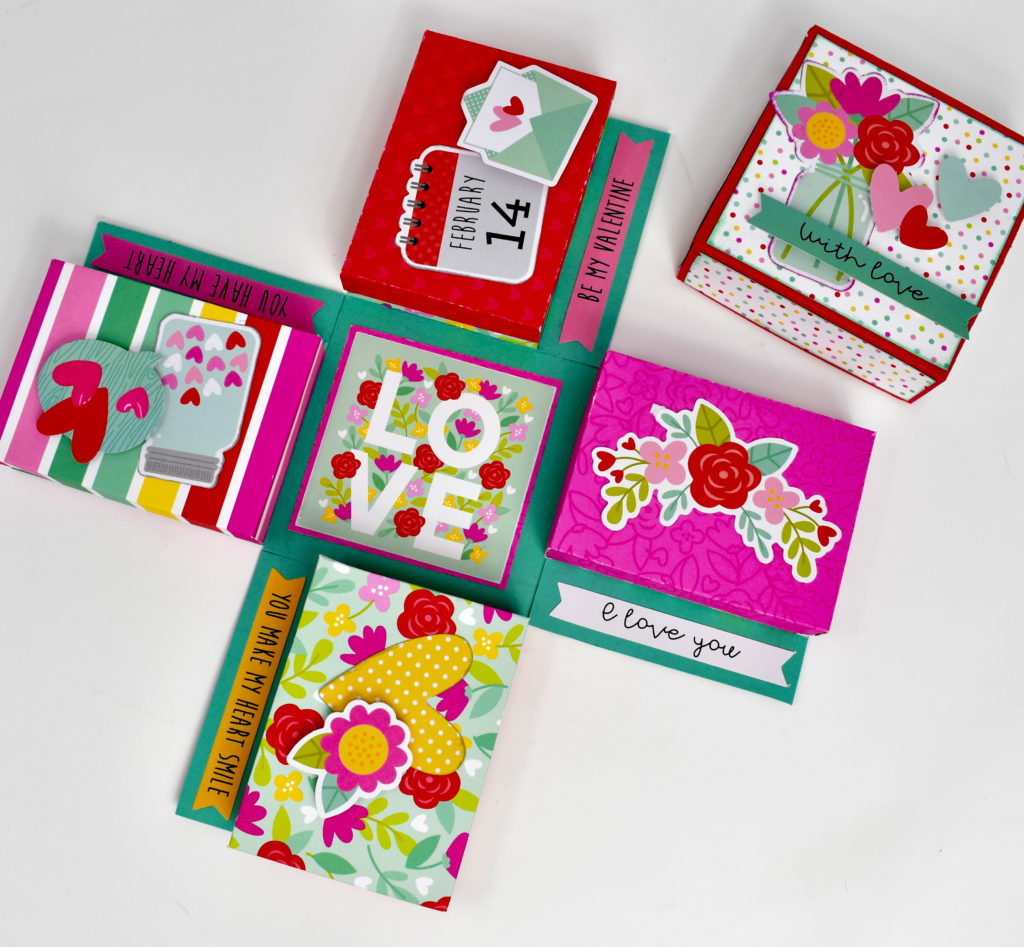
I love adding extra dimension to my projects, so I used pop-dots to give some of the elements a little more height. I had to be careful when adding pop-dots to the elements inside the explosion box to make sure they didn’t interfere with closing the box. If you decide to add extra dimension to your project, just be sure to keep the extra height in the center of the inside boxes.
I hope that you’ve enjoyed this tutorial as much as I have. The Explosion Box 4 Gift Boxes will make a great addition to your SVG library. Happy crafting!