Stationary Set by Traci and Centerpiece by Corri

Today we have some fabulous projects by Traci and Corri
Hi Lori fans!
I’m so excited to be on the blog today sharing a really fun, and pretty quick, project with you.  As many of you may know, I’m a mini album girl.  They are my all-time favorite project.  Despite my mini love, I also love giving fun gifts with cute packaging.  So today I decided to share my love of little gift notes.  A 3×3 gift note is the perfect little “accessory” to a perfectly wrapped present.  I make several at a time so that when I have a birthday, wedding, or new baby gift to wrap, I already have a cute little hand-made gift enclosure to go with it.
Here is some gift note inspiration for you — complete with Lori’s adorable 3×3 stationary box to keep the cards in until you need them.
I love all of Lori’s digital cutting files, so it’s never hard to find the perfect addition to any card or project.  For this one, my favorite part of each card are the sentiments.  Lori designed the “Happy Birthday”, “Thank You’ and “Hello” pieces with an adorable font and a great background piece.  The ability to cut a white background allowed each of my sentiments to “pop” off any pattern paper I layered it onto.  I also love the cupcake for this card…especially with the little heart cut out.
I have always been a fan of Echo Park…especially the paper and embellishments that Lori designs for them.  Most of the papers I’ve used in this card set are from the “My Girl” Collection.  For the card below, I added a fun little branch from the sticker sheet and set an adorable bird up on pop dots for dimension.
For the “Thank You” card, I found Lori’s mason jar cutting file
This design can be used for so many things — I cut the design and then added a flower sticker and brad from the “My Girl” collection and finished it off with a knot of twine.
For the 3×3 box, I cut the file and also created an “inset” shape for each side.  After adding the inset accent pieces, I cut one of Lori’s new 3D flower designs for the front.  The flower also serves as a little accent to tuck the tab behind so that the lid stays closed 🙂  So, so, cute!
Thanks so much for visiting today!  Please stop by my personal blog, Artsy Albums, to say hello!
Traci
Next we have this adorable center piece by Corri.
I have a fun project for you today that would be great for a Memorial Day or July 4th table decoration.
I cut Lori’s Octagon Flower Pot as sized in the file from some kraft card stock.
For the rim of the pot, I used the red wood grain paper from Echo Park’s “Perfect Summer” collection which Lori designed.
I cut 3 of the Spiral Stars (size reduced to 2.795″h) and 2 Spiral Flower 1 from some navy card stock and some pattern paper from the “Perfect Summer” collection.  I cut an extra base layer for each flower, then hot glued a wooden skewer to one of the base layers and mounted the assemble flower to that with foam dots.
To add some stability, put something with a little weight in the bottom of the flower pot.  I used a few tokens from Chuck E. Cheese!   I used some more hot glue to glue a 4″ foam ball in the pot and then arranged my flowers and covered with some paper shreds.
You could change up this cute project for all kinds of summer parties.  Add some graduation caps and 2013 on your sticks for a cute graduation party center piece. Corri

Beautiful Easter Basket by Christine

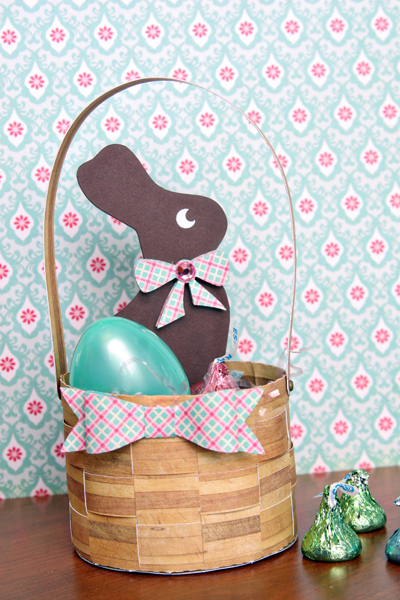
Ok, I will admit it.  I have a weakness for chocolate. So I’m so glad that most holidays feature sweets as part of the celebration.  Easter, of course, is no exception.  In fact, it’s the best holiday for chocolate and sweets in my book.  So when I saw that big chocolate bunny created by Lori, I just knew he would be the perfect thing to put into my woven Easter basket.

First, I cut out the basket.  I used some woodgrain paper from     Lori Whitlock’s paper for Echo Park.  The basket went together very easily but I would suggest cutting out two handles so that you can have both sides of the handle look the same and so that it is a bit sturdier.  Lori has a video on her YouTube channel that shows you the exact steps to putting this basket together.
Next, I added this cute little bow as decoration.  Wow, what fun these little bows are to put together.  I am definitely going to do more of these in my future projects.
Here is my little chocolate bunny.  I thought it would be fun to cut out his bow a couple more times and attach the extra pieces with foam adhesive.  I love the dramatic look.  I also cut out a mirror image of him and the bows sothat you could see him from both sides.
I think that this is going to be a cute little table decoration for my foyer table.
Supplies used:
Other Supplies used:
Silhouette Cameo
Scor Tape
Stampin Up! Dimensionals
Bo Bunny Gems
Making Memories Brads

Easter Card by Christine and Spring Frame by Natalie

I LOVE Spring/Easter decor. It is a great reminder that this cold, ugly snow will go away someday. Christine is first to share the joy today, she says…
Easter comes early this year so I wanted to get a head start on my Easter cards.  This pretty little basket filled with eggs is just the perfect focal point for my round card.  Check out the envelope too.  It’s so fancy with a matching rounded flap.
Files I used:
Easter Basket in the Silhouette store  #7909
Elegant String Tied Envelope in the Silhouette store #6239
Next up is Natalie with an adorable Easter Frame…
Hello everyone, I am starting to think spring might be around the corner.  We had a glorious weekend here, and we are actually starting to see patches of grass around.  So I guess that means it is ok to start decorating for spring.  I love spring, I love the flowers it brings and the colors of all the decorations.  So I decided to make a cute little shadow box with this cute little bunny I found in Lori’s shop.
To make this, I used Lori’s 5×7 shadow box frame found here, which also includes a tutorial with it, that came in handy when assembling it.  I also used her bunny silhouette found here, and her Hello Summer collection from Echo Park.
Once the frame was all built, I added the bunny with a little foam adhesive and added a little cotton to the tale.  I think it turned out great, clean and simple and ready to make my house happy with spring!


Hexagon Card by Mendi and Frame by Joy

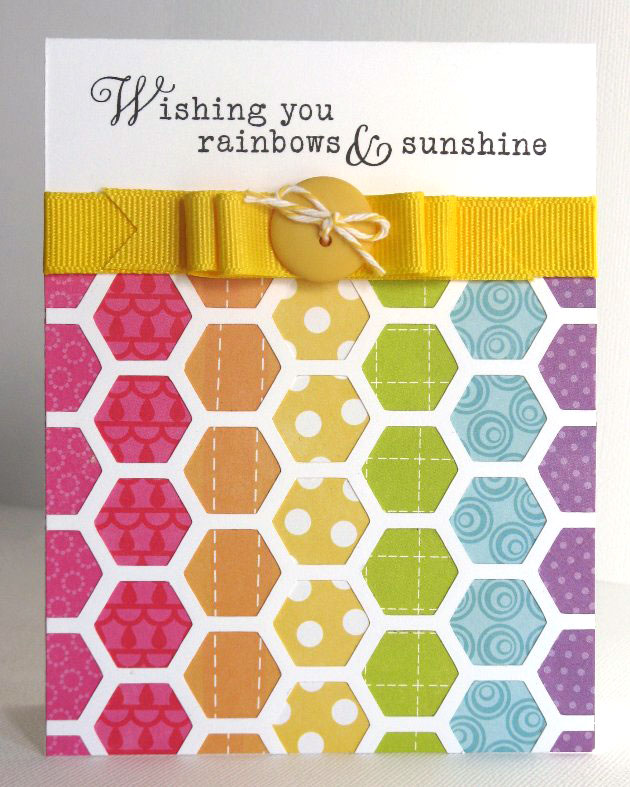
I always love to see what our Creative Team has done and today is no different. Look how fun and bright this cute card is. I agree with Mendi, I am ready for Spring right now, how about you? Mendi says…

“I don’t know about you, but I’m seriously ready for some sunshine so for today’s card I altered Lori’s Hexagon Card cutting file to form my card’s rainbow background pattern (using my favorite Summer Days paper collection which Lori designed for Echo Park).    I hope it shows that with some great basic shapes and a little creativity, you can really get a lot of mileage and different looks from a single cutting file!  Hop over to my blog today where I am sharing a video tutorial to better explain how I used Lori’s file to create my card.”
Next up is Joy. She is so great and creating decorative items for her home.

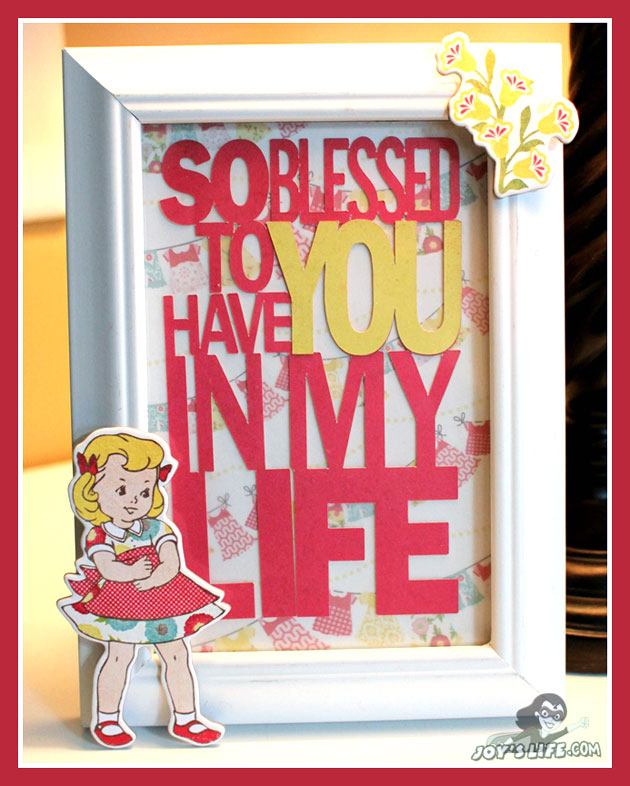
When I saw Lori’s Family Word Art Titles file in her store, I just had to have it!  This phrase is something that I tell my husband and children all the time, so it is especially meaningful to me.  I did something very, very simple.  I used my Cameo to cut the phrase out.  Then I cut a piece of paper from Lori’s new Sweet Girl paper line to use as the background.  There’s a trick though!  The patterned paper was just what I wanted to use, but the brightness of it competed with the phrase.  To solve this, I covered it with a piece of vellum.  Problem solved!  It muted the print just enough to make sure that the saying really stood out.  I put everything in the frame and added those precious chipboard images from Lori’s Sweet Girl embellishments.  I hope you’ll come by my blog for more projects and ideas.  Here are some things I’ve pinned on Pinterest that I made using Lori’s great files.  Happy crafting!