Using Multiple Colors of Heat Transfer Vinyl with Kathy

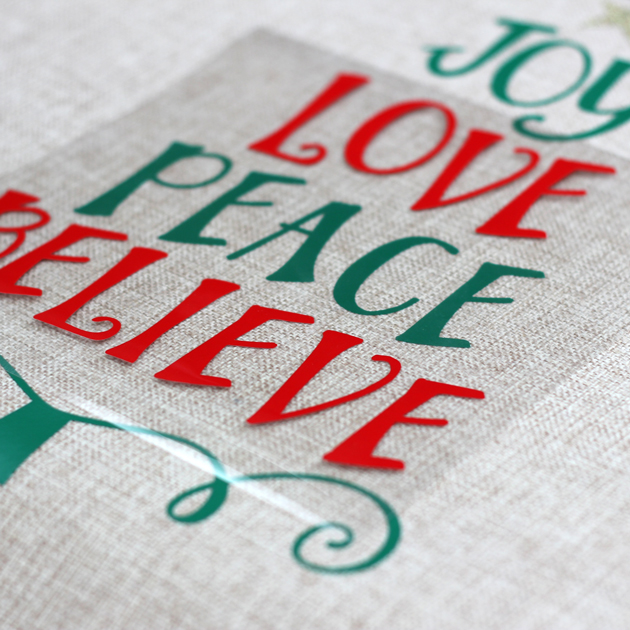
Hi Everyone and Happy Thanksgiving!  It’s Kathy today with an easy tutorial showing how to keep a design’s shape and spacing when using multiple colors of heat transfer vinyl.    I wanted to create some Holiday decor gifts, and I though some seasonal throw pillows would be fun.  I found this Joy Love Peace Believe Tree design in Lori’s Shop (here in the Silhouette Store) and decided to add it to a throw pillow.

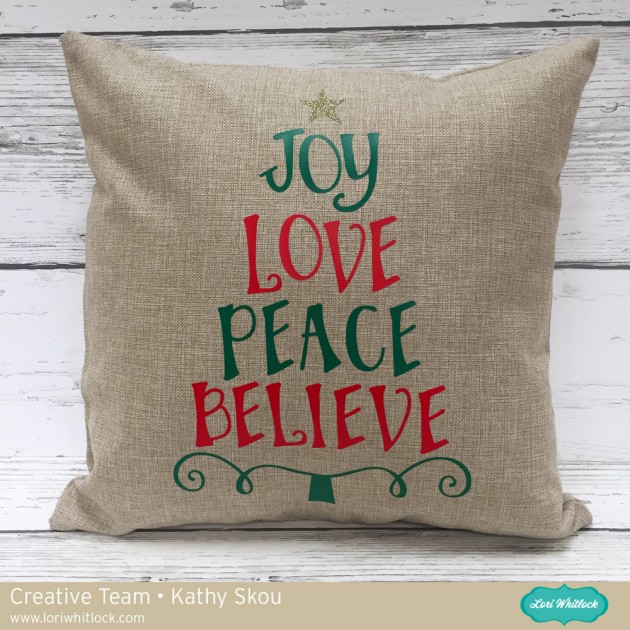
I loved how the different tiers were different colors and wanted to make sure I kept the shape.  Here ‘s how I did it…

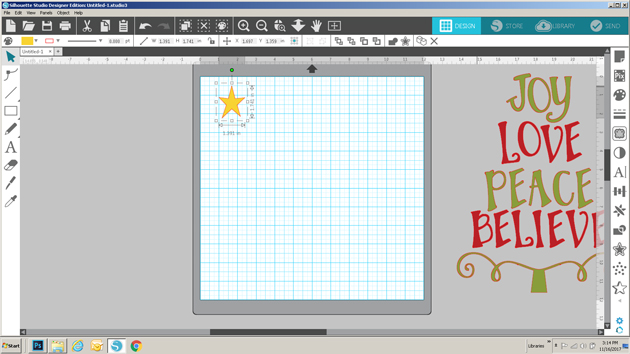
I started by loading the file into my Silhouette Software.  Next, I sized it to fit on my pillow case.  My pillow was 18″x 18″ so I knew I wanted the design bigger than the original.

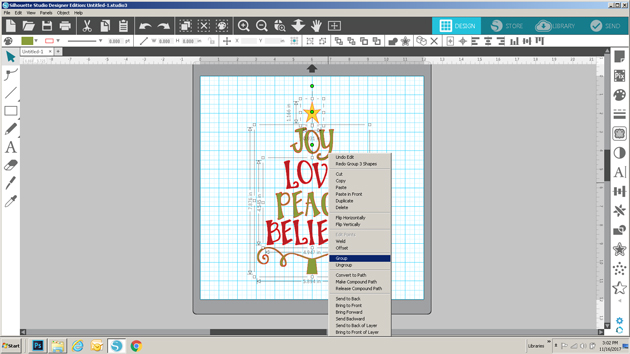
I selected all parts of the design and right mouse clicked and selected group.   This allowed me to change the shape of the whole design uniformly.

I clicked the corner of the design and dragged it to the size that I wanted.  It is bigger than the mat, but I just needed to make sure that all of the green elements fit on the mat at once since that was the largest area of a single color in the design.

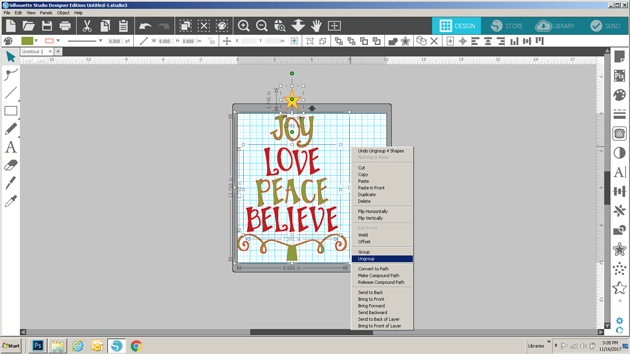
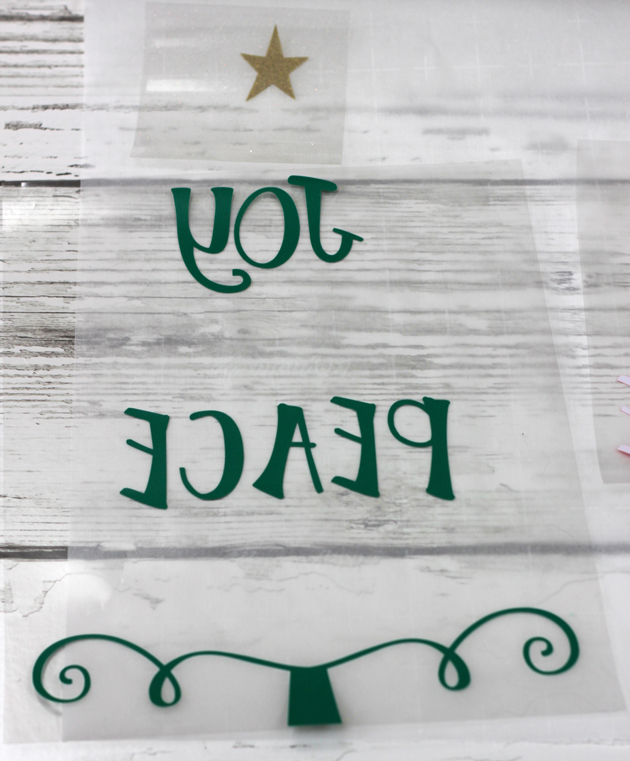
Once it was sized properly, I ungrouped the file.  I then double checked that all elements of each individual color were grouped together, ( all the reds in one group, all the green in another) since I wanted to cut them at once, and in their original place in the design.

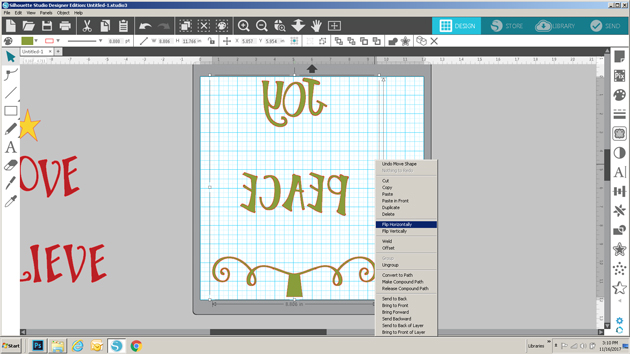
I dragged the red words and the star from the mat, and then mirrored the green words on the mat (you always want to do this when cutting words in vinyl)  Notice they are still spaced as in the original design.   Next I hit send.

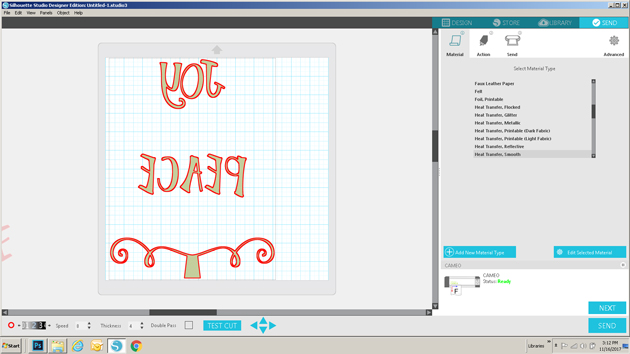
I added the green heat transfer vinyl to my mat, with the shiny side down,  selected the proper media from the menu, and set my blade depth to 2 and sent to cut.  (for my design I used Siser Heat Transfer Vinyl in Green, Red and Glitter Gold)

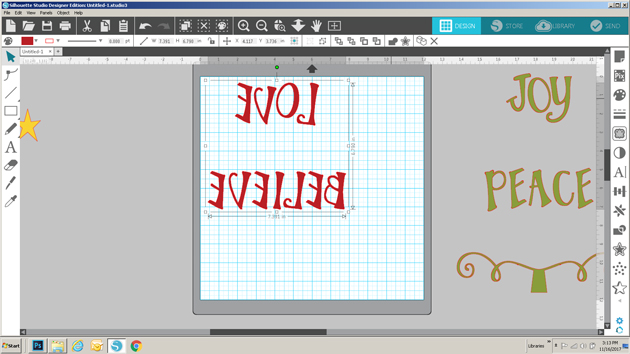
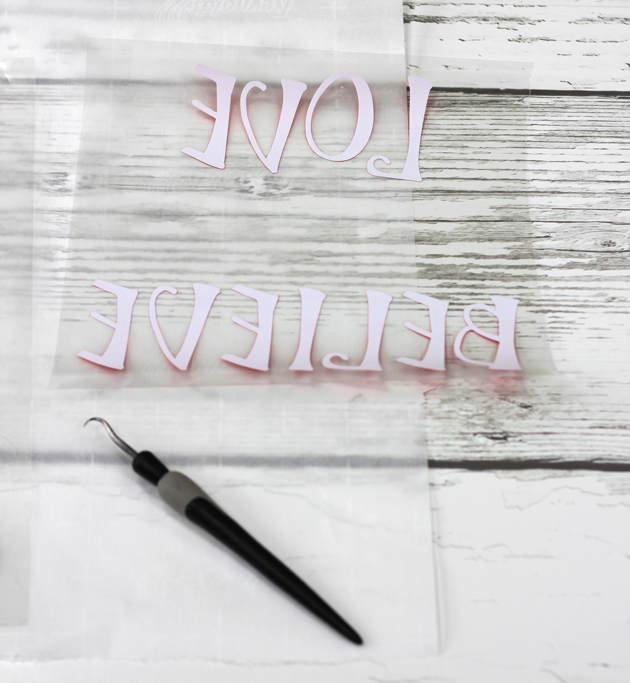
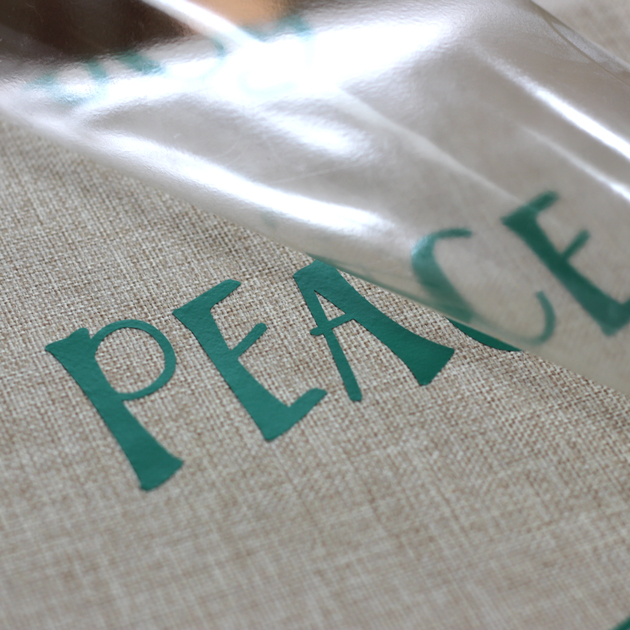
I repeated this process with the red and gold pieces of the design.  Notice the red also maintain their original spacing.

One the vinyl was cut, I weeded out the negative space so all that was left were the parts of my design.

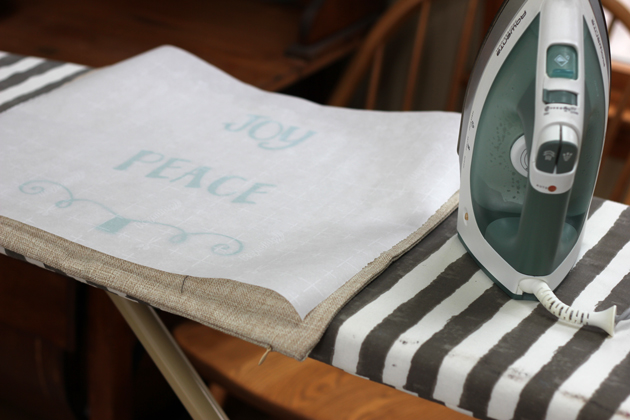
I centered the design on my pillowcase.  (I purchased this plain pillow case on Amazon.)

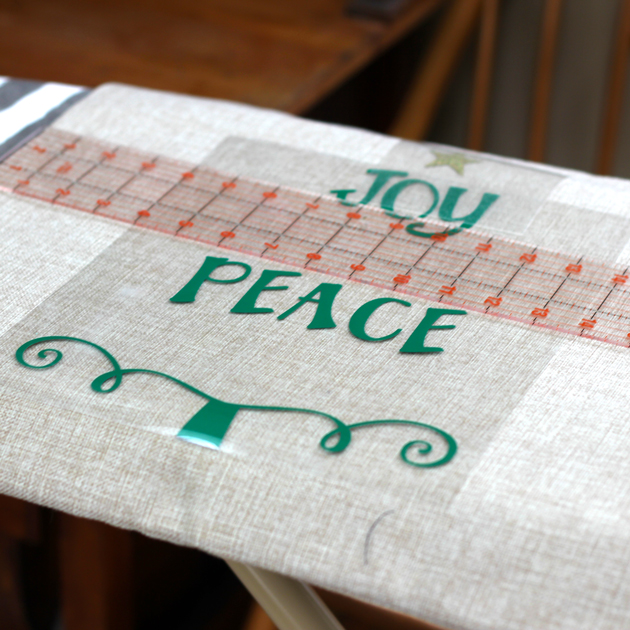
To start, I ironed on the green since this was the largest part of my design.  I put a piece of parchment paper over the clear plastic holding the design and ironed on a cotton setting, no steam for 10 seconds per each part of the design.

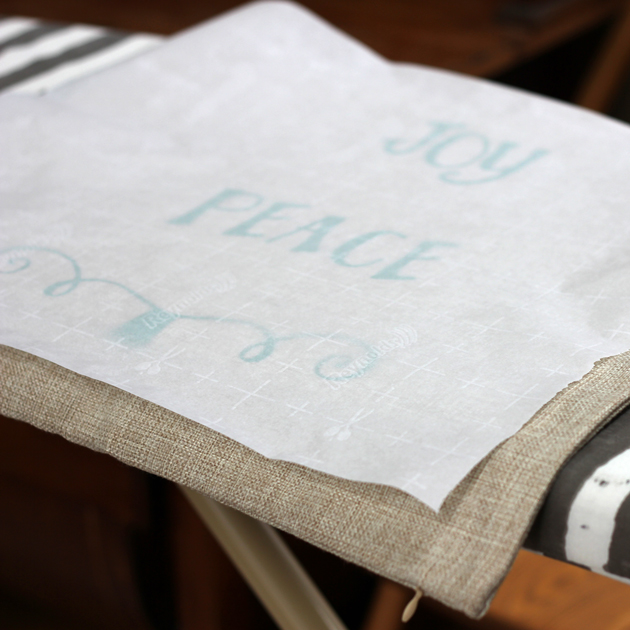
Next, I peeled off the plastic (be careful, it can get hot!) leaving only the design on my pillowcase.

To make sure it was ironed on well, I covered the design with my parchment again and ironed it a little more.

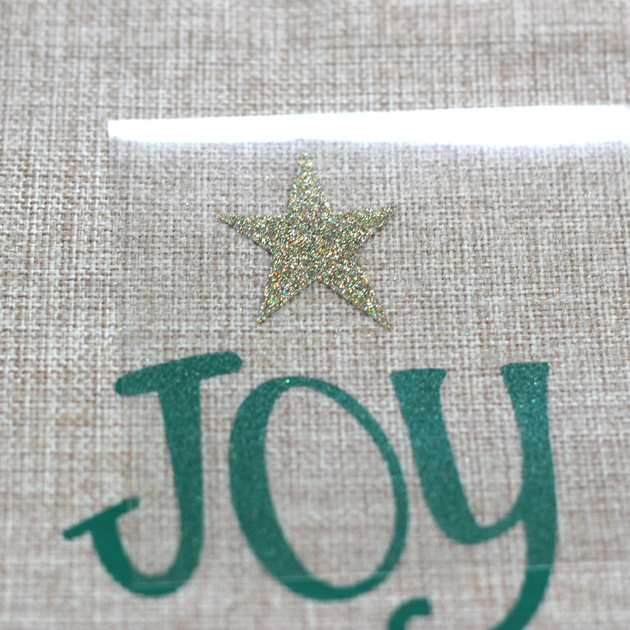
I then repeated this process with the gold star and the red words.  It was easy to correctly place the red words because of the way I cut the pieces on my mat.

Once I ironed on all of the pieces, I added the pillow fill to the case and done!

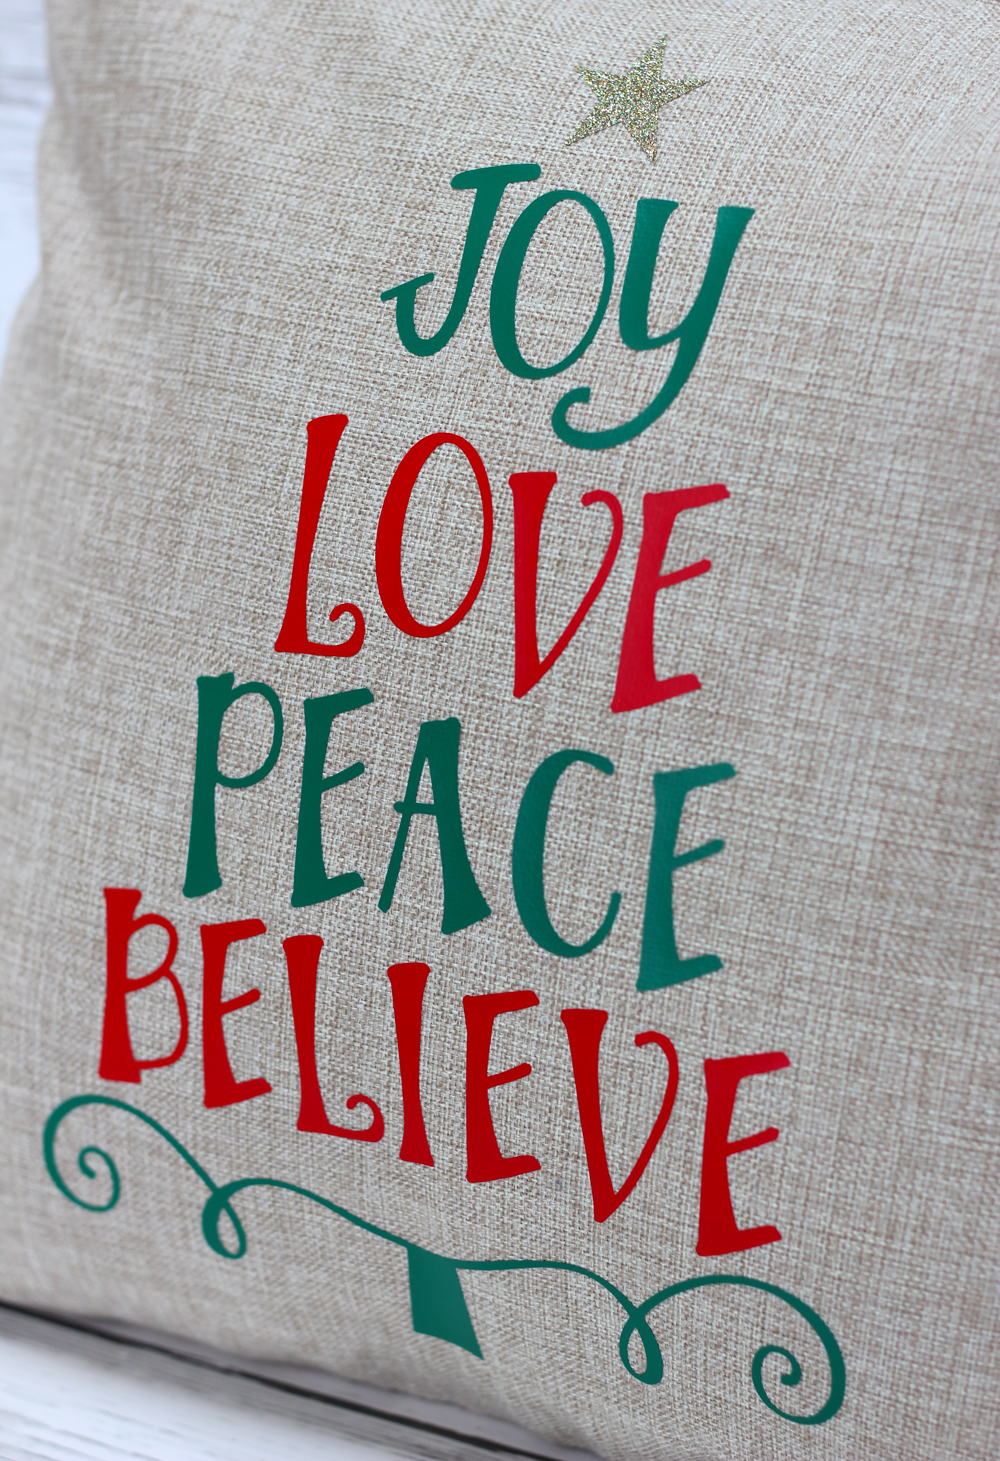
This will make a fun, festive gift, I have plans on making a few more for friends, after I finish my turkey of course!  That’s it for me today, thanks for stopping by to peek!

Guest Designer Jennifer Beason!

Hello, everyone. I’m so pleased to be back as a guest designer for the Lori Whitlock team. Today I’m sharing a home decor piece I created using a shadow box I picked up from Michaels, some Doodlebug cardstock, and of course some of Lori’s awesome cutting files.

After lightly tracing a circle on the fabric backing of the shadowbox, I began laying out the leafy branches of the wreath. (The leaves are part of the Mason Jar Bouquet Card).

Next, I cut three different types of rolled flowers in various colors and sizes. Once they were glued together, I played around with the placement until I was happy with the design.

The “love grows here” phrase was cut with a border and then embossed with a Doodlebug wood grain folder.  So the grain stood out, I rubbed over the embossing with a light green/teal gelato.

Don’t forget a project like this can easily be adapted to any season. Think Fall or Christmas, Lori has cutting files for every occasion. Well, that’s it for me. Thanks so much stopping by. 🙂

Jennifer

Cutting files used:

Love Grows Here (here in Silhouette Store)
Box Card Mason Jar Bouquet (here in Silhouette Store)
4 Leaves Set (here in Silhouette Store)
Rolled Flower 6 (here in Silhouette Store)
Rolled Flower 14 (here in Silhouette Store)
Rolled Flower 19 (here in Silhouette Store)


Car Monogram Tutorial with Anita

Hi!  Anita here with a tutorial to make your own car window monogram. This is for my daughter’s car and she loves anything that is monogrammed.  I previously purchased one and it came off in the car wash.    I used Lori’s Monogram Set A-Z which is a lovely file set with so many different options for your personalization needs.  You can find this file here in Lori’s store and they are sold as individual letters in the Silhouette store.  Here is the M, here is the C and the L.

There are a few supplies that you will need for your project.  You will need some kind of vinyl and transfer tape.   I chose some glitter vinyl from Cricut.  You will also need a brayer, a craft stick or scraper and a weeding tool, or pick.

Open all three files on your mat, they will likely overlap but you can move them around.

Ungroup your monogram files one set at a time.  Move the three initial groups that you want to use onto your mat.

Ungroup the desired monogram files from the remaining files and leave them on your mat.  I am using  CLM.

I  decided that I wanted to use a round monogram so I kept that file on my mat.  The other files were off to the left and messy so you can highlight them all and delete them.

I made the circle and monogram large so that I could get the placement that I wanted within the circle.  I  measured the space on her rear window which would allow for the monogram to be positioned so that the rear wiper would not touch it when in use.

I resized it to fit her window.

When you put the vinyl on your mat,  you want to use a brayer or a pizza roller to make sure that the vinyl is stuck to the mat well and will not move.

Next, select the vinyl setting for cutting on your machine and adjust your blade.  This is very important because you want it to make what is called a kiss cut which is essentially to cut through the vinyl but not the backing.  This will make more sense as we move forward.

Once your design is cut, you need to weed out the pieces of vinyl that you do not want to have in your final design.

After weeding,  cut the backing with your design on it so that you have at least 1/2″ clearance on all sides.  Cut a piece of the transfer tape to the same size or slightly bigger dimension than your design piece.  Remove the liner from the transfer tape piece and gently place it over your cut image.   Use a scraper to burnish the transfer tape onto the vinyl.

Now you might be wondering why my sample above is pink and my actual monogram that I put on the window is silver. Well, things don’t always work out and you might have to start again.  I worked hard at trying to burnish the pink monogram and just believe that the vinyl was old and the design was a bit intricate so it just did not work.  I moved on to plan B and it worked like a charm.

Peel the backing paper from the design,  leaving the transfer tape, with your design, sticky and exposed.  Be sure to clean the window first and then put the transfer tape with the vinyl images onto the window.  Use your scraper to make sure that it is burnished to the window.

Pull back a tiny piece of the transfer tape to make sure that the letters are sticking.  When you know they set, pull the whole piece of tape off at a 45 degree angle, slowly and carefully.  I’m so happy with this design!  I’m sure my daughter will love it!

Happy monograming.  You can monogram so many things, from clothing, to home goods, to a car window.  Lori has so many adorable files that would look so awesome in vinyl on a surface of your choice.

Hugs,

Anita


Anniversary Keepsake with Kathy

Hi Everyone!  It’s Kathy today with a fun project I created as a little something to give my parents for their 50th Anniversary.  We went on a fun trip to Maine as a family, and we’re planning a party later in the year, but I wanted to give them a little something to commemorate the day!  Take a peek…

I started with an 8×10 block of wood that I painted and sanded the corners.  The K is from Lori’s Mega Monograms Set (here in the Silhouette Store ).   I used Lori’s LW Block Font  for the other letters.  I wanted to add a bit of sparkle, so I created a slight offset for all shapes & letters and cut them from gold paper.  Here’s a close-up…

It will look perfect on their living room bookshelf!  That’s it for me today, thanks for stopping by!

Permanent Vinyl Tutorial with Kathy

Hi Everyone!  It’s Kathy today with a fun tutorial using Permanent Adhesive Vinyl to customize some wine glasses!  We have some good friends with a pool who gave us an open invitation to swim this summer!   I wanted to give them a little something as a thank you for their generosity.  I found these acrylic wine glasses at HomeGoods and thought they’d be the perfect gift!

It was so simple to add the little fish from Lori’s Island Paradise Set (here in the Silhouette Store).

1.  I started with some Acrylic Wine Glasses (good for the pool area, they don’t shatter!) and some colorful permanent (outdoor) vinyl sheets.

2.  Load your design onto the virtual mat and size it for your object.  I added a rectangle around them to make it easier to remove the unwanted pieces of vinyl from around the design without wasting vinyl.  Change the cut settings to Vinyl. (blade depth of 2)

3.  Place the  vinyl onto the mat and feed it into the Cameo.  You can omit the mat if you’re using a 12″ sheet (choose load media), but I’m used to using my mat when I use smaller pieces of vinyl.

4.  Once the design is out, peel  away the unwanted pieces of the vinyl.

5.  I cut the eyes from white and black vinyl and peeled the back off the vinyl and added them to my fish.  It was easy to do this with simple, little pieces.  I thought it would be easier to add the eye layer before placing the fish on the glass.  For more complex or intricate designs you would want to use transfer tape to add any layers.

6.  Transfer tape makes it easy to place a design on your object.  First cut a piece about the same size as your design.  Peel one edge of the tape from the backing and place the tape on the edge of the vinyl backing.  Peel it off, while pressing it over the design.

7.  Once the back is completely off, rub your scraper over the design to make sure it all sticks to the tape.

8.  Peel the tape off, the design should come with it.  If it doesn’t, press it back down and go over it again with your scraper.

9.  Place the tape with your design over the glass.  Starting from the center of the design, start pressing onto your glass.  Move outward, pressing out any air bubbles.  Once the design is down rub over it with your fingers again to make sure it’s on securely.

10.   Slowly peel the transfer tape off the glass.

I’m really happy with the way they turned out!  It’s such a nice way to personalize a gift!  You could also do monograms!

That’s it for me today!  Thanks so much for stopping by!