Box Card Envelope Flowers

Hi there friends and Happy Wednesday!

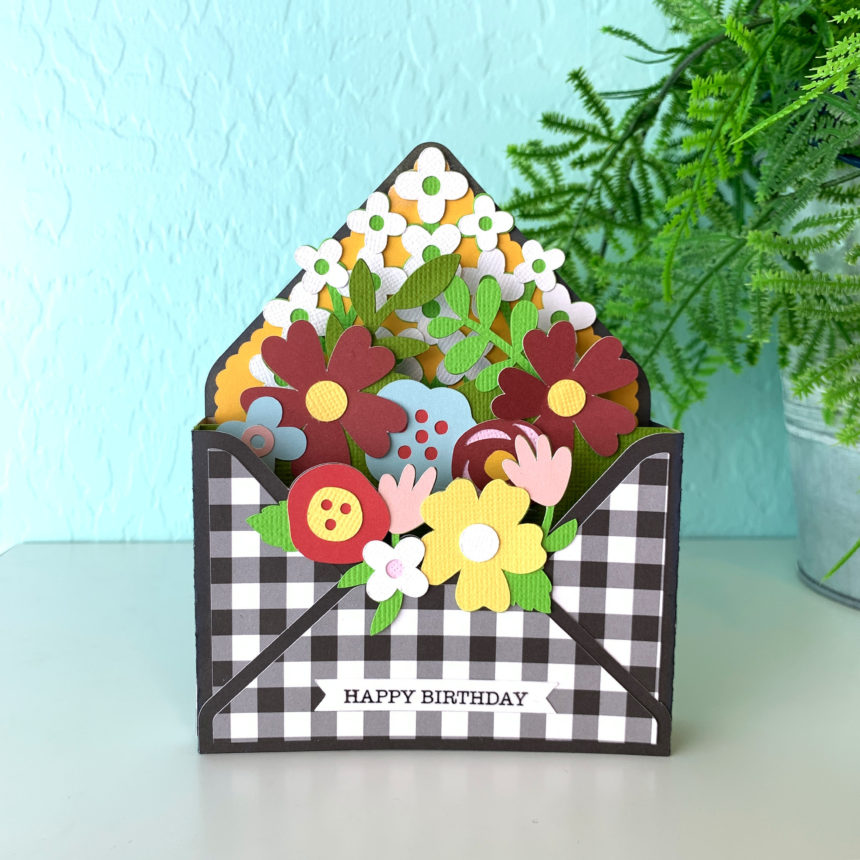
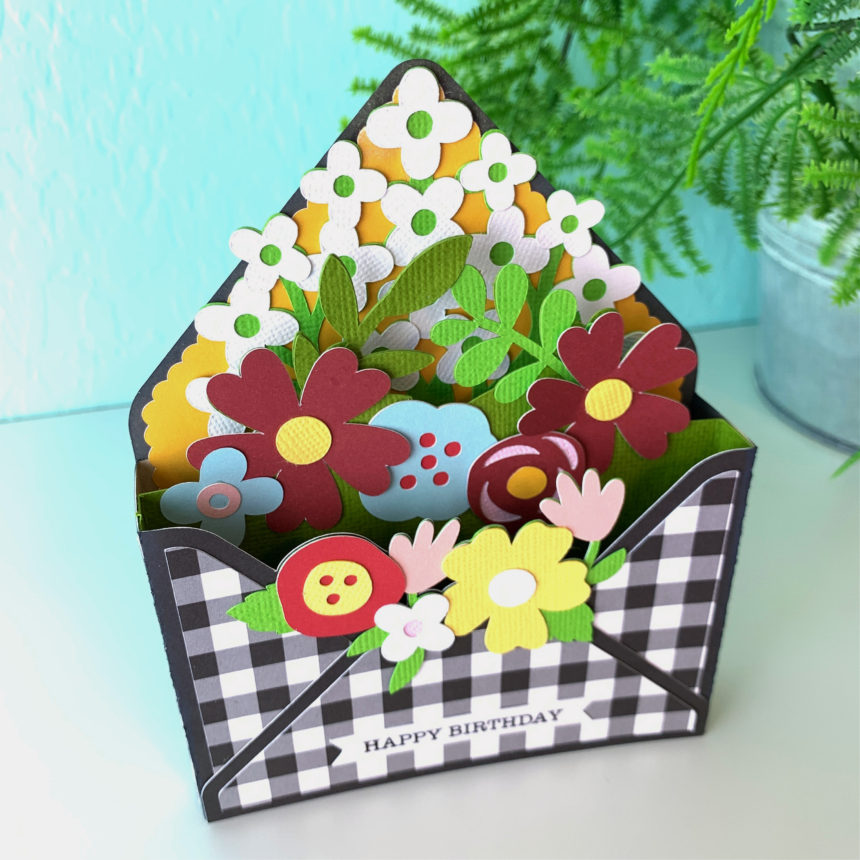
I am loving the envelope box cards Lori has been adding to the shop and couldn’t miss the chance to share another one with you. This is the Box Card Envelope Flowers (SVG, Silhouette). I love how customizable they are. The file comes with the happy birthday sentiment but this can easily be changed to a thank you, thinking of you, I love you, or anything else you may need.

The papers I used are from the A Magical Place collection by Echo Park Paper.

I hope you all are doing well. Thanks for stopping by!

Brandie

Gnome Shamrock Box Card Tutorial

Hi there friends! Today I am showing how I made the Box Card Gnome Shamrock (SVG, Silhouette). I was able to make four of these little guys in no time.

I cut all of the elements out of  80lb cardstock. For the pieces that have grass I had my machine do a second cut before removing the cutting mat from the machine. On a Cricut all you have to do is hit the C button again once the first cut is complete and before you take the cutting mat out of the machine. On Silhouette, you can set a double cut in the Send panel.  Doing the second cut always saves me time. I do not like to weed paper, so frustrating.

Once all my pieces were cut I inked all the edges to add some dimension. I also ran all the small pieces through my sticker maker.

For the gnome insert I glued the hat into place first and worked my way down with the beard, pants, and shoes. Then I added the nose at the center of line where the hat and beard meet. Then I attached one of the small shamrocks and hands. Also don’t forget the little ball at the end of his hat.
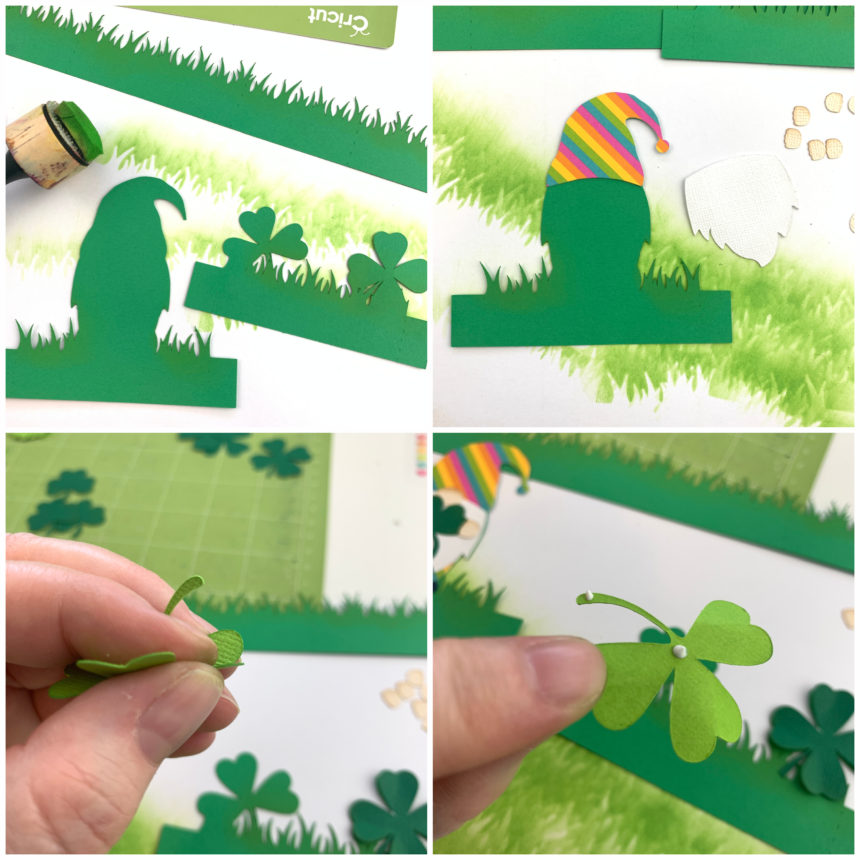
I wanted to give the shamrock insert a little more dimension so I gently folded the petals of the shamrocks then applied glue to just the centers and the very end of the steam and glued into place on the insert.

The long strip of grass is for the box. I folded all of the score lines in a mountain fold. Making sure all of my inking was on the out side of the box. Then I add glue to the tab and created the box.

For the inserts both tabs are valley folds. I glued the shamrock insert into place first. I lined up the edge of the tab  against the front and bottom of the box. Then before the glue sets fold the box flat to make sure it will lay flat for mailing.  I then glued in the gnome insert into place by lining up the bottom edge of the tab with the bottom edge of the box at about the center of the box. I also folded the box card flat before the glue set to make sure it would fold flat.

Once the inserts were in place I added the sentiment to the front with the remaining shamrock. Now he’s ready to brighten someone’s day! Thanks for stopping by!

Brandie
Valentine Viking Impossible Card

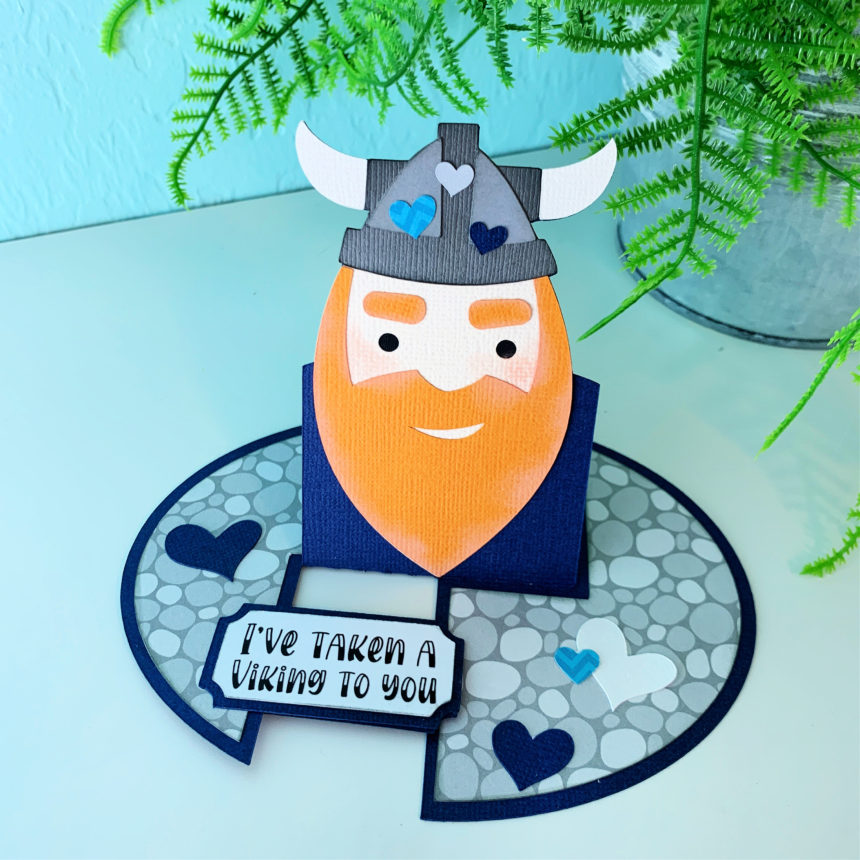
Hi there friends! Lori added some cute new Impossible cards to the shop last week and this cute guy caught my eye. It is the Impossible Card Valentine Viking (SVGSilhouette). The impossible cards are easy to assemble (see tutorial here) and come together quickly. If gluing isn’t your thing the Viking can be flattened as a print and cut for even faster assembly.

Be sure to go check out all the new valentine projects in the shop (SVG). Thanks for stopping by!

Brandie

A2 Tiered Box Card Tutorial

Hi there friends! Brandie here with a tutorial on the new A2 Tiered Box Cards. I made the A2 Tiered Bird Mountain (SVG, Silhouette). This snowy mountain card will make a perfect birthday card for my dad who loves the outdoors.

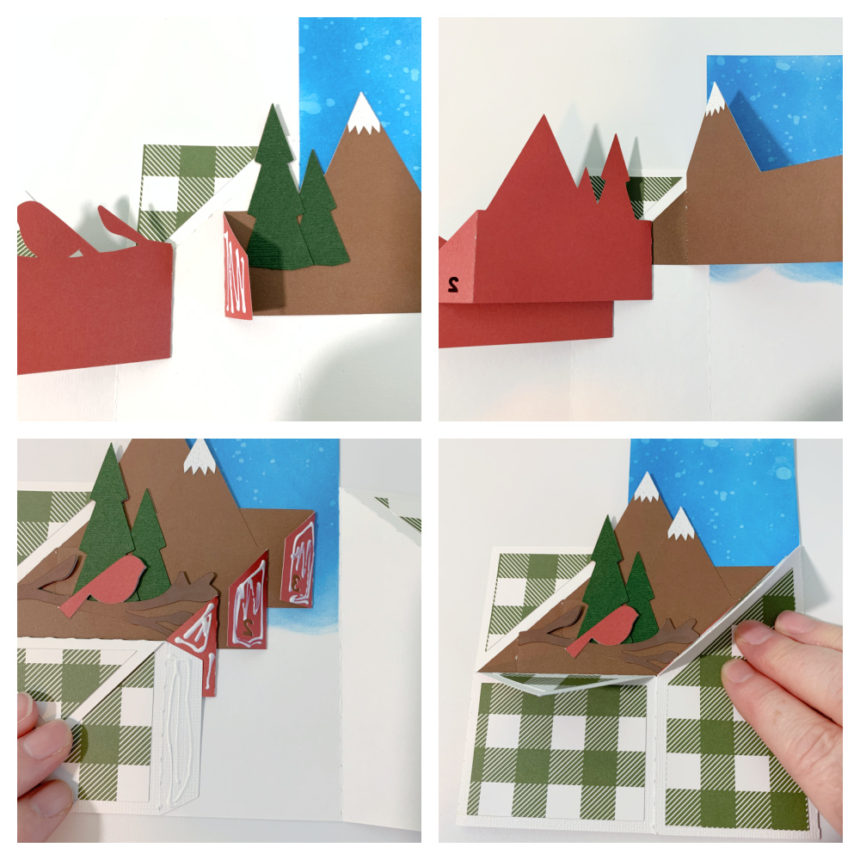
I cut the box card body out of white cardstock but wanted a blue snowy backdrop for the mountains. So I used some distress oxide inks on the tallest middle panels. I then made all of the folds on the score lines (see picture for fold diagram). Then I assembled the inserts. All of the inserts will have a valley fold on the tabs. I also applied the decorative panels to the outside of the box. Once I was ready to glue the inserts in I applied the glue to the outside of the tab(red side for me). Then lined up the front of the tab to the vertical score line and the diagonal score line of the box.

For the second the third insert I lined the tab up to the tab in front and the diagonal score line of the box. I then folded the tabs all in and applied glue to the backs of the inserts and the tab to close up the box (see picture below on how I applied the glue to avoid gluing the box tab to the inserts).

Now that the box is assembled I added the background mountain and the snowflakes.  The green plaid paper is from the My favorite Christmas collection by Echo park Paper Co.

And don’t forget, the New Year’s Sale is happening now in Lori’s SVG Shop.  Get 50% off All SVGs when you use code NEWYEAR at checkout!  Don’t wait, sale ends tomorrow!

Thanks for stopping by today and have a safe and happy New Year!

Brandie

12 Days of Christmas Day 7 & Hexagon Pop Up Card Christmas Tractor

Welcome to Day 7 of our 12 Days of Christmas! Each day from December 1-12, there will be a free SVG file of the day, along with a special promotion!  For Day 7 we have this Gift Card Tag Wreath File.  This file will be free today only, so don’t miss out!

In addition, as our special promotion, today only get 30% off all of the items in our Bundles Category!  Use code BUNDLES to take advantage of this great deal!


And check out this gorgeous card by Brandie!

Hi there friends! Popping in today with one of the new Hexagon Pop up cards. Lori has several versions in her shop and in the Silhouette store. I used the Christmas Tractor (SVG, Silhouette). Lori also has a great assembly tutorial that you can find here.

I used papers and stickers from the A Lumberjack Christmas collection by Echo Park Paper.

Thanks for stopping by today!

Brandie