Gift Card Tag

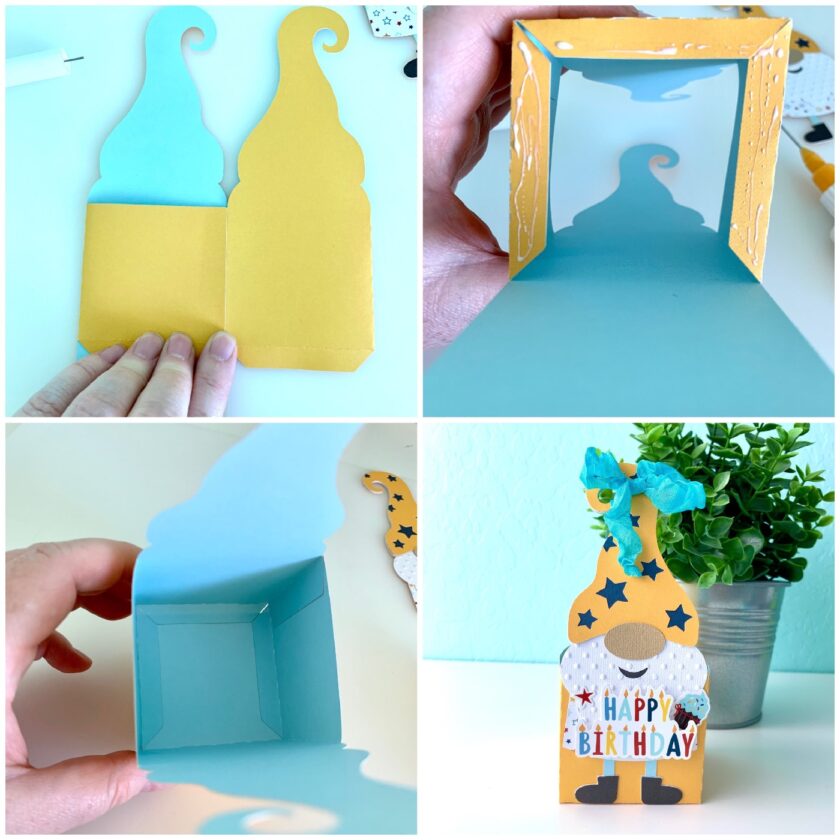
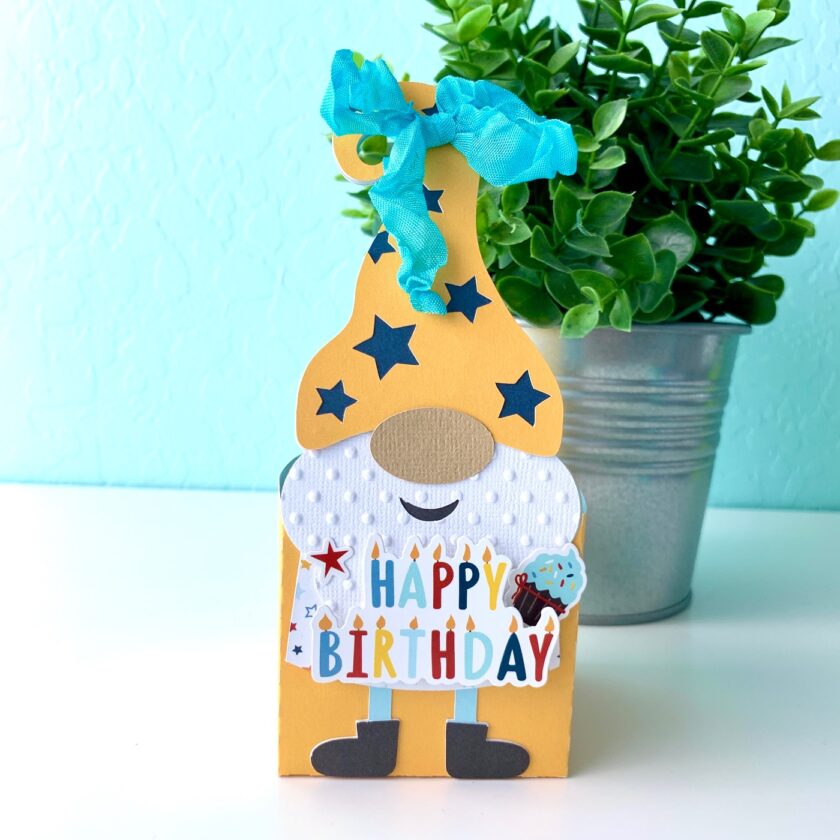
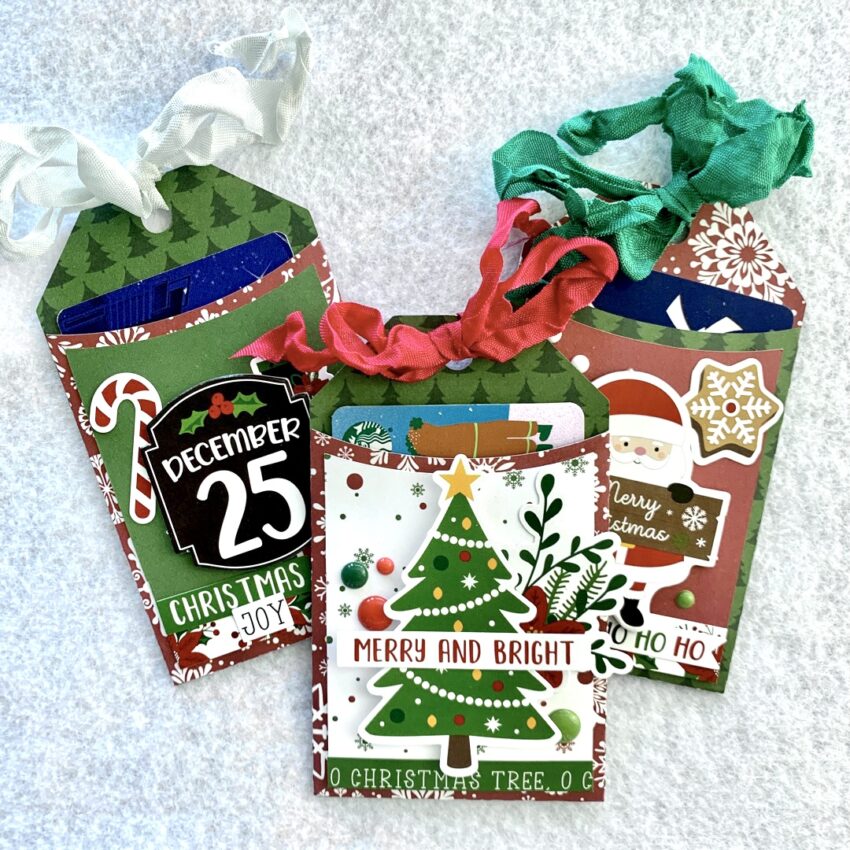
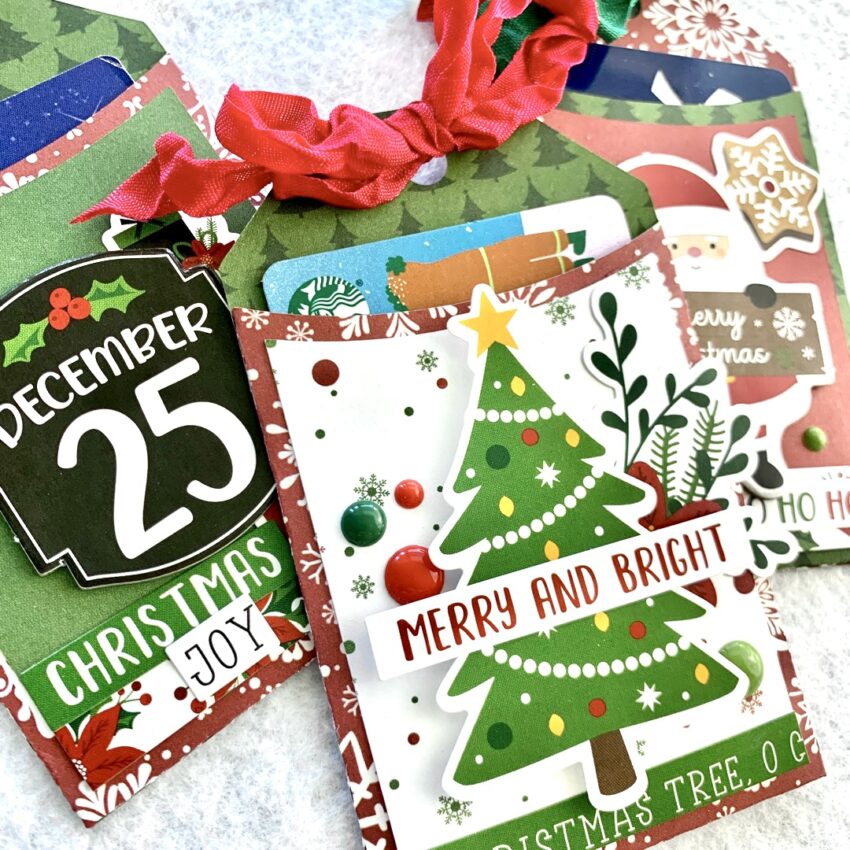
Hi there friends! Do you need a cute way to give a gift card? I like giving drink cards for teacher gifts and wanted a cute way to dress them up. I used the Gift Card Tag Christmas Tree P&C (SVG, Silhouette).  This file has a print and cut Christmas tree image, but I wanted to use some of the new Christmas Magic goodies from Echo Park Paper. I tied some crinkled seam binding through the top hole and stuffed my gift cards inside. Easy-peasy cute gifting!


And don’t forget, we have a Gift Certificate Special happening through tomorrow.  Purchase a $25 gift certificate for a friend (or yourself!) and get a $10 credit added to your Lori Whitlock Shop Account.  Don’t miss out, this special ends tomorrow!

Shop Gift Certificates

Thanks for stopping by today!

Brandie

Fonts not uploading into Silhouette?

Hi friends! I recently started using Silhouette Studio. Everything was great until I had some trouble getting some of my purchased fonts to show up in the program even after I had done all of downloading, install, restart solutions I had been given. Luckily I had found someone with another suggestion that did fix my problem. So I’m going to share it with all of you too. Now this tip is for a Windows based PC.

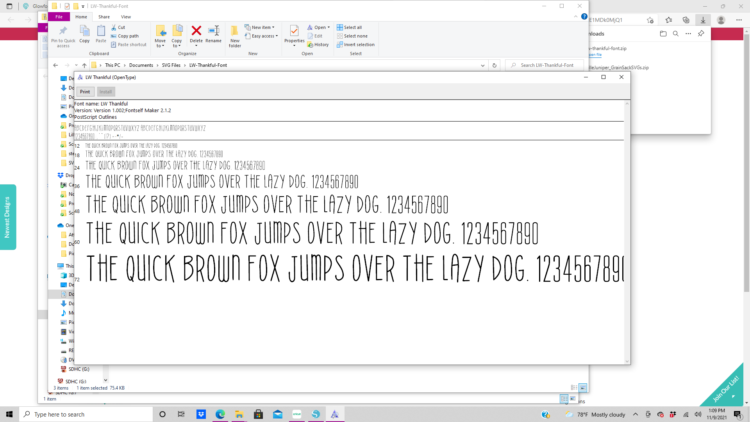
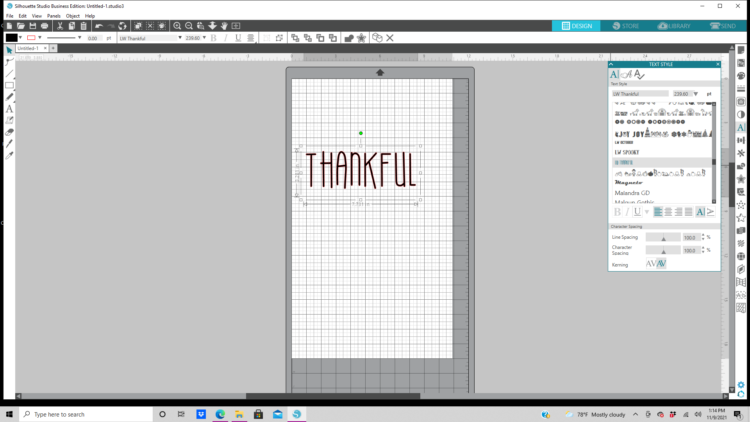
I am trying to use the Thankful Font (SVGSilhouette). I have downloaded and installed the font.
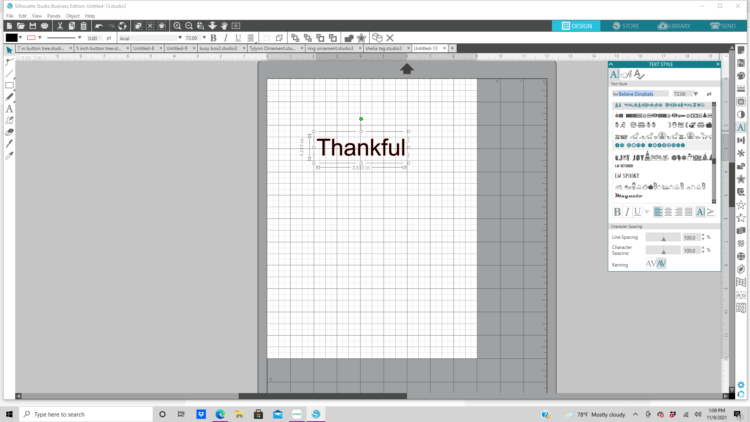
I typed in thankful and when I go to the Text Style window the Thankful Font does not show up as an available option.
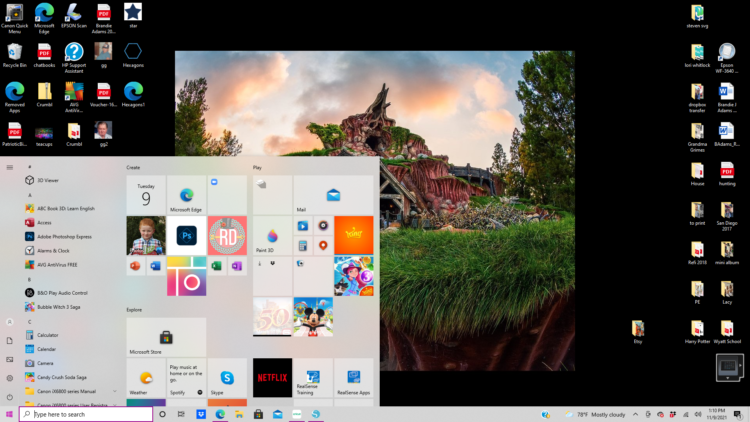
First close out of Silhouette Studio. Go to the Start menu and search for the Run app. Select it.
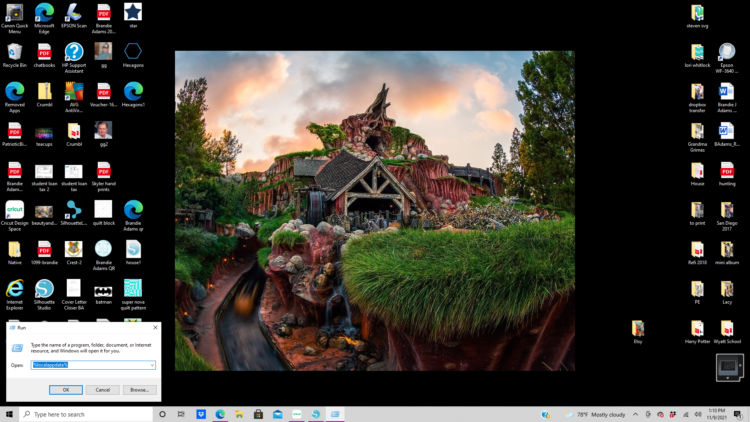
When the Run window pops up type in %localappdata%  in the Open bar.
Then double click on the Microsoft folder.
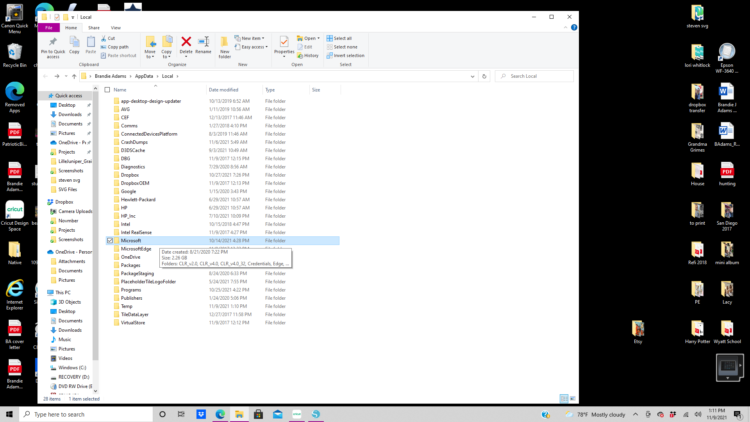
Now double click on the Windows folder.
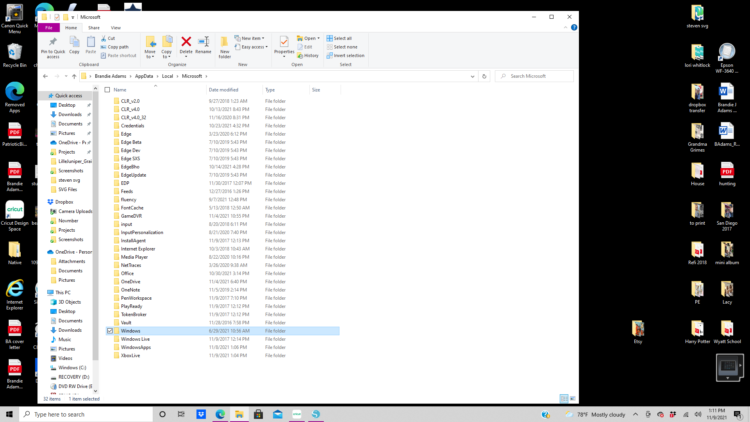
Now double click on the Fonts folder.
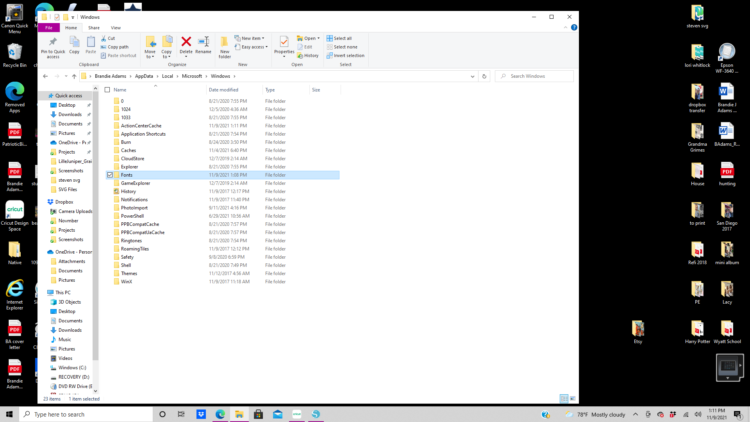
Now in the fonts folder you will see all the fonts that need permission for Silhouette to use. Right Click on Thankful Font and another smaller window will open. Click on Install for all users. Repeat for all the fonts that aren’t showing up in Silhouette.
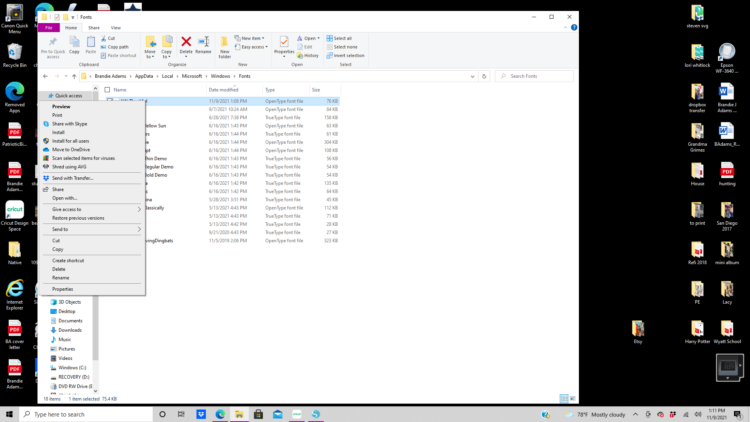
Now reopen Silhouette Studio and the Thankful font is in the Test Style Box as an available option.
I hope this tip was helpful.
And don’t forget, the November Sale is happening now in Lori’s SVG Shop.  Get 30% Off all SVGs, Fonts, Pattern Fills and Commercial Licenses when you use code NOV2021 at checkout.  Don’t miss out, sale ends Saturday.
Thanks for stopping by today!
Brandie
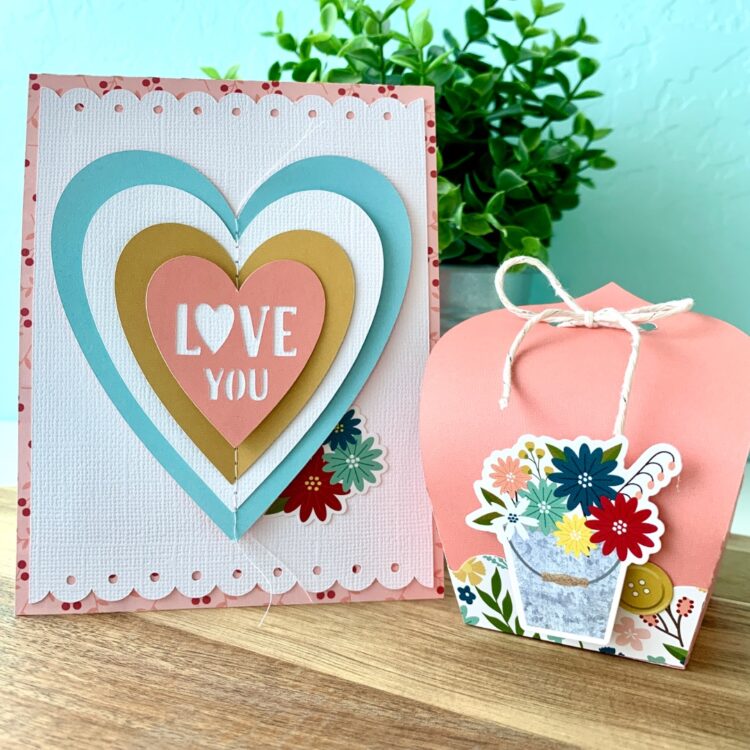
Fall Flower Pail Box Card

Hey friends! Just popping in to share a Fall version of the Box Card Flower Pail (SVG, Silhouette). This little box card is so cute as is but I added a few stickers from the My Favorite Fall collection by Echo Park Paper. The papers are also from the My Favorite Fall collection.

I hope you have a great week and thanks for stopping by!

Brandie

Pumpkin Impossible Card

Hi there friends! I’m popping in today to share this cute Impossible Card Pumpkin (SVGSilhouette). I’m not sure why this type of card is called impossible because it is one of the easiest pop up cards to make. I think I spent more time trying to decide which papers to use! LOL! If you haven’t tried to make one yet you really should. Lori has lots of options for almost every occasion. She also has a tutorial you can find here.

I used papers from the 6×6 Halloween Magic paper pad by Echo Park Paper.

Thanks for stopping by!

Brandie

Halloween Countdown Tutorial

Hi there Lori Whitlock friends! Anyone else look forward to this time of year to do all the fun Fall/Halloween crafts? It is my favorite.

I am sharing a fun idea for a Halloween countdown today. I used my Glowforge laser cutter to  make this project out of wood but it would also be cute as a flat design cut out of paper or vinyl and applied to a premade sign blank. I also think my steps below would work for cutting this project out of chipboard if your machine does that.

The files I used are Halloween Haunted House Scene (SVGSilhouette), Halloween Tree (SVGSilhouette), Halloween Tombstones (SVGSilhouette), and the Spooky Font (SVGSilhouette).  I also used the rectangle tool in Silhouette to create my base.

For the numbered tombstones I wanted a simple shape. I used the knife tool in Silhouette to slice off the cross from the tombstone on the end.  I then typed out the numbers 0-9 and cut an extra 1,2, and 3 so that I would be able to do the higher number double digits in the count down.

I then typed out days till Halloween in the spooky font and created an offset. I welded the offset letters together and grouped them together to keep the word spacing from shifting.

With the offset letters, house scene, and the spooky trees I welded  a rectangle to the bottom of the images to create a tab to fit into the slots that I add to my base. The dimensions of the rectangles for the base are determined by the width of the material being used. If you are making a flat countdown this step is not necessary.

Once I had the tabs added to the images I created the slots in the base of the countdown. The top two small rectangles are for the spooky trees. The middle rectangle is for the house scene and the bottom rectangle is for the numbered tombstones and days till Halloween letters. I centered the skinny rectangles on the larger rectangle then spaced them as shown below. I selected all of the rectangles and created a compound path. The large black rectangle is the bottom of the base.

I cut everything out, painted, and assembled.

I really like how it turned out and my little guy cant wait to start counting down the days to Halloween. If you have any questions let us know. Thanks for stopping by!
Brandie