Tropical Suitcase Box Card

Hi guys, Traci here! Today, I’m sharing a great summer card that has me dreamin’ about the sun, sand and tropical vibes. It’s made with one of Lori’s awesome cutting files called Box Card Tropical Suitcase (SVG, Silhouette) and the flamingo, hibiscus and palm tree are perfect for this time of year.

Pop-up Card with Flamingo, Palm Tree, Hibiscus Flower

I love all the details on this card … especially on the little blue suitcase. Check out the handle and those tiny corner pieces with the enamel dots. So cute! This card would be perfect for a summer themed party, a birthday, someone who loves flamingos or traveling, or simply telling someone you’re thinkin’ of them!

Pop-up Card with Flamingo, Palm Tree, Hibiscus Flower

It looks great sitting on a desk or a counter for a little summertime décor and it folds flat for mailing and storage. I made this with cardstock from my stash and Echo Park’s Endless Summer collection designed by Lori.

Lori has so many amazing cards … I hope you’ll try this one next. Happy crafting!   

Blog * Facebook * Instagram * Pinterest

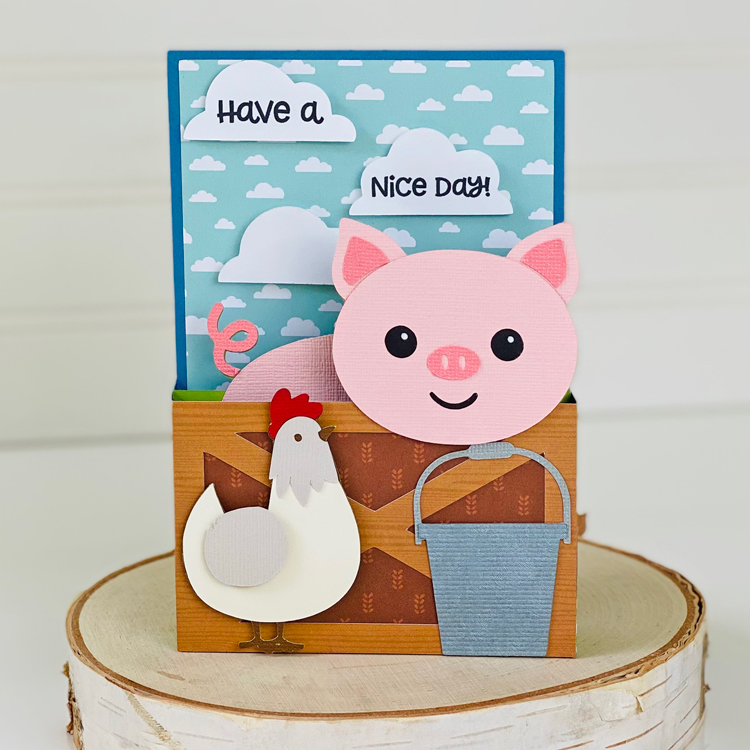
5×7 Box Card Pig Barn

Hello crafty friends! Aimee here with you today sharing what I think is one of Lori’s cutest cards EVER!! This is the 5X7 Box Card Pig Barn (Lori’s SVG, Silhouette) and I have to be honest about how much I fell in love with this little piggy while I was making him. He is sure to brighten anyone’s day with his sweet little face. Have a friend or family member who needs a little pick me up? Then look no further than this card. It folds flat so he travels nicely through hand or through mail.

Most papers used are from the new Fun on The Farm collection and I think it adds so much more cuteness to the card! And I feel like I need to point out that I accidently flipped my paper the wrong way while cutting and had to horizontally flip the entire card (minus the chicken and pail) so if you noticed it looked different, that’s why. Lol!

Thanks for stopping by today!

Aimee

Surfing Van Box Card

Hi Everyone! For my project today I made the Surfing Van Box Card, (SVG, Silhouette). I used some patterned paper and stickers from Echo Park’s Endless Summer designed by Lori which was absolutely perfect for this card. These box cards are so simple to put together and definitely a favorite for those who receive them. This one is great for someone who is going on vacation or just spending a special day at the beach!

For help putting this together, there is a general assembly for shaped box cards here.  Thanks for stopping by and have a wonderful day!

Box Card Tractor Tutorial

Anita here with a fun card tutorial to put together Lori’s Box Card Tractor (SVG, Silhouette).  I made this for my grandson and used John Deere type colors as my inspiration.

Here are the pieces that I cut.  Because I wanted my tractor to be yellow and green I cut extra pieces of the inner part of the box card with the seat and the engine and also the end covering pieces.  I then trimmed them to fit and glued them on.

I folded the grey tractor card base on the score lines and glued the tab in place.  I then put the tires together.

This photo shows how I put on the extra piece on the insert that goes in the middle of the card.  To complete the card I slipped the insert into the box shape of the tractor and glued the tabs to the sides.

Here is a photo of the card lying flat all ready to be mailed. It fits into a standard A2 Envelope.

Thanks for looking and have a great day.

Hugs,

Anita

Princess Castle Box Card Tutorial

Hello everyone! Marcia here today. Have you seen Lori’s new Our Little Princess collection from Echo Park Paper?  There are lots of coordinating die cuts that you can use to create a truly special card for your little princess. I love making dimensional cards so I selected the Castle 3 Box Card (SVGSilhouette).

Let me show you how easy it is to put together.

  1. Cut out pieces with your electronic cutter. You can use the print and cut feature for the sentiment on the back of the card or use a sticker from the collection. If the pattern paper you are using is different colors on the front and back, you will want to cut 2 of the castle backs that the sentiment piece is adhered to. This is so when viewed from the front, it is the same color as the rest of the card.

  2. Glue the black cardstock pieces behind the windows and door. Use coordinating ink to ink the edges of the paper to add dimension.

  3. Assemble the card front panel, the back panel, and the 2 castle inserts.

  4. Glue the card base to create a rectangle and then adhere the card front and back panels to the base.

  5. Add the box card inserts and then embellish with stickers from the Our Little Princess collection.

This card folds completely flat for mailing (A7 envelope) and is sure to bring a smile to the lucky recipient’s face. Be sure to check out all the other castle cut files in Lori’s store too.

Thanks so much for stopping by.
~Marcia