New at Jessica Sprague

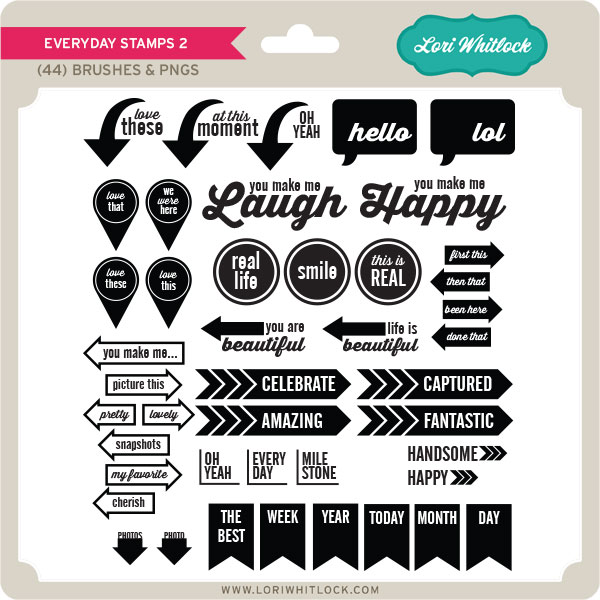
The digital kit we have debuting this weekend at JessicaSprague is great for adding flair to your Project Left style albums. And, this weekend ONLY can pick up this adorable set of stamps for 25% OFF. What a deal! Get them for this price through the weekend. SALE ENDS SUNDAY!

EVERYDAY STAMPS 2

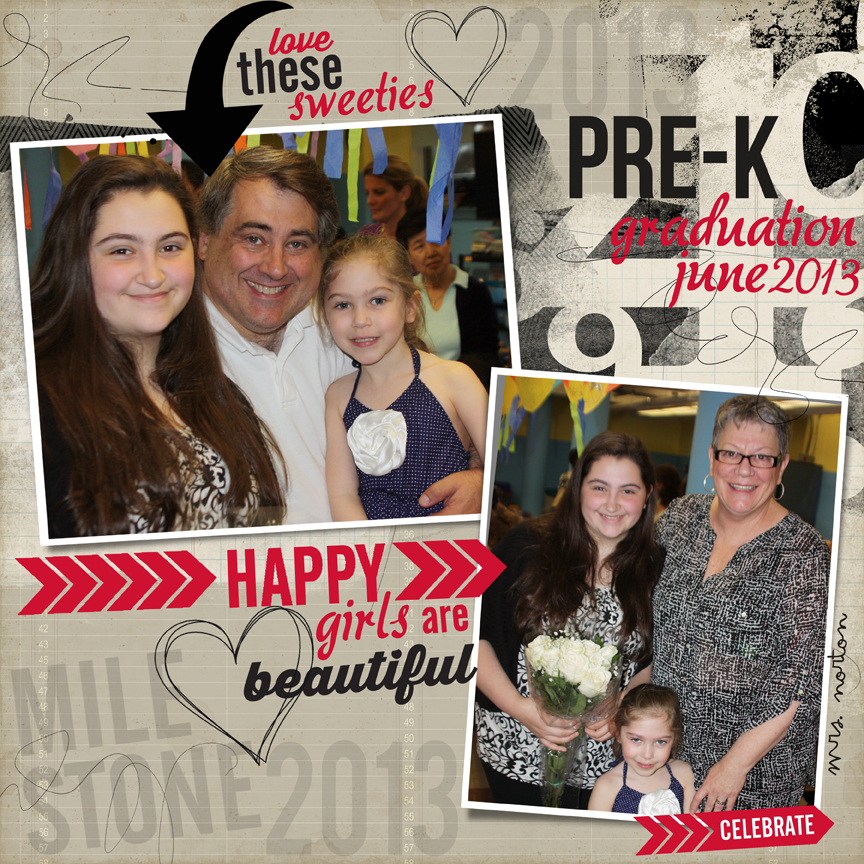
layout by Chrissy
products used Office Oriented PapersEveryday Stamps 2, BY Liv.edesigns-Loopies No. 4, Anna Aspnes- Artsy Duo 1

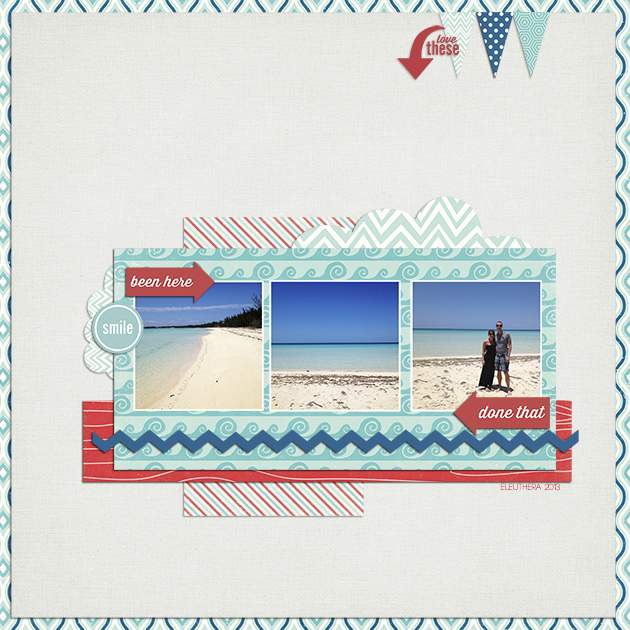
layout by Haley Ney
products used Everyday Stamps 2EP A Perfect Summer Kit

layout by Kim Lund
products used Everyday Stamps 2

Silhouette Tutorial by Corri Using the Offset Feature

Hi everyone! Corri here.

I have a quick tutorial for you today using the Offset feature in Silhouette Studio software. The offset feature is great for creating a shadow layer around your image.

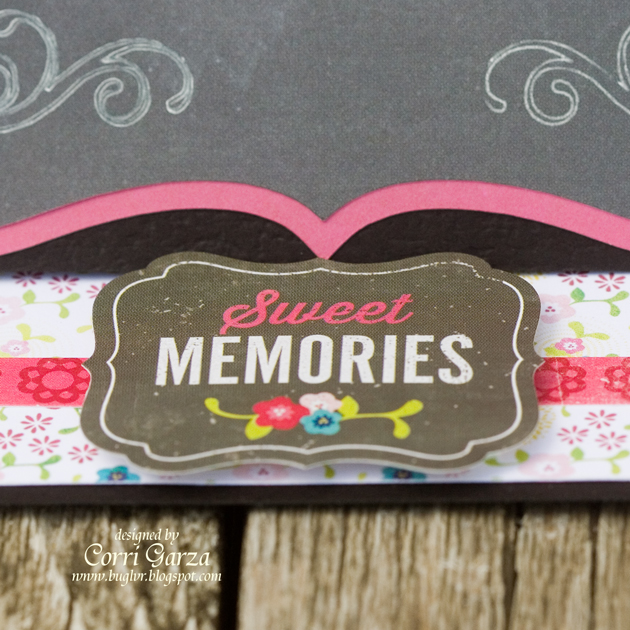
I used paper and a sticker from the Echo Park “Here & Now” Collection .  I love the chalkboard paper!
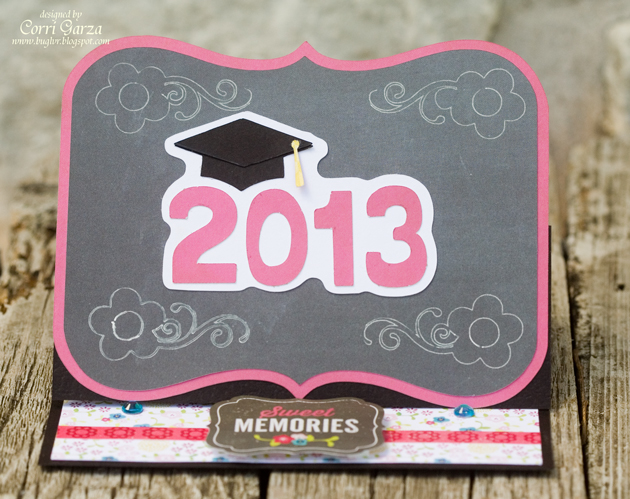
 

First, I typed 2013 in Lori’s Happy Font at 1.5″h.

Next, I opened this graduation cap file, ungrouped and deleted the 2012. I sized the cap file (including both layers) to 1.75″h and positioned the cap’s base layer on top of the numbers. Select the offset menu from the tool bar in the upper right of the screen and click offset.
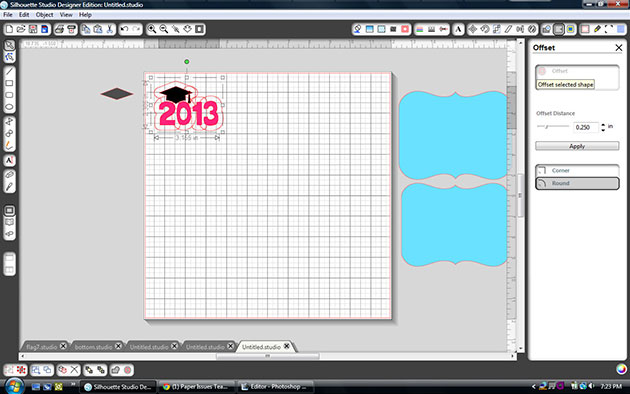
You can adjust the slider to make the shadow smaller or larger.  I left it at .25 so that I wouldn’t get a cut out in the middle of the “O”.
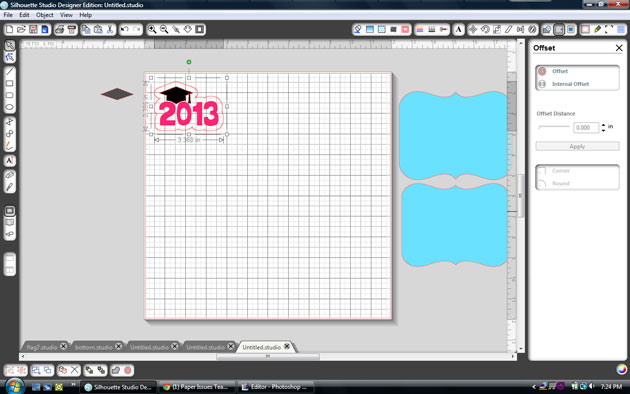
 

Click apply.
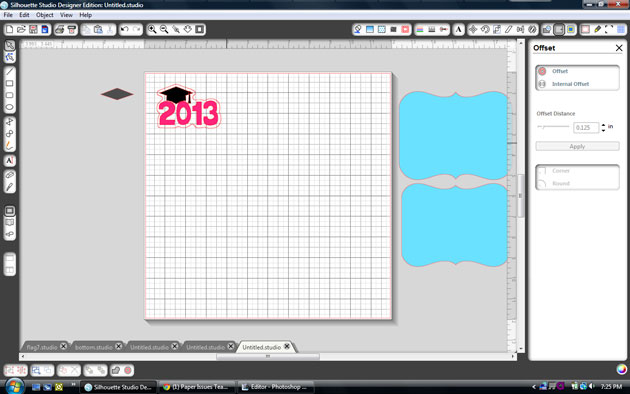
 

To create a little tighter shadow, click the new offset layer that you just created and click internal offset and then apply.    Now you can drag the layers apart and cut.


For the base of my card, I used the Easel Bracket Card.  I used my new sketch pens to draw this pretty flower flourish in each corner.

To get your Cameo to sketch the flourish, first select the bracket shape.

Click the cut style menu at the top of your screen and select no cute.

Replace your blade with a sketch pen and select sketch pen in your cut settings.
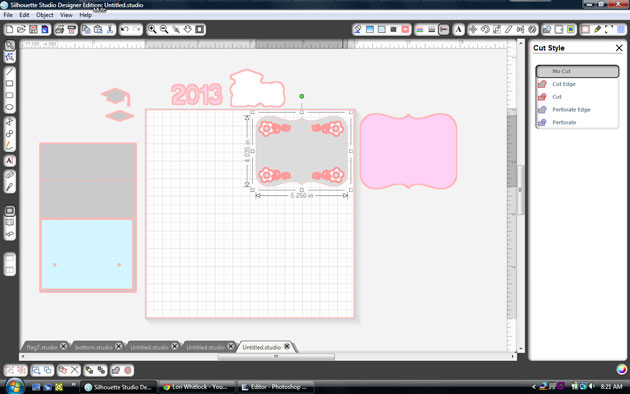
Click cut.


Do not unload your mat.  Replace the pen with the blade.

Select the bracket again, go to the cut style menu and change it to cut.

Select the flourishes and change them to no cut. Adjust your cut setting back to pattern paper and then cut.

Penny Sliding Card by Christine

Monday came way too early for me and I was not prepared to show you all the beautiful Creative Team projects. I would like to make it up to you today and share with you this beauty with you. Take it away Christine… Lisa
One of the things that Lori does best is create fun interactive cards and I have found that I love making them!  So today I am going to show you a brand new interactive card in the store called the Penny Slider Card Circle.  I also needed to have a special envelope to put it in because of the weight and height so I also cut out the Sliding Box for it.
 
The card was a lot of fun to make and I can see all kinds of potential for this one.  The directions and tips that Lori gives on her YouTube video are definitely worth watching.  You can see it here.  I used some fun paper, chipboard and sticker gears and brads from Lori’s All About A Boy paper collection for Echo Park.
When you swing the card around the penny makes the little gear more in a circle and around the card at the same time.  Pretty cool, huh?  Here’s a closeup.  I used a Papertrey Ink stamp for the center image.  I loved how the little 3D star embellishment fit right inside the middle.

The slider box is going to see a lot of use in the future.  This box can be used with or without the inside box.  It’s fun to decorate and I love the bracket shape on the front flap.  I created a mat for the flap by using the Internal Offset feature and also enlarged the file to fit my card.  The chipboard gear and sticker ribbon on the front is acting as my closure.  I  attached it to the box with some foam adhesive and then attached the smaller circle and brad on the bottom part of the box, then wrapped a cotton string, up and around both pieces to hold it closed.

Here is a closeup of the card in the sliding part of the box.  You can see how the foam adhesive under the blue circle helps to lift it up so that the pennies can slide underneath it.
I hope you have enjoyed my project today.  Be sure to check out the other slider card,  Penny Slider Card Straight, as well as the some of the other interactive cards in Lori’s shop!

Lori Whitlock Supplies Used:
Other Supplies Used:
All About a Boy Paper Collection and Embellishments by Lori Whitlock for Echo Park
Papertrey Ink 2012 Birthday Tags stamp set
Stampin Up! Ink in Pumpkin Pie
Foam Adhesive from Imaginisce
Cotton string, Joann’s