Baby Bottle Shaped Shaker Card Tutorial

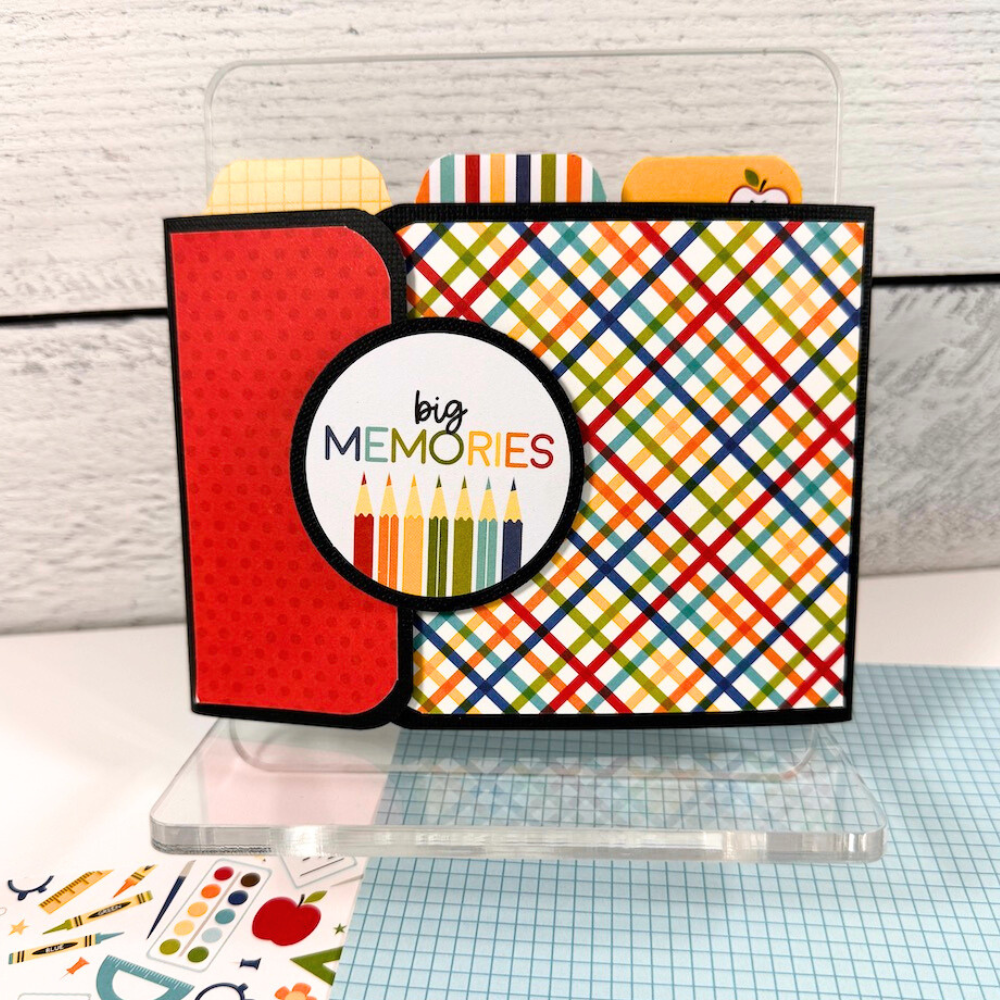
Hello Crafty friends, today I want to share how I made this adorable Baby shaker card!

The file for my project today is the Baby Bottle Shaped Card (SVGSilhouette).
 
I opened my file in Silhouette studio & took the bottle panel of my file, (coloured in white in my pic), & made a copy so that I now have 2. 
 
One will be used to create a frame for my shaker by making an internal offset & the other I will use to cut a sheet of acetate for the shaker window.


I created an internal offset of 0.450 on one of them. You can now put the other, (for the acetate), without the offset to the side. I have slightly enlarged my card so the offset measurements may vary depending on the size of your card. I just kept playing with mine till I got it to the desired size.
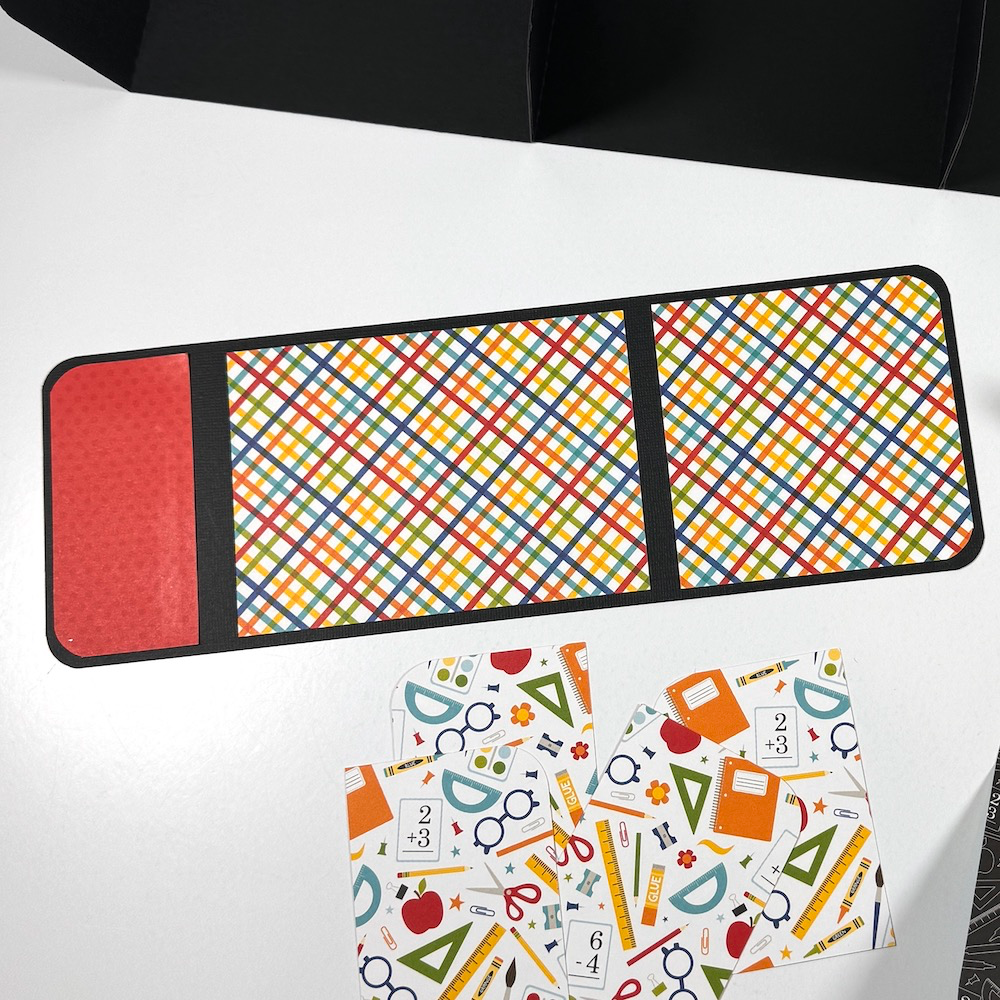
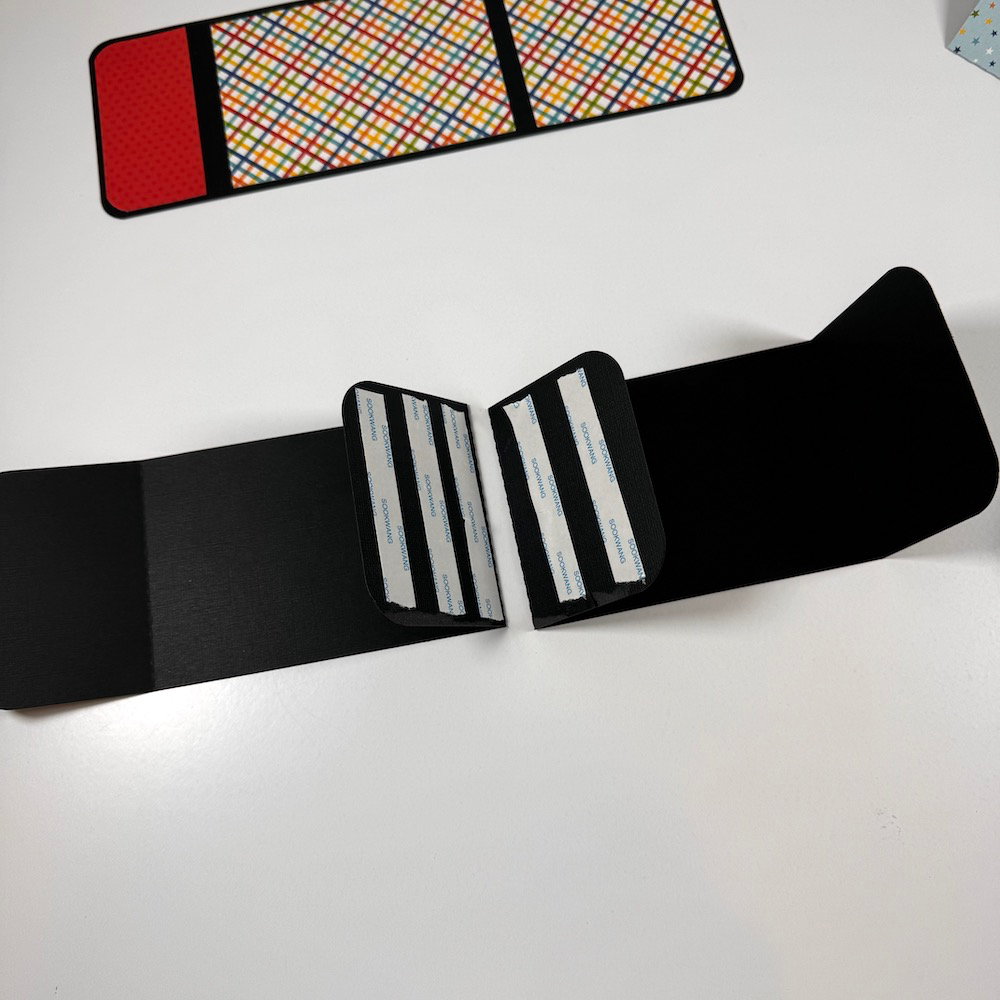
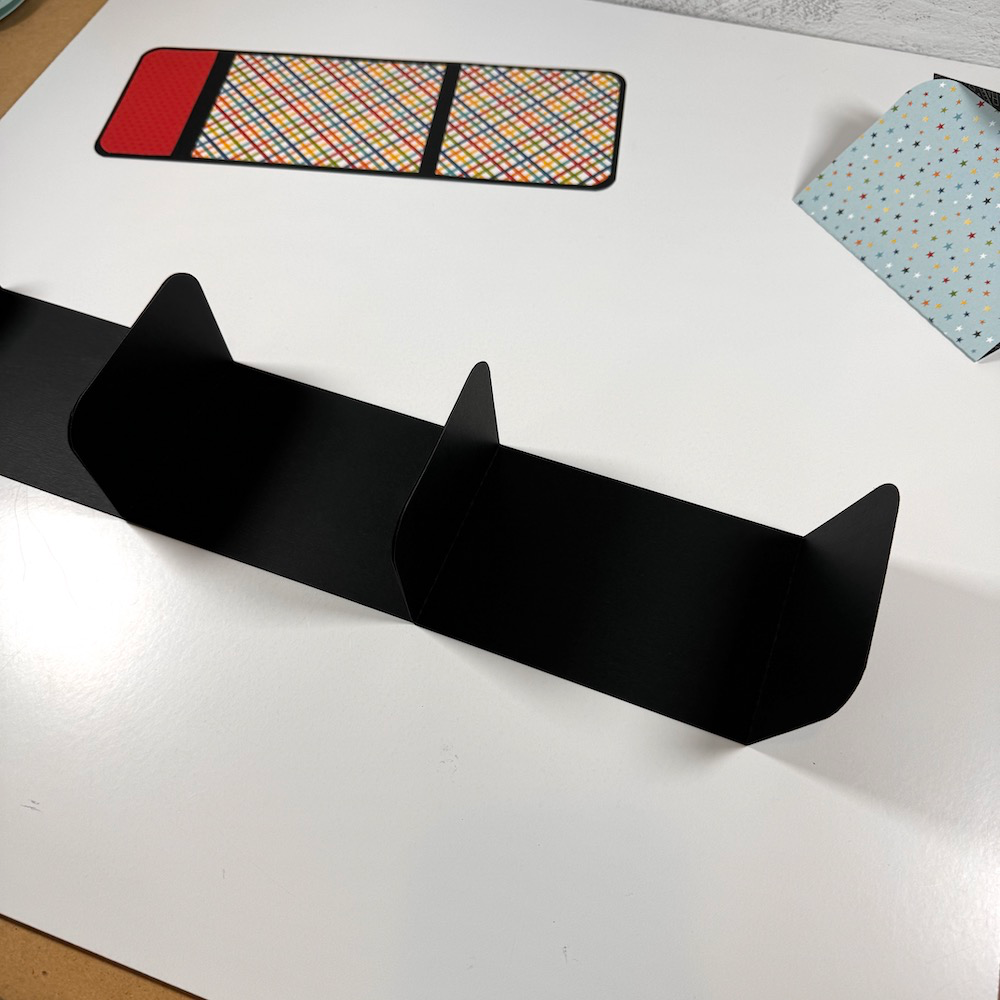
 I then copy & pasted this to fill my page. I was able to fit 4 in total. I cut out 12 pieces of this panel. These are to create the frame for your shaker. You only keep the outside frame. The insert is not needed. You will only need to cut 1 frame if you prefer to create the window frame with foam tape. I prefer this way as I find them much sturdier. I then cut out another of the same panel using the printed paper to make the top printed panel. This time keep both the frame & inside cut. Once I cut out all my pieces the first step was to glue the frame together by layering carefully my 12 pieces.
How thick the layer will depend on the type of shaker confetti you use inside. My shaker balls where a little raised & I wanted them to move freely in my card.
Next I glued together my top panels onto the front of my bottle panel & also glued down the shaker frame I created onto the bottom part.
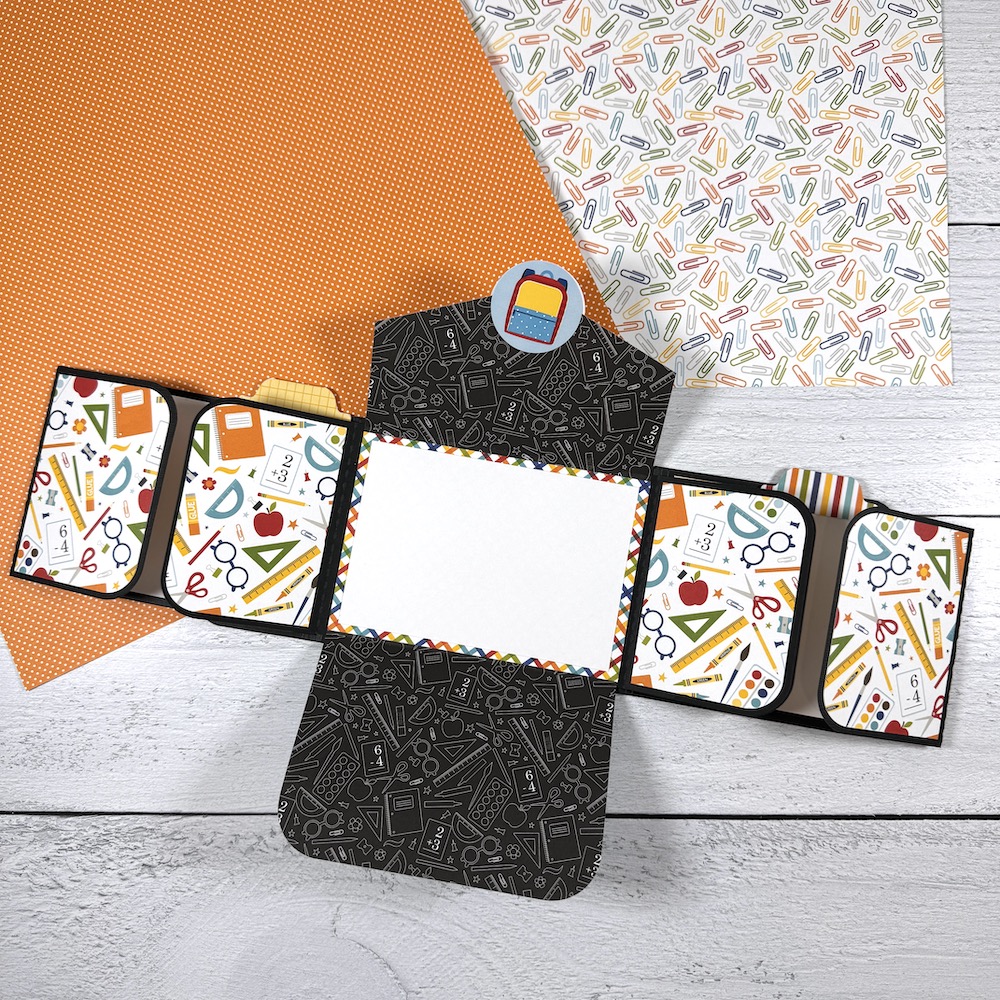
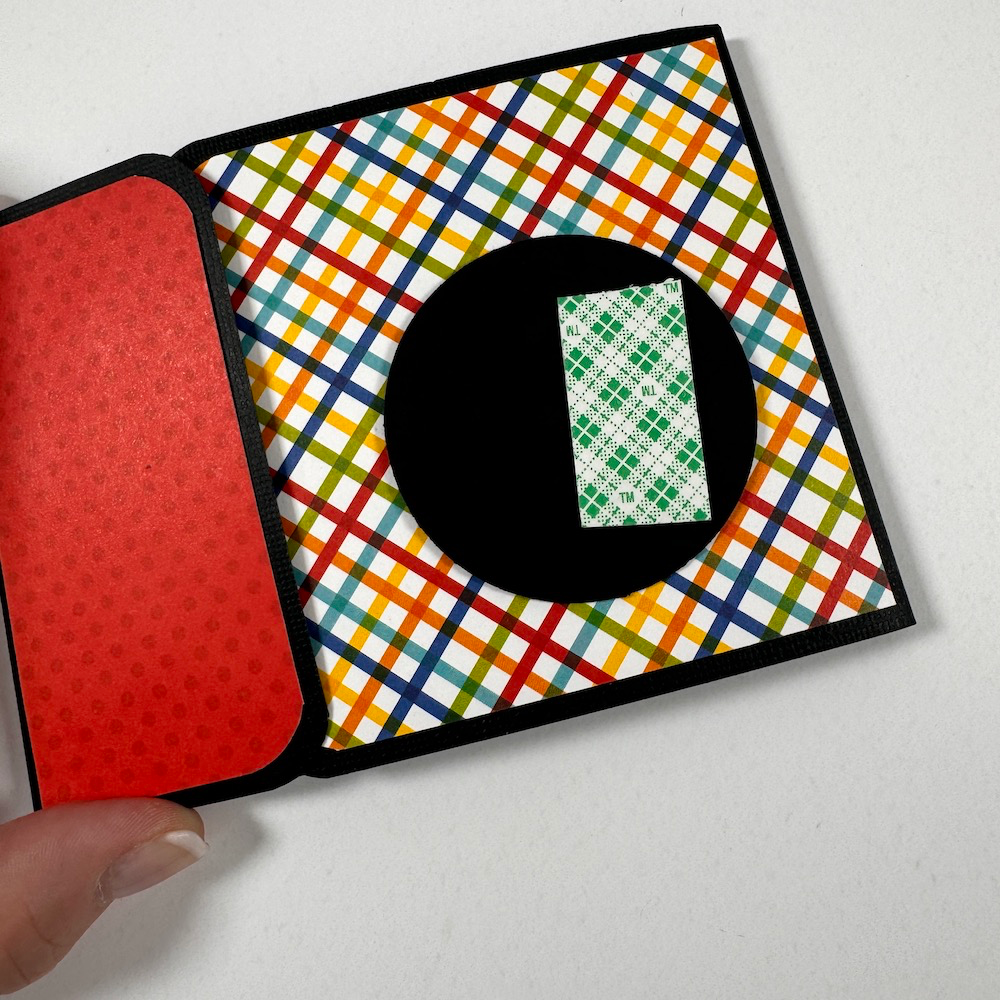
I wanted some embellishments as well as sprinkles in my card, so I adhered some cute stickers on the inside panel first.


Once my stickers were in place I took the panel & glued it inside my frame. This should fit perfectly. Then I added my tiny balls. You can use any sprinkles in your stash. I wanted mine to look like milk inside the bottle that is why I chose the white balls. Next I gave my acetate a light brush of powder on the side I was going to glue down so that it is not static. I then glued the acetate to the frame. I let it dry before the next steps. Acetate takes a little longer to dry & not so instant as paper. Once the acetate was dry I glued on top the printed panel frame. Lastly I glued down my complete bottle panel onto the front of the card frame.
I added a sticker with sentiment on top to finish off!
 
For more inspiration, check out my Instagram!
Thanks for stopping by!
Hugs
Noelene 🙂


5×7 Box Card Happy Birthday Dog

5×7 Box Card Happy Birthday Dog

 Hello Little Midge


I am expecting a new little grand doggie coming into the family soon.  Her name is Midge and she is a little Frenchton. She’s mostly a black/brown brindle with a touch of white and is the cutest little roly poly pup!
 
My daughter Abby is anxiously awaiting the day when Midge can come to stay. It was Abby’s birthday recently so I made this card with a little “Midge” wishing her happy birthday!  It is a very easy box card with lots of colorful balloons!  (and very easy to mix it up by changing the colors) The sentiment is a print and cut that is provided in the file. Of course I always print about 10 so I can use the sentiments on other projects! 
I hope you enjoy this card.  It can be found in Lori’s shop (click on the top link at the very top) or can be found at the Silhouette store HERE

💕 Sue Kment

School Folio Mini Album Tutorial

Hey guys, Traci here and today I have a cute folio style mini album to share with you! I designed this with a school theme that’s perfect for some of your child’s “big memories”. I used one of Lori’s creative cutting files called Multi Flap Mini Album (SVGSilhouette) and had so much fun putting this little 5.5″ x 4″ scrapbook together!

First, let’s take a look inside then I’ll explain exactly how I made it. I decorated this little scrapbook with paper and embellishments from the Bella Blvd, School is Cool Collection.

The album has 2 interactive pages with 4 flaps and one envelope style fold-out in the center. When you open it, the page above is the first one you see. It has a great spot for a photo of your child’s first day of school or a fun picture with friends. Flip that over …

… and you’ll see this! On the left is a gate-fold style page with 2 flaps and space inside for more photos. In the center is an envelope style fold-out. Use the clock embellishment to lift up, the bottom section folds down, and inside …

…  I added a plaid paper and white photo mat. I covered the flaps in a black patterned paper filled with more school supplies.


On the right, there’s a second gate-fold page. You could add photos to all the flaps (front and back), cover them in a cute pattern paper, or … both!

On the backside of that gate-fold page, there’s another page with a photo mat and a cute bookworm sticker.


Here’s a broader look at the folio. Check out all those fun spaces for photos of your child’s school days! If you add pictures to all of the flaps, this mini album will hold 15 photos. I decided to add cute papers to some of mine so, this one holds 9-11 photos.

Now for the tutorial …

  1. I cut out all of my pieces using black card stock and patterned papers.

2. There is one base piece that folds around the flap pages. I folded this piece on the score lines and added the red and plaid prints.

3. There are 3 flap pages that are all the same size and have 2 score lines on each. Fold the score lines on all three pieces, then adhere the flaps back-to-back as shown in the photo above. This becomes a tri-fold with two flaps that open to the right and left, and each flap has two additional flaps.

  1. The envelope style fold-out gets adhered in the center of this piece, and then the entire piece gets adhered to the base. It will help to fold up all of the flaps into a 5.25” x 4” bundle and adhere the entire thing between the score lines on the base cover.

5. Add photo mats and embellishments as desired.


6.  You can finish by wrapping a ribbon or twine around the album, or choose a large embellishment to keep your cover flap closed. To do this, I added a piece of foam tape to the right side of the back of my embellishment, added it to the larger side of the cover, and tucked the smaller side of the cover underneath.  

And there ya have it! This super cute mini album can be made with ANY paper collection in ANY theme! It would be fabulous designed for fall, Halloween, or Christmas and displayed on one of my Artsy Albums Display Stands as decor in your home. So fun!

For a video tutorial of this album, please see Lori’s YouTube video here:

https://youtu.be/XilujNe8Im8?si=uD0qPvYaatU-C8h9

I hope this inspires you to create Lori’s Multi Flap Mini Album. Thanks for stopping by and have a great day!

Blog * Shop * Facebook * Instagram * Pinterest

A2 Box Card Halloween Mailbox Bat

Hi there friends! Do you send cards for Halloween or know someone who loves spooky season? If so, Lori has some cute new Halloween cards available. I made the A2 Box Card Halloween Mailbox Bat (SVG, Silhouette). But the entire bundle is worth having! (SVG). I love the cute characters and all the florals in these cards. I used papers from the Halloween Party by Echo Park Paper Co.


Thanks for stopping by today and happy spooky season!
Brandie

Money Roll Gift Bag Set Tutorial

Happy Thursday everyone! I’m here today to show you how I made this cute birthday money roll gift bag set (SVGSilhouette).

I always start by making sure I have all my pieces cut

Then I start by assembling the bag by placing the decorative paper on the cardstock. I also put adhesive on the 3 flaps as shown below.

The last flap gets adhered to to the 3rd flap as shown.

I then add the decorative paper to the money roll portion of the project. Adding adhesive as shown.
Make sure not to remove all adhesive strips or you will have a money box with no money. Complete the box by leaving the back side open to get your roll money into it. I taped my bills together using washi tape. Once your money is in the box and the tab is through the slot, fold the ret of the box together and adhere it closed.

The money roll fits perfectly in the little gift bag.

You can decorate the bag however you like. I had this little Doodlepop that looks kinda like our birthday girl so I added a black circle and the little pops. Also tied the bag together with matching ribbon.

What a fun little birthday gift and perfect for a kiddo turning 18. We filled it with $2.00 bills for a little added fun.

Hope you will give this fun project a try. Happy Crafting!
Chelsea