Instax Photo Banner Using Build A Banner Dingbats Font with Kathy

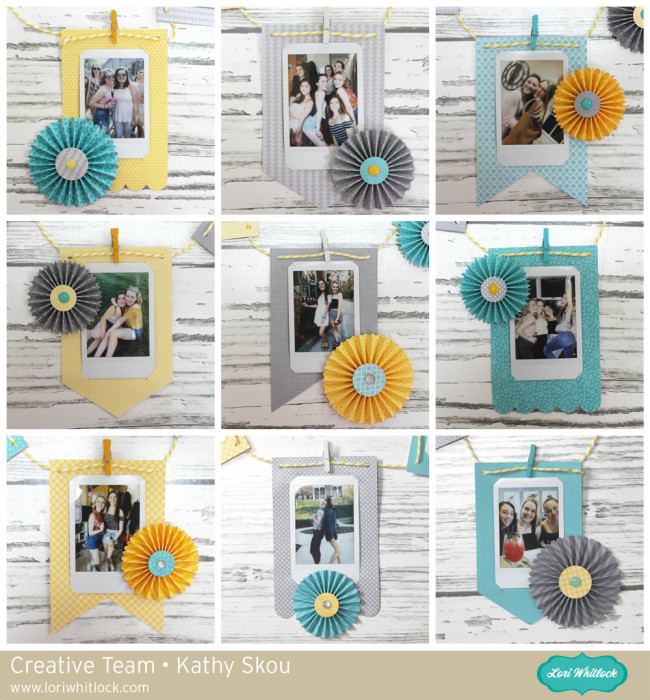
Hi Everyone!  Today I have a tutorial showing you how to create a fun banner using the Build a Banner Dingbats Font (Lori Whitlock SVG Shop, Silhouette)  My daughter is headed off to study in Scotland for her Junior year and I wanted to make her a little something to decorate her room, that wouldn’t take up too much suitcase space!  I thought a banner with some of her favorite photos would be fun.  She loves her Instax camera so I made the banner to hold some of these cute instant photos!

If you’re not familiar with Dingbat Fonts, they are fonts that have pictures and shapes in place of the letters.  Lori has a lot of them in her shop, and they really can be used for almost anything including vinyl, HTV and cutting projects like mine.  If you look at the picture below, I’ve typed out A through Z using the Build a Banner Dingbats Font and the Text tool.

To create my banner I started by choosing 3 of the banner pieces (A, X and U)  I resized each piece to be 5″H x 3.25″W so that each piece would be large enough to hold a picture.

I wanted to make the banner so that my daughter could swap out the pictures if she wanted, so I set out to add small cut lines on the banner pieces to hold just the corners of the picture.  To do this I needed first to know the size of the pictures being used.  Instax pictures are approximately 3.39″H x 2.13″W so I created a rectangle that size using the shape tool.

I placed the rectangle on one of the banner pieces and centered it using the Transform tool.

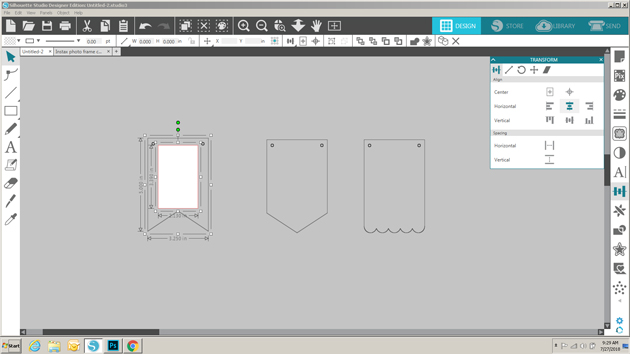
I drew a line 0.5″ long and then moved it to one corner of the picture.  Using the green dot, I slanted the line so that it covered one of the corners.

Next, I copied the small line, clicked on the copy, right mouse clicked and selected flip horizontally.  This gave me a line to add to the opposite corner.   I made sure the two lines were properly aligned by using the transform tool.  Once I was happy with the placement, I selected both lines and grouped them.

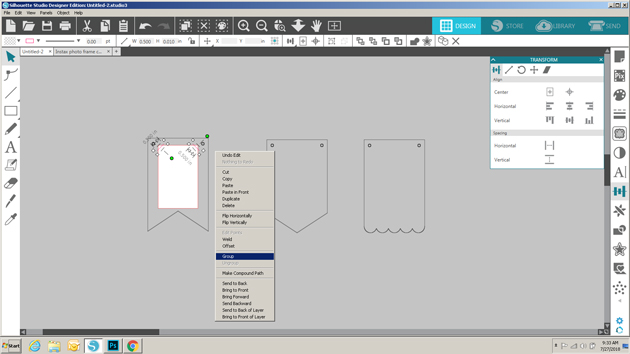
To create the bottom lines, I made a copy of the grouped top lines, right mouse clicked on the copy and selected flip vertically.  I positioned those lines along the bottom of the rectangle.

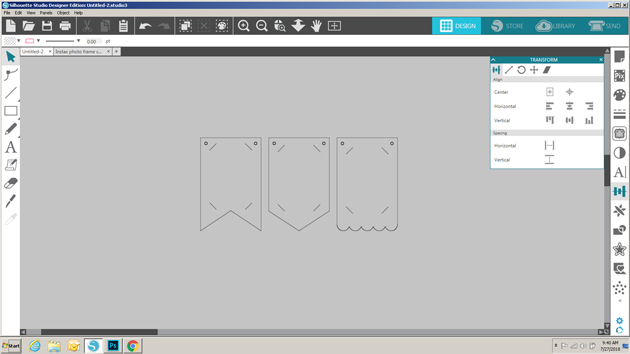
Again I made sure that all the lines were aligned correctly within the banner piece using the transform tool.

Once they were all in place, I removed the rectangle, and grouped the slot lines along with the banner piece to make them one.

I copied the lines before grouping and added them to the other banner pieces, centering them using the transform tool.

Once they were all ready, I sent them to cut!  I added the pictures to the cut pieces, and decorated them using some Rosettes from the Build a Rosette Set 1.5″ (SVG, Silhouette) and Build a Rosette Set 2″(SVG, Silhouette).  I strung all of the banner pieces together on a piece of twine, holding them in place with small clothespins.  Some quick hints: 1)  Hot Glue is your friend when making rosettes, and 2) before threading the pieces on the twine, add a little glue to the ends of the twine and let them dry.  This will prevent fraying.

That’s it for me today, thanks for stopping by to peek!


*BLOG * INSTAGRAM *

What is a Dingbat Font?

Today I wanted to show you how much fun you can have with dingbat fonts! I have quite a few dingbat fonts in my shop. Some of you may be wondering what the heck a dingbat font is!?! Let me see if I can explain…

Dingbats are fonts composed of images and phrases rather than numbers and letters. Once you install a dingbat font on your computer you can access them just as you would any other font through your cutting software (Silhouette Studio, Cricut Design Space, etc.). Here’s a LINK to some instructions for installing fonts on both Mac and PC. Dingbats can then be used as die cut files for vinyl, HTV and paper crafts. The possibilities are endless!

Each of my dingbat fonts comes with 26 darling graphics and phrases that you can mix and match to make fun projects. That’s right you get 26 cute graphics for $4.99, making dingbats a really economical way to collect a lot of awesome cuttable art. Below is an example of a vinyl wall art cluster made using my new Barnyard Dingbats.

I have a super helpful VIDEO out on my YouTube channel showing exactly how to use my dingbat fonts in Silhouette Studio.

I hope you have fun playing with all the fun new dingbat fonts that I have in my shop. Let us know if you have any questions or if we can help you get stared using them. Have a lovely day!

August 2018 Kit of the Month

We have a brand new special for the entire month of August ! You can get this Free Kit of the Month with any $20 purchase (Purchase must be in one transaction.) Simply add the 2018 August Kit of the Month to your shopping cart along with ANY $20.00+ purchase from the SVG Shop and this file is yours FREE. Be sure to use Coupon Code: AUG18KOTM (case sensitive) at checkout. This offer is good through August 31, 2018.


(Your cart must reach at least $27.95 before the coupon will be applied and then $7.95 will be subtracted from your total at checkout. The files will be available for immediate download after you pay for your order by visiting MY ACCOUNT>COMPLETED ORDERS>ORDER DETAILS inside of your account. Only one discount code per order allowed.)

Thanks for visiting the blog today! Please let us know if you need any help with your files. We want to make sure everyone is happy with their purchase. Have a great day!

Tuesday Freebie and New in Shop

ALL WEEK, this SVG file is FREE with any $1.99 purchase!

We have a FREE file with purchase all this week! Simply add this Twist Pop Card Cool file  to your shopping cart along with ANY $1.99+ purchase from the SVG Shop and this file is yours FREE. Be sure to use Coupon Code: COOL (case sensitive) at checkout. This offer is good through next Sunday.

(Your cart must reach at least $3.98 before the coupon will be applied and then $1.99 will be subtracted from your total at checkout. The files will be available for immediate download after you pay for your order by visiting MY ACCOUNT>COMPLETED ORDERS>ORDER DETAILS inside of your account. Only one discount code per order allowed.)


In addition, don’t forget about this special ! You can get this Free Kit of the Month with any $20 purchase (Purchase must be in one transaction.) Simply add the 2018 July Kit of the Month to your shopping cart along with ANY $20.00+ purchase from the SVG Shop and this file is yours FREE. Be sure to use Coupon Code: JUL18KOTM (case sensitive) at checkout. This offer is good through July 31, 2018!

(Your cart must reach at least $27.95 before the coupon will be applied and then $7.95 will be subtracted from your total at checkout. The files will be available for immediate download after you pay for your order by visiting MY ACCOUNT>COMPLETED ORDERS>ORDER DETAILS inside of your account. Only one discount code per order allowed.)
 
 
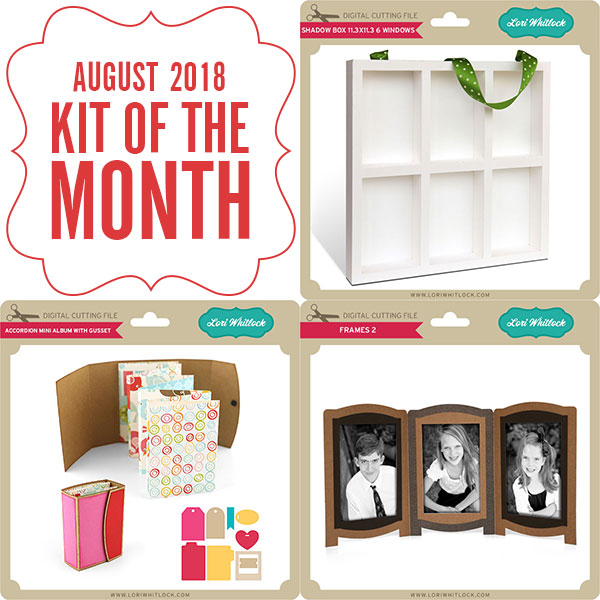
Check out the new SVG files releasing this week!   And, just like always, the NEW SVG files are ON SALE 25% OFF through the weekend in the SVG Shop! These downloads include SVG files that may be used with Cricut Explore, Silhoeutte (DE upgrade required), Eclips, Brother Scan and Cut, and any other software that will open SVG files. No coupon code necessary, the newly released files are all discounted in the shop! Be sure to go get them while they are on SALE this week. 

Thanks for visiting the blog today! Please let us know if you need any help with your files. We want to make sure everyone is happy with their purchase. Have a great week!

Back to School Backpack with Michelle

Soon the school buses will be packed with children heading back to school. Make their first day special with this adorable Backpack treat bag.

Backpack Treat Bag

You can find the files to make this at the Silhouette Design Store, or right here at the Lori Whitlock SVG Shop. When combined with the “Back To School” Collection from Echo Park Paper Co., you’re certain to get an A+ and start the school year with fun!

Have a crafty day!

Michelle