Hi everyone Brigit here with a fun tutorial using the sketch option and pens in the designer edition of the Silhouette Studio software.
This is such a fun feature of the software, you really can make some unique projects.
For this card I made internal offsets of the pieces and filled with colors and pattern paper.

I used the love birds file and the kiss me which is from the photo props set, both are from Lori’s shop.
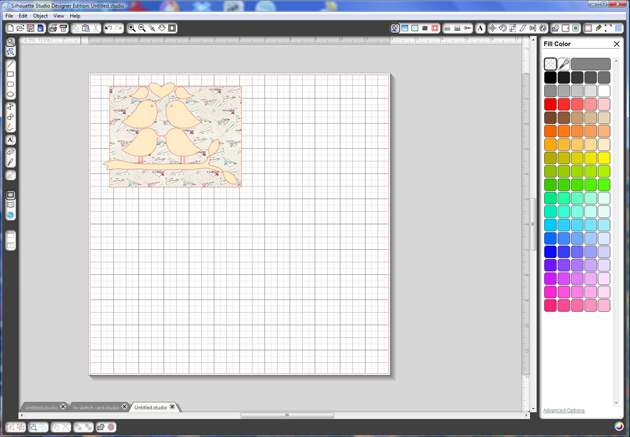
First I started with a 5 1/4″w x 4″h rectangle for my card, I filled that with pattern paper.
I ungrouped the love birds file and place the leaves where I wanted them and then resized to fit inside the card shape.
 |
I made a copy of the birds on the branch, with the knife tool cut the birds and deleted them. Traci has a nice tutorial here on using the knife tool.

Select all the other pieces, go to the Offset Window and make an internal offset of .050 of all the shapes. You just want to keep the internal pieces of the birds, leaves and branch, but keep both of the wings.
Before you disregard the birds ungroup and keep the eyes.
When I made the heart bigger the internal offset got too wide so I ended up resizing and doing an internal offset again, you’ll see below.

Select the birds on the branch, leaves and wings, (I ended up going back and adding the wings because I wanted them to have the sketch feature also, that’s why you don’t see them in the picture), go to your Sketch Window, I used the Continuous, no fill because I’m using the color internal offsets as fills.
Resize your heart and tilt so the birds fit inside.
Now you can make an internal offset of the heart, same as the other pieces, .050.
Select the original heart and change that in the Sketch Window to Continuous.

Color all the internal offset pieces whatever color or pattern paper you would like and place them inside the sketched ones, these are not suppose to be exact, you want it to look like a sketch.
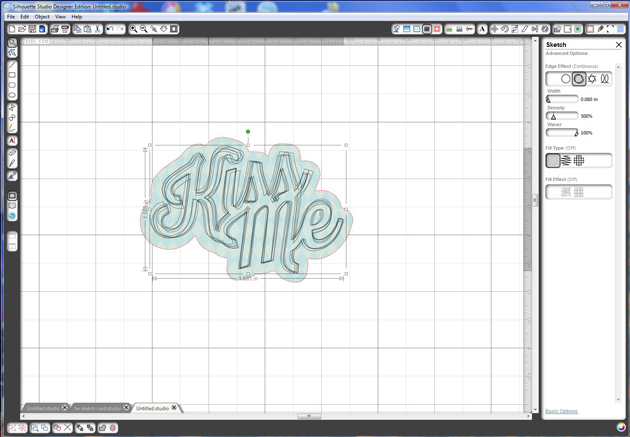
For the kiss me, go to the Offset Window and make an Offset of .15.
I filled the offset with pattern paper.
Resize both pieces so they fit where you want them on your card.
Select the kiss me, go to the Sketch Window and change to Continuous.
Under the Sketch Advanced Options I lowered the width, just so you could see the kiss me a little better.
There are three things you are going to do now, print, sketch and then cut in that order.
With my paper size and registration marks set I print out my project.
The Sketch marks will not print out, those are only to be used with your sketch pens or markers. So don’t worry when you don’t see them on the print out, they come next.

After it’s printed, under the Cut Window select only the sketch pieces click on the cut. You don’t want the card and the offset of the kiss me to sketch with the pens.
Put your sketch pens in the silhouette, here are two nice tutorials about sketch pens, Traci’s and Christine’s if you have never used them before. I actually used a gel pen with another pen holder I have for my card.
Place you paper on the mat and you want to go through the detecting your registration marks.
Change your settings to sketch pens and cut.
Go get a cup of coffee, the continuous sketch takes awhile, but it’s so worth it!

After the sketch is done, put your blade back in again, now under the cut window only cut around the card and around the offset of the kiss me.
Load your mat with paper and go through the process of detecting your registration marks and change your settings to whatever paper you are using and cut.
To finish up the card I glued it onto a 5 1/2″w x 4 1/4″h white card, added some Totally Sky Trendy Twine and a cute little button.
I hope you find this tutorial helpful, thanks for stopping by, you can find me at