Hexagon Easter Bunny Box tutorial by Aimee

Hi friends! Aimee here with you today to share a tutorial on how I made these adorable Hexagon Easter Bunny Boxes! This is one of the new cut files for Easter.  You can find it on the Lori Whitlock site here or on the Silhouette Design Store here.

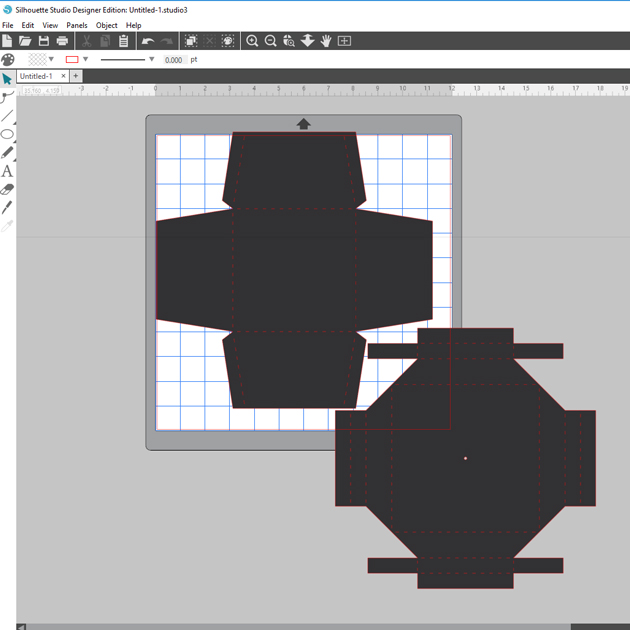
When you open this file up in the Silhouette program it is already color coded and shows you where most of the pieces go to get you started.

I separated all of my pieces and added 3 more sets of the inner ear piece cut so that I could fold them in half long ways (which I will show in a few minutes) and adhere them together to create a look of extra “fluff”.

So here is what it looks like after I cut out all of my pieces. I went ahead inked up the edges and let that dry before going to my next step.

I started assembling my box by adding glue to side piece first and then the bottom flaps. Do not put glue on the top tabs because your box opens and closes from the top flap.

Next comes the face. Start with the black piece for the eyes and adhere it to the underside of the flap with the eye holes lined up with the eye holes that are cut into the box.


Next I worked on the ears where I folded each inner ear piece in half long ways (4 pieces for each ear). Then glued them together and then to the outside ear piece.

Time to add the ears to the box…slip the bottom of each ear piece into the slots provided and glue to the underside of the top flap of the box. Then glue the white hexagon piece to the underside. This gives the ears more stability and the whites of the eyes.

Your box should look like this now. The rest is simply adhering all of the mouth pieces together and then adhering to the box.

Here is Mrs. Bunny…

and her sweet little cotton tail!

and here is Mr. Bunny.

And here is the sweet little couple together. 

Thanks for stopping by today to take a look and I hope that everyone has a blessed Easter holiday!

Aimee

Rainbow Palette Carrot Boxes


Hello, Crafty Friends!! Winter is almost behind us and with all the rain we’ve been getting here lately the flowers will soon bloom! If Spring will be here soon, then so will Easter!! Time for pretty colors and lots of sunshine and BUNNIES!! I consider all my kiddos my little bunnies… they’re quick, bounce around a lot, and so stinking CUTE!!  So, I made these adorable carrot Easter baskets using Lori Whitlock’s Easter Basket with Carrots File for each of them… because what little bunny doesn’t like carrots, right??!!

Image 1

You can find this Easter Basket with Carrots box file in Lori’s SVG Shop, HERE.

OR in the Silhouette Design Store, HERE.

I used my Sizzix eclips to cut out my project. And when you first load it into the ecal software it downloads onto your window, the shapes are displayed stacked on each other. I usually separate my pieces by color.

Then, if I’m making multiples, I add and cluster my multiple shapes together so that I can cut more at one time.  Depending on how large the shape is I may also separate them further into multiple pages.

Then, I cut. The box piece was too big to cut multiples so I just cut one box at a time, multiple times.

I love rainbows. It makes a wonderful Spring palette. It’s bright and cheerful! And since I’m using a multi-color color scheme I chose to tie them all together with my patterned paper. I used a rainbow gingham pattern that contained all the colors I used for my boxes. This way I don’t have to worry about finding matching paper for each color and still have them coordinate with each other.

I cut out all my pieces except the WHITE pieces (the scalloped circles and tags) and I’ll show you why…

I cut my white pieces from the same piece of cardstock. Except, my tags are printed with HAPPY EASTER on them first.

For the tags, I decided to use my machine’s PRINT-2-CUT option. First, I printed my tags.

Go to FILE, then click PRINT from the menu. Don’t forget to print with the registration marks!! That is very important!

Once it was printed, I lined up my print out sheet to the very left of my cutting mat.  Line it up with the corner.

Then, go to the CUTTER tab, click on PRINT-2-CUT. You’ll be taken to the PRINT-2-CUT menu screen. Click NEXT.

Before you proceed, THIS PART IS SUPER IMPORTANT, make sure you HIDE all the text in the tags.

If you do not do this it will CUT each of those letters… and we don’t want that!! So make sure all your tags are blank!

You’ll notice that there are registration marks on your print out.

When you choose NEXT on your PRINT-2-CUT window, it will ask you to align the laser dot with the registration mark. Get it the closest to the center of the registration mark as possible for BOTH registration marks. Then, CUT!!

For the main boxes, I folded at the crease lines, all go the same direction, toward the center of the box.

I added a little line of glue to the tabs and adhered them to the side walls and set aside to dry.

I shaded my carrots using my ColorBox PetalPoint ink pads in Pinwheel and sponge daubers to shade the edges of my carrots. Then, added details using the fine tip ends of similar colored markers. This part is totally optional and for a much quicker project, you can totally SKIP it!!

I ran my carrots, carrot stems, and background pieces through my Xyron 3″ Sticker Maker for quick and easy adhesion.

Then attached them to my cut out scalloped circles and sent them back through my Sticker Maker.

Attached the backgrounds onto the boxes, then attached the scalloped circles with carrots to the centers.

Then topped off each box with iridescent ribbon that I tied to create multi-looped bows and attached my tags.

And here are my finished boxes…

These just make me so giddy!! With the bright rainbow color palette, I can’t help but be HAPPY!

I know my little bunnies (my 4 kids) will absolutely love these! They’d love the box just by itself but I’m a super awesome mom so I’ll stuff it full of goodies!! LOL

Hope you loved this tutorial!

REMEMBER… Easter is April 1st!! Very fast approaching… so get going and get creating!!

HAPPY SPRING, HAPPY EASTER, & HAPPY CRAFTING EVERYONE!!

~ Mitsyana Wright

Gift Set Tutorial by Brigit

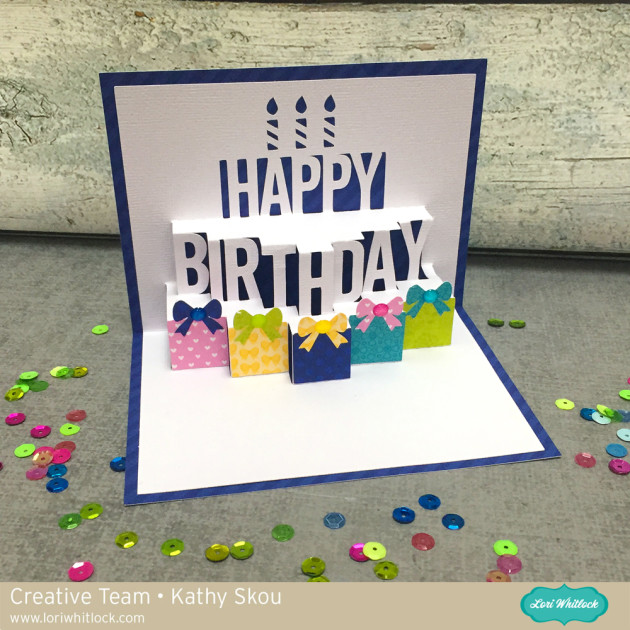
Hello there, it’s Brigit here today sharing a quick tutorial. I needed a gift bag for a friend and since she’s a cat lover I thought the cat on the pop up drawer birthday cat would be perfect for a gift set. You can get this file also from the Silhouette Design Store here.

I uploaded the pumpkin favor box and pop up drawer birthday cat into Cricut Design Space and deleted the pieces I didn’t need, leaving just the box and card with the cat. You can also get the pumpkin favor box from the Silhouette Design Store here.

I grouped the card with the cat and resized to 4″ x 5.25″ and then ungrouped. Since the sentiment is a print n cut I selected both the top banner and text to flatten, this turns it into a printable single image.

Next I duplicated the cat and sized it so it fit between the score lines on the front of the box. Then cut out the project using my Cricut Maker.

Hope you enjoyed this gift set, thanks for stopping by and have a wonderful day!!

Rolled Flower Arrow Sign Tutorial with Brandie

Hi there crafty friends! Brandie here with a another sign tutorial.

One of my goals for this year is to complete several of my in process projects. I am guilty of starting several projects at once then not finishing them to start something else. Ha! I hope I’m not the only one!

This sign is one of those projects. I attended Pinners conference two year ago and purchased the kit to make this sign. For the longest time I only had the arrow painted on the wood. Yesh!  The original design included felt flowers that I did not like so being the paper loving girl I am I found some rolled flowers that are perfect.

I used Rolled Flower 30, Rolled flower 31, and Rolled flower 32. You can find them in Loris shop and in the Silhouette store.

I uploaded the flowers into Cricut Design space duplicated and resized them to have three different sizes.

I cut the flowers out of 65lb cardstock. I prefer the lighter cardstock for making flowers. I find it easier to work with. I started with the outside end and wound the petals toward the center circle. While still holding the flower I loosened my grip on the flower to let it out a little. I applied some hot glue to the circle then pushed the petals down on the glue. I then flared the petals out to create a more natural look.

I dry fit the flowers on the arrow first. I then glued the leaves on the flowers and then glued the flowers onto the arrow.

I have this sign as part of a gallery wall in my front entire. That’s it for me today.

Thanks for stopping by!

Brandie

Baby Mini Album with Anita

Hi Everyone:

Anita here with a fun tutorial to make this mini baby album.  My brother’s girlfriend just became a grandmother of a beautiful baby boy and I made this album for her to fill and to share with her friends.

This is a photo of the cut file.  It is called Baby Layered Mini Album and you can find it in Lori’s store and in the Silhouette Store.  I mixed and matched some wonderful collections  from Echo Park to make my album including A Perfect Winter, A Perfect Autumn, A Perfect Christmas and I Love Family.  I bought 1.5 inch colored rings from Amazon for the album.

I decided that I wanted each page the same print/color so I used the replicate function on my Silhouette to mirror the left tabbed page to the right so that I could glue them together to create a heavier page.  I then cut both pages from the same paper and adhered them back to back.

I then  used the rectangle tool on the left side bar to create a white piece to be a photo mat.    I like to put the item I am trying to match the size on my mat.

Here is the sized rectangle on my mat.

Here is a photo that shows the other rectangles that I created for the pages of my album.  I then cut two of each for each page of the album.


I used Lori’s font called Wide Marker at the 56.0 font size and moved them on to the bottle to see how it would look.


Here are the pieces for my album.

There you have it.  This worked up very quickly and it so cute.  Can’t wait to send it off to it’s recipient.

Hugs,

Anita