Hello, Crafty Friends!! Winter is almost behind us and with all the rain we’ve been getting here lately the flowers will soon bloom! If Spring will be here soon, then so will Easter!! Time for pretty colors and lots of sunshine and BUNNIES!! I consider all my kiddos my little bunnies… they’re quick, bounce around a lot, and so stinking CUTE!! So, I made these adorable carrot Easter baskets using Lori Whitlock’s Easter Basket with Carrots File for each of them… because what little bunny doesn’t like carrots, right??!!

You can find this Easter Basket with Carrots box file in Lori’s SVG Shop, HERE.
OR in the Silhouette Design Store, HERE.
I used my Sizzix eclips to cut out my project. And when you first load it into the ecal software it downloads onto your window, the shapes are displayed stacked on each other. I usually separate my pieces by color.

Then, if I’m making multiples, I add and cluster my multiple shapes together so that I can cut more at one time. Depending on how large the shape is I may also separate them further into multiple pages.

Then, I cut. The box piece was too big to cut multiples so I just cut one box at a time, multiple times.

I love rainbows. It makes a wonderful Spring palette. It’s bright and cheerful! And since I’m using a multi-color color scheme I chose to tie them all together with my patterned paper. I used a rainbow gingham pattern that contained all the colors I used for my boxes. This way I don’t have to worry about finding matching paper for each color and still have them coordinate with each other.
I cut out all my pieces except the WHITE pieces (the scalloped circles and tags) and I’ll show you why…

I cut my white pieces from the same piece of cardstock. Except, my tags are printed with HAPPY EASTER on them first.
For the tags, I decided to use my machine’s PRINT-2-CUT option. First, I printed my tags.
Go to FILE, then click PRINT from the menu. Don’t forget to print with the registration marks!! That is very important!

Once it was printed, I lined up my print out sheet to the very left of my cutting mat. Line it up with the corner.
Then, go to the CUTTER tab, click on PRINT-2-CUT. You’ll be taken to the PRINT-2-CUT menu screen. Click NEXT.

Before you proceed, THIS PART IS SUPER IMPORTANT, make sure you HIDE all the text in the tags.
If you do not do this it will CUT each of those letters… and we don’t want that!! So make sure all your tags are blank!

You’ll notice that there are registration marks on your print out.
When you choose NEXT on your PRINT-2-CUT window, it will ask you to align the laser dot with the registration mark. Get it the closest to the center of the registration mark as possible for BOTH registration marks. Then, CUT!!

For the main boxes, I folded at the crease lines, all go the same direction, toward the center of the box.
I added a little line of glue to the tabs and adhered them to the side walls and set aside to dry.

I shaded my carrots using my ColorBox PetalPoint ink pads in Pinwheel and sponge daubers to shade the edges of my carrots. Then, added details using the fine tip ends of similar colored markers. This part is totally optional and for a much quicker project, you can totally SKIP it!!

I ran my carrots, carrot stems, and background pieces through my Xyron 3″ Sticker Maker for quick and easy adhesion.

Then attached them to my cut out scalloped circles and sent them back through my Sticker Maker.
Attached the backgrounds onto the boxes, then attached the scalloped circles with carrots to the centers.

Then topped off each box with iridescent ribbon that I tied to create multi-looped bows and attached my tags.
And here are my finished boxes…

These just make me so giddy!! With the bright rainbow color palette, I can’t help but be HAPPY!
I know my little bunnies (my 4 kids) will absolutely love these! They’d love the box just by itself but I’m a super awesome mom so I’ll stuff it full of goodies!! LOL
Hope you loved this tutorial!
REMEMBER… Easter is April 1st!! Very fast approaching… so get going and get creating!!
HAPPY SPRING, HAPPY EASTER, & HAPPY CRAFTING EVERYONE!!
~ Mitsyana Wright

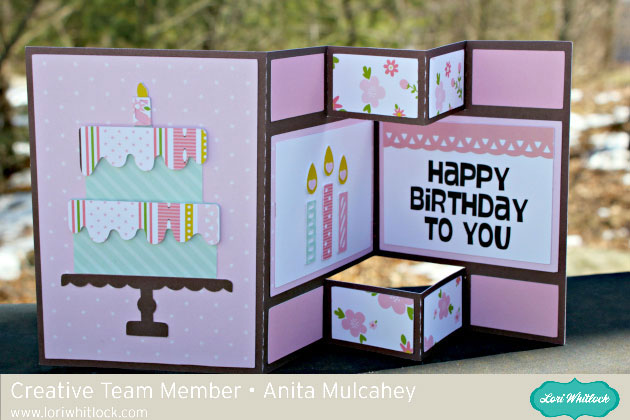
 Here are all the pieces. There are several that are small so remember to keep track of them.
 I put together the pieces of the card and glued everything down before I started folding. It is much easier to work on the folds that way.