Double Slider Birthday Card Tutorial

Hello friends, Marcia here today. I have a fun interactive double slider card  tutorial for you today. These are super fun to make as well as receive. There are lots of double slider card designs in the store. I made the Birthday Dog card (SVG, Silhouette) which I thought would appeal to the one year old who received it.

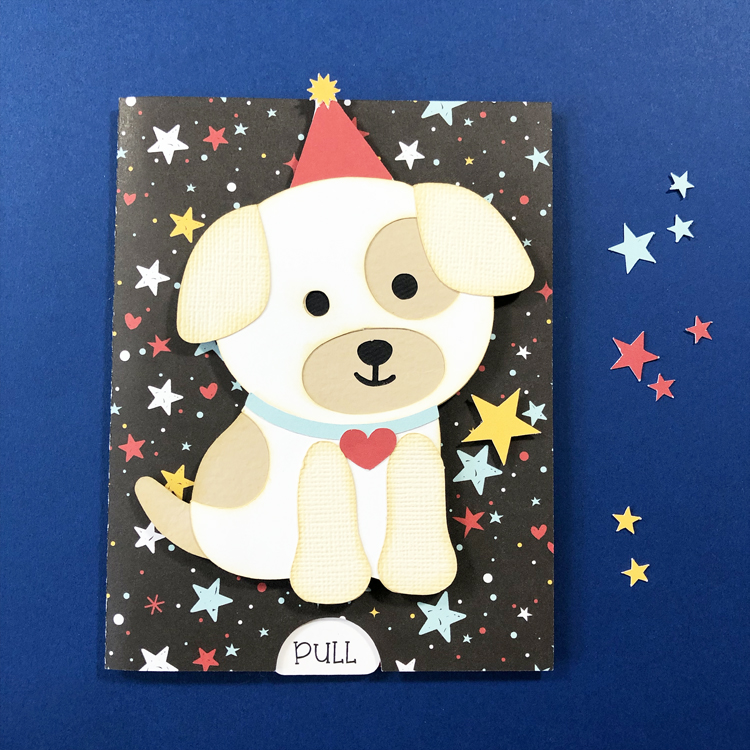
When the “PULL” tab is pulled, the dog’s birthday hat lifts off his head revealing the Happy Birthday sentiment. So cute!

Let me show you how to make one yourself.

1.  Choose your cardstock or pattern papers and cut out all the pieces. I used the Silhouette print and cut feature to print “Happy Birthday” and “PULL” before cutting out these pieces. Assemble the dog, backing the eyes and nose with the black circle, then add the white head and body over the top of the base dog. Top with the dog ears and front paws. Finally add the collar and the heart tag.

2.  Cut 2 of the Pull tabs. Only one needs to have the printed PULL on it. These will be glued together to make the tab stronger. I also printed two white inserts to allow me to sign the inside of the card since the pattern paper is quite busy. Adhere one of the white inserts to the right inside portion of the card.

3.  You will need to cut a strip of plastic packaging and insert it into the two slits as shown on the inside front of the card.
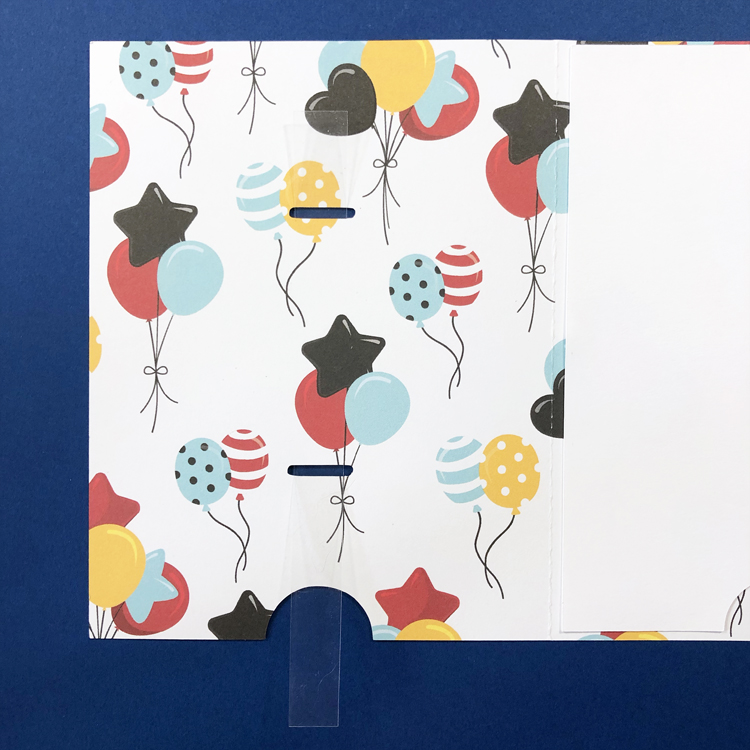
4.  Use a piece of double sided tape to adhere the two ends together. The pull tab is attached to the other side of the double sided tape. Make sure the PULL text faces the front of the card. The plastic strip should be loose enough to slide easily. Test the mechanism.
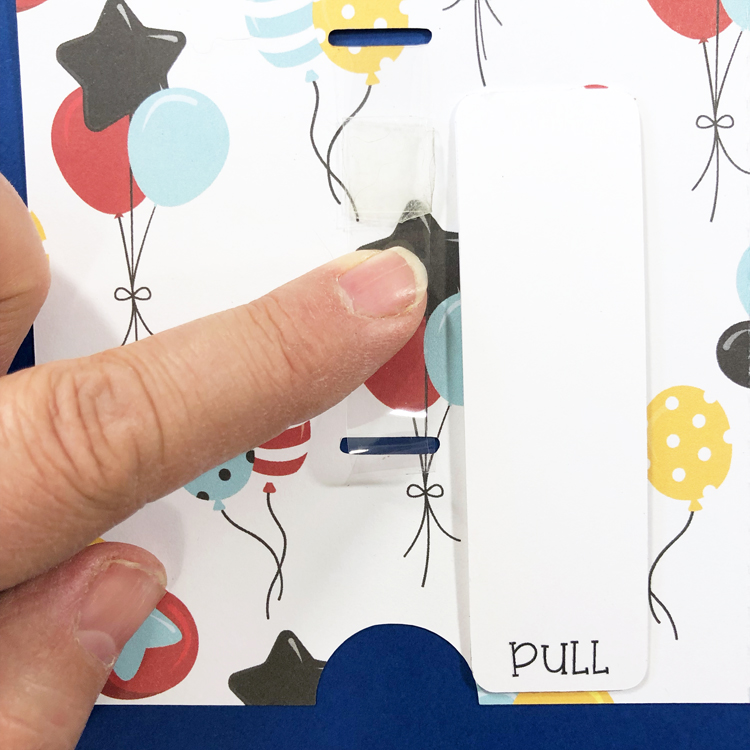
The front of the card now has a sliding plastic strip between the two slits.
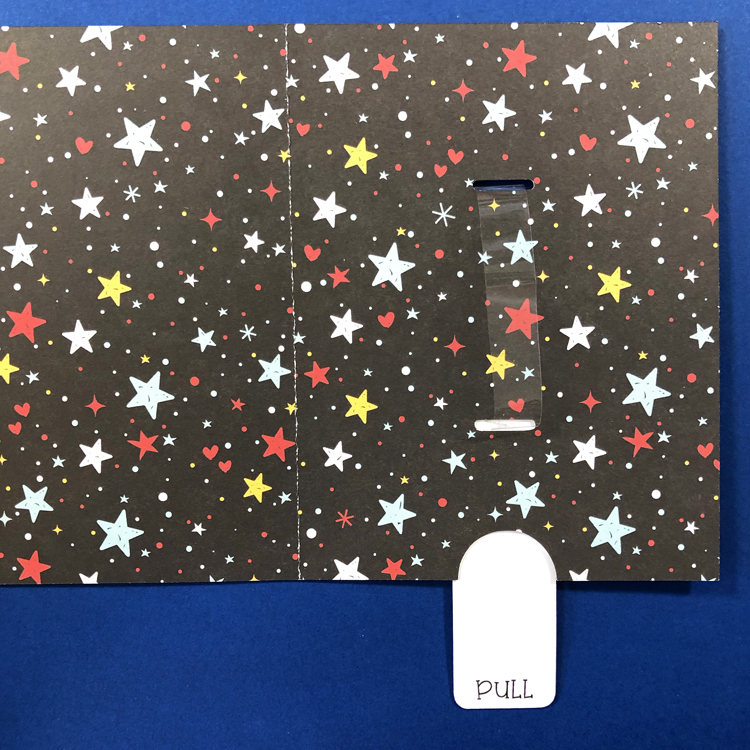
5.  To keep the pull tab from wobbling, add foam tape strips on both sides. Mount the white insert to hide the sliding mechanism using more foam tape.
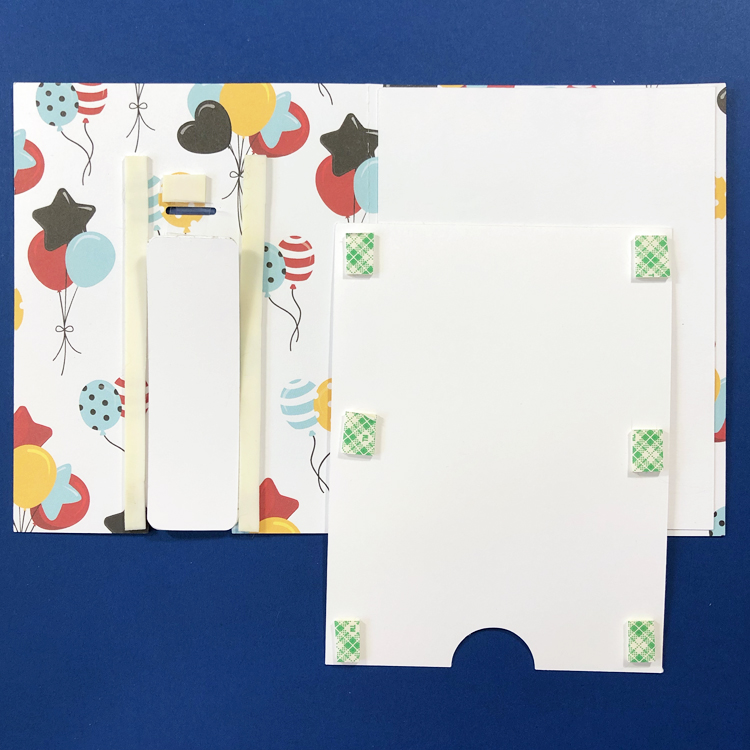
6.  Attach the Happy Birthday sentiment to a strip of stiff clear plastic. With the pull tab pulled all the way out, use double sided tape to attach the hat with the sentiment to the top of the sliding strip. Mount the dog over the top using foam tape. Test the mechanism again to make sure it doesn’t catch on anything.
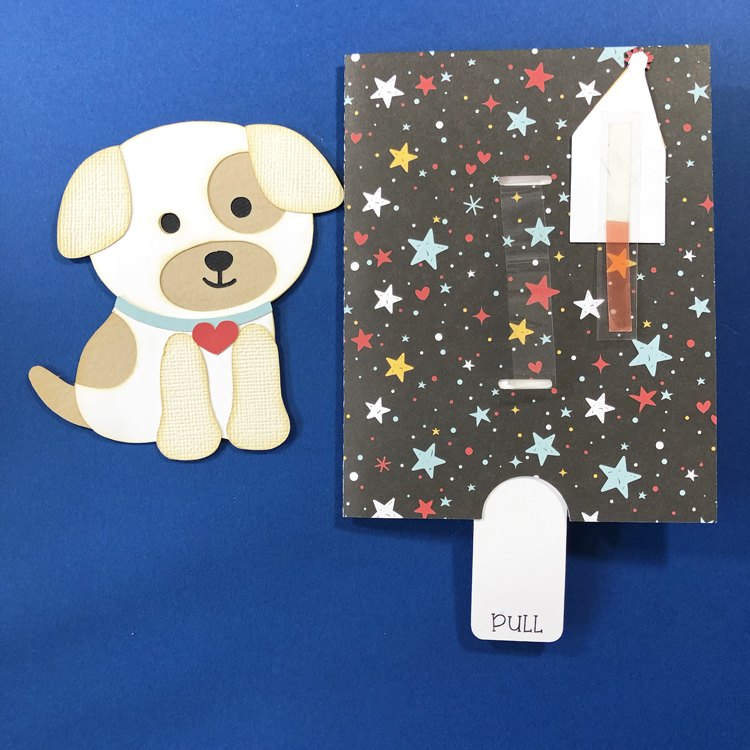
7.  Add the cut out stars to the front of the card.
If you get stuck along the way, there is also a YouTube tutorial here.

Check out all the other Double slider cards in the store. Thanks so much for stopping by.

~Marcia
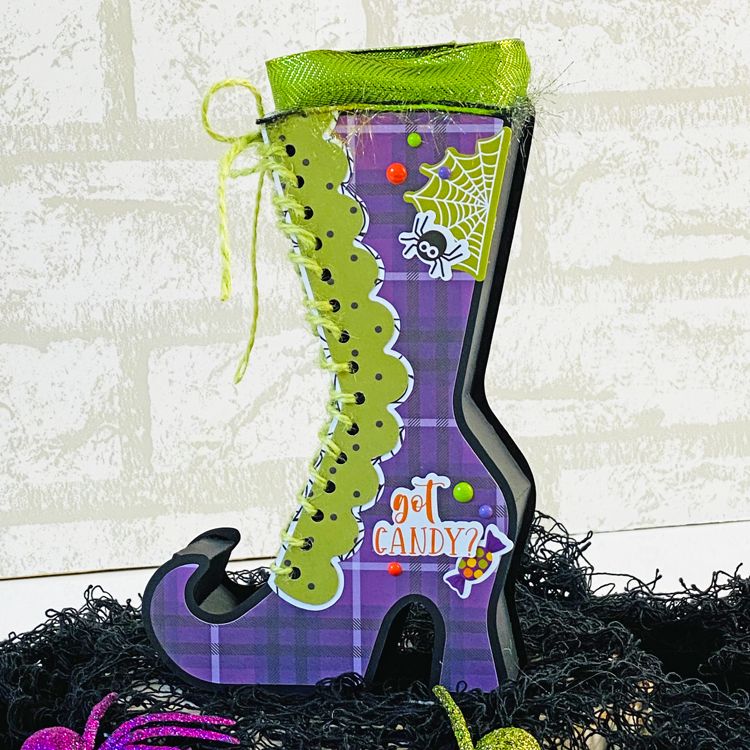
3D Halloween Witch Boot 2 Tutorial

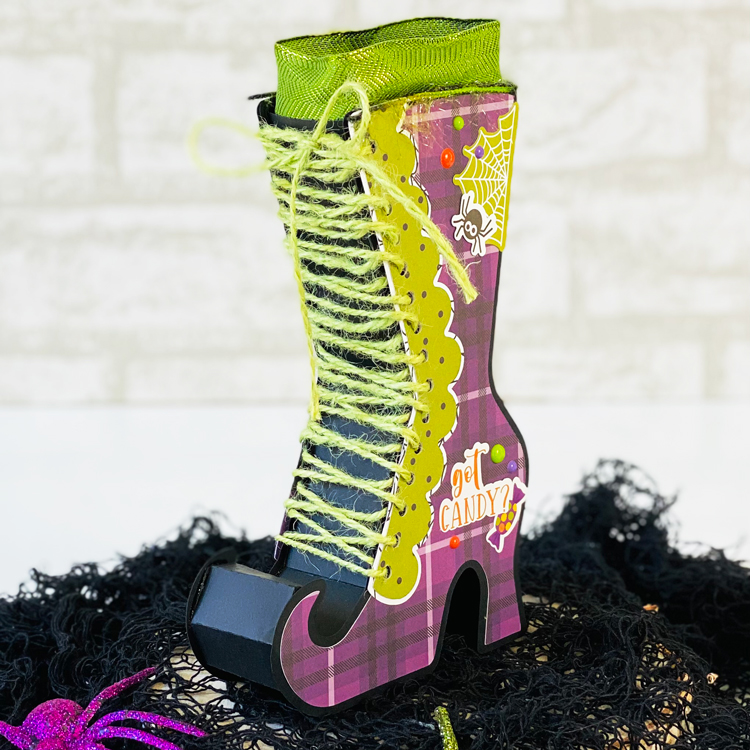
Hello crafty friends! Who’s ready for some candy and Halloween? Well, maybe not the candy but the cooler temps and the Halloween crafty fun? I say…yes, please!! Today I have a tutorial on the newest and adorable 3D Witch Boot 2 (Lori’s SVG Shop, Silhouette). This a new boot style that just came out Tuesday along with some other awesome Halloween projects like some cards and a great witch’s hat which could be a cute match to the boot!

How cute is this?!?! It laces up just like a real boot and was fun to decorate. I’m so excited to have this to add to my Halloween home décor this year! So if you want one for your own décor, gather your supplies and follow along with my tutorial. And if you are wondering, I used the Halloween Magic collection from Echo Park Paper for this project because I had to have the gorgeous purple plaid for the main part of the boot.

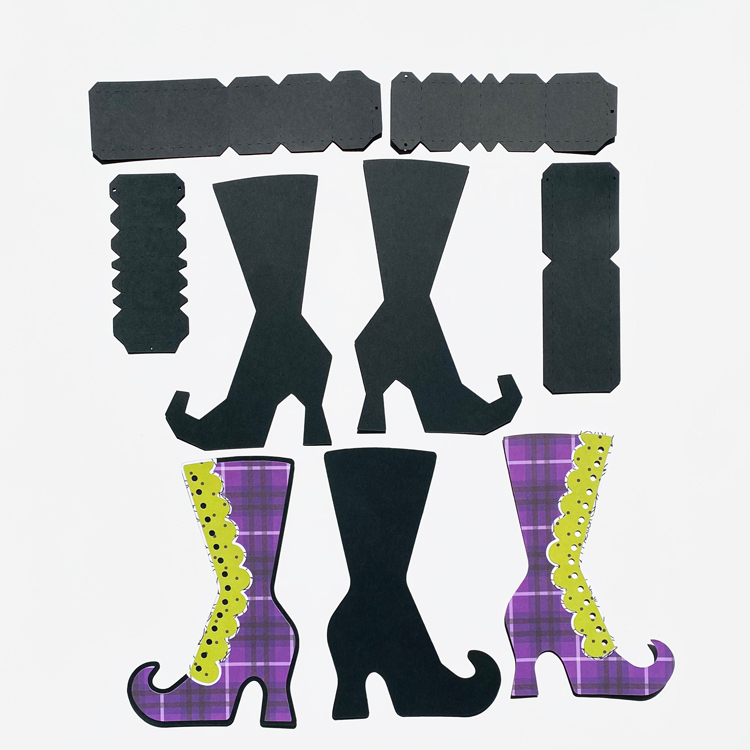
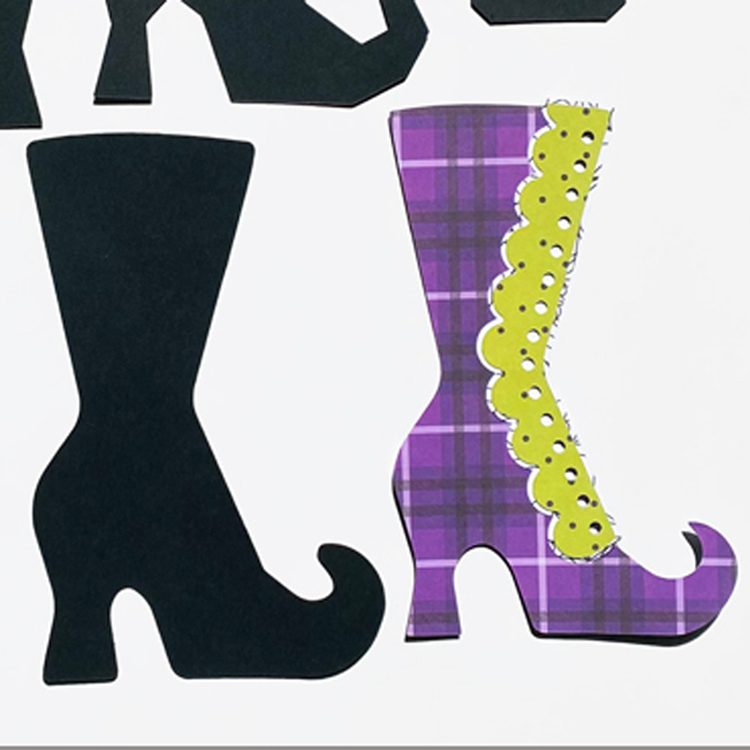
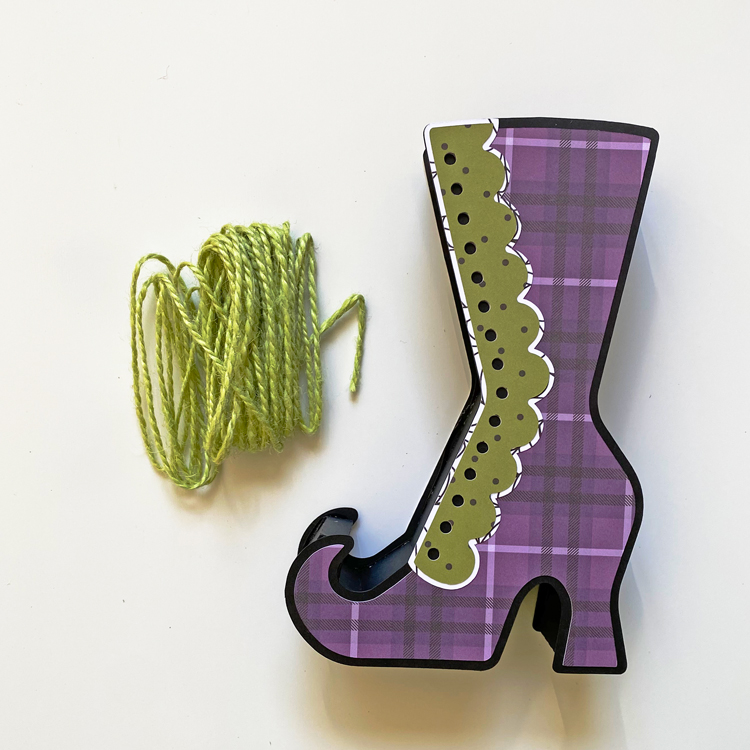
So as with any project, the first part is to pull your papers out and let’s get started by cutting out the pieces. As you can see I used a lot of black cardstock because I wanted this piece to be sturdy to hold up through the years with it being packed and stored while not in use. **Do not adhere the outside boot panels together yet. I have special instructions on where to apply glue for these.**

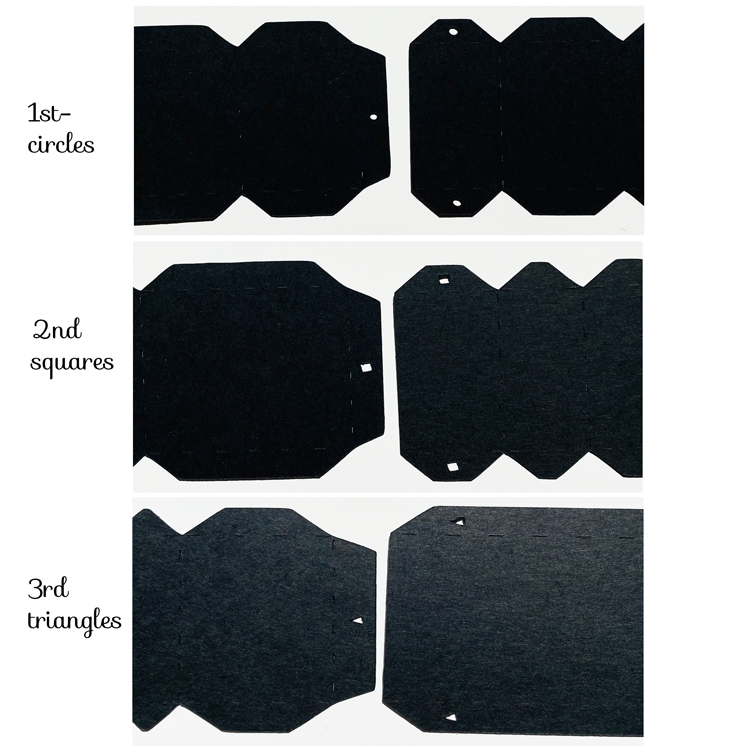
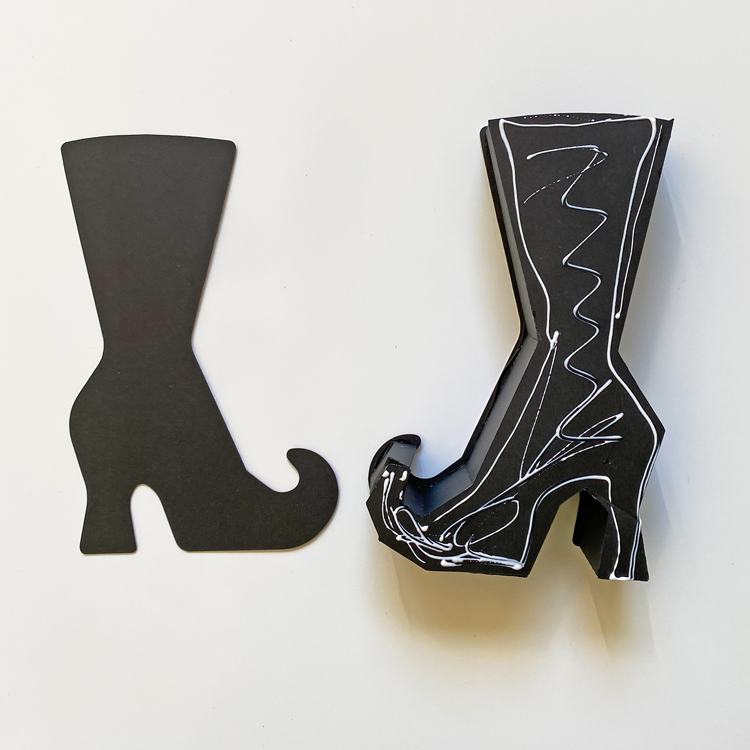
Next step is to focus on the tabbed pieces. Lori has added some shapes to the cuts to help guide us along and line up the pieces properly. Line the first piece with on centered circle to the second piece with circles on the side tabs and adhere them together. Then you do the same for lining the pieces up with squares and then the triangles. This means you will have one long piece to adhere to the boot liner but if you prefer to work in smaller sections then watch Lori’s video on how she adheres the main part of the box together.

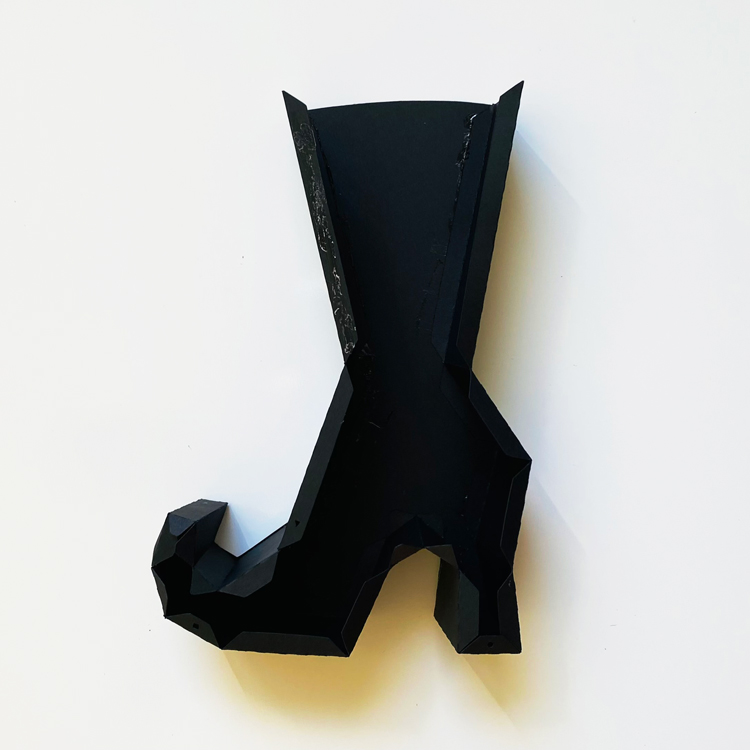
Now that you have one side of the inner boot adhered together, add your adhesive to the tabs and then lay the side boot piece to complete the inner boot box.

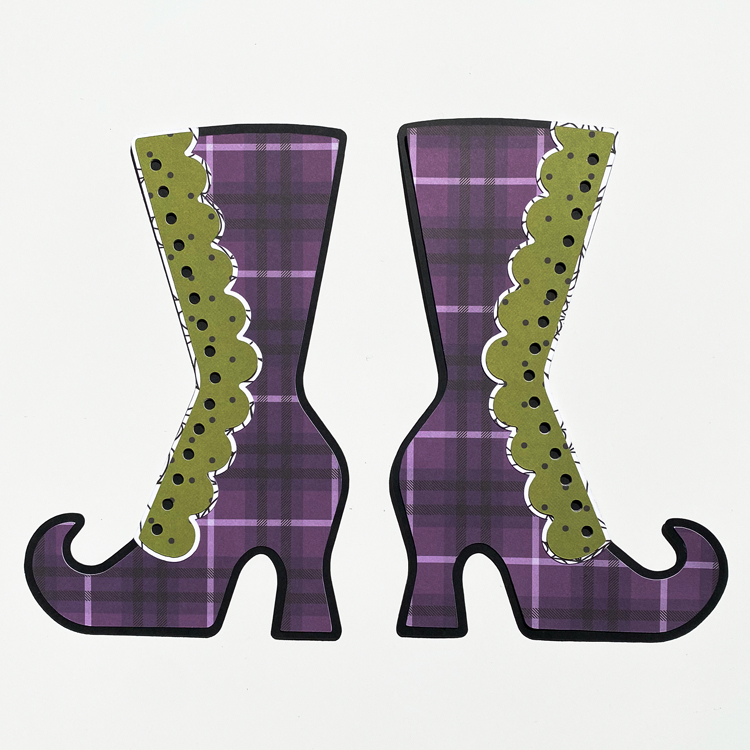
Now let’s start on the outer boot panels. Adhere all of the pattern paper pieces together but not to the black boot panel.

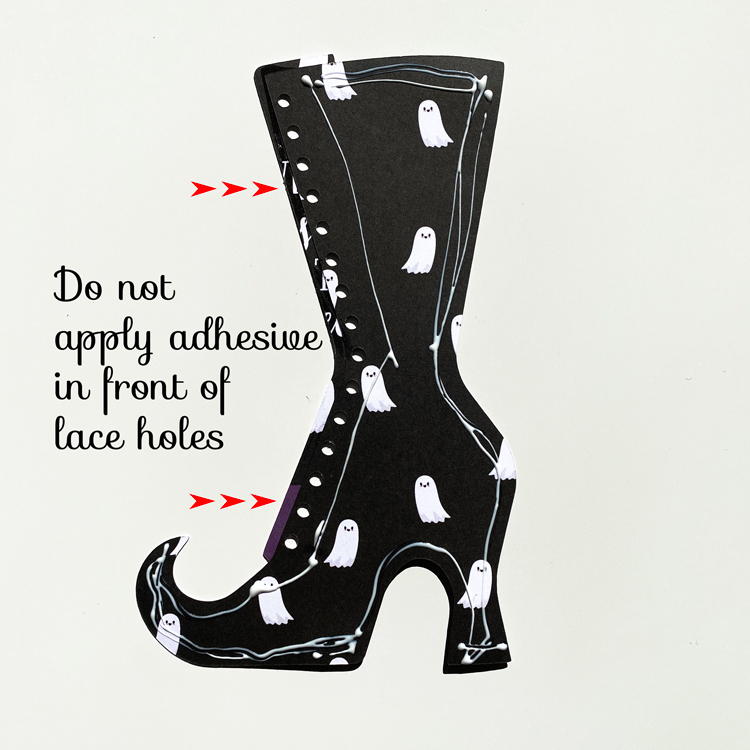
Now you will adhere the pattern paper pieces to the black boot panel but do not add adhesive in front of the lace holes. You need to be able to access these when lacing up the thread or twine.

Now you will have completed pieces that look like this but you will be able to slightly pull the pieces apart in front of the laces to thread your yarn or twine.

Next you can adhere the purple plaid panels to the box.

Lastly, you will take your twine or yarn and lace up the boot and then decorate as you wish.

And now you have a fun Halloween decorative piece that can be used as a centerpiece of candies or just sitting out by itself on a shelf. It is sure to be noticed and complemented by guests!

That’s all from me today! Hope you all enjoy this project and my tutorial. Have a great day!

Aimee


Window Box Card Tutorial

Hi Everyone!  We are happy to be back on the blog after being down for a few days!  We appreciate your patience.

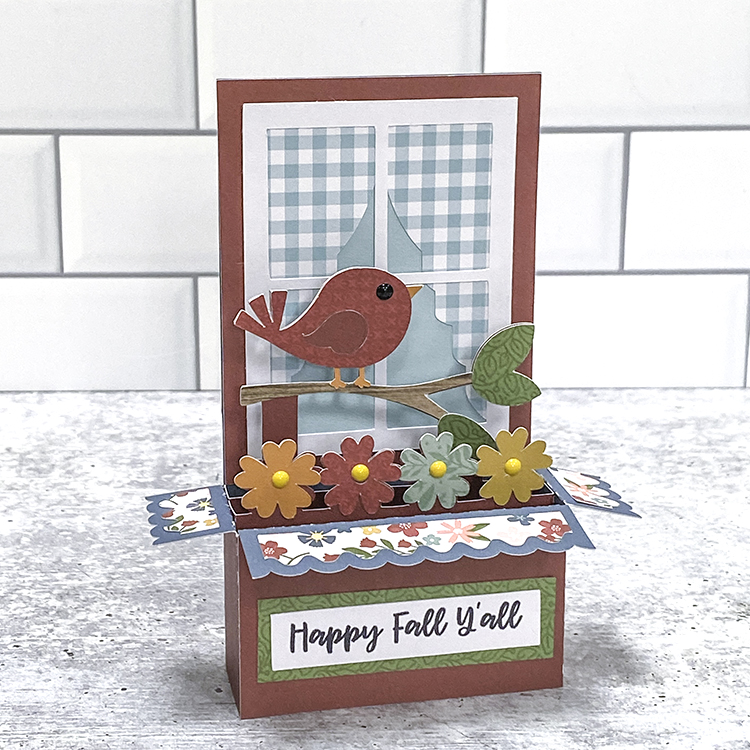
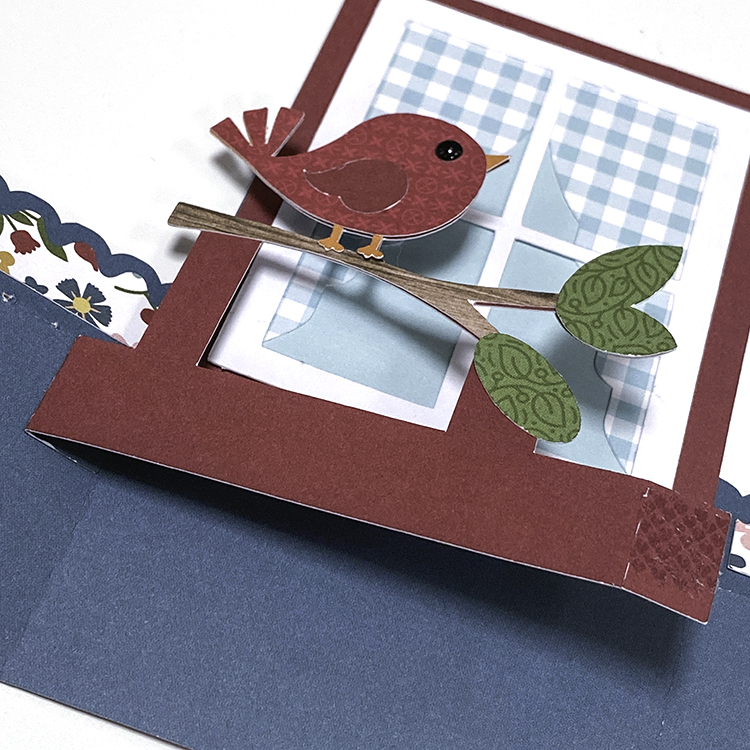
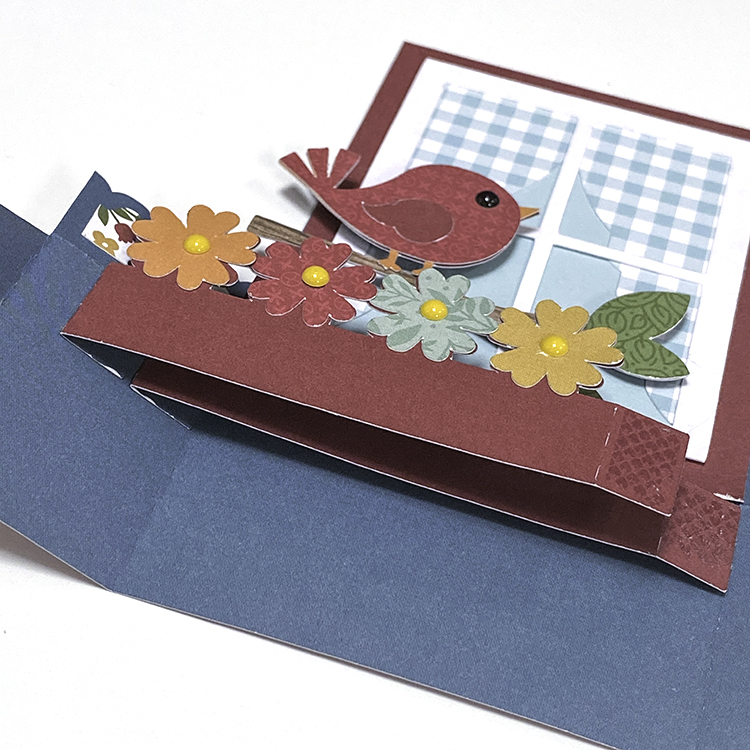
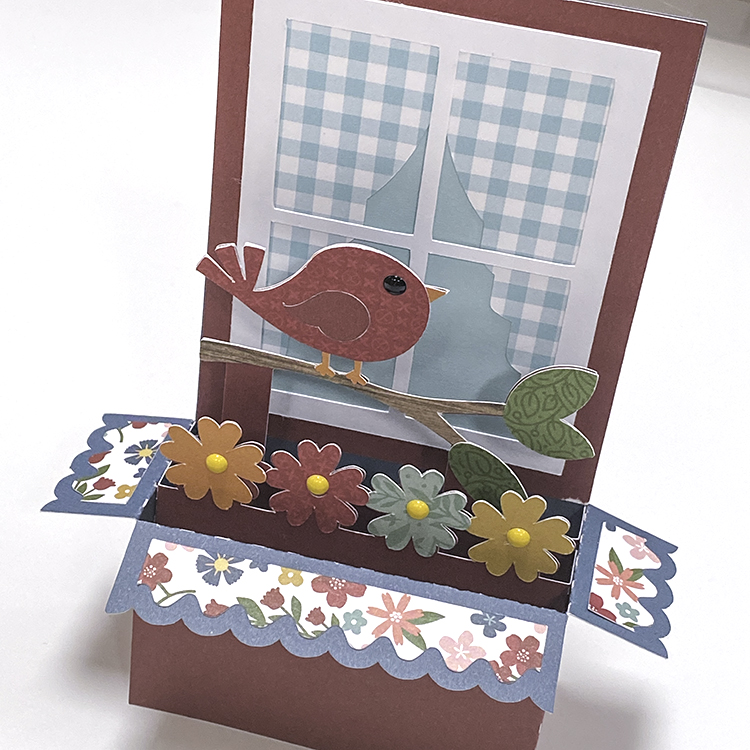
Today I have a tutorial showing how to assemble the new Box Card Window Files.  I made the new Box Card Fall Window Bird (SVG, Silhouette) using papers from Echo Park Paper’s Harvest Market Collection.  This is such a sweet card which could be used to welcome in fall or even wish someone a Happy Birthday just by changing out the sentiment.

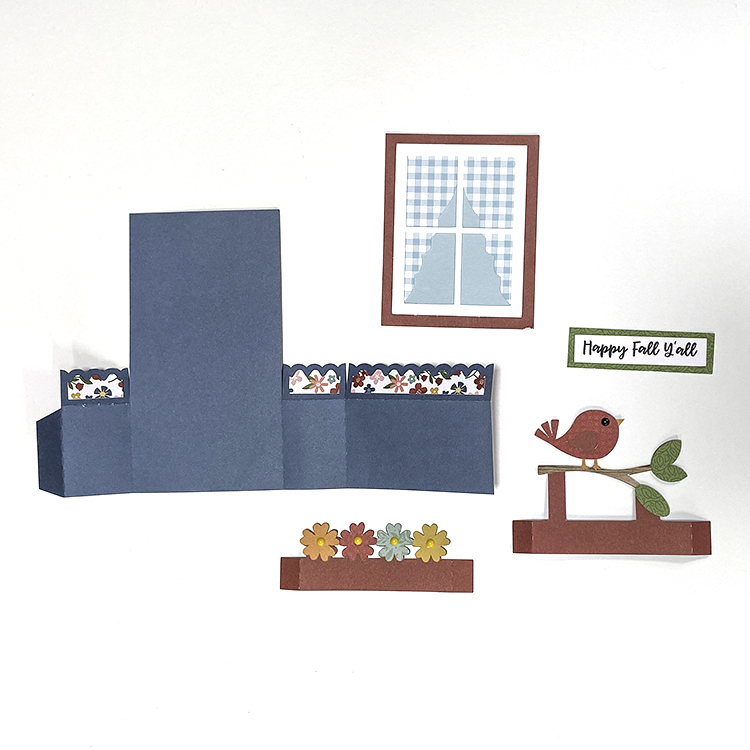
To start I cut out the pieces of the card.  I layered the window pieces and glued, print and cut the sentiment, and added the layers to the inserts.  If you ever need help with specific piece placement in Lori’s cards… here is a great hint…  you can reload the file into your cutting software.  Lori groups the pieces together as they go in the final project so it’s easy to see how things are layered and pieced together.


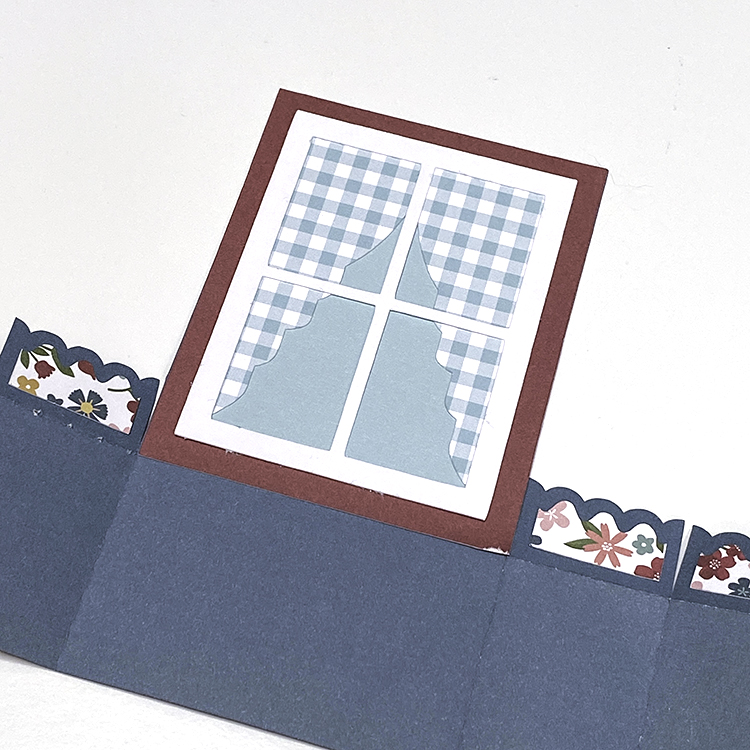
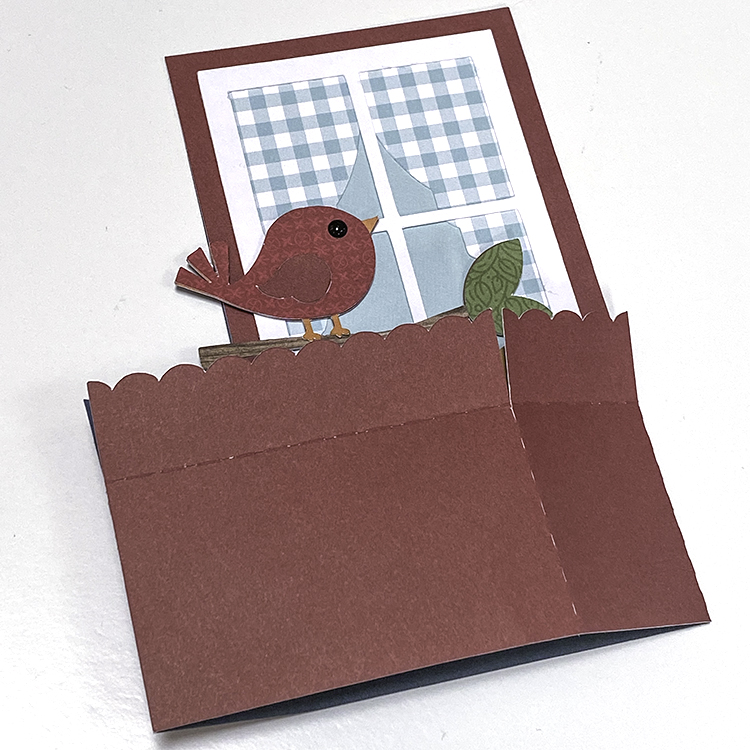
Next I added the window to the inside back of the card base. (the outside of my card is maroon, the inside or b-side of the paper is navy)

The next steps cover adding the inserts.  I started with the bird insert since it goes furthest back.  I glued the insert tab to the side of the base, aligning the top of the insert base with the top score line on the side.

Next I added the flower insert.  I glued the tab to the side of the base, just beyond the tab of the first insert.  Leave a little space between the insert tabs so that the card will fold flat.  You want to make sure that the inserts are aligned together and to the bottom of the window.

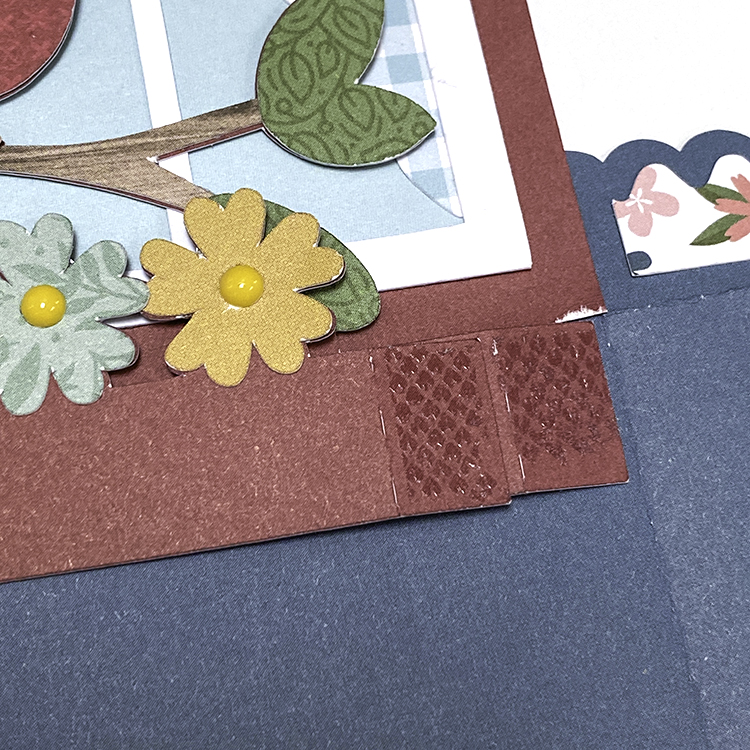
Add adhesive to the remaining insert tabs, and to the tab on the base of the card.

Fold the base over, pressing down to make sure the edge of the base is secure and that the inserts are adhered to the inside of the card base.

Looking down inside the box part of the card, you can see that the inserts are perfectly aligned.  As a last step I added the sentiment to the front of the card base.  This card folds flat for mailing and fits into an A2 Envelope.  If you need one, Lori has a great set here.

And don’t forget, there is a sale happening now in the Lori Whitlock SVG Shop!  Get 30% Off all SVGs, Fonts, Pattern Fills and Commercial Licenses when you use code SEP2021 at checkout.  Don’t miss out, sale ends tomorrow!

Have a great day!

BLOG | INSTAGRAM


Halloween Countdown Tutorial

Hi there Lori Whitlock friends! Anyone else look forward to this time of year to do all the fun Fall/Halloween crafts? It is my favorite.

I am sharing a fun idea for a Halloween countdown today. I used my Glowforge laser cutter to  make this project out of wood but it would also be cute as a flat design cut out of paper or vinyl and applied to a premade sign blank. I also think my steps below would work for cutting this project out of chipboard if your machine does that.

The files I used are Halloween Haunted House Scene (SVG, Silhouette), Halloween Tree (SVG, Silhouette), Halloween Tombstones (SVG, Silhouette), and the Spooky Font (SVG, Silhouette).  I also used the rectangle tool in Silhouette to create my base.

For the numbered tombstones I wanted a simple shape. I used the knife tool in Silhouette to slice off the cross from the tombstone on the end.  I then typed out the numbers 0-9 and cut an extra 1,2, and 3 so that I would be able to do the higher number double digits in the count down.

I then typed out days till Halloween in the spooky font and created an offset. I welded the offset letters together and grouped them together to keep the word spacing from shifting.

With the offset letters, house scene, and the spooky trees I welded  a rectangle to the bottom of the images to create a tab to fit into the slots that I add to my base. The dimensions of the rectangles for the base are determined by the width of the material being used. If you are making a flat countdown this step is not necessary.

Once I had the tabs added to the images I created the slots in the base of the countdown. The top two small rectangles are for the spooky trees. The middle rectangle is for the house scene and the bottom rectangle is for the numbered tombstones and days till Halloween letters. I centered the skinny rectangles on the larger rectangle then spaced them as shown below. I selected all of the rectangles and created a compound path. The large black rectangle is the bottom of the base.

I cut everything out, painted, and assembled.

I really like how it turned out and my little guy cant wait to start counting down the days to Halloween. If you have any questions let us know. Thanks for stopping by!
Brandie

Fall Stationery Box Tutorial

Hi there paper crafting friends!  It’s Michelle Starcher, aka the Bookish Designer, hopping onto the blog to walk you through the steps to create Lori’s Stationery Box 2 (SVG, Silhouette).  This stationery set includes places to store your A2 cards and envelopes along with tags.  You can customize this box, so you will probably want to make more than one to store your cards for different occasions. All the pieces are 8.5×11 compatible, and there are two tag shapes and an A2 card base included in the file.

In this photo tutorial, I will break down the steps to create the Stationery Box 2.  I wanted a place to store my fall themed cards, so I used burnt orange cardstock for all of the base pieces.  I used accents and a plaid pattern paper from Lori’s collection, A Perfect Autumn, to finish out the fall theme.  The file includes everything you need to complete the stationery box, along with files for cards and tags.

In the cut files, you will find two small rectangles and a base piece that has three stacked rectangles with tabs.  These are used to assemble the lid for the stationery box.  Before you assemble the lid, adhere the two small pattern pieces to the small cardstock rectangles as shown.  Next, fold along all of the score lines and add adhesive to the tabs of the lid base.  The small rectangle pieces will be used to form the sides of the box lid and hold everything together.  (Although not shown in the picture, I recommend attaching the other pattern pieces to your box lid before you assemble the lid. You should have three patterned rectangle pieces: two for the front and back,  and one, slightly narrower piece, for the top of the lid.)

To assemble the lid, you will fold along the score lines and attach the tabs to the sides of the small rectangle pieces.   Make sure your rectangle is lined up correctly with the longer sides attaching to the longer tabs of the lid’s base.  I recommend starting from the outside and working your way in as shown in the image below.

To assemble each of the base pieces, fold along the score lines and add adhesive tape to the tabs.  Fold in the tabs to create a box shape.  The four base pieces will be used to form individual boxes that will create sections inside the stationery box.  You will create two boxes for tags, one for cards, and one for envelopes.  The tag and card boxes will be taller in the back than in the front when assembled (see example below).  The envelope box will be the same height in the front and the back.  The image below shows one of the tag boxes with adhesive tape on the tabs and one assembled.  Adhere the small tabs first to create a base for your box.  Then fold and adhere the front to complete the box.

To assemble the stationery box, you will glue the base pieces together.  First, adhere the card box to the envelope box with the shorter side of the card box in front.  Next, add the tag boxes to the front of the card box, with the shorter sides of the tags boxes in the front.  The image below shows the stationery box with one of the tag boxes adhered to the rest of the stationery box.

Once you have joined all of the individual boxes, you will use the remaining cardstock pieces to hide the joints of your assembled box pieces.  There are two rectangles, one for the front and one for the bottom.  In addition, there are two staircase pieces that will be used on the sides of the stationery box. Using the adhesive of your choice, attach the cardstock pieces to the appropriate side of the box.

Finally, decorate the outside of your box.  Then add cards, envelopes, and tags to the inside.

Don’t forget you can make multiples of the Stationery Box 2 to hold cards for different occasions. Plus, you can make one, fill it with handmade cards and tags, and give it away as a gift.  Well, that’s all for me today.  I am off to make some cute fall-themed cards and tags to fill up my box:)

Until next time,

Michelle