Vintage Bucket Tutorial

Hi there paper crafting friends!  It’s Michelle Starcher, aka the Bookish Designer, hopping onto the blog to walk you through the steps to create Lori’s Vintage Bucket (SVG, Silhouette).  I was looking for something festive that I could use to hold utensils for Thanksgiving dinner, and I came across the Vintage Bucket.  This file is the perfect way to set out plastic utensils for any party or event.

VIntage Bucket

In this photo tutorial, I will break down the steps to create the Vintage Bucket.  In the cut files, you will find everything you need to complete the Vintage Bucket, expect for the floral wire or pipe cleaner used for the handle.  After cutting all of the pieces, I sanded the edges of my dark brown cardstock and inked the edges of my pattern paper to create a more vintage look.  In addition, I folded down the tabs on pattern paper and rolled it along the edge of my desk to give a little bit of curve to my paper.  I did the same thing to the long brown rectangle that will become the bucket handle.
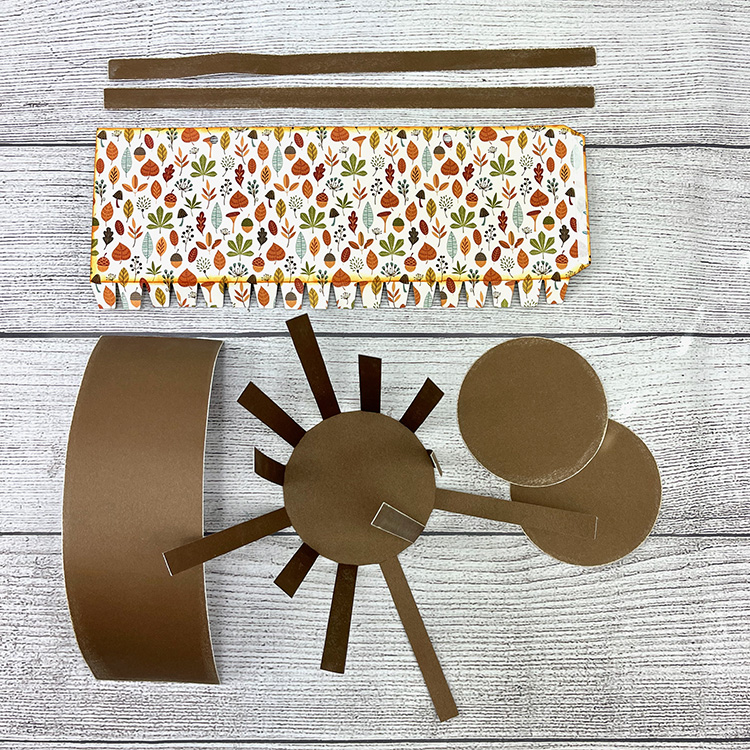
Next, I added adhesive to the tab of the “bucket” and attached it to the other side.  Be careful to line up the two sides as perfectly as you can to create the cylinder shape.  Then, place one of the circles inside the bottom of the cylinder.  Flip the bucket over, add glue along the edge of the dark circle, and fold down the little tabs.  Once you have done that, add more glue and place the second brown circle on top to cover the little tabs.
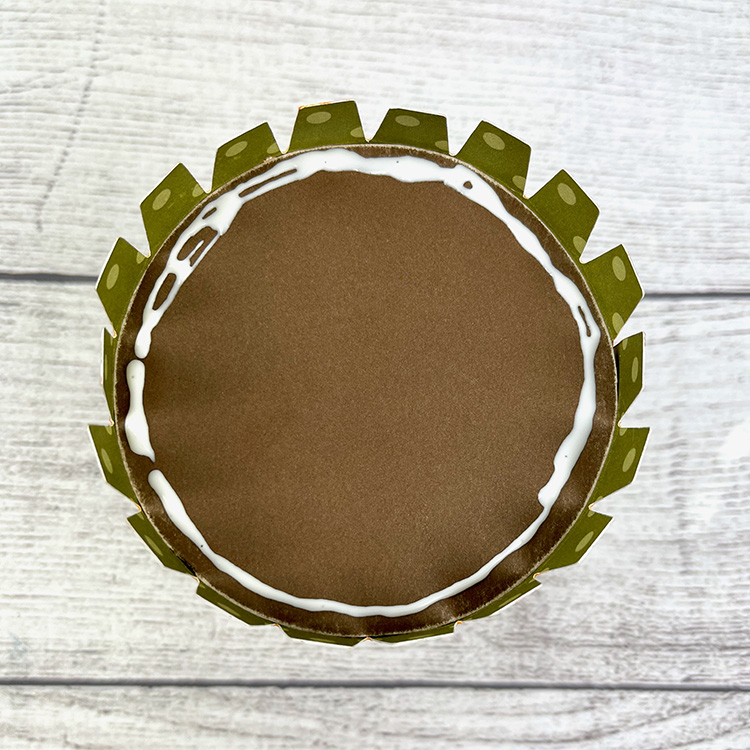
Once you have assembled your bucket, you will adhere it to the “sun” shape.  I used glue to adhere the bucket to the “sun” shape and adhesive tape to adhere the “sun’s rays” to the bucket.  I lined up one of the “sun’s rays” to cover the seam in the bucket.  This caused the holes for my handle to be covered up, but I was able to use a hole punch to create new ones when I was ready to add the handle.
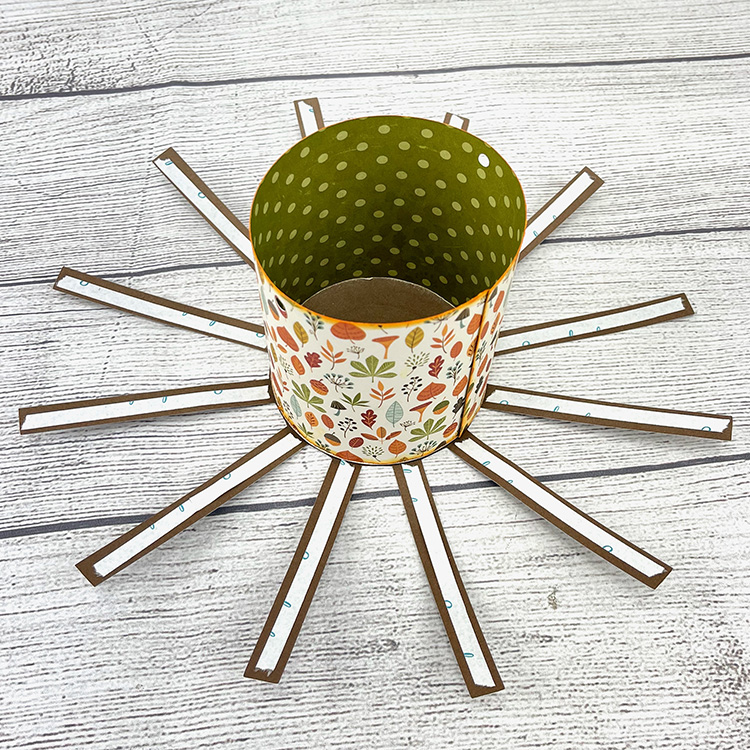
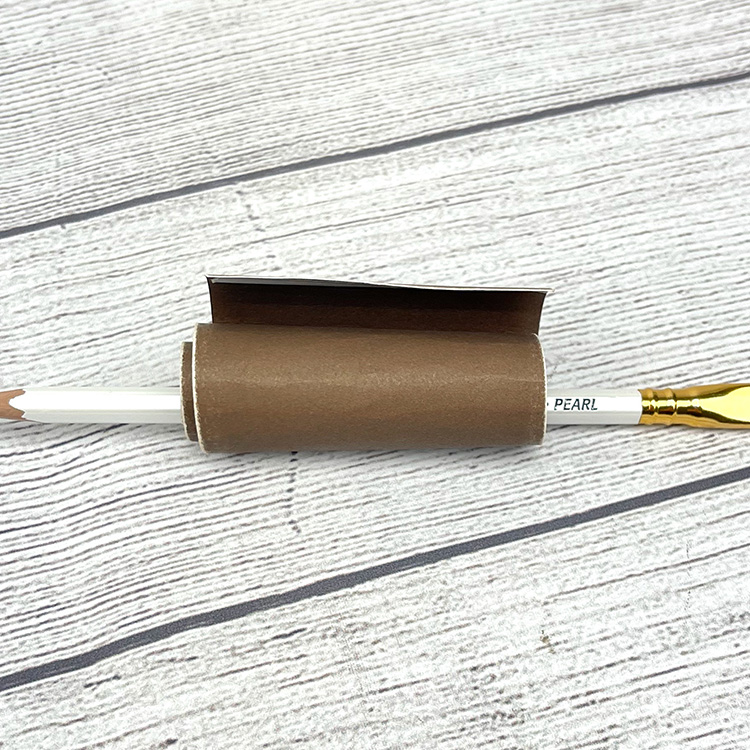
Next, I added the rectangle strips to the top and bottom of my bucket.  I added adhesive tape to both ends of the rectangle and used a pencil to help me role the rectangle piece into a tube shape. To finish the tube shape, I took the pencil out and held it in between my thumb and index finger to tighten the tube.  I used adhesive tape to close the tube.  For the handle, I used washi tape to cover the floral wire and added add the paper tube to the top to form the handle for the bucket.  Insert one end of the floral wire into one of the holes in the bucket and pinch to close. Repeat on the other side as well.
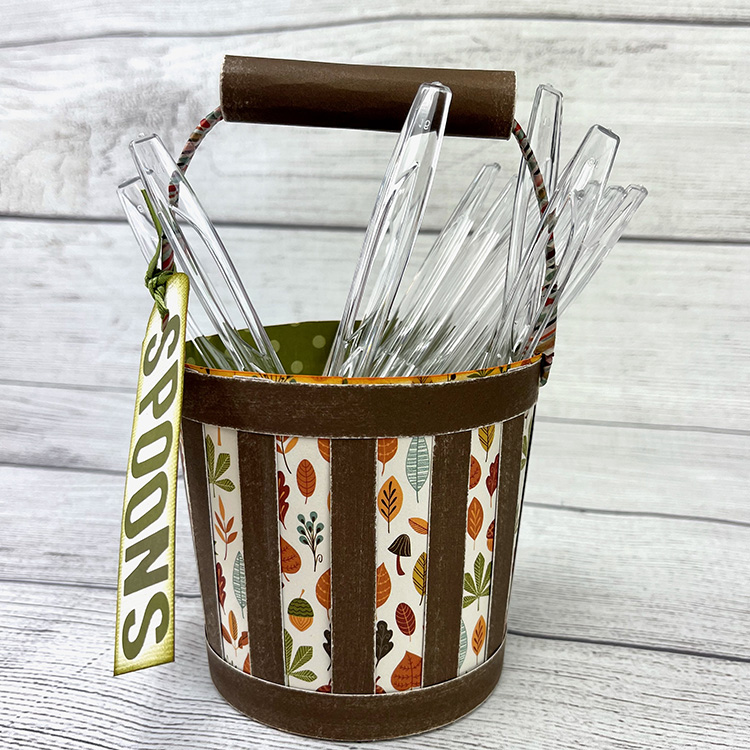
Once my bucket was finished, I made a quick tag and used alphabet stickers to spell out “Spoons”.  I inked the edges and attached the tag to the bucket using ribbon.  I am planning to make two more Vintage Buckets to hold my forks and knives as well.
If you are interested in a more detailed video tutorial on how to put together the Vintage Bucket, Lori has one available on YouTube.

Until next time,

Michelle
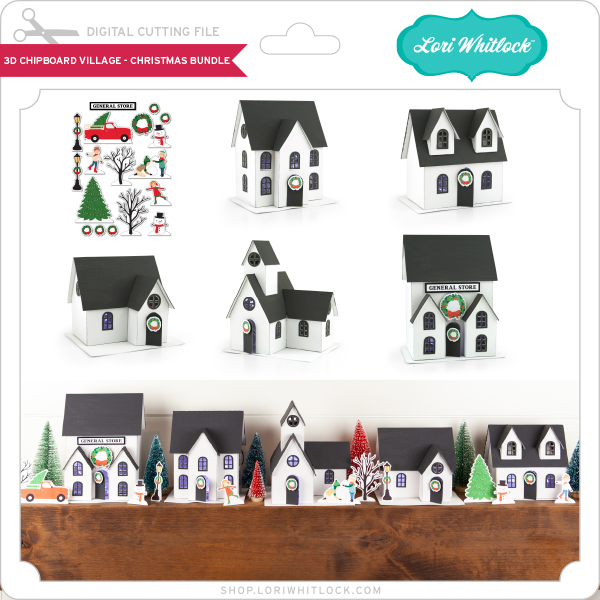
NEW! 3D Chipboard Village Files + Free Class

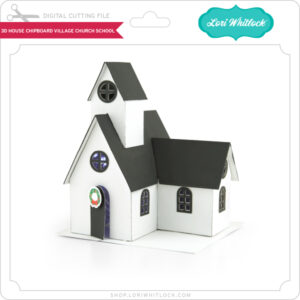
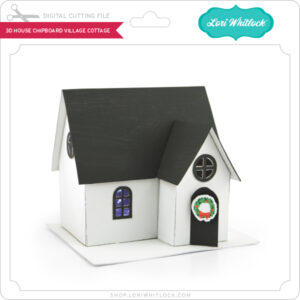
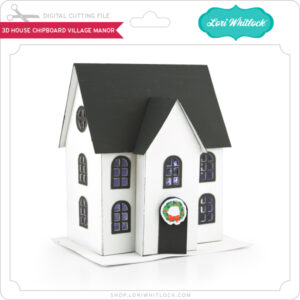
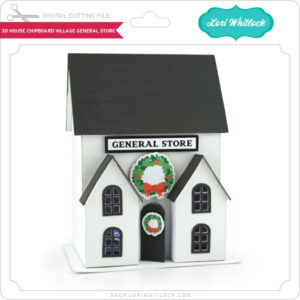
I am so excited to show you all a project that I have really been working hard on — a 3D Chipboard Village! These darling chipboard houses are part of a premium project series. My goal was to design a village that is sturdy and that can be displayed all year long. The village is made up of 5 buildings, each more fun than the next!  In addition to the houses, I have created a print and cut embellishment set for Christmas.  Going forward I plan on creating other seasonal/holiday embellishment sets so that you can decorate and enjoy your village all year long!

The village houses can be purchased in the Silhouette Store individually and as a bundle.(Silhouette bundle is available for a limited time, see link for details)  They are also available in SVG format in the Lori Whitlock SVG shop both individually and as a bundle.  Below are photos and links for the village.

3D Chipboard Village Christmas SVG Bundle

3D House Chipboard Village Church/School (SVG, Silhouette)  Finished size: 5 1/2″ x 7 1/2″ x 5″
3D House Chipboard Village Cottage (SVG, Silhouette)  Finished size: 4 3/4″ x 5 1/2″ x 4 1/2″
3D House Chipboard Village Manor (SVG, Silhouette)  Finished size: 6″ x 5 1/4″ x 4″

3D House Chipboard Village General Store (SVG, Silhouette)  Finished size: 7 1/4″ x 5 1/2″ x 4″
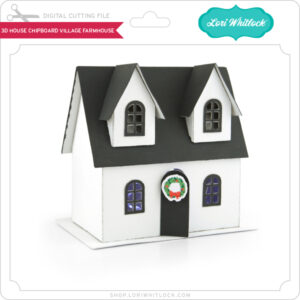
3D House Chipboard Village Farmhouse (SVG, Silhouette)  Finished size: 5″ x 5 1/2″ x 3”
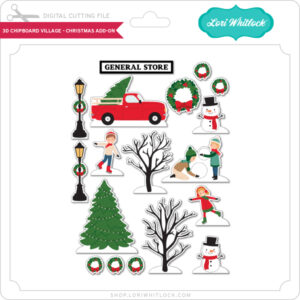
3D House Chipboard Village Christmas Add-On (SVG, Silhouette) Created using the print and cut feature of your cutter

I will be conducting a 2-part Chipboard Village class that will broadcast live from the Silhouette headquarters.  The first session will be November 9th, 2021 at 11am (MT) and the second session will be November 16th, 2021,11AM (MT)   These classes will mainly focus on the assembly of the village along with helpful hints and techniques.  The classes are free, and open to all, but you do need to register to watch the live sessions. You will need to purchase the files to create the houses.

Class One – November 9th, 2021 11AM MT – REGISTER HERE
This class will cover the assembly of the 3D House Chipboard Village Church/School, 3D House Chipboard Village Cottage and the 3D House Chipboard Village Manor

Class Two – November 16th, 2021 11AM MT – REGISTER HERE
This class will cover the assembly of the 3D House Chipboard Village General Store, 3D House Chipboard Village Farmhouse, and the 3D House Chipboard Village Christmas Add-On

Unable to attend the classes?  Both sessions will be added to Silhouette’s YouTube Channel within a couple of days of the live broadcast.

If you’re ready to join us, all you need to do is to download the files in your preferred format (links above).  I’ve also listed some basic items I used to create the village as seen above including…

• 1 Package Silhouette Chipboard
• White spray paint
• Charcoal Acrylic Paint
• Adhesive (THIS one works well, too)
• Sticker Magnet Roll
• fairy lights or electric tea lights
• Patterned Paper (optional – I didn’t use any on these samples)

Of course you can use your imagination to create and embellish your chipboard house any way you desire. Because this house is made of 2 layers of chipboard, it’s nice and sturdy!

I hope that you are able to join us!  Have a great day!

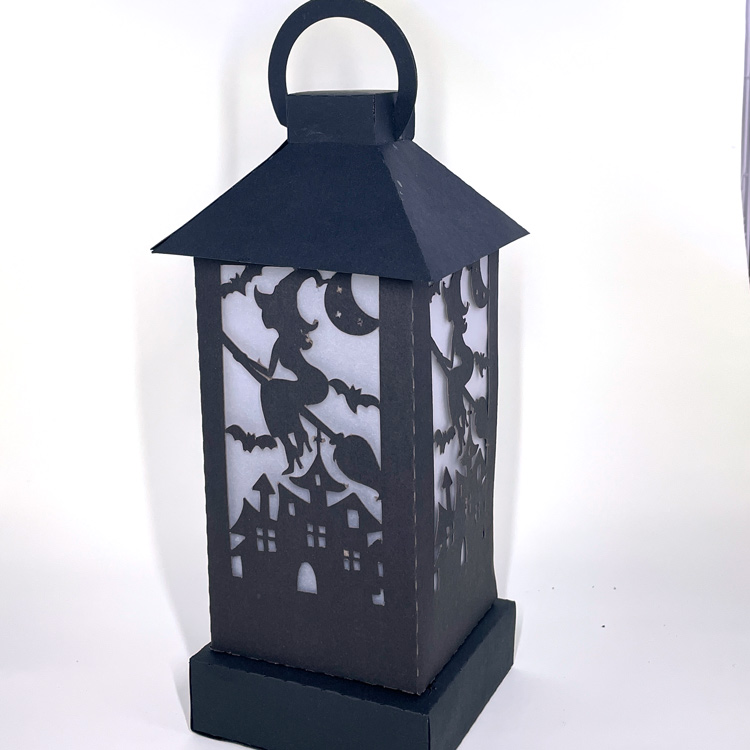
3D Halloween Lantern Tutorial

Hi Everyone!  There are some new Halloween lanterns in the shop.  I thought it would be fun to make some for this weekend!

Halloween Project Bundle 2

Halloween Project Bundle 2 (SVGs)

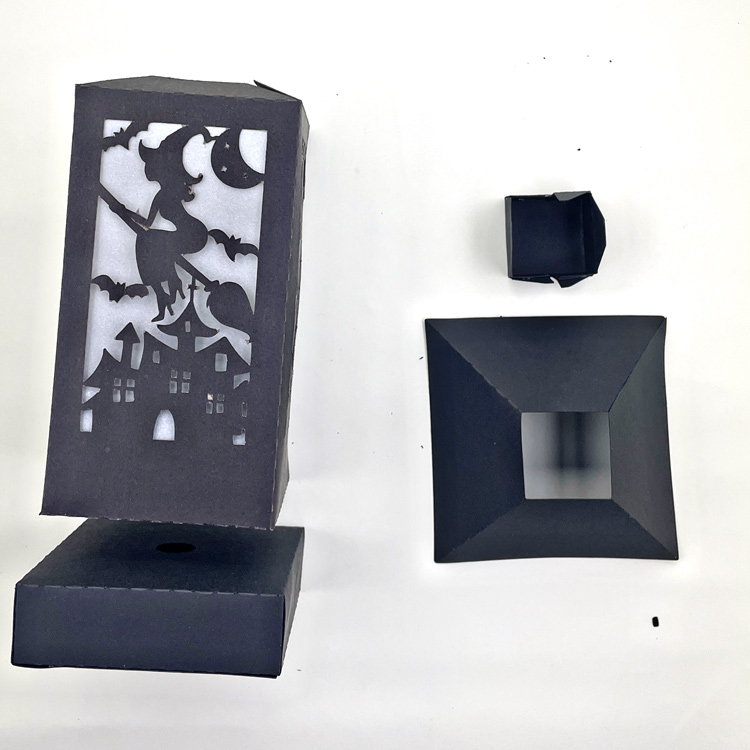
I made the 3D Witch Lantern (SVG, Silhouette )  I’ve put together a tutorial showing how to assemble today.

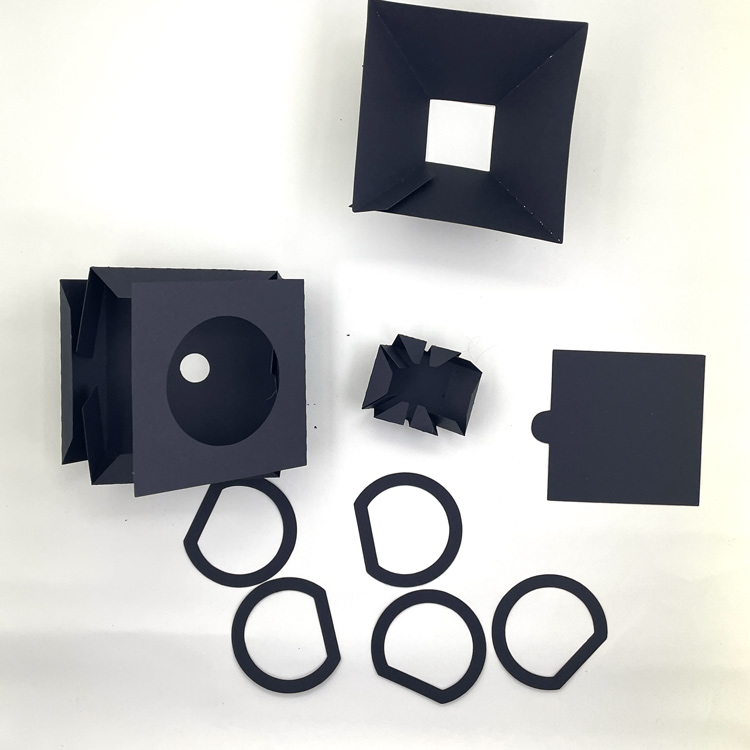
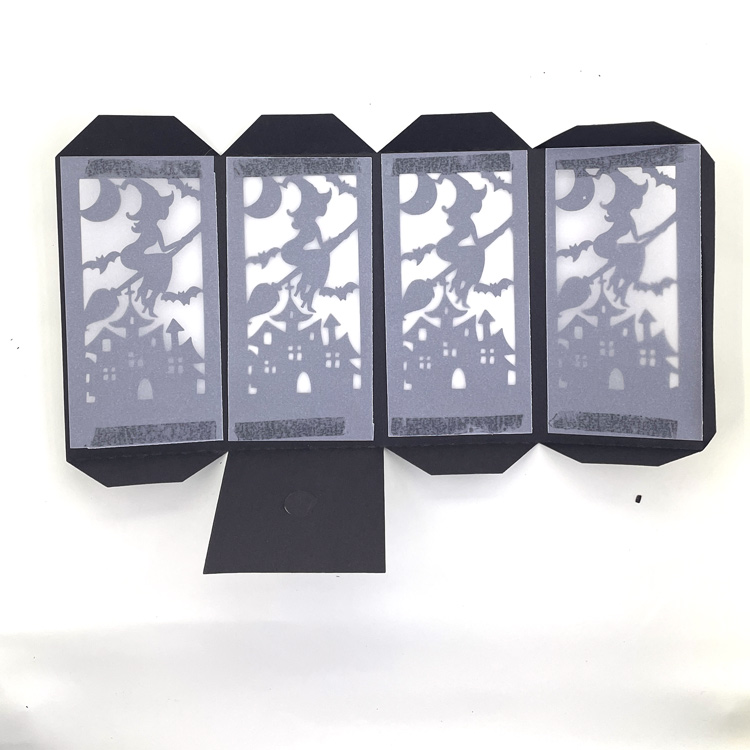
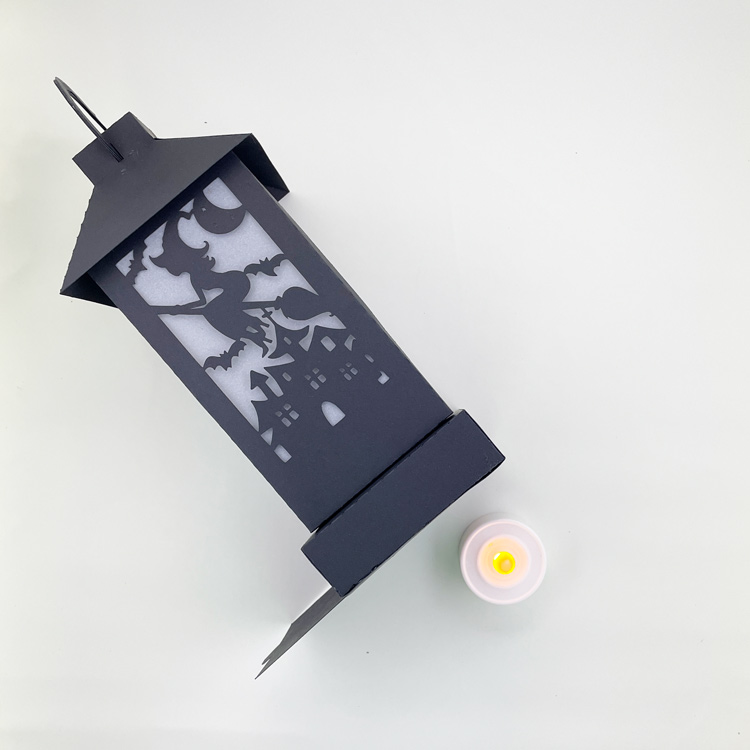
1. First, cut out all your pieces on your cutting machine.  You can see the pieces below.  I’ve folded them along their score lines.

2.  If you wish to add vellum to the insides of the lantern, do this next. I cut the vellum in 2.5″ x 5″  pieces.  I used adhesive on the top and bottom of the vellum to attach the lantern.

3. Glue the individual pieces into shape by adding glue to the tabs, and folding.  The tabs go on the inside so they are not seen in the final project.

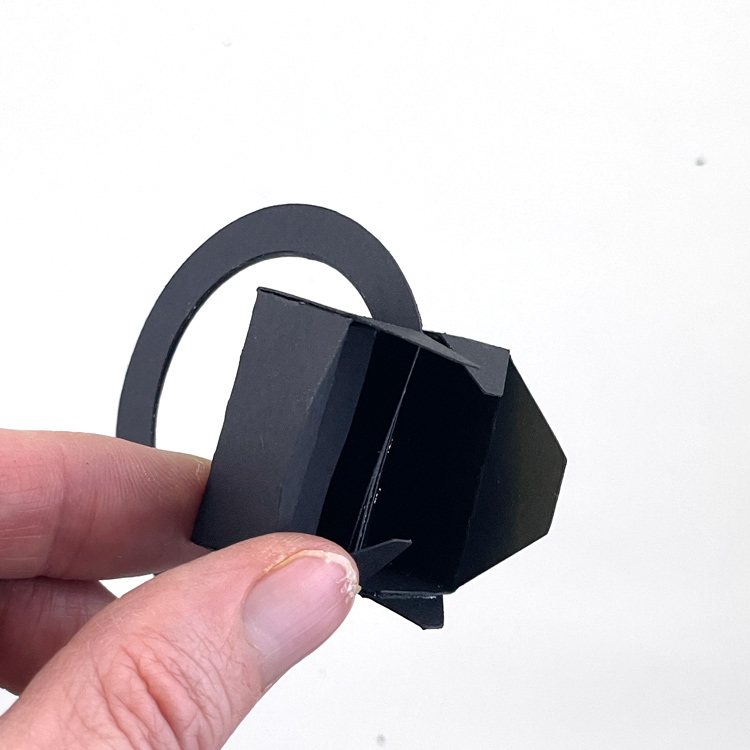
4. Glue all the circle handle pieces together in a stack to make one thick piece.  Thread the stacked circles into the slots in the small square piece.

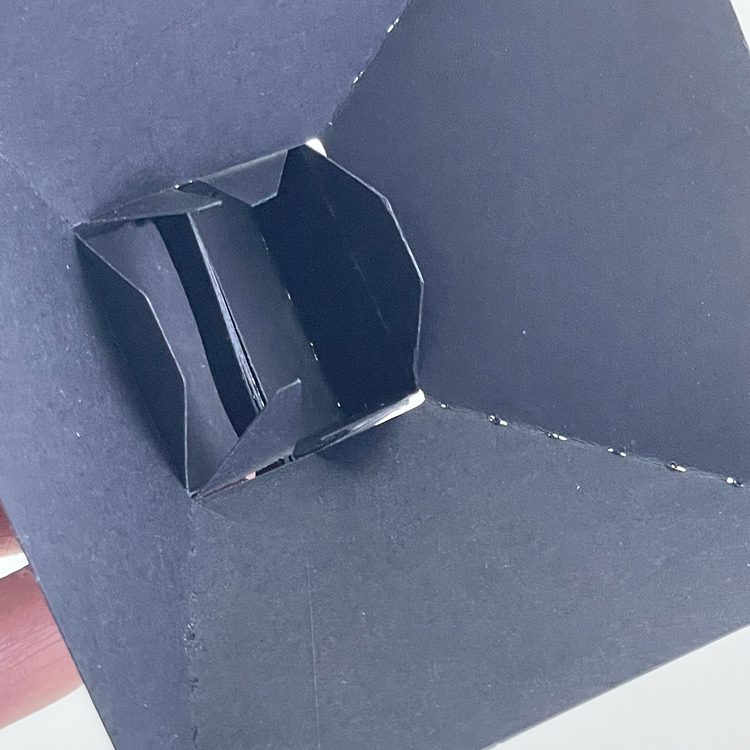
5. Insert the combined handle pieces into the domed top of the lantern, Secure by gluing the tabs of the handle to the inside sides of the dome piece.

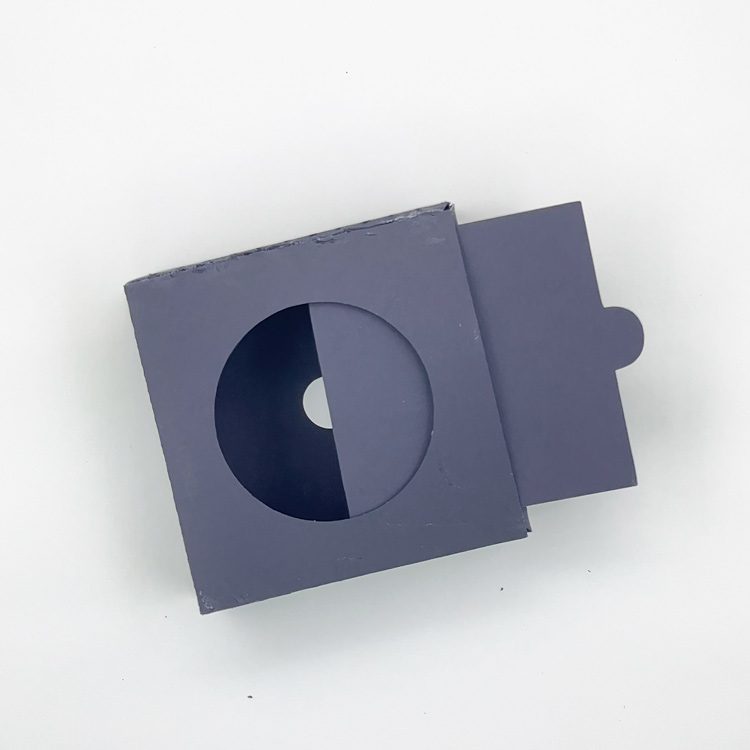
6. For the lantern base, glue 2 opposite sides of the panel with the large hole very close to the edge.  This will allow you to add the slider piece to close the hole.

7. To complete, stack the pieces and glue.  Start with the base, then add the decorative lantern piece, and finally the top with the handle.

8. Place an electric tea light beneath the lantern. And you are ready to display!

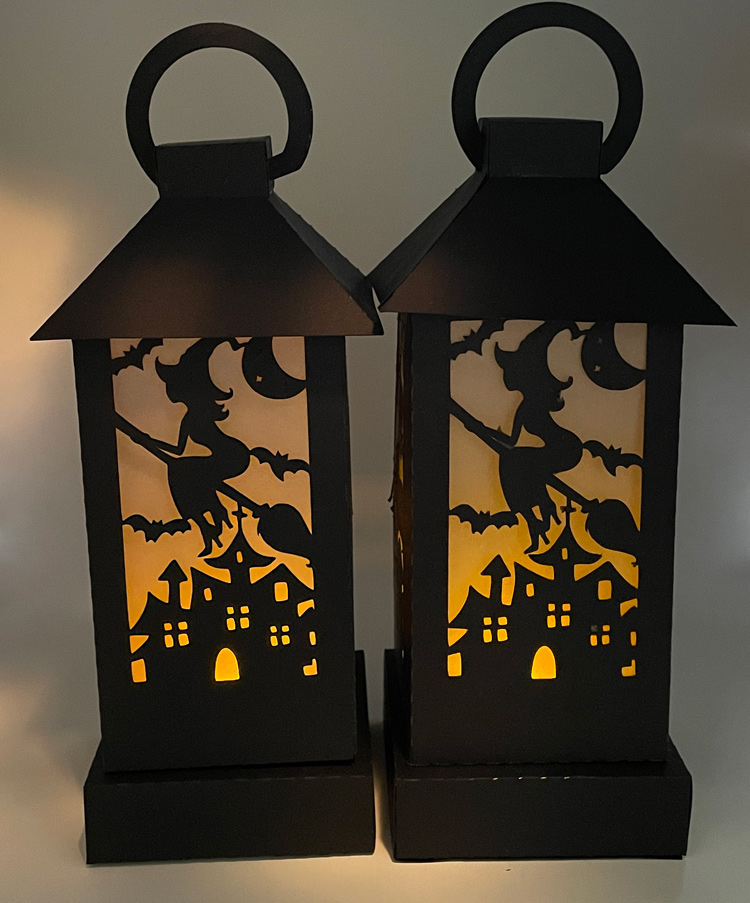
I made a second lantern and sized it just a little smaller, so that all the cuts could fit on three pieces of 8 1/2 x 11 paper. You can see both sizes above.  An electric tea light easily fits in both sizes.

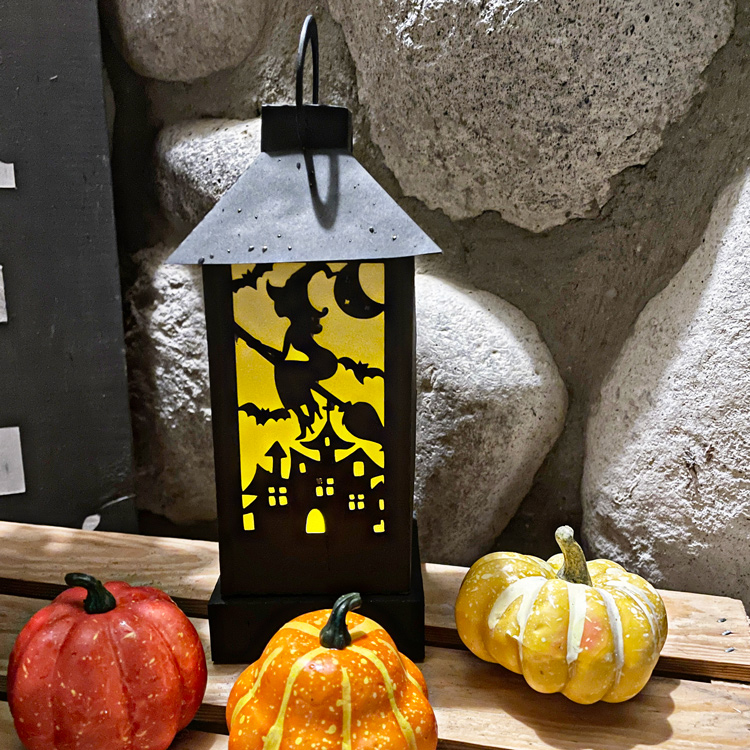
Check out all of the lanterns in the shop this week.  This post has photos and links to Lori’s SVG Shop and the Silhouette Store for each of the designs.  Have a great Halloween!

Ashley

3D Witch’s Brew Bottle Tutorial

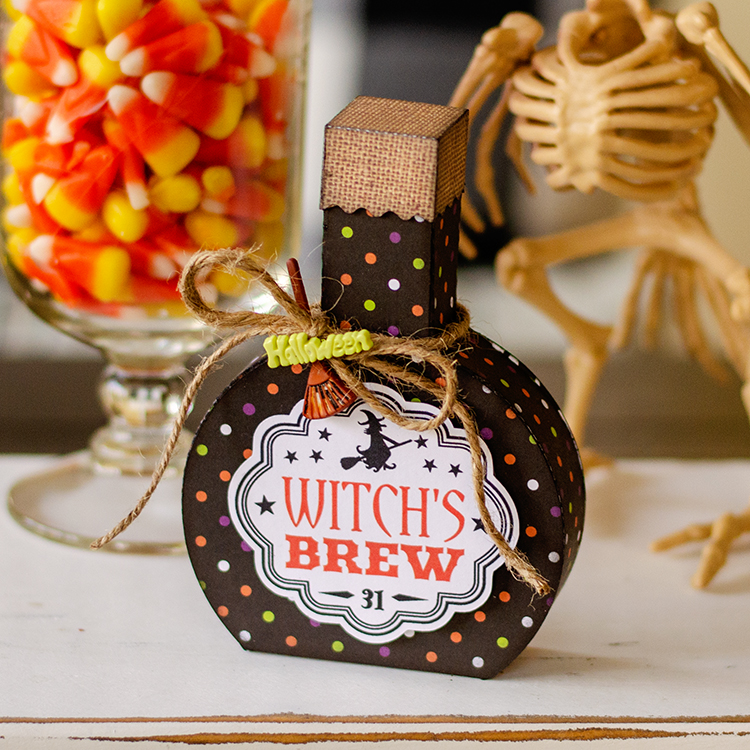
Hello everyone Brigit here! For today’s project, I’m sharing a tutorial on how I made this cute Halloween bottle which is the 3D Halloween Warlock Root Bottle, (SVG, Silhouette).

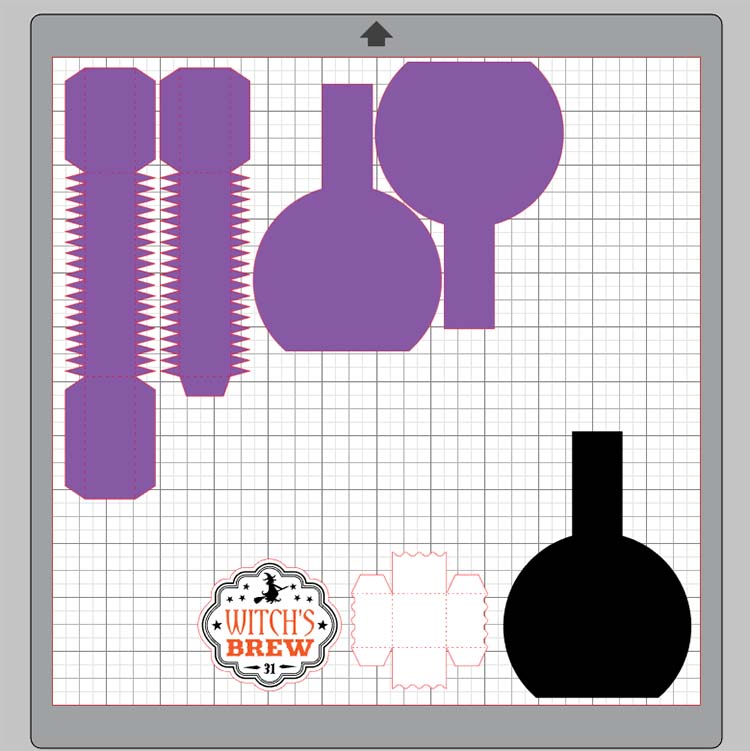
To make putting the bottle together much easier for myself I duplicated the front layer and made it .010 smaller, that is the black layer you see below. So my bottle front size width is 3.489 and I made the black piece 3.479.

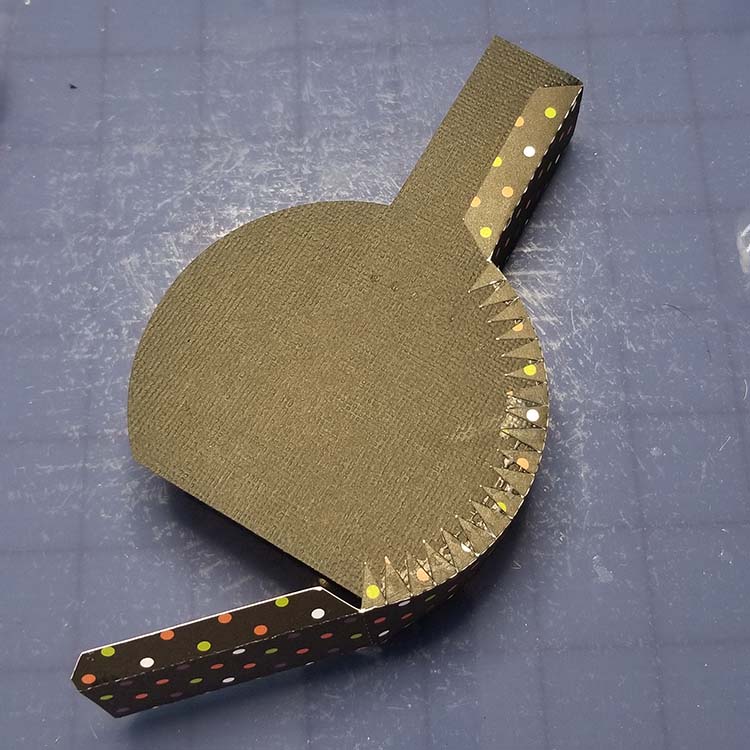
It’s easier to form the shape of the sides going around the outside of this extra piece.

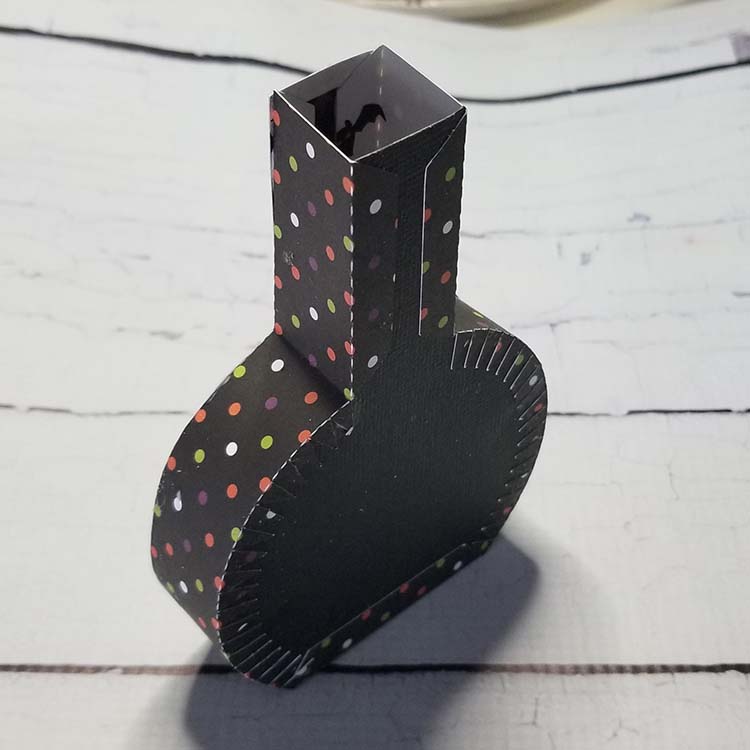
After forming the front with the extra piece I add the back gluing the bottom first and then the top neck sides one at a time. Then I glue the rounded sides one side at a time, it fits together perfectly this way.


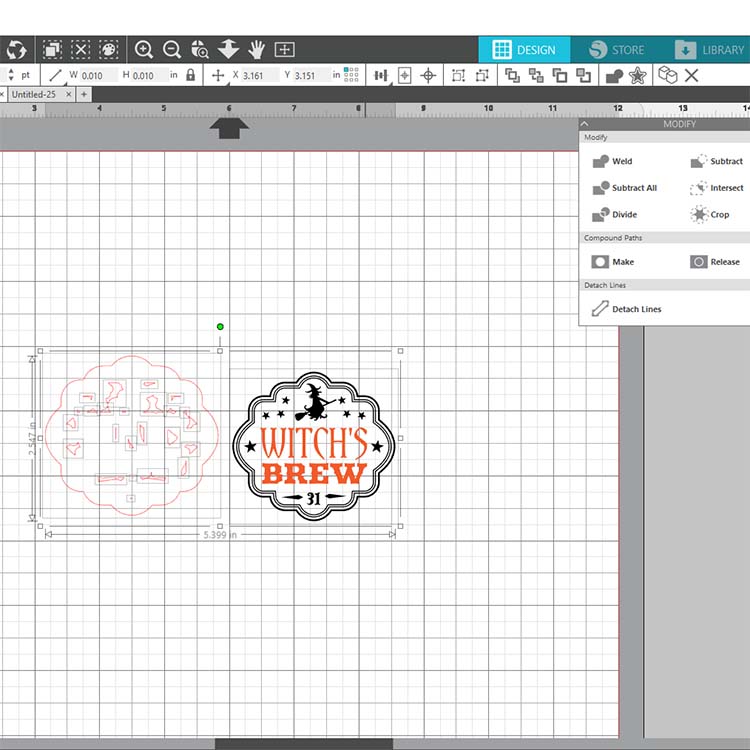
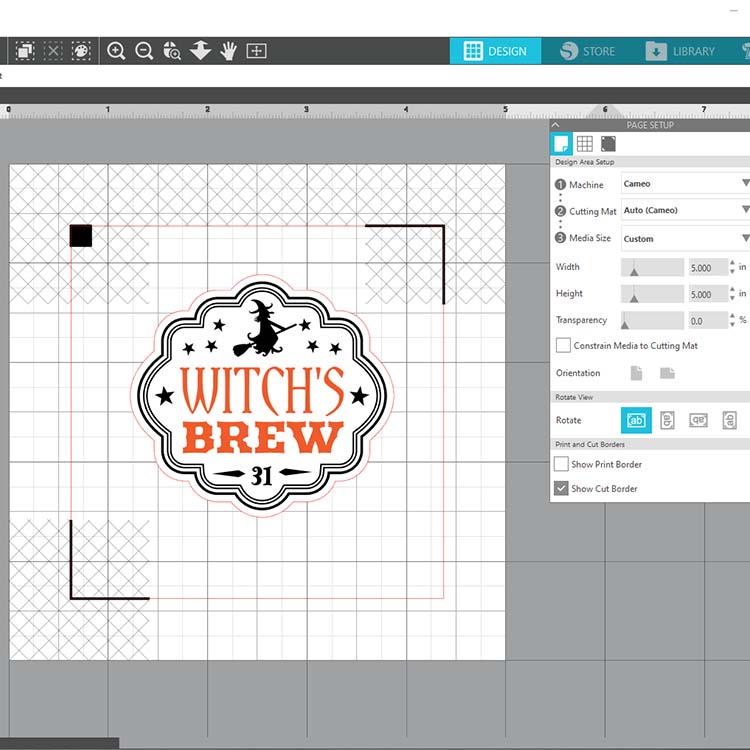
Instead of using the label that came with the file, I used the Witch’s Brew (SVG, Silhouette) and did a print and cut. I first made an offset and released the inside pieces and deleted them. I then centered and grouped the label together.

I turned on the registration marks and resized the media size to 5″ x 5″ under the page setup menu and then printed. Don’t forget to select cut edge when sending it to cut.

Hope you enjoyed this project and this tutorial helped!

Thanks for stopping by and have a wonderful day!

Blog – Pinterest – Instagram

New Window Flip Cards!

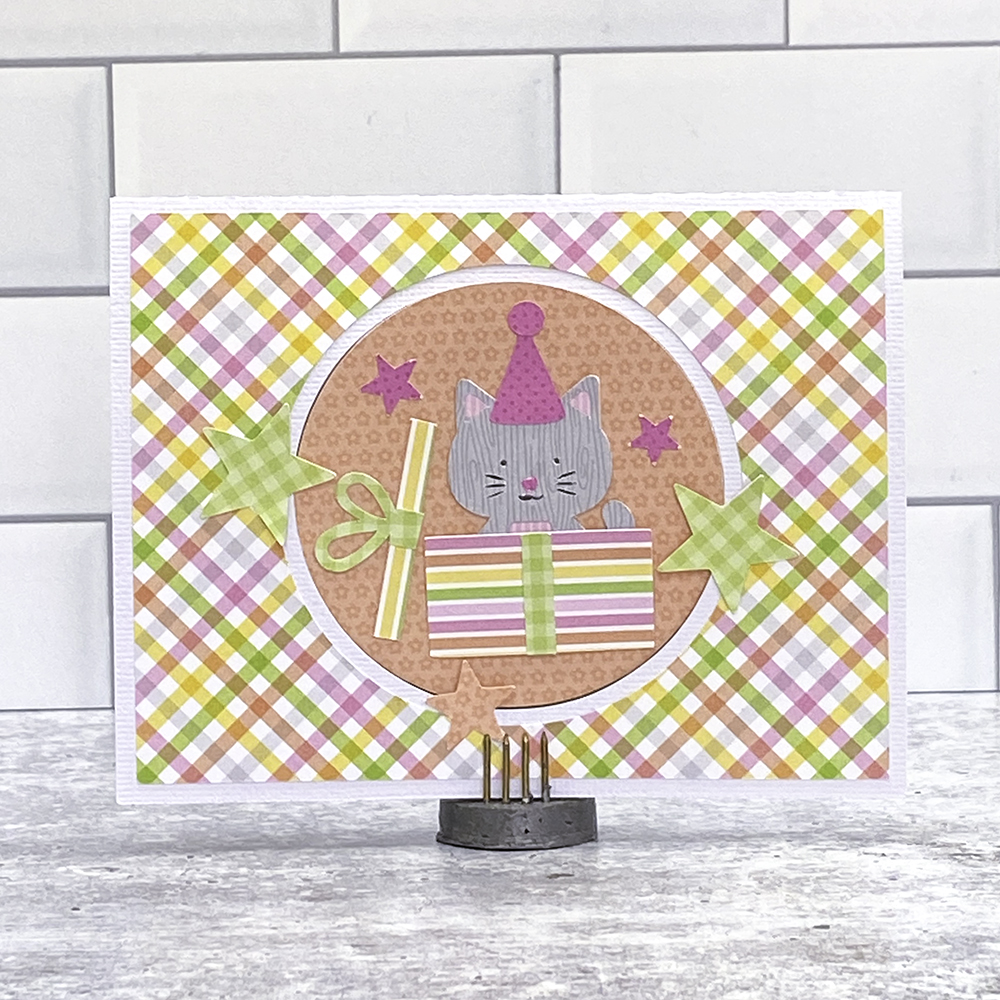
Hi Everyone!  I’m excited to bring you a new card that will be added to the shop this week!  It’s called a Window Flip Card and I made the new Window Flip Card Birthday Cat (SVG, Silhouette – coming this week).  Take a peek…  Here is the front of the card…

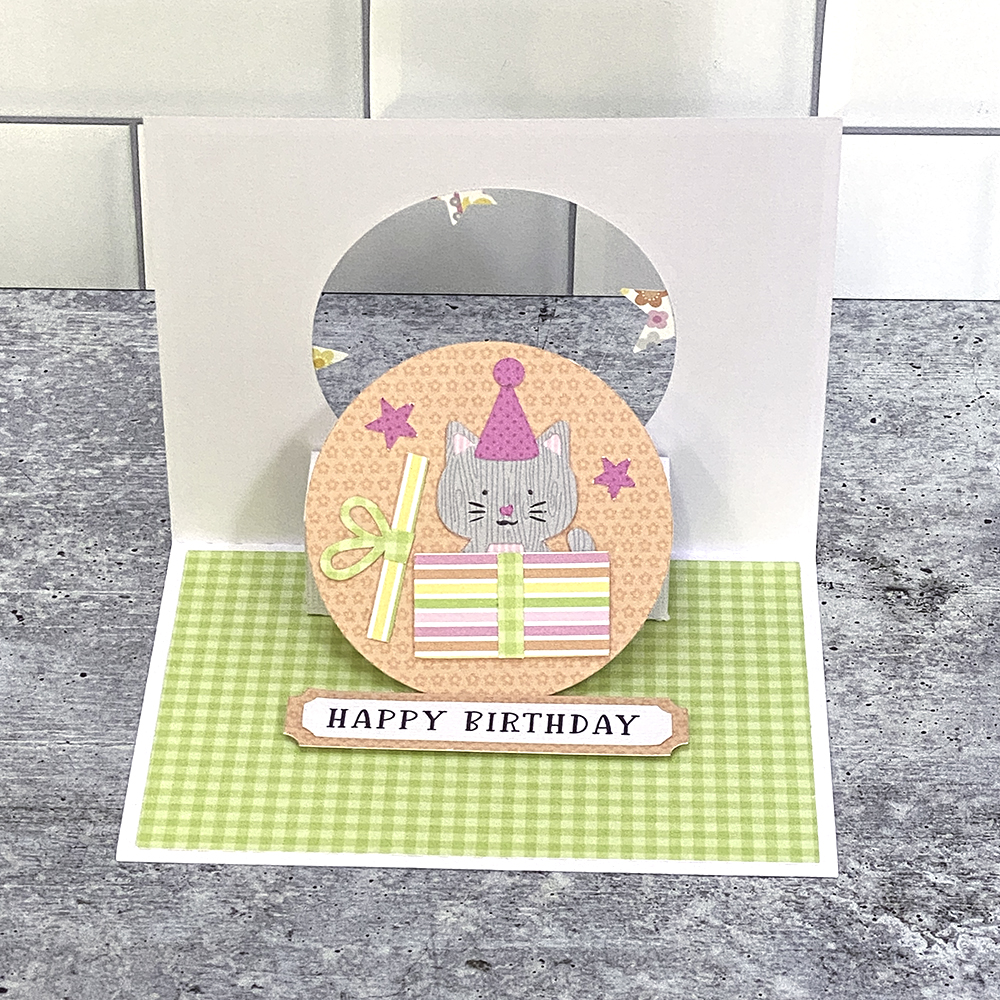
And when you open the card, ta-da! you get a cute little flip up!

These cards are pretty easy to assembly, I’ve put together a quick tutorial below…


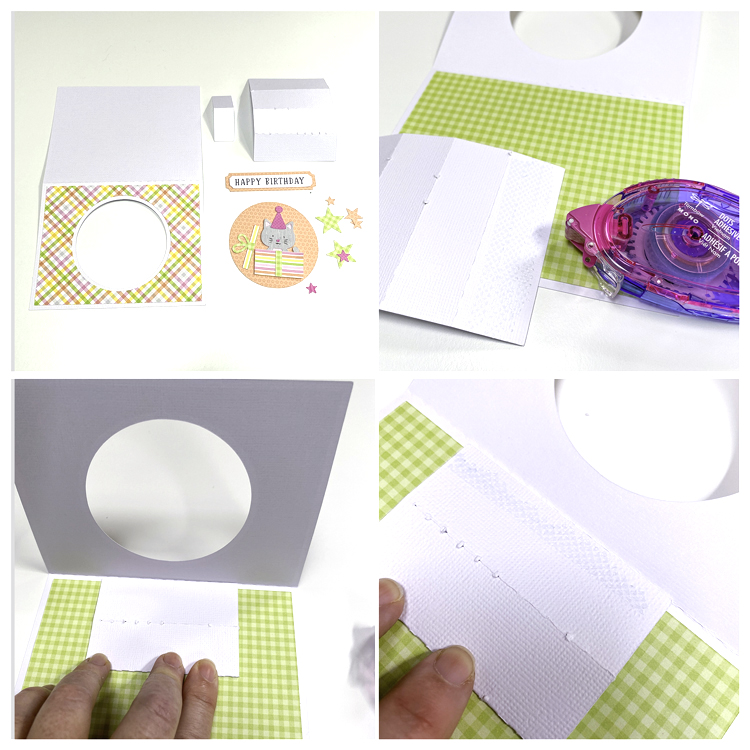
In the upper left photo, you will see all the pieces of the card.  I pre-assembled the kitty and present, print and cut the sentiment and added the front cover panel and the inside panel.  If you ever need help with specific piece placement, you can always reload the file into your cutting software, Lori groups the pieces as they go in the final project.

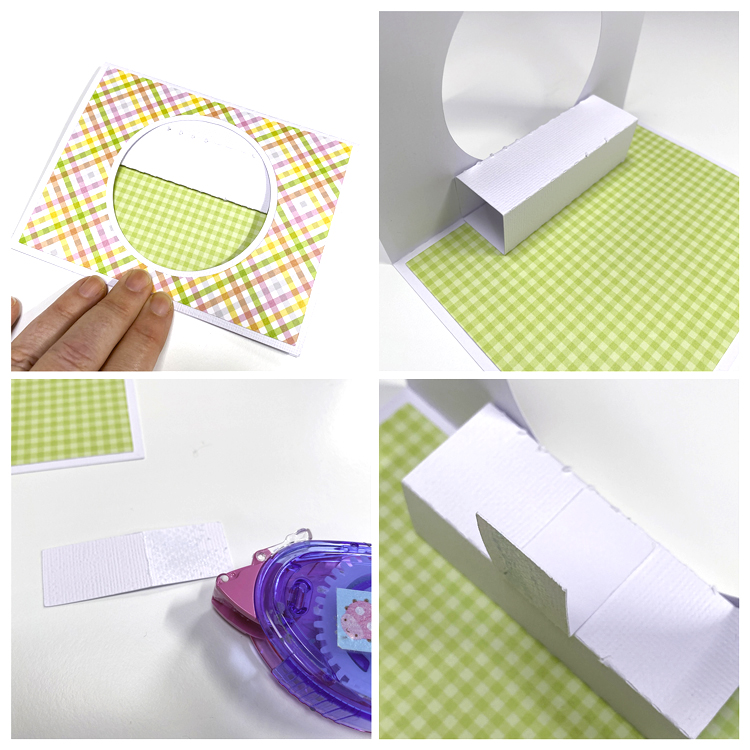
Start with the piece with the 3 score lines.  Fold all the score lines in the same direction.  Cover one end section in adhesive.  Fold the whole piece in half… adhesive on the outside.  Attach this piece to the bottom half of the open card base.  It should be centered, and the piece with the adhesive should be facing down and closest to the fold in the card (see bottom left photo).  Once this is in place, add one strip of adhesive on the section closest to the card fold as shown bottom right photo.

Fold the card closed and press so that the top of the card is firmly attached to the folded section.  Now, when you open the card, you will have a squared tube inside the card.  Next, fold the small tab along the score line.  Cover the smaller side of the tab with adhesive (bottom left).  Adhere this small piece to the top of the squared tube, centering it.  You want the remaining tab to be sticking up furthest away from the fold. (bottom right)

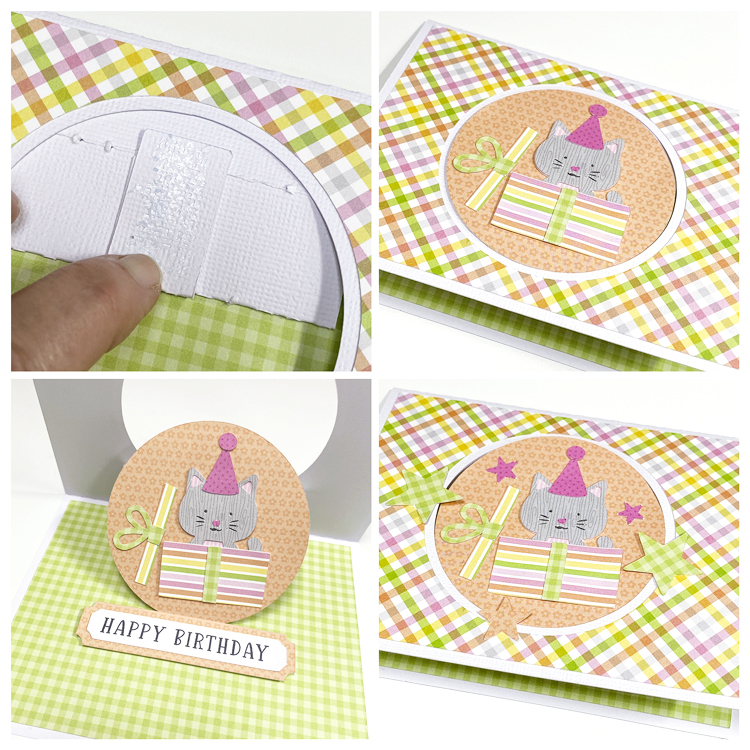
Now when you close the card, fold the tab up and add adhesive (top right)  With the card still closed, add the circle with the cat, making sure it is centered and press down to adhere it to the tab.  Now when you open the card, the kitty circle will pop into the card.  I then added the sentiment strip so that it would prop up the kitty circle when the card is open.  I used foam tape to give it a little height.  Lastly close the card and add the stars.  Make sure there is no adhesive on the edges that overlap the circle.

There are lots MORE window flip cards coming to the shop later today/tomorrow, so be sure to check them all out!  That’s it for me today, thanks for stopping by!

BLOG | INSTAGRAM