Vinyl Application Tutorial on a Travel Mug

Happy Thursday Everyone:

Anita here with a tutorial on the application of vinyl to a travel mug.  I wanted to make this for one of my friends for Valentine’s Day as one of her true loves is coffee.  I used Lori’s SVG called I Only Need Coffee on Days with “Y” (SVGSilhouette).  I used some Cricut silver matte vinyl for my project.  I selected matte vinyl for my cutting surface.  You do not need to mirror the design when using regular vinyl on a project.

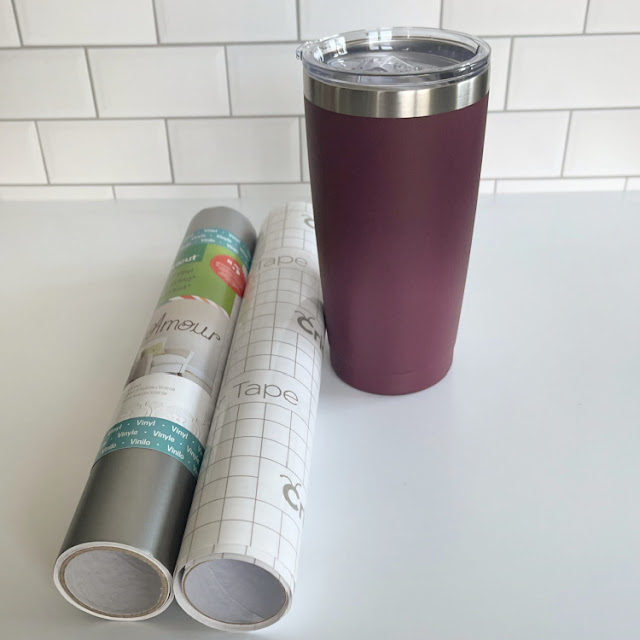
Here are the materials that I used for my project.  You will want to pick up some transfer tape if you don’t have any as it makes these vinyl projects so much easier.

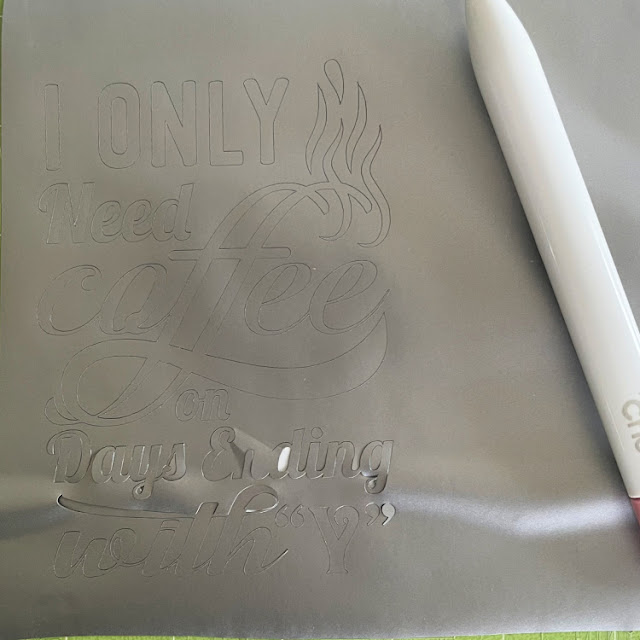
Here is the design cut out and that is my weeding tool from Cricut which is next to the design.  It has a hook on the end which makes fishing out those tiny little pieces so easy.  You can use a pin and I have used a seam ripper in the past too.  You are going to want to remove all of the pieces of design that you don’t need to be there.  I started in one corner and slowly peeled the excess away from my design.  If there are fine elements to your design you might need to hold onto the design with one hand as you pull the excess away so that your design doesn’t tear.

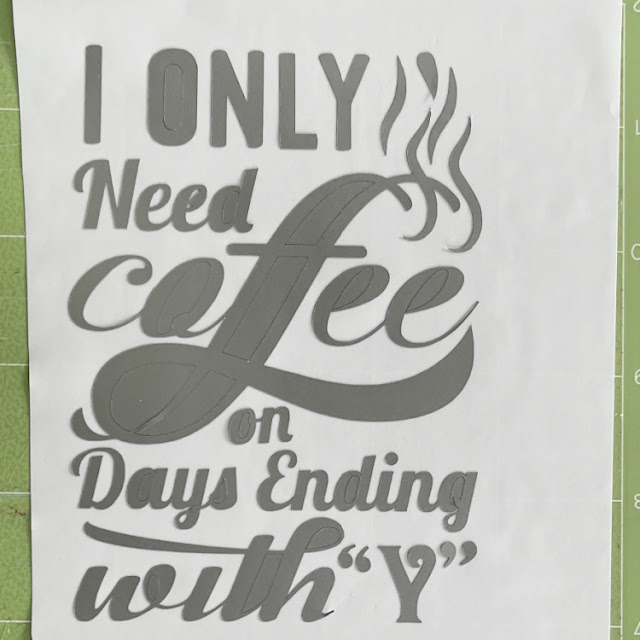
Here is what my design looked like after I peeled away all of the excess piece which came off in one piece,  Next, I needed to go in and grab those extra little bits to help define my design more.  I used my weeding tool for this.  You can use a pin as well.

.

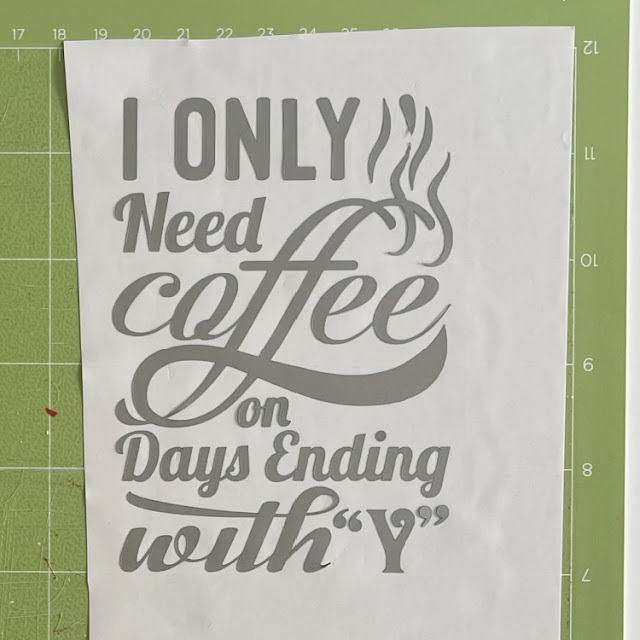
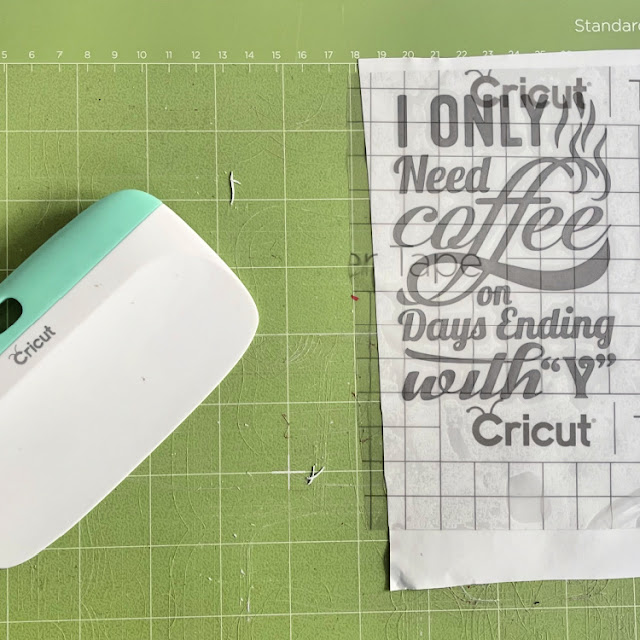
My design is now all weeded and ready for the transfer tape to be applied directly on top of the design.  I cut a piece of transfer tape a little larger by 1/2″ or so around your design.  Then I peeled off the white piece on the transfer paper leaving the sticky side exposed and then stuck that down on top of my design.  I leave my design on my mat through these steps as it is easier to work with.  At this point, you need to burnish the transfer tape onto your design.  Essentially you want the tape to pick up just the vinyl from the backing paper so that you can adhere it directly to your mug and see exactly where it will go.  I used my Cricut scraper that I bought but you can certainly use a popsicle stick for this step.  Check to see if you successfully got the vinyl to adhere to the transfer tape.  If not, continue to burnish until it all comes off the backing paper.

This photo shows the transfer tape on and the tool that I used to burnish the vinyl onto the transfer tape. And my well-loved mat, lol.

Lastly, I placed my transfer tape onto the mug.  I started carefully at one edge laying it on and let it gently fall where it wanted to given that the cup is rounded.  I then used my fingers to smooth out the transfer tape.  Once I was happy with the placement, it was time to again burnish the design to get it to adhere to the cup.  It came out great and I’m sure that she will love it.

Thanks for looking and have a great day.

Hugs,

Anita


A2 Card Envelope Box Tutorial

Hello everyone! Marcia here today. I have an A2 card storage box tutorial to share with you today.  This A2 Card Envelope Box (SVGSilhouette) cut file can be found in Lori’s store along with many other varieties of boxes. I used some pretty pattern papers from Lori’s new Day In The Life collection as well as coordinating cardstock from my stash.


Let me show you how easy this box is to put together.

1. Choose your papers and cut out two box bottom pieces and two box top pieces. The cut file contains only one of each so be sure to cut everything twice. Adhere the panels to the cardstock base. Using cardstock for the base pieces will ensure a sturdy box.


2.  Working with the bottom of the box first, adhere the two sides of the box together.


3.  Turn the box upside-down and adhere the tabs to the box bottom. Then fold the last flap over the bottom and glue it down.


4.  Now let’s work on the box top. Adhere the front to the back by gluing the rectangular piece with pattern paper over the same size rectangular piece with no pattern paper.  Fold the sides in making sure the side with pattern paper is on the outside, tucking the tabs in. Adhere the sides and then the tabs.

5.  Place the last rectangular pattern paper piece on the inside of the lid.

6.  There are stamp cut file pieces that you can use to adorn your box making it look like a stamped envelope. I also placed a journal card on the front so I can use that space when gifting my box full of cards to someone. Or if it is just too pretty to give away, to write what kind of cards I have stored inside.

These boxes would be great for storing your Valentines too.
Thanks so much for stopping by. Be sure to check out Lori’s Store for more amazing cut files.

~
Marcia

Altering the Size of the Candy Box File

Hello Everyone:
Anita here with a quick tutorial on taking one of Lori’s Candy Box SVGs and resizing them to fit the candy bar size that I need.  I used Candy Box 6 Candies (SVGSilhouette).  I used Lori’s two Echo Park Paper collections including Our Little Princess and All About a Girl.
I wanted to make my own chocolate bars for Valentine’s Day given that there are food allergies in our family and wanted a pretty box to put them in.  I picked this box as it seemed like it would fit the candy bar mold that I have.  This file comes in two parts, Part 2 is for the box and part 1 is for the scalloped inserts.  I used Part 2.  When I imported my file into Silhouette Studio I used the grid lines on my mat on the screen to determine the size of the unaltered file.  I knew what size I needed to fit my candy bar and with the file still grouped together I dragged the corner until the dimensions were what I needed them to be.  Be sure that you don’t ungroup them before doing the resizing.  As you can see from the photo above I did a pretty good job of getting my box to fit my candy bar.

These are the cut file pieces for my box.  I opted to use the decorate overlay around the inner edge but you wouldn’t have to if you were short on time.  I often put an acrylic sheet over the opening when making boxes but decided that the chocolate bar looked better with the hole open.

These are the box pieces assembled and ready for my chocolate bar. That’s it for me.  Be sure to check out all of Lori’s Valentine’s Day files.

Hugs,

Anita

Mini Vertical Mailbox Tutorial with Brandie

Hi there! Today I am sharing another cute Valentine’s Day project. This little mailbox is a perfect size for a tiered tray or a small space that needs a little holiday decor. It can also be filled with treats to give to a special someone.

The file is the Mini Vertical Mailbox (SVGSilhouette). I cut everything out of 80lb cardstock. All of the score lines are mountain folds except for the front door.

I started with the bottom and glued the tabs to the longest piece while lining the bottom edge up with the score line on the tab. I then glued the sides of the mailbox to the bottom, again using the score lines and edge of the tab to line everything up.
This part can be a little tricky but go slow and really secure the sides before moving to the arches of the mailbox. I applied the glue to the front straight sides first and made sure they were secure.
As I moved along to the arches, I applied glue to a few of the small tabs at a time and made sure they were dry before moving around the arch. I glued each side separately. Then when the arches were dry, I applied glue to the three remaining tabs, lined them up then flipped the mailbox onto its back, and pressed the tabs down from the inside through the front door.
I then glued the pattern papers on the sides and front door and assembled the little envelope. I then glued the red trim strips of paper to the edges of the mailbox.  I glued the largest heart to the front door and added a floral sticker. I also glued the little envelope to the front of the mailbox.
Now, this little mailbox is ready to be displayed with my other holiday decor. Thanks for stopping by today friends!
Brandie

Valentine Sticker Tutorial for Cricut Design Space

Today I’m sharing a tutorial for stickers in Cricut Design Space.  Lori has many sticker files in her shop.  I’m showcasing the Valentine Cute Stickers (SVGSilhouette).

Valentine Cute Stickers

To begin, download and upzip your sticker file to your computer.

Open Design Space.

Click on upload on the Canvas screen.

Upload the file under the Image tab.

Then open the file onto your canvas.

The file comes in at this size.  Notice the 7.07″ x 9.94″ size.


Make sure your file is selected and select Flatten.


At this point, you will notice a warning exclamation mark.


This is because of the size of the project.

Select the stickers and resize them until it is smaller than 6.75″ x 9.25″.

This is what the stickers look like on the make screen.  Select Continue.

I like to select printer settings on the Use System Dialogue screen.  Select that option. Select print settings and paper settings for your printer.  And print.

Now it’s time to cut.  I’m using the Cricut Explore 2.  If you have Cricut Sticker paper, making sure to select Custom on the dial and select Sticker Paper for the material.

I have some Avery Project Sticker paper.  It isn’t as thick as the Cricut Sticker paper.  My first sheet of stickers cut all the way through the paper with the Sticker Paper material selection.  So I selected Iron on to get the kiss cut for my second sheet.

This is the kiss cut.

These are my first stickers.

If you want smaller stickers, resize your project to the desired size.

Here I duplicated the sticker sheet and resized it smaller.  Select both sheets and select attach.  This will cut the stickers on one page rather than separating the 2 smaller sheets on 2 pages.

Now you are ready to cut all sorts of stickers.  Pick some up during the sale this week.

Ashley