Hey guys, Traci here and today I have a cute folio style mini album to share with you! I designed this with a school theme that’s perfect for some of your child’s “big memories”. I used one of Lori’s creative cutting files called Multi Flap Mini Album (SVG, Silhouette) and had so much fun putting this little 5.5″ x 4″ scrapbook together!
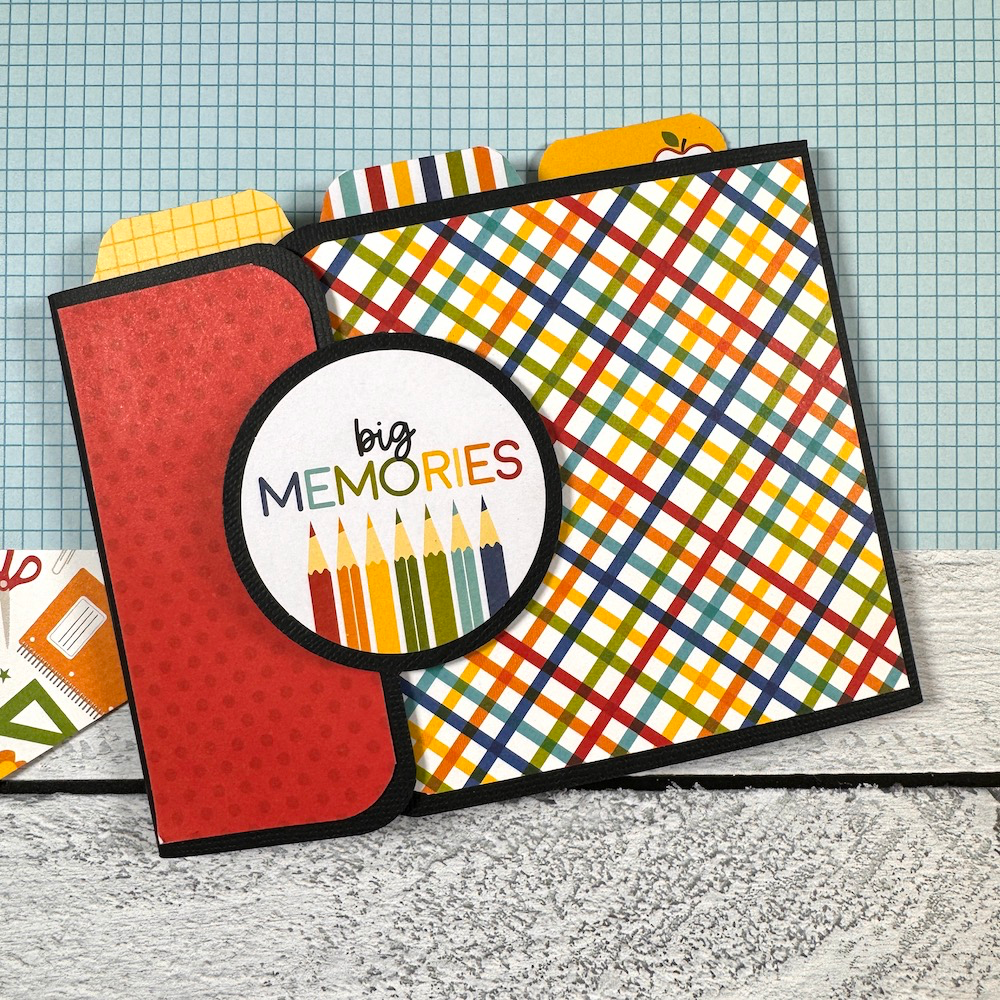
First, let’s take a look inside then I’ll explain exactly how I made it. I decorated this little scrapbook with paper and embellishments from the Bella Blvd, School is Cool Collection.
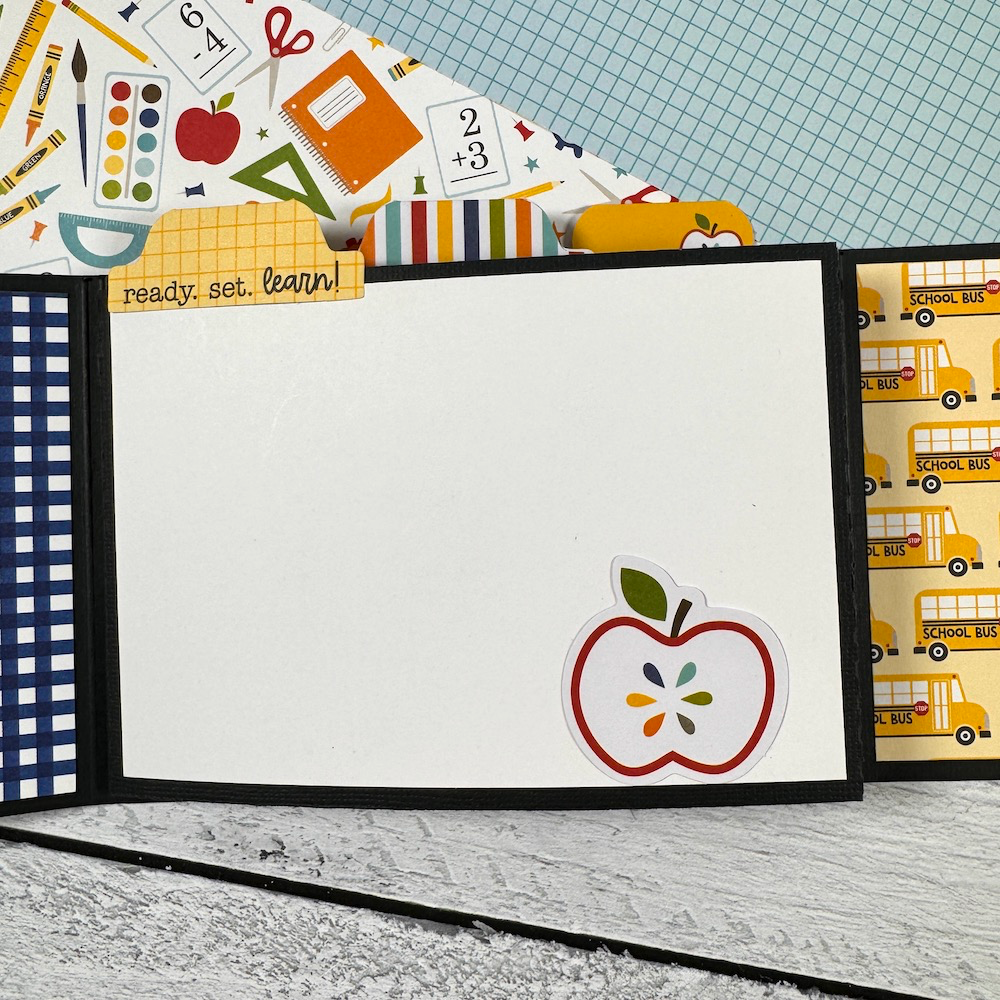
The album has 2 interactive pages with 4 flaps and one envelope style fold-out in the center. When you open it, the page above is the first one you see. It has a great spot for a photo of your child’s first day of school or a fun picture with friends. Flip that over …
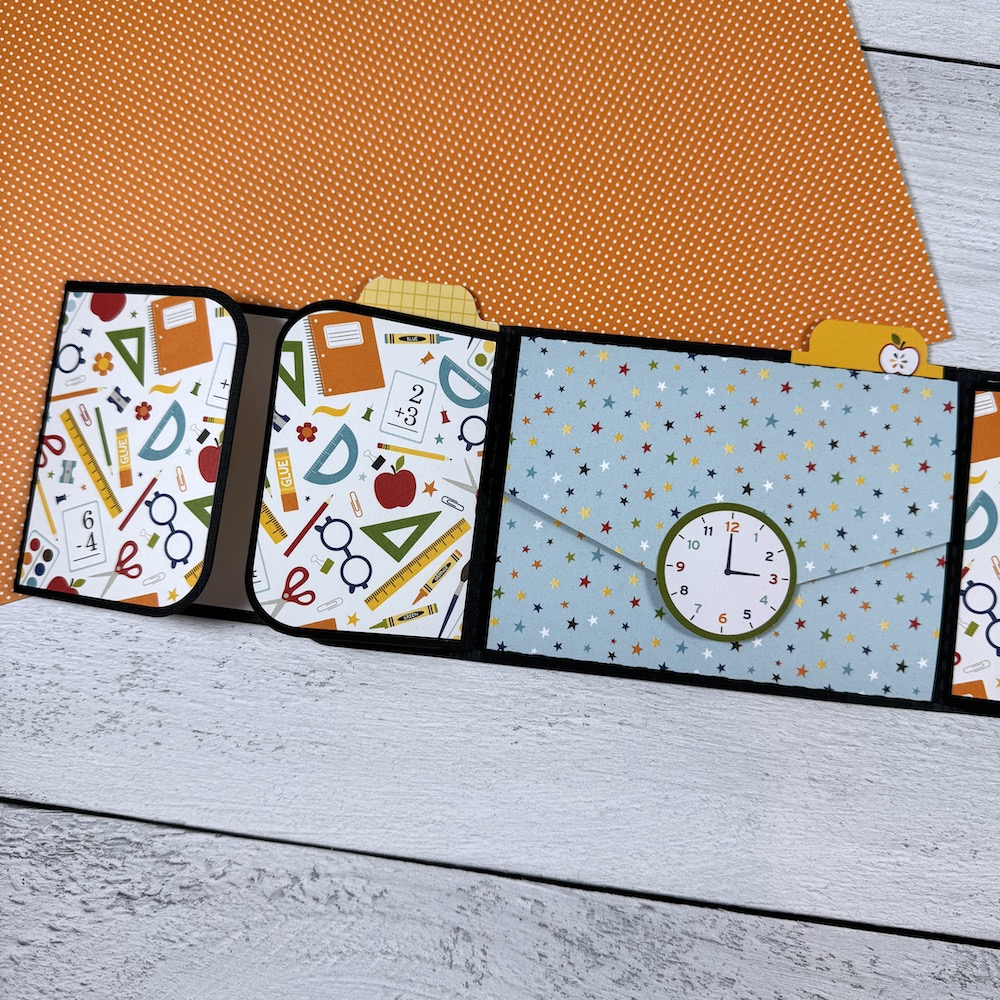
… and you’ll see this! On the left is a gate-fold style page with 2 flaps and space inside for more photos. In the center is an envelope style fold-out. Use the clock embellishment to lift up, the bottom section folds down, and inside …
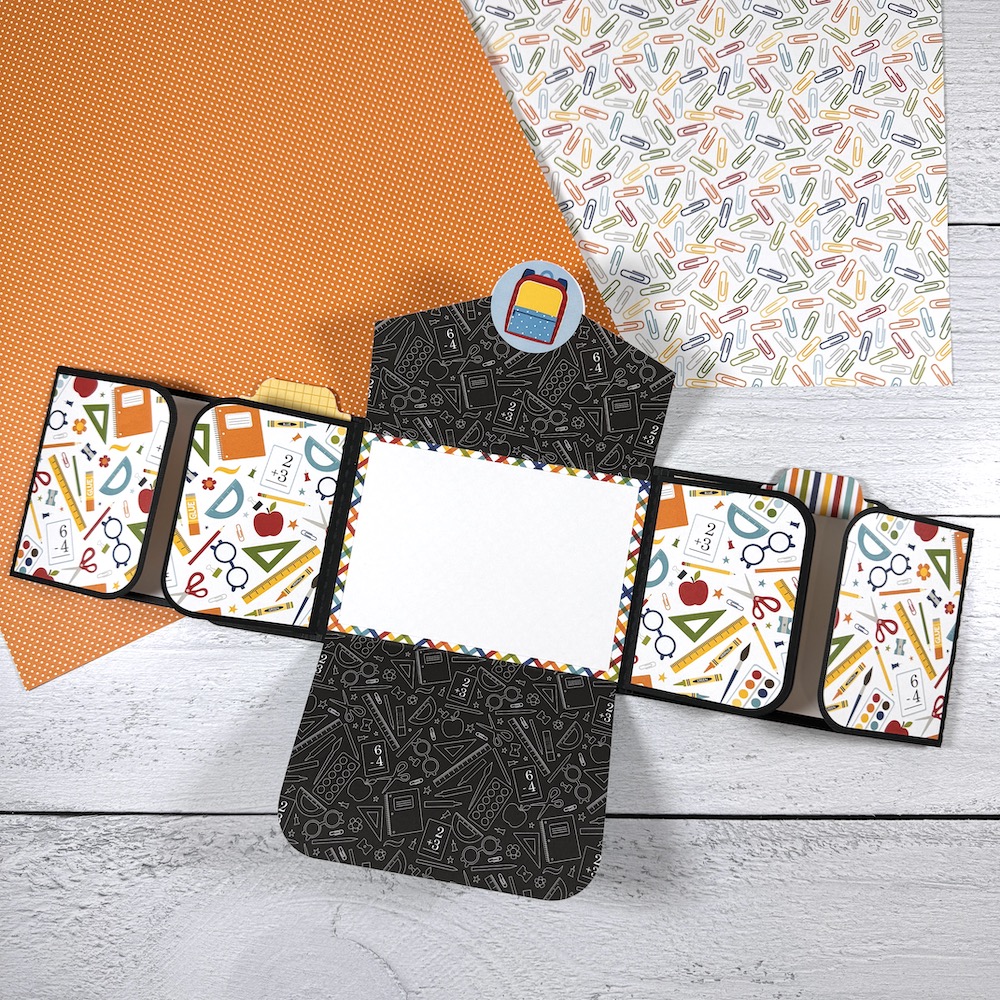
… I added a plaid paper and white photo mat. I covered the flaps in a black patterned paper filled with more school supplies.
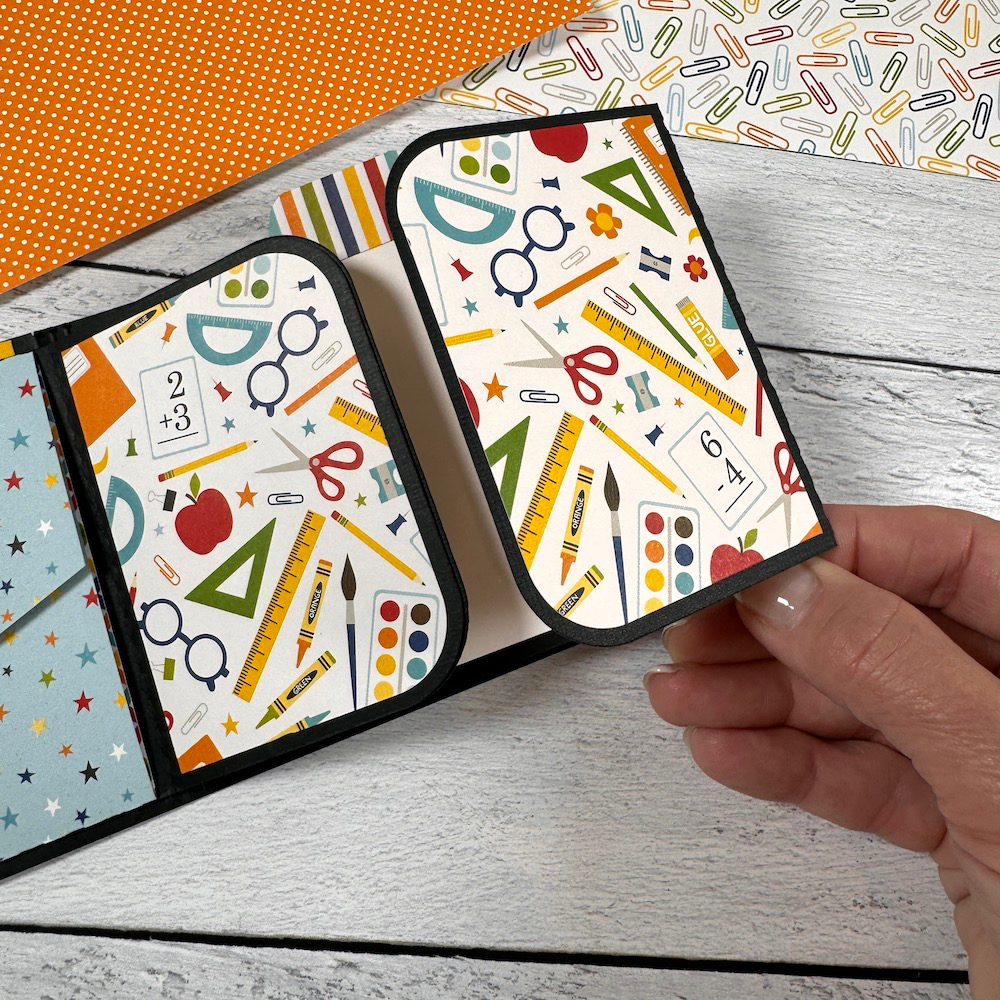
On the right, there’s a second gate-fold page. You could add photos to all the flaps (front and back), cover them in a cute pattern paper, or … both!
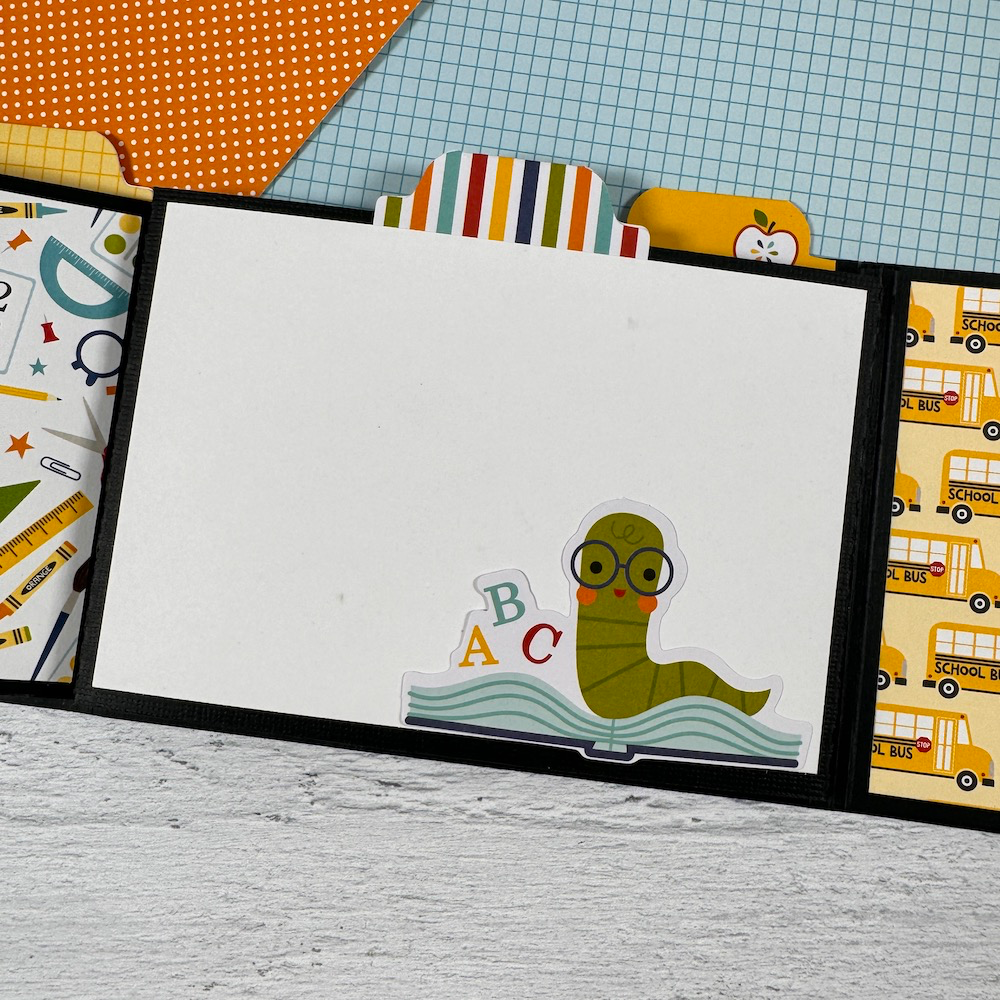
On the backside of that gate-fold page, there’s another page with a photo mat and a cute bookworm sticker.
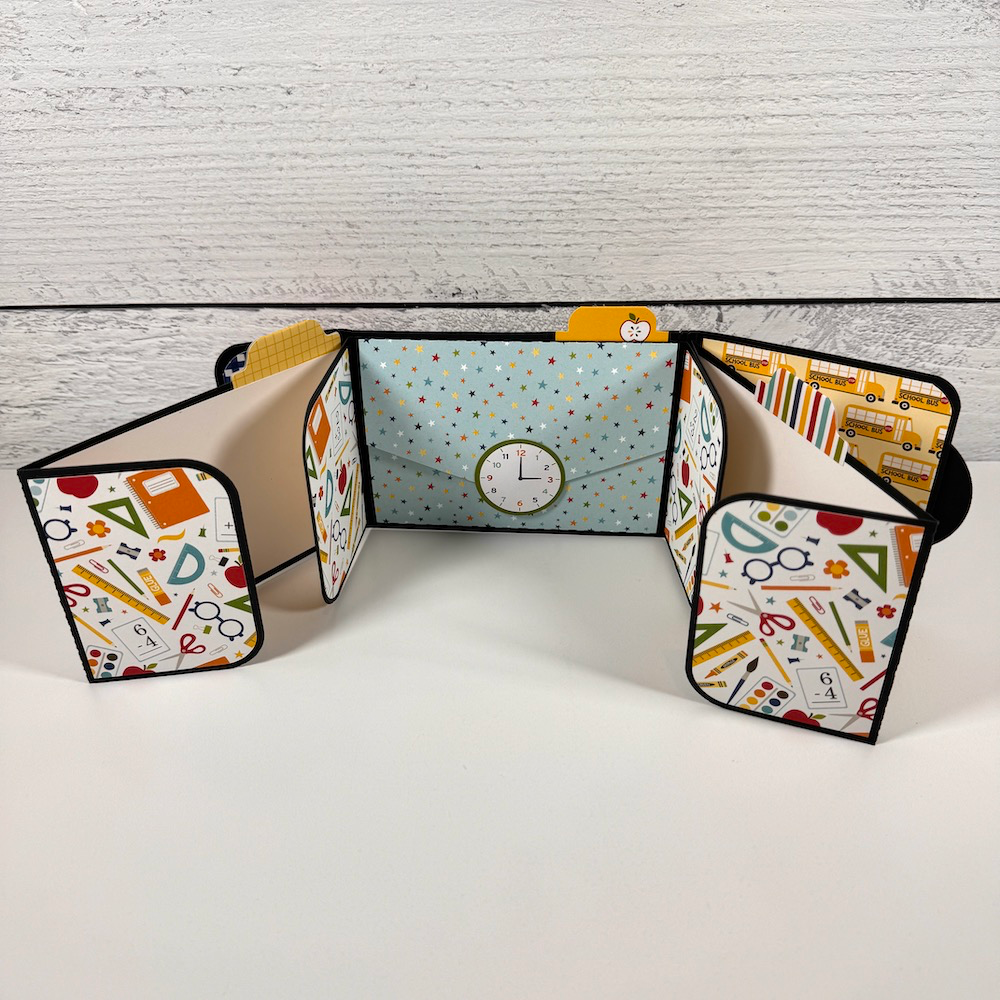
Here’s a broader look at the folio. Check out all those fun spaces for photos of your child’s school days! If you add pictures to all of the flaps, this mini album will hold 15 photos. I decided to add cute papers to some of mine so, this one holds 9-11 photos.
Now for the tutorial …
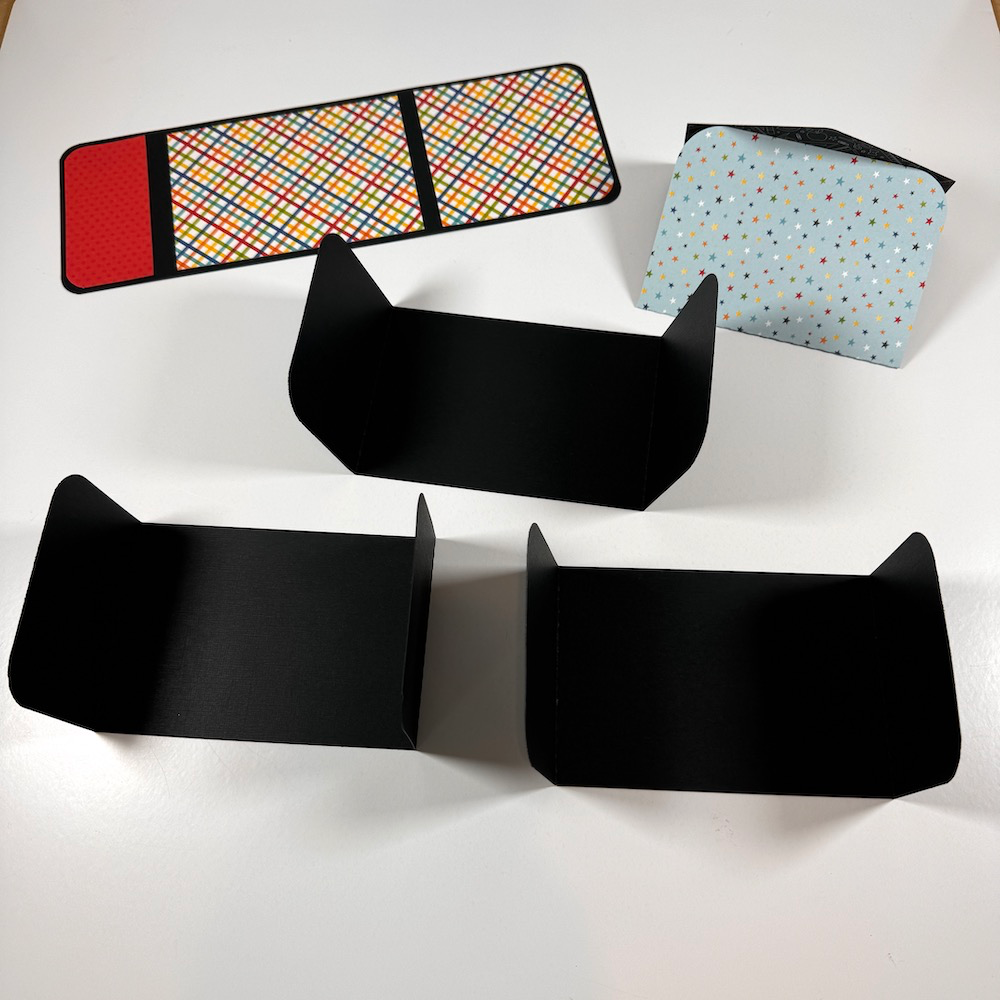
- I cut out all of my pieces using black card stock and patterned papers.
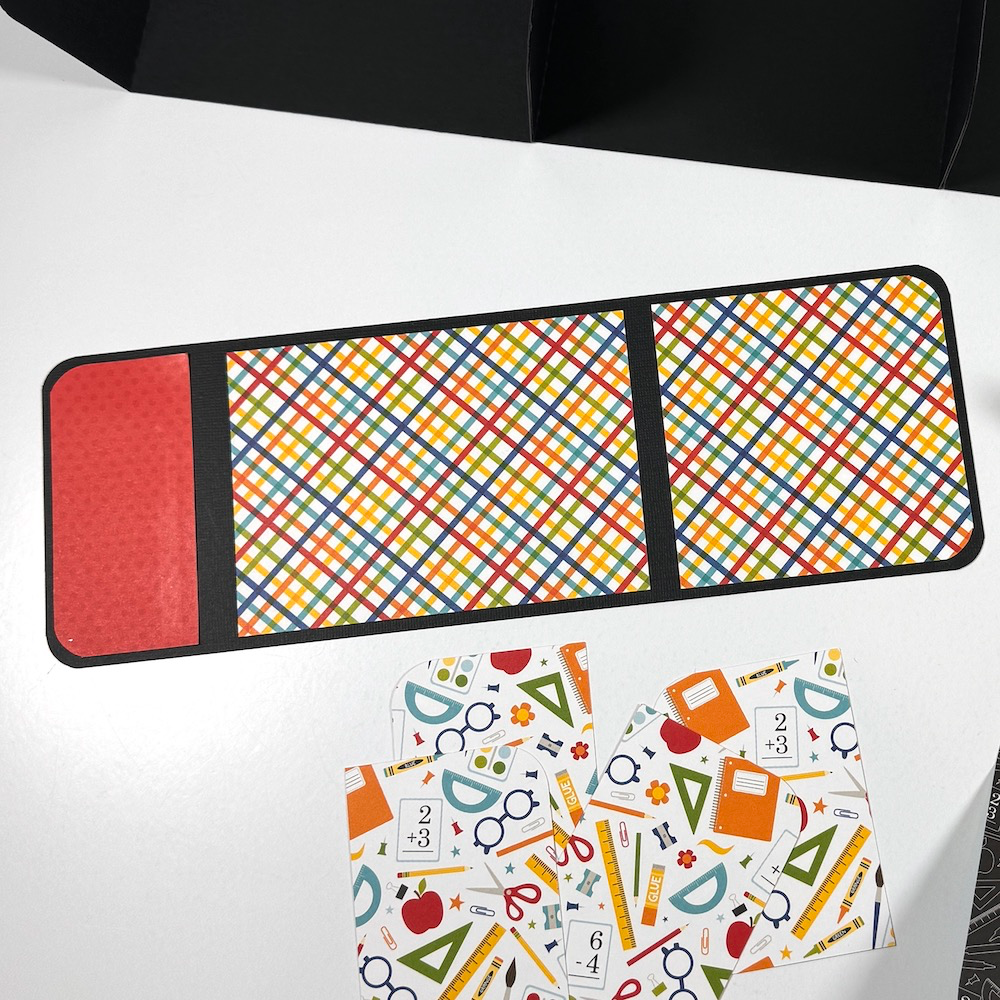
2. There is one base piece that folds around the flap pages. I folded this piece on the score lines and added the red and plaid prints.
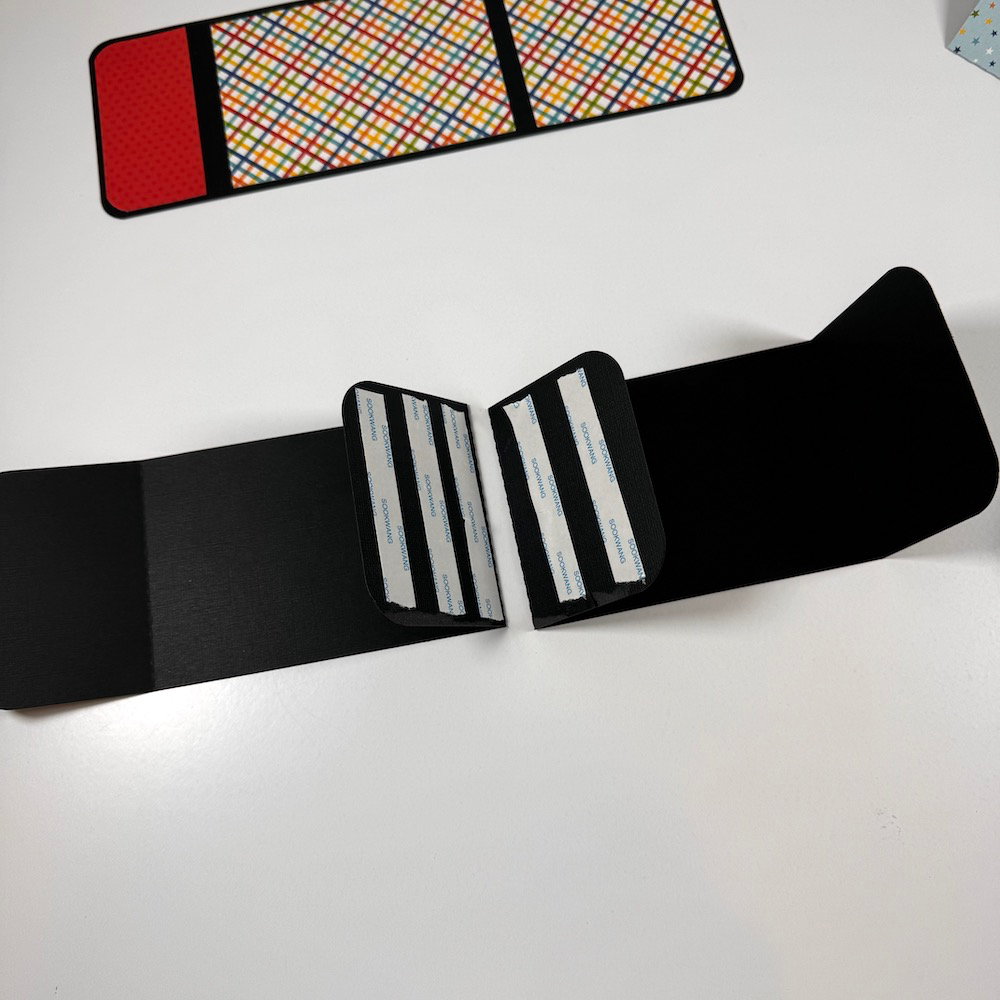
3. There are 3 flap pages that are all the same size and have 2 score lines on each. Fold the score lines on all three pieces, then adhere the flaps back-to-back as shown in the photo above. This becomes a tri-fold with two flaps that open to the right and left, and each flap has two additional flaps.
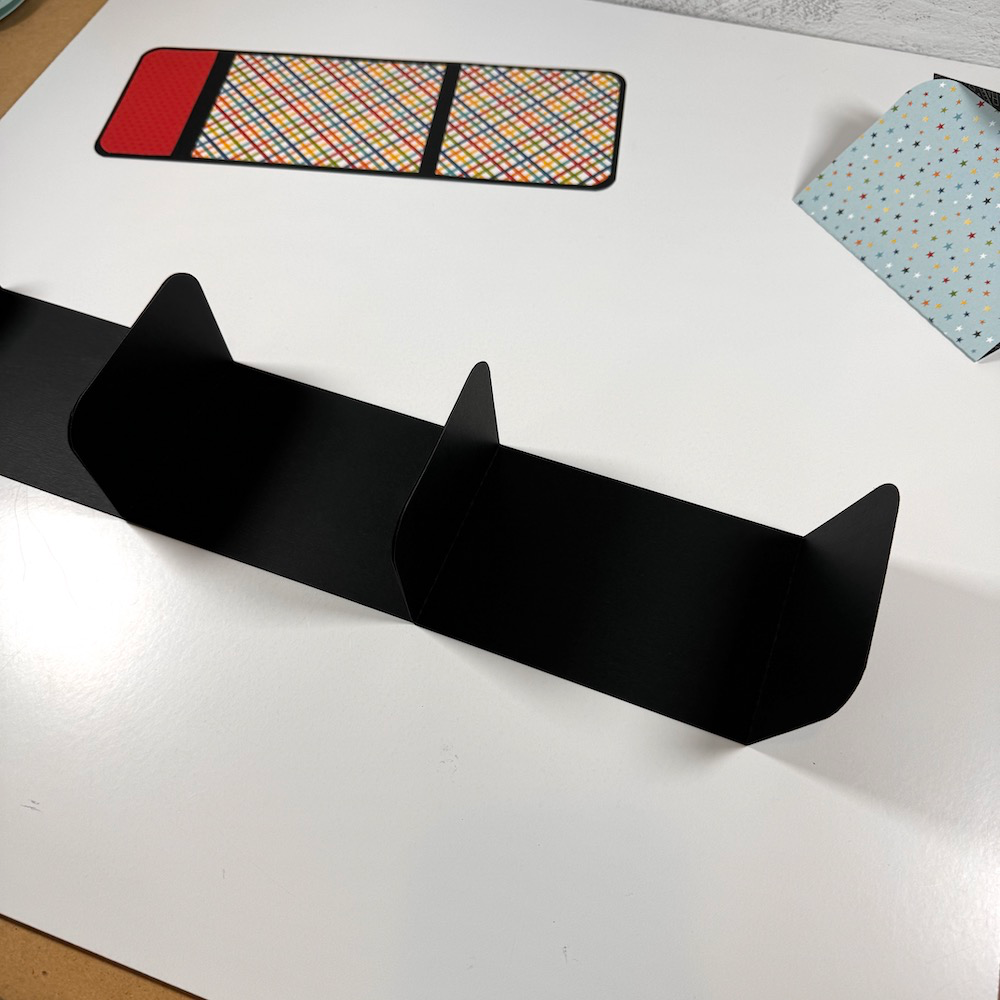
- The envelope style fold-out gets adhered in the center of this piece, and then the entire piece gets adhered to the base. It will help to fold up all of the flaps into a 5.25” x 4” bundle and adhere the entire thing between the score lines on the base cover.
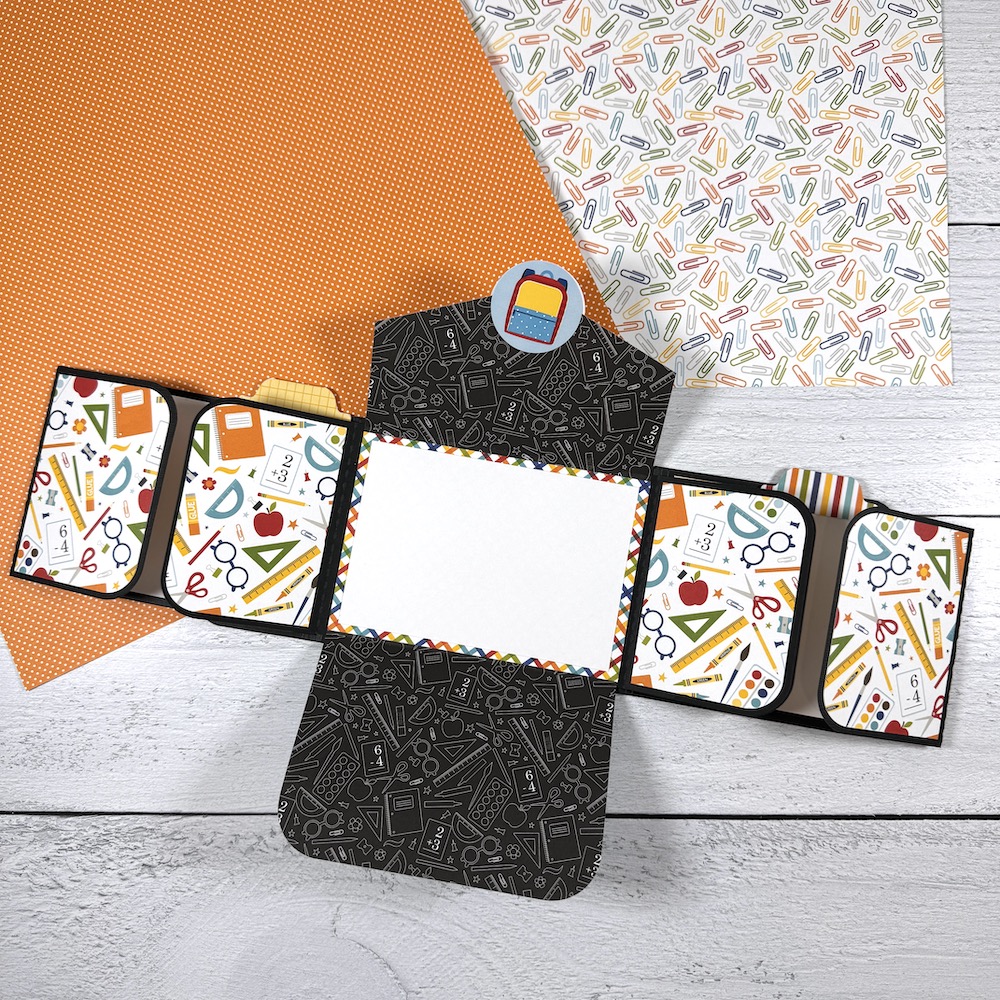
5. Add photo mats and embellishments as desired.
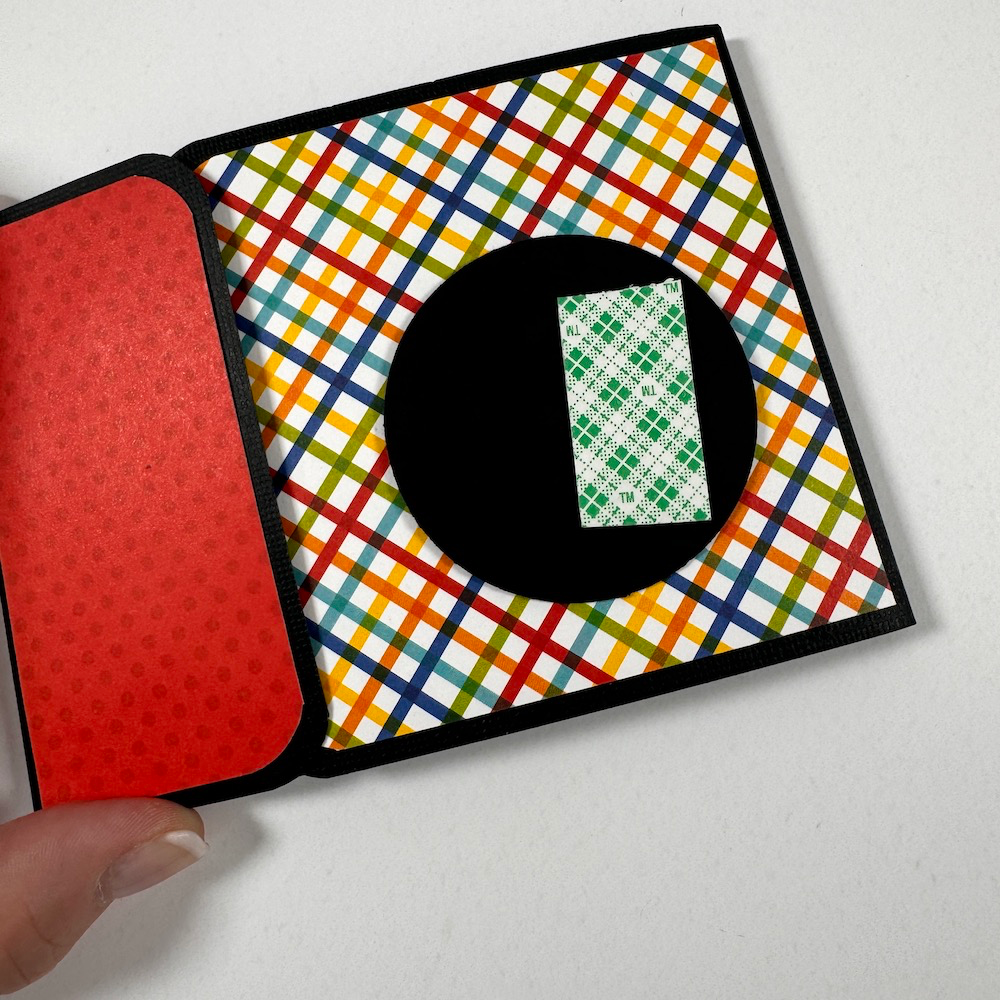
6. You can finish by wrapping a ribbon or twine around the album, or choose a large embellishment to keep your cover flap closed. To do this, I added a piece of foam tape to the right side of the back of my embellishment, added it to the larger side of the cover, and tucked the smaller side of the cover underneath.
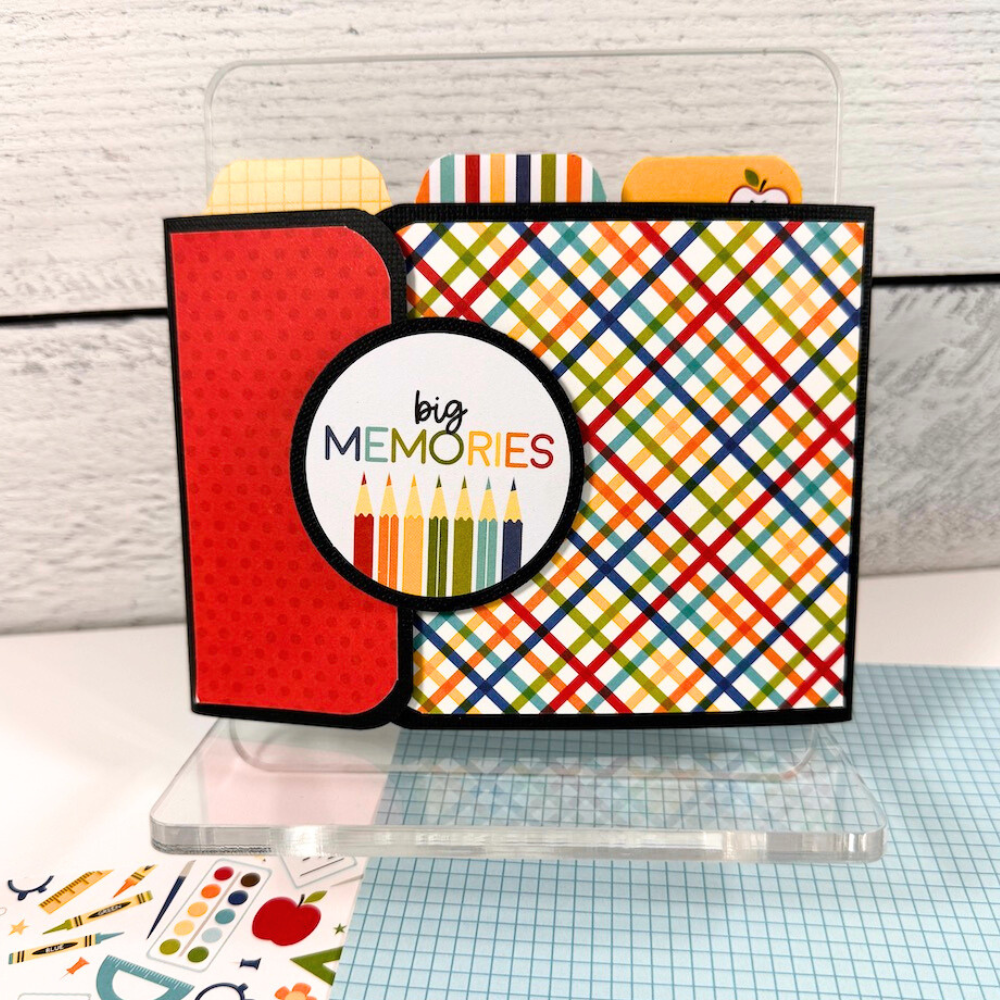
And there ya have it! This super cute mini album can be made with ANY paper collection in ANY theme! It would be fabulous designed for fall, Halloween, or Christmas and displayed on one of my Artsy Albums Display Stands as decor in your home. So fun!
For a video tutorial of this album, please see Lori’s YouTube video here:
https://youtu.be/XilujNe8Im8?si=uD0qPvYaatU-C8h9
I hope this inspires you to create Lori’s Multi Flap Mini Album. Thanks for stopping by and have a great day!

Blog * Shop * Facebook * Instagram * Pinterest



.jpg)
.jpg)
.jpg)
.jpg)
.jpg)
.jpg)
.jpg)
.jpg)
.jpg)
.jpg)
.jpg)