Tags… not just for gifts anymore!

Hi Everyone, it’s Kathy today with a fun, new way to use one of Lori’s files!  As soon as I saw the Gift Tag Set (here in the Silhouette Store) I thought that it would make a fun Mini Album!  The tags are the perfect size for smaller photos including those adorable Instax photos!  Take a peek at what I created….


I started by cutting the file for the box and tags and assembling them.  I then printed out some fun Instant pictures of my kitties.

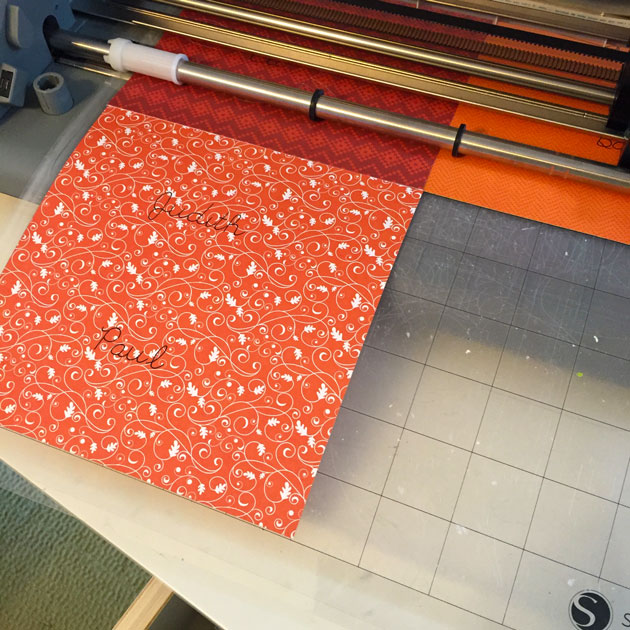
(A little hint when choosing a patterned paper for your box… make sure that the print looks ok upside down!  Otherwise the back of your box will have the pattern going the wrong way!)

To decorate the front of my box, I used pieces from Lori’s Cat Belly Box (here in the Silhouette Store) to make my kitty faces… and added some stickers and alphas from the collection I used.  On to creating my “pages”… I simply added my pictures and some embellishments to each Tag, and gathered them all together with a ring and some ribbon!  It went together so quickly!

Here are some close-ups of the Tag Pages…

You could make a quick and easy mini using the Gift Tag Set  to showcase some vacation photos or maybe a little brag book for a new mom or grandparent!  It goes together very quickly and the results are so fun!  That’s it for me today, thanks for stopping by!

Tear Strip Card Tutorial with Tya

Hi there Lori Whitlock fans! It’s Tya here to share with you a super fun tutorial. If you are looking to spice up your handmade cards – look no further! I am going to share with you how to make a card with a tear away strip on it. It is so fun and easy! Let me show you how I did it!

 So I was looking on a Pinterest board for cool and creative card ideas and I stumbled upon this cool business card and knew I had to see if I could do the same on a regular card.

And imagine my surprise when I found that Lori had designed a file for the Silhouette with not one but FOUR different tear away strips! I was so excited to try it out and share with you how to do it –


LW-Scalloped-Card-Envelope-Set


First off – find a card base that you like – I used a scalloped edge card – add the card base and the tear strip cut files on the workspace-

I added the tear away strip to the bottom right edge of my card base. Make sure that you get the edge of the tear away strip right flush with the edge of the paper so that it will tear all the way off. (See below)

Now let’s choose a sentiment. Using the draw a rectangle tool (the rectangle shape on the top, left side of the side toolbar) draw a rectangle about and inch high and as wide as your card base. Type out your sentiment. (I used the print and cut feature, but you can use your word processing program instead if you prefer). Cut this out.


Now to make sure it lines up with your tear away strip, I like to lift up the edge slightly as shown and then lay the sentiment down to the inside of the card base.


Now that we have our sentiment down, its time to decorate the front. I used Lori’s darling I Love Sunshine line from Echo Park to make my cards.

This technique is really quite easy, but I think it packs a lot of punch and is a fun way to add an interactive element to your cards. Kids will love this!

Here are the cards close up – Before the tear strip is torn off –

And after!


Thanks so much for stopping by! I hope you all have a great day!

Supplies used:

I Love Sunshine Collection

Scallop Card/ Envelope Set – LW Store, Silhouette


Tear Strips- LW Store,Silhouette 

Circle Square Card Bases- Silhouette, LW Store

LW Jumbo Font- Silhouette, LW Store

LW Lizzy Font – Silhouette

Strawberry Card Tutorial with Traci

Hi Lori fans!  It’s Traci from Artsy Albums and I’m glad to be back on Lori’s blog today with a fun tutorial for making cards out of Lori’s cute new strawberry files.  I’ll show you two different card styles today and lots of “how to” pictures … so let’s get started!

These adorable strawberry designs are actually “print & cut” designs, but we are going to cut all of the pieces for a more layered look.

Let’s start with the first flip up Strawberry Jar card.  First, I opened the design and created an offset to make my card base.  I set my offset around the jar to 0.125.

Once I had the offset for the jar, I created a mirror image.  I went to the Replicate button and clicked “Mirror Above”.

I moved my two jars tops together and welded them so that I could fold the shape in half to create the card base.  I also used the type tool to type my sentiment for a print and cut.  (You can search Lori’s site for lots of Print & Cut tutorials if needed).  When you are ready to cut your shape, be sure that “cut edge” is highlighted in your cut setting window.

Once my white card base was cut, I cut out the other pieces and layered them on the front of the card.  Again, since this was originally created as a print design, you will want to be sure that “cut edge” is highlighted in your cut setting window before cutting out each piece.   By the way, the paper I used is from an Echo Park collection called Jack & Jill (Jill) designed by Lori also!

The second design is a pull-out card.  First, I opened the design and ungrouped all of my pieces.

I located the solid “basket” piece first and moved everything else off of my software mat.   Next, I created an internal offset (setting .20) so that I would have a card base that would be small enough to slide back into the basket.

Once I had the inset piece for the basket, I created an offset on each of the three strawberries so that when I cut the card, the strawberries would have a white edge.  I then welded the strawberry offsets to my basket inset.  To simplify, you are welding a smaller basket and three larger strawberries together. (Ignore my second set of strawberries in the photo … you don’t need them).

Once you have the strawberries welded to your basket inset, you can add a sentiment with the type tool if desired and then do a print & cut for the base of the card.

For the card pocket, locate the original blue “basket” piece and create a mirror image above the shape.

Move the pieces so that they touch along the future fold line.  Weld them together and cut the piece out.  Now you should have a basket piece that looks like the photo below.  Fold the piece in half and add adhesive along the right and left sides to create a pocket.  Leave the top free of adhesive so that the white card you created in previous steps can slide down into the pocket.

Finally, cut out the remaining pieces of the basket and strawberries and adhere them to your base card and pocket.  So Cute!

Thanks so much for letting me share these two cards with you.  I hope you found the tutorial helpful!  I would love to have you stop by my blog at Artsy Albums sometime!  Tell me you found me here at Lori’s and leave me a comment to introduce yourself!

Link to Strawberry File Set


Permanent Vinyl Tutorial with Kathy

Hi Everyone!  It’s Kathy today with a fun tutorial using Permanent Adhesive Vinyl to customize some wine glasses!  We have some good friends with a pool who gave us an open invitation to swim this summer!   I wanted to give them a little something as a thank you for their generosity.  I found these acrylic wine glasses at HomeGoods and thought they’d be the perfect gift!

It was so simple to add the little fish from Lori’s Island Paradise Set (here in the Silhouette Store).

1.  I started with some Acrylic Wine Glasses (good for the pool area, they don’t shatter!) and some colorful permanent (outdoor) vinyl sheets.

2.  Load your design onto the virtual mat and size it for your object.  I added a rectangle around them to make it easier to remove the unwanted pieces of vinyl from around the design without wasting vinyl.  Change the cut settings to Vinyl. (blade depth of 2)

3.  Place the  vinyl onto the mat and feed it into the Cameo.  You can omit the mat if you’re using a 12″ sheet (choose load media), but I’m used to using my mat when I use smaller pieces of vinyl.

4.  Once the design is out, peel  away the unwanted pieces of the vinyl.

5.  I cut the eyes from white and black vinyl and peeled the back off the vinyl and added them to my fish.  It was easy to do this with simple, little pieces.  I thought it would be easier to add the eye layer before placing the fish on the glass.  For more complex or intricate designs you would want to use transfer tape to add any layers.

6.  Transfer tape makes it easy to place a design on your object.  First cut a piece about the same size as your design.  Peel one edge of the tape from the backing and place the tape on the edge of the vinyl backing.  Peel it off, while pressing it over the design.

7.  Once the back is completely off, rub your scraper over the design to make sure it all sticks to the tape.

8.  Peel the tape off, the design should come with it.  If it doesn’t, press it back down and go over it again with your scraper.

9.  Place the tape with your design over the glass.  Starting from the center of the design, start pressing onto your glass.  Move outward, pressing out any air bubbles.  Once the design is down rub over it with your fingers again to make sure it’s on securely.

10.   Slowly peel the transfer tape off the glass.

I’m really happy with the way they turned out!  It’s such a nice way to personalize a gift!  You could also do monograms!

That’s it for me today!  Thanks so much for stopping by!

Octagon Teapot Tutorial by Corri

Hi everyone!  Corri here today sharing this beautiful new 3D Teapot 2 SVG (Silhouette file HERE) that Lori added this week.  This would make a great gift for Mother’s Day!  You could fill it with your Mom’s favorite tea bags or with a small gift and a gift card.

I used paper from the Lori’s Jack & Jill Collection for Echo Park Paper.  This large floral print is perfect for the teapot.

To assemble the teapot, first cut everything out from the papers of your choice.

If you choose a detailed pattern paper like this for your project, I suggest leaving all the pieces on your mat.  That way the pattern will match up easily as you glue the panels in place.

Next,  apply glue to the glue tabs of the two teapot pieces (white), glue them together and the glue the end tabs together to form a circle.

Now you are ready to start forming the octagon shape.


Apply glue to the glue tabs as show and line them up with the adjacent panel.  It helps to fold the panel with the glue tab out, apply the glue and then line up the panel as closely as possible to the score line.  Be patient on this portion of the assembly.  Wait a few seconds to allow the glue to dry slightly before moving on to the next tab to prevent shifting.

Continue all the way around glueing the tabs in place.  Follow the same steps with the base and lid.

Glue the base in place. Glue the two pieces of the handle together folding taps out and then glue in place.  Fold the spout in half, fold tabs out and glue in place.

Finally, glue the decorative panels in place. So cute!!

Be sure to check out all the new files added to the shop this week.