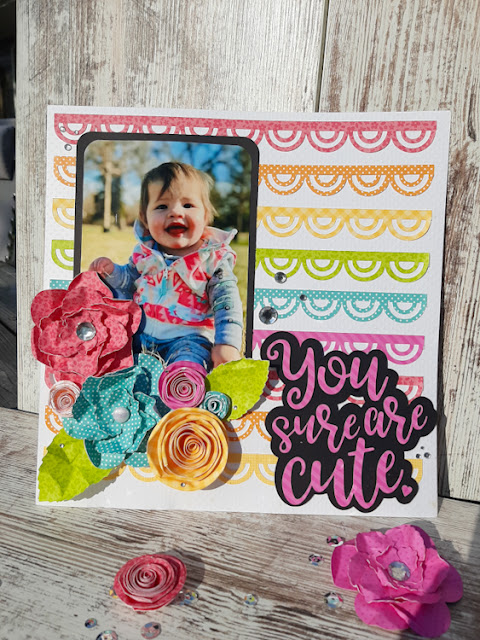
Flowers and Borders Layout

Happy Monday creative friends! Today, I’m sharing a layout I made of my adorable granddaughter using some borders, flowers and a title, all cut from Lori’s files. I will link below. I used some petite patterns from Doodlebug Designs for my project and cut all my elements on my Cricut.

I cut all my flowers and assembled them. They are very easy to make. I used the Rolled Flower 47 (SVG, Silhouette) and 3D Flower (SVG, Silhouette).
My title was the You Sure Are Cute (SVG, Silhouette) file that I offset to give it a little pop. The borders were cut from the Mega Border Bundle (SVG, Silhouette). I welded and sliced them to get the borders the size that I wanted.

I love how bright and fun this page turned out. Thanks for stopping by today and happy crafting!

Chelsea

Memorydex Cards

Memorydex Cards have really made a comeback this year in the scrapping world, so I thought I would join in and create a bit.  I used Lori’s new Echo Park collection Life Is Beautiful.  Beautiful patterned papers, tons of embellishments, including puffy stickers. It was so much fun to play with this beautiful collection.  I added my cards to a Heidi Swapp Memory Dex Spinner but Lori has a super cute Memory Dex box you can make, you can find it here in Lori’s Shop or here in the Silhouette Store.

My first set is the Memory Dex Scalloped Cards or here in the Silhouette Store.  I added some stitching, lots of layers and lots of embellishments from the Life is Beautiful Collection.
Next are the Memorydex Envelopes or here in the Silhouette Store, again stitching and stuffed with embellishments…oh so much fun!
And one more set, Memorydex Foldover Cards or here in the Silhouette Store.  There is also a bit of stitching on these and layered up with all the goodies.  I had so much fun creating all of these.  They are fast and fun.  I can see why they are making a comeback.  I hope you give them a try.


Box Card Rose Box

Hi there friends! With Valentine’s Day fast approaching I have been busy making cards to send out. Today I’m sharing one that I am sending this year. I love the roses in this box card, they are so fun and easy to adapt to any season and person. Box Card Rose Box (SVGSilhouette).


Thanks for stopping by today. Have a great week!

Brandie

A2 Card Envelope Box Tutorial

Hello everyone! Marcia here today. I have an A2 card storage box tutorial to share with you today.  This A2 Card Envelope Box (SVGSilhouette) cut file can be found in Lori’s store along with many other varieties of boxes. I used some pretty pattern papers from Lori’s new Day In The Life collection as well as coordinating cardstock from my stash.


Let me show you how easy this box is to put together.

1. Choose your papers and cut out two box bottom pieces and two box top pieces. The cut file contains only one of each so be sure to cut everything twice. Adhere the panels to the cardstock base. Using cardstock for the base pieces will ensure a sturdy box.


2.  Working with the bottom of the box first, adhere the two sides of the box together.


3.  Turn the box upside-down and adhere the tabs to the box bottom. Then fold the last flap over the bottom and glue it down.


4.  Now let’s work on the box top. Adhere the front to the back by gluing the rectangular piece with pattern paper over the same size rectangular piece with no pattern paper.  Fold the sides in making sure the side with pattern paper is on the outside, tucking the tabs in. Adhere the sides and then the tabs.

5.  Place the last rectangular pattern paper piece on the inside of the lid.

6.  There are stamp cut file pieces that you can use to adorn your box making it look like a stamped envelope. I also placed a journal card on the front so I can use that space when gifting my box full of cards to someone. Or if it is just too pretty to give away, to write what kind of cards I have stored inside.

These boxes would be great for storing your Valentines too.
Thanks so much for stopping by. Be sure to check out Lori’s Store for more amazing cut files.

~
Marcia

Adorable Grid Pop Up Card Valentine Gnome

At first, I was a little worried about how these new Grid Pop Up Cards would go together, but they are easy peasy, rest assured – just follow Lori’s instructions that are on the mat as you cut the design. They are super simple!  You can find a blog post with instructions for the Grid Pop Up Card SVG files HERE. I will be making lots more of these.

You can find this little guy here in Lori’s Shop or here in the Silhouette Store.  Make sure to try these out and share them with us on Lori’s page, we would love to see what you are creating.

Thanks for stopping by ~ Cathy