My Teacher Rocks Sticky Note & Pen Holder by Aimee

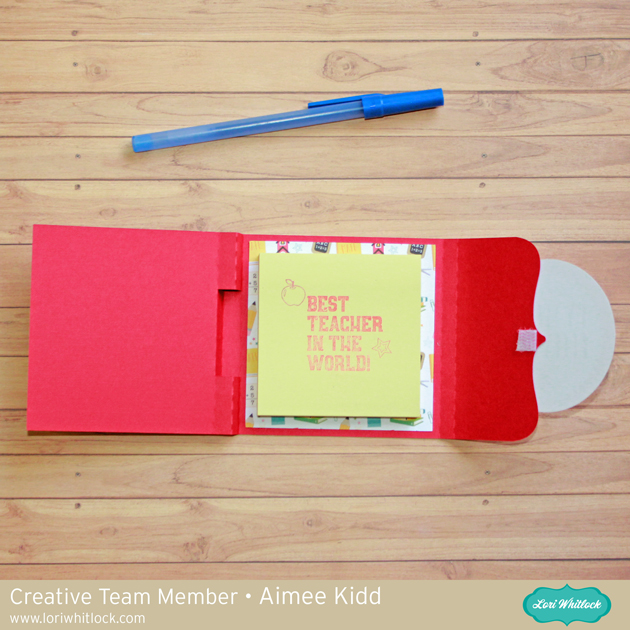
Hi friends! Aimee here today with an adorable My Teacher Rocks notepad. I know most everyone is on a traditional school schedule and right in the middle of Summer fun but our kids attend a year round school so we are already back to school for the 2018-2019 school year. So here I am sharing this teacher gift early in hopes you have time to get a jump start on yours.

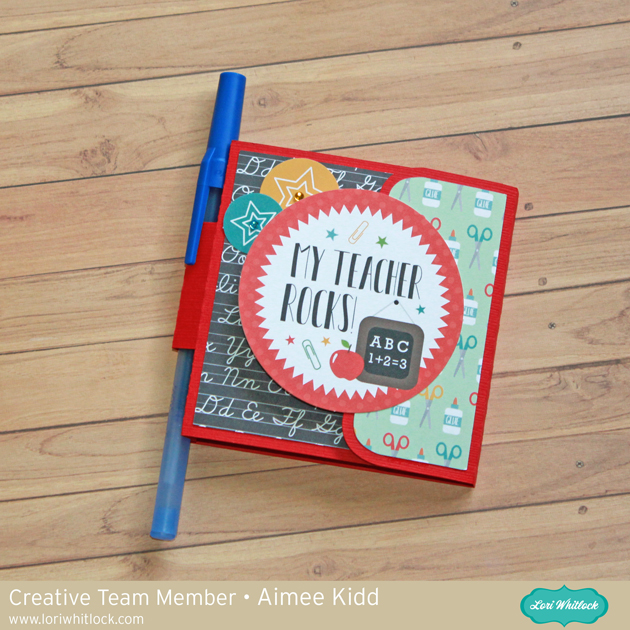
I used the Sticky Note & Pen Holder svg which you can find at the Lori Whitlock store here or in the Silhouette Design Store here. You’ll also notice I used the amazing new Back To School collection by Lori for Echo Park on my project.

Thanks for stopping by today and hope everyone is enjoying their Summer so far!

Aimee

Accordion Book Box Gift Card Holder

Anita here with a tutorial to make this fun Accordion Book Box Gift Card Holder from Lori’s store and which you can also find in the Silhouette Store.  I used Lori’s brand new collection from Echo Park called Back to School.  The colors are awesome and worked perfectly for a masculine gift card box.  The sentiment I used is Lori’s design also and it is called Brush Happy Birthday to You.  You can find it here in her store and here in the Silhouette Store.

These are the pieces for the project.  You have to cut two each of the long sheets which are scored horizontally so that you can make the accordion fold pieces.

My paper is two sided so I decided that I wanted the red to show on the outside so this is how I folded all four of the accordion pieces as well as the insert.

I glued the red side together and then held it down with my hands until it dried.  Once it was dry I glued the blue sides to each other as well.  These accordion pieces are going to make the base for creating a spot for the gift card holder to fit.

Here are all four pieces glued together and ready to be put into the box.

I laid them out here so that you could see how to put the box together.

All four pieces are glued down and I have now glued down the top as well.

Insert is glued in now also.  Next I glued down all the accent pieces.


I cut an extra piece to put in the front left side of the card so that I could write a note.  Here is the box open with the gift card in it.

Here is the front and side view.  I will be making more of these, what an awesome way to present a gift card.  That’s it for me today.
Hugs,
Anita

The Sweetest 3D Gift Box with Michelle

Hello! Michelle here today to share the sweetest little 3D Camper that’s also a clever little gift box!

You can find SVG files to make this 3D Camper at the Lori Whitlock SVG Shop or at the Silhouette Design Store. I used papers from the Sweet Baby Girl line by Echo Park Papers, but I’m certain that this would look great with any papers for any occasion. Lori has a video tutorial that makes this so fun and easy to put together. It’s my new favorite project!  (the 3D Tree is also available here in the Lori Whitlock SVG Shop and at the Silhouette Design Store)

3D Camper Trailer Gift box

There’s so much room the box. Perfectly sized to hold candy and gift cards, or jewelry and small toys. It would also be great for Birthday Party favors. Lori also has a larger 3D Camper that would make a great centerpiece for the party table. That would be such fun party decor! Its so fun to make little things that you know everyone will love.

Thanks for letting me share today.

Happy Crafting!

-Michelle


Frog Bobble Head Favor Box with Brandie

Hi there Friends! Brandie here with a bobble head favor box. I needed a little box to tuck my favorite tube of baby cream and a gift card for a new momma friend.

I used the Favor Box Tuck Flap (SVG, Silhouette) and the Bobble head Card Valentine Frog (SVG, Silhouette). All of the papers come from the Sweet Baby Boy Collection by Echo Park.

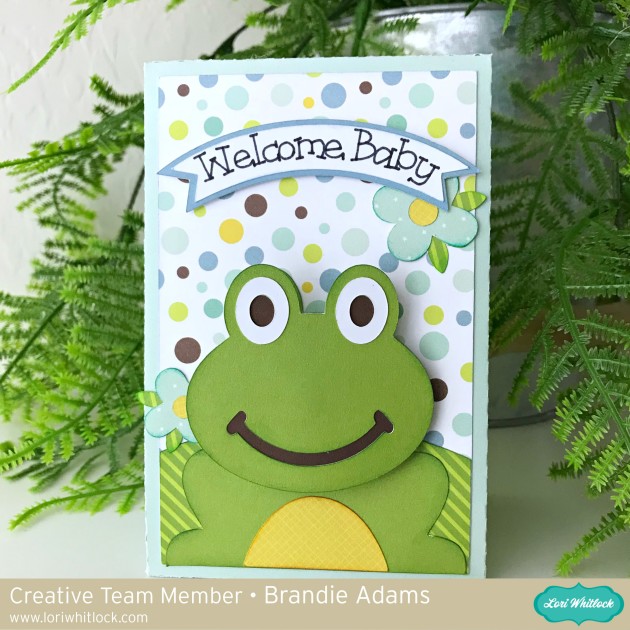
I uploaded the bag and card into Design Space. I then removed  the images I wouldn’t be using for this project, resized the frog and banner, and changed the greeting to say Welcome Baby.

I inked the edges of the banner and frog. Assembled the bag, banner, flowers and frog.

For the wobble feature I DIY’ed my own wobble spring. I used 26 gauge wire, a hot glue gun, pencil, and two 1 inch paper circles. I wrapped the wire around the pencil a few times, cut the excess wire, then applied some hot glue to the paper circles, attached the wire spring to the hot glue on both ends, and then used liquid glue to attach the wobble spring to the back of the frog head.

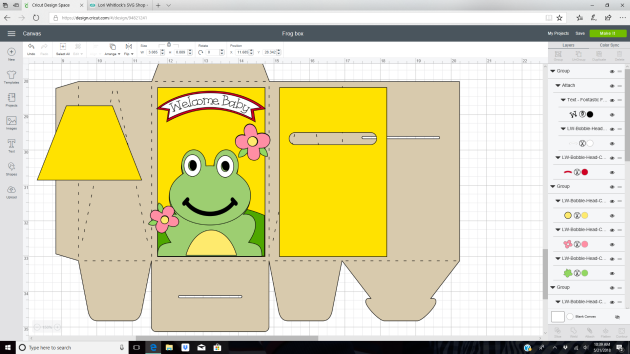
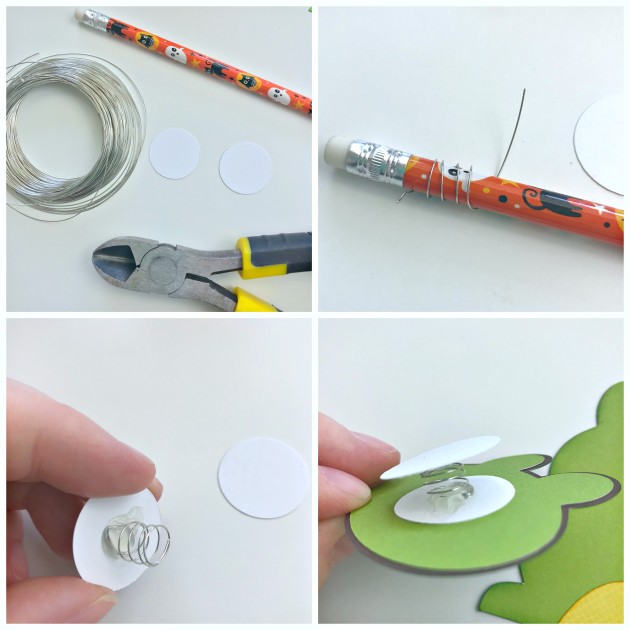
I assembled the bag using liquid glue and attached wobble spring to the bag.
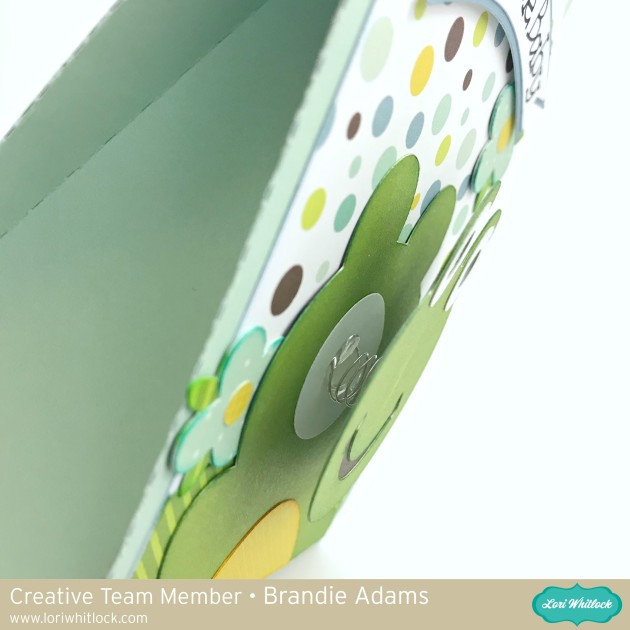
It is hard to tell in still images, but that head is very wobbly! I love that I was able to get the same effect without having to buy anything extra.

That’s it for me today. Thanks for stopping by!

Brandie


Father’s Day Tool Box Card Tutorial with Anita

Hi Everyone:

Now that we have celebrated Mom it is time to start thinking about the Dad!  I made this sweet card which was so easy to put together for my hubby.  I used the A2 Father’s Day Toolbox Card cut file which you can find here in Lori’s store and here in the Silhouette store.  I used two of Lori’s wonderful Echo Park lines, Wish Upon a Star and I’d Rather be Crafting.

Here are the cut out card pieces and the embellishments that I used from her Wish Upon a Star collection for the bolts on the front of the tool box.

You are going to want to fold your score lines.  Lori’s file includes holes for the brads.  I didn’t punch them out because I wanted to use the enamel dots instead.  You will have a nice pocket in the front to fit the tools when you are done.

I wanted a more plain design to show on the inside so I cut extra  inserts and glued them down.

Here are all the pieces ready to be glued into the pocket.  I popped three of them up to give the card some more dimension.

That’s it for me today.  Lori has lots of wonderful Father’s Day cards and gift boxes for all your celebrations.  This card came out really wonderful and I’m sure that one of the Dad’s in my life are going to love it.

Hugs,

Anita