Make Your Own Party with Michelle

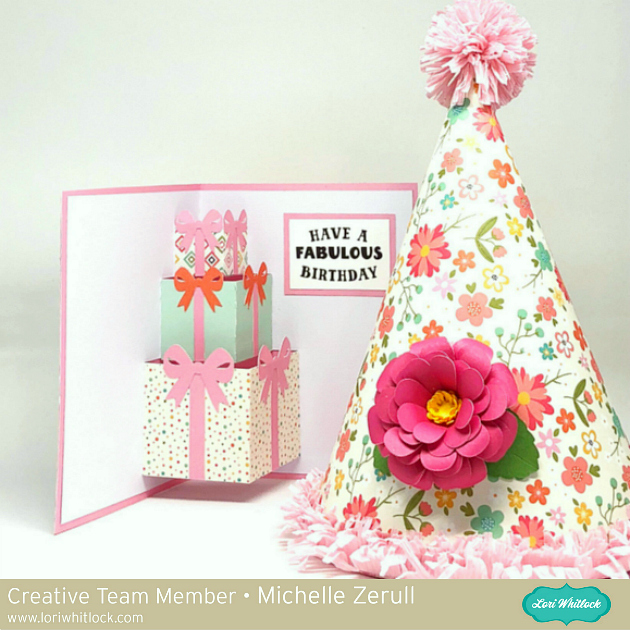
Recently, I found myself without a handmade card for a special birthday. No Card? I felt horrible! knew that I needed to step up my game, and keep a few special cards on hand. Lori has some adorable pop up cards in the shop and everyone loves a Pop Up Card!

Paper Birthday Hat and Pop Up Card

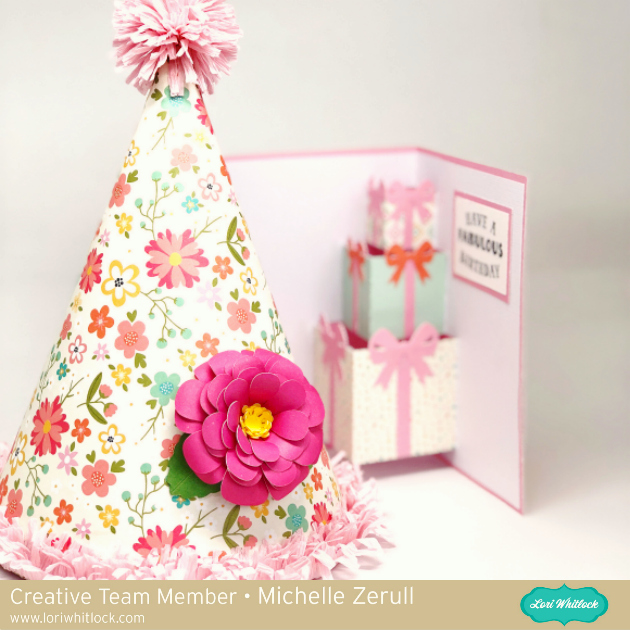
For this set, I used the Pop Up Birthday Card Presents file that can be found in the Lori Whitlock SVG Shop or at the Silhouette Design Store. Just for fun, I made a coordinating Party Hat from the A2 Princess Party Hat file at the Lori Whitlock SVG Shop or the Silhouette Design Store. To make the hat extra special, I added a bit of crepe paper embellishing and a cute paper flower. The file for the flower is also found at the Lori Whitlock SVG Shop and the Silhouette Design Store. All of the pretty papers came from the I’d Rather Be Crafting line of papers and embellishments by Echo Park Paper.

I’m pleased with how cute they turned out as well as how easy they were to make. I also feel good knowing that I have a cute birthday card ready when I need it.

Paper Birthday Hat and Pop Up Card

Have a Creative Day!

Michelle

<3

Paper Flower Shadow Box Tutorial with Michelle

Hello Friends! Paper Flowers are so popular and they are so fun to decorate with. Today I would like to share an easy tutorial for this cute home decor project featuring one of Lori’s latest flower files.

Paper Flower Shadow Box Tutorial

This is such a quick project to make. The flower only takes about five minutes to put together. When cut at normal size, the flower fits perfectly in this 4×4 Shadowbox Frame. The Shadow Box Frames are one of Lori’s classic designs. There’s an excellent Youtube Video showing how to assemble the frame. It’s so easy to make, and looks so professional. I love it! You can find the file for the 4×4 Frame at the Lori Whitlock SVG Shop, or at the Silhouette Design Store. You’ll also need the 3D Flower File. You can find the file at the Lori Whitlock SVG Shop and also at the Silhouette Design Store.

Photo Tutorial for 3D Paper Flower

Materials Needed to make the Flower:

  • fast drying glue or hot glue
  • a kitchen bamboo skewer or other end of a thin paint brush
  • white craft glue
  • yellow Prills or small beads for the flower center
  • a piece of craft foam or mouse pad
  • a stylus with ball on the end or the end of a clean pencil eraser.
  1. Curl petals away from you using your wooden kitchen skewer. This is the same motion that you would use to curl birthday ribbon.
  2. with petals facing down, place the petal piece on the foam and using a circular motion, roll your stylus around in the center until the petal begin “lifting” and a depression is formed in the center. Repeat Steps 2 & 3 for all petal pieces.
  3. Begin building your flower from the outside (Larger petal) towards the center. Use a small amount of fast drying glue or hot glue and hold in place until the glue is dry before moving to the next piece, then continue building the flower up one layer at a time. Note: Allow each one to dry first so that your flower doesn’t shift. When you get to the last smallest piece, add a drop of white craft glue to the center and add small beads or Prills to mimic a flower center. Flocking or yellow powder such as tumeric makes a fun center too.

While your flower center is drying, complete the shadow box as described in Lori’s Video. Any pretty papers from a 6×6 pad will look lovely on the front of the frame. I used a paper from Echo Park Paper and a piece of 10-inch ribbon (optional) to complete the look.

The great thing about making paper flowers is that there isn’t a right or wrong way. Try different curling variations for different looks. If you like, you can add inks or chalks for additional color variations. Each flower is unique and will be beautiful when you are finished.

I’m so pleased with how this came out. It really brightens up a corner of my craft room, don’t you think?

Paper Flower Display

Have a creative day!

Michelle

<3

School Clipboard Card with Anita

Happy Monday Everyone:

Anita here with a quick and easy fun back to school card for your favorite student.  I just love how cute this is and how easy it was to put together.  The night before the first day of school I used to give my kids a card and a treat to wish them well in the coming school year.  This card would be perfect for that.  I used Lori’s cut file called School Clipboard Card and you can find it here in her store as well as here in the Silhouette store.  I used her awesome new Echo Park line called Celebrate Autumn and her Perfect Princess line as well.  That’s it for me today.  Be sure to check out Lori’s store for all your back to school and fall card and gift giving needs.

Hugs,

Anita

Pencil Shaped Box 2 Assembly with Brigit

The pencil shaped box 2 makes a great gift for a student or teacher, just fill it with some treats or small school supplies, even a gift card. You can also get the file here from the Silhouette Design Store. The paper used is from Echo Park’s Back to School collection designed by Lori.

I change all my score lines  to solid in Silhouette Studio Business Edition and save the file as an svg to bring into Cricut Design Space so I can cut it out on my Cricut Maker. The new scoring wheel works great and it’s worth the extra step to fix my lines. I really like SSBE better than Design Space that’s why I do it this way but you can change the lines in Design Space also.

I actually change the lines an easier way now, I don’t know why I didn’t think of it before. I release compound path all the score marks and delete all but one in each row, I select that one and drag it to make it longer, works great.

Here’s all my pieces cut out, you can see how nice a job the cricut’s scoring wheel does. I forgot I had to do a tutorial so I had put together my project already I cut out these pieces using solid color cardstock, that’s why the difference in the competed project photo.

I bent all my score lines and put some scor tape on each tab, it gives a nice strong immediate hold, but you can use any glue that has a good hold.

For the bottom part of the box I cut out two octagon pieces, one to put inside which helps to form the box easier and one for the bottom. You can make the inside a tiny bit smaller then the bottom for a better fit.

Here’s the bottom glued on, the two pieces make it very sturdy, you really can put a bunch of treats inside this box.

Next I put the top of the pencil on, I raised all the tabs up and put the piece on all at once, I just held it in place and then put my hand inside and gently pushed each tab to the top.

Last is the pencil tip, glue the whole inside and place on top. I made sure all my seams lined up.

It really is a super simple box to put together and so cute, I just added a piece of twine and tag from the Back to School collection.

Thanks for stopping by and have a wonderful day!

Fall Shadow Box Tutorial with Brandie

Hi there friends! Brandie here with a fun project to get you in the mood for all the Fall things! Fall is my favorite season. I love the colors, smells, and most importantly the cooler temperatures! ( I live in the desert of Arizona)  For this months project I also challenged myself to use something from the August 2018 Kit of the Month. I picked the Shadow box 11.3×11.3 6 windows. (SVG, Silhouette)

Lori has a great video tutorial on how to assemble the shadow boxes here. I watched it a couple of times to get a good idea on how to assemble the shadow box.

I used Bazzill Marshmallow cardstock for the frames. This cardstock is extra thick and worked beautifully. I used Scotch tacky glue to glue everything together. (except for the outside bottom of the frame.)  After I had the smaller frames lined up in the correct spot I used my scissors to press the insides tabs down to get a good seal on the glue.

For the outside of the frame I added some dark brown twine  to the top of my frame so that I can hang the shadow box. I also used extra strong double sided tape for the last outside section of my frame. I wanted to be sure I had a good quick adherence for the inside tabs I wouldn’t be able to reach with my fingers or scissors.

The front and back of the shadow box is covered with papers from the Celebrate Autumn collection by Echo Park.

Once I had my shadow box assemble I went on to the embellishing. The flowers on top of the shadow box are a sunflower (SVG). I kept them pretty simple. I used a golden brush pen to draw some lines on each petal. I pinched each petal lightly then bent up the end of each petal. I then glued each segment down one on top of the other. For a little added bling I used a brad from the Echo Pack Celebrate Autumn collection for the center of the sunflower.

The paper pumpkins are from the Pop Up Box Card Fall Pickup. (SVG, Silhouette).  I resized them to fit into the window. I also used the tree from this card in the window with the hedgehog.

For the falling leaves window I used the trees, fence, and oak leaves from the  Flexi Card Fall Scene. (SVG, Silhouette)

All of the remaining windows are filled with stickers, tags, ephemera, chipboard, and papers from the Celebrate Autumn collection by Echo Park. The little resin pumpkin, pinecone, acorns, and berries are from floral picks I purchased from Hobby Lobby.

I love how this project turned out. I am so looking forward to Fall! Thanks for stopping by today!

Happy crafting!

Brandie