3D Flower Pot Bouquet

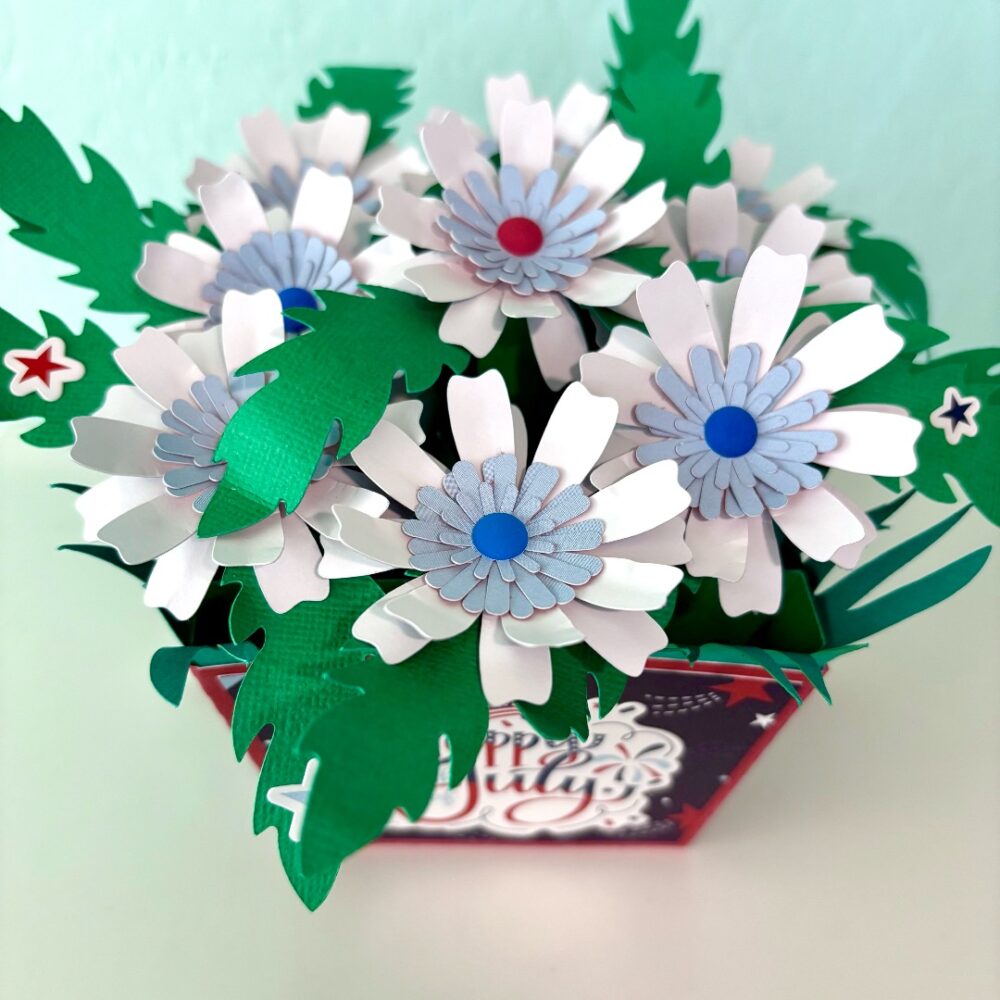
Hi there, friends! Today, I am sharing a tutorial for the 3D Flower Pot Bouquet Daisies (SVG, Silhouette). This flower bouquet would make a perfect hostess gift, birthday gift, or a sweet pick-me-up for a friend. I used the Stars and Stripes collection by Echo Park Paper Co for a patriotic theme.
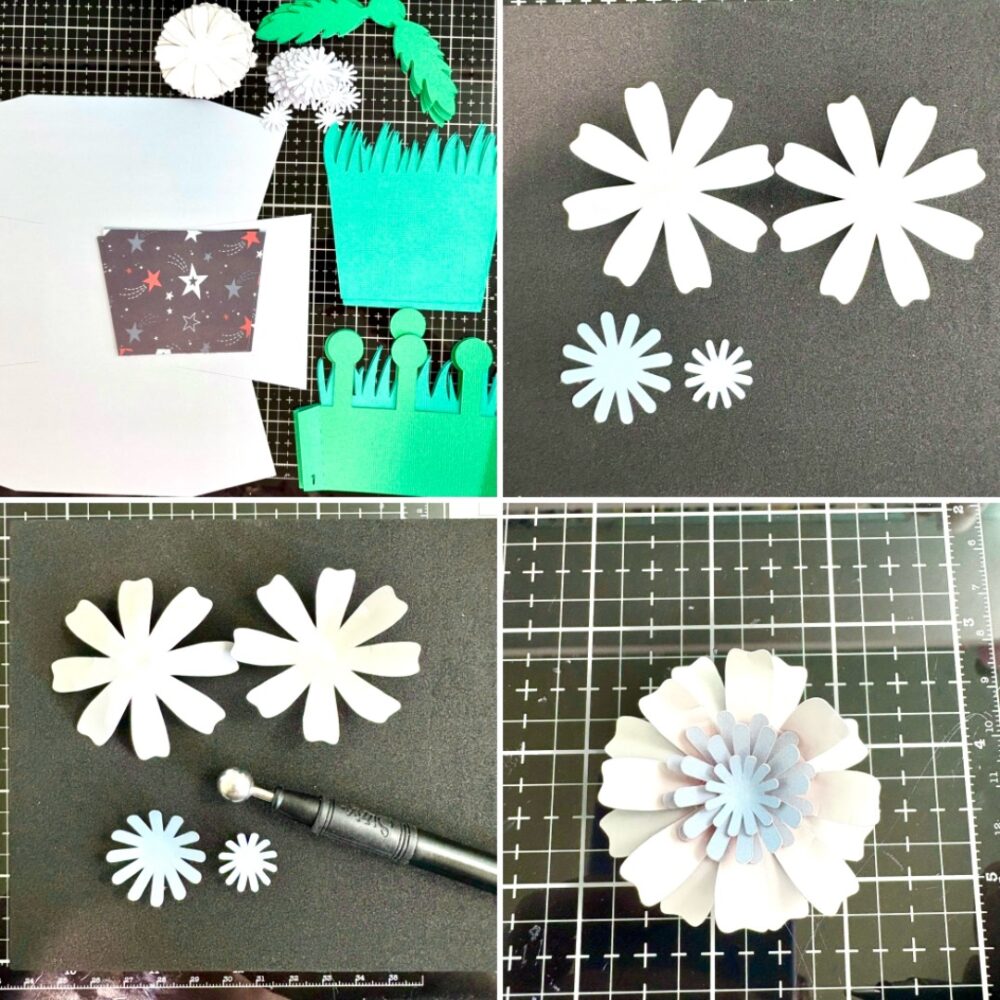
To begin this project, I cut all the flower pieces first so that I could shape the flowers while my Cricut cut the remaining pieces. The flowers have five layers total. Two of the layers make the flower, and three for the centers. I used a stylus tool and a foam mat to shape my flowers. This process takes a little time, but it wasn’t complicated.

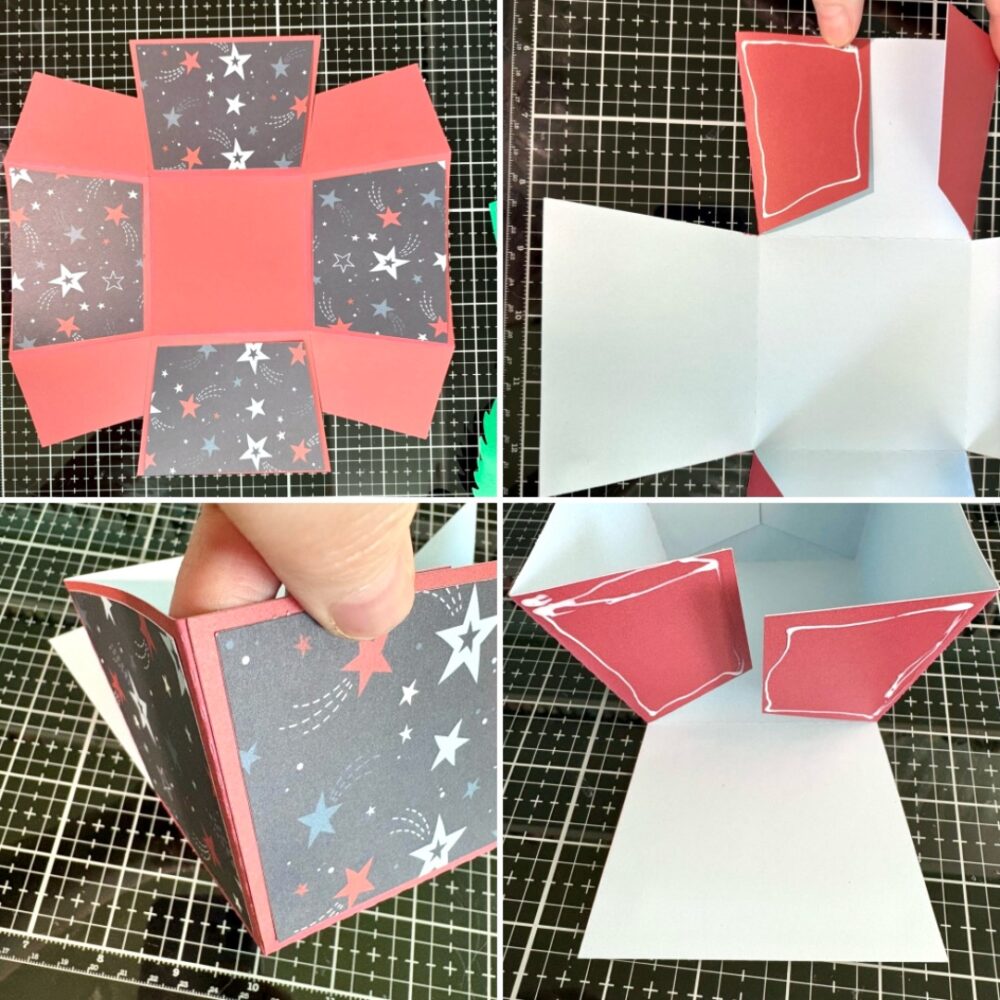
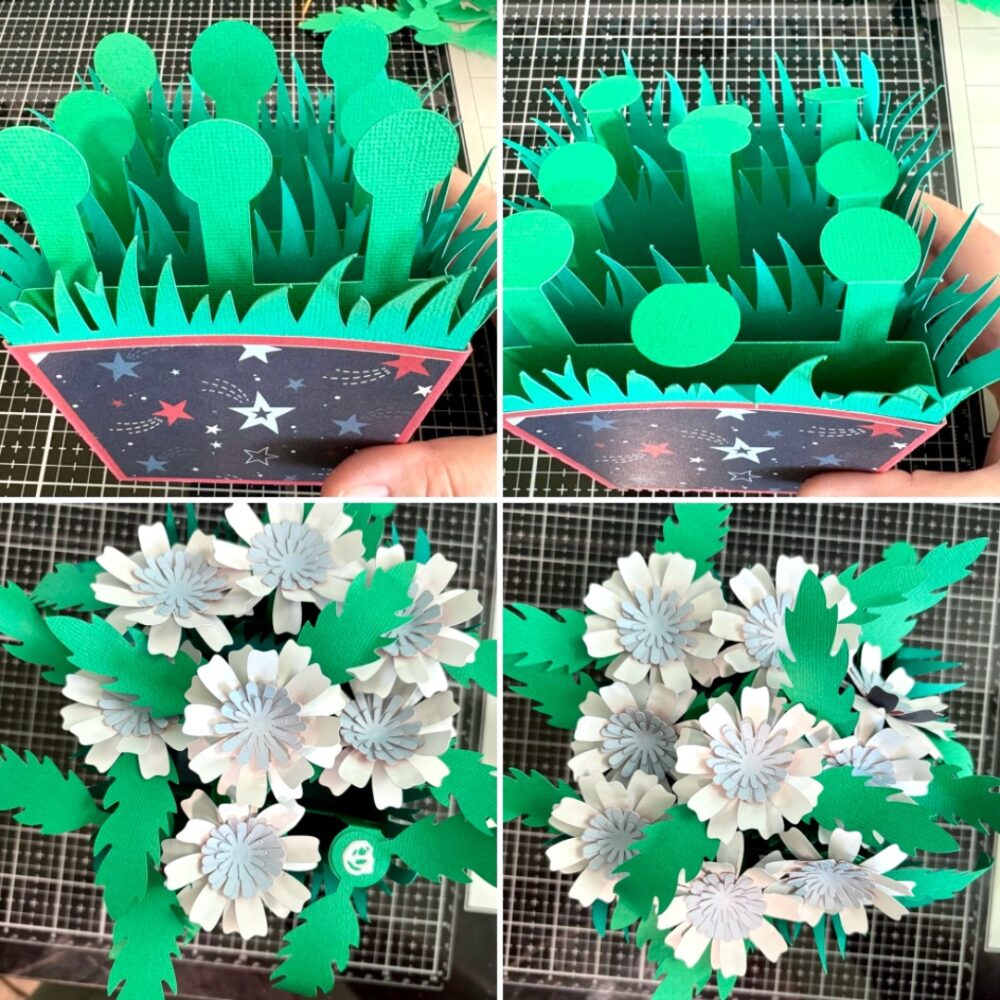
For the pot I folded all of the score lines into mountain folds, inked the edges, and glued the decorative panels in place. Two of the sides of the pot have two large tabs each. I added glue to one tab at time and made sure to line everything up with the edge of the pot. I repeated this process for all four corners.
I then glued into place the four grass panels to the inside of the pot, one on each side. For the inserts I folded all of the tabs into a valley fold and added glue to outside of the tab. I eyeballed this part but I tried to make a sure the number three insert was in the middle of the pot.  There is five inserts total, three for the flowers and two grass inserts. I inserts are numbered which makes gluing them in order easier.
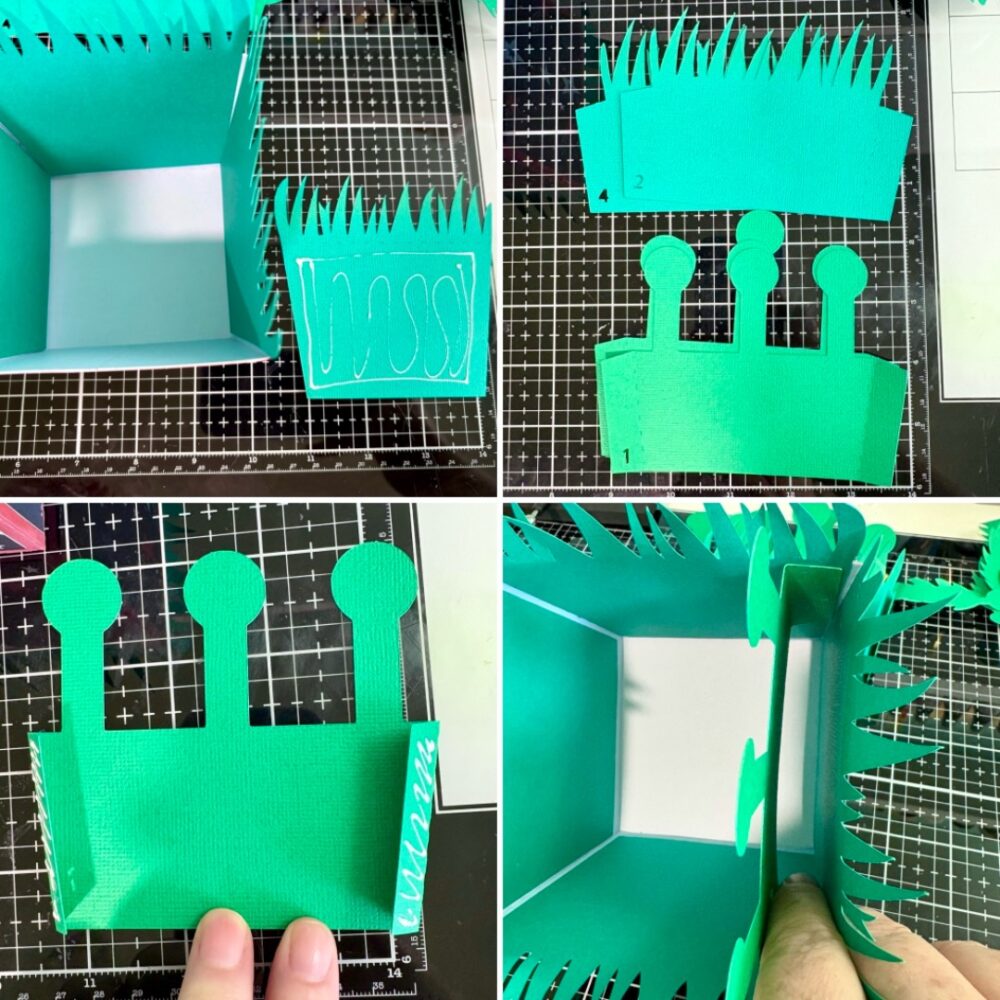
With all the inserts glued into the pot I folded down the round heads for the flowers and leaves. I glued the leaves on first then glued the flowers on top of that.
I embellished my pot with a sticker from the collection and added enamel dots to the centers of all of the flowers.

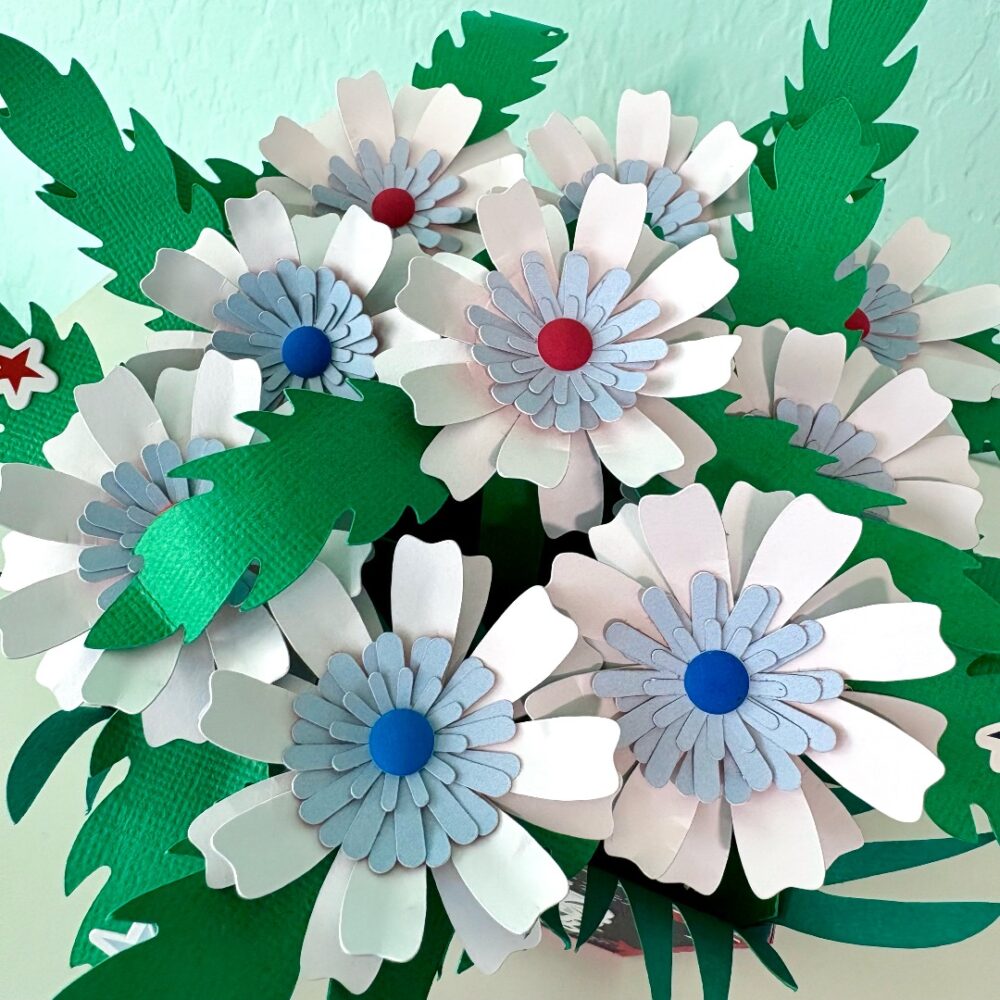
This was a fun little project and would be cute in any theme. I think my next one is going to be back to school themed, since my kid goes back in three weeks!
Thanks for stopping by.
Brandie

An Oldie but a Goodie- The Side Step Card!

I was paging through my library of Lori’s files on my Silhouette, pages and pages, mind you.  And I came across this side step card and I remembered how I used to love to create these as you can enhance with all the embellishments for Lori’s collections.  So, I just had to give it a try again with Lori’s Echo Park Firefly Collection.

The Step Card Side file is here in Lori’s Shop  or in the Silhouette store.  I used the Firefly card stock for the base and papers from the 6×6 pad for the accent papers, a bit of the washi tape, several pieces of the chipboard, stickers, a tag and enamel dots.  You can simply create a scene with these little step card bases and all the embellishments.  Tons of fun to just start layering and see what you come up with.  I adore this collection and how this card turned out.


Thanks for joining us today!

~Cathy

3D Flower Pot 6

Hello! Today I am sharing one of the new 3D Flower Pots. I made the 3D Flower Pot 6 (SVG, Silhouette). I included a Thinking of You sentiment and added a battery powered light to the inside of the flowerpot. This little flower pot is perfect to give to someone who needs a little pick me up. I used papers and embellishments from the Firefly collection by Echo Park Paper.

Thanks for stopping by!

Brandie

Mason Jar Pop Up Box Card

Happy Spring almost Summer Everyone!  I have a quick little card tutorial to share with you today using Lori’s new Echo Park Collection Firefly.  I simply adore everything about this collection, the patterns, the amazing details, the colors….it is all swoon worthy, you have to get it.  It is just so perfect for summer.  The card is one of her pop up box cards, that fold flat for mailing and then pop up and give a fabulous 3 d effect for your recipient.  You can find this card here in Lori’s Shop or here in The Silhouette Online Design Store.  I just love mason jars and this is just so cute.

First, cut and organize all your pieces.
I always ink all my edges, except the white.
Put your card base together, here I used papers from the 6×6 Firefly paper pad and card stock.  Your score lines will be a peak and a valley.
As you can see here, it fold to a 5×5 card base.
Next, make this piece.  Here I added some beautiful washi tape from the Firefly collection.  Love it!  Again you will have a peak and a valley for score lines.
You are only going to add adhesive on the two ends, and you can see where I wrote here and here.  Make sure no adhesive goes in the middle, otherwise your card won’t pop up.  My adhesive fits the first little panel and then from the second score line to the right.
Once you add this piece, you can see how the little pop up box is formed to add your remaining dimensional pieces.
Now just finish up the layers for these two pieces and add adhesive to the sides.  Add them in order, as Lori numbers them for you…1 & 2.
Press them firmly to the sides to create the pop up effect!
And there you have it!  The cutest little card popping with joy!  I love using all the fun embellishments form her collections to really create my own take on each of her cards.


Thank you for joining us today!
Cathy


Box Card Flower Trunk Tutorial

Hello crafty friends! Today I am sharing an assembly tutorial for the Box Card Flower Trunk (SVG, Silhouette).  I used papers from the Day and Life collection by Echo Park Paper Co. I also cut a few extra flowers to add to my card to give it a fuller look.

The body of the box card is in two parts that will be glued together. The tabs are all folded in a valley fold. First, I inked the edges of all of my pieces then glued the decorative panels to the outside of my trunk. I then assembled the flowers. All of the flowers have two layers. I then glued the flowers to the two inserts. Three of the flowers are on the front insert and two flowers on the back insert.

For the trunk I added glue to both tabs and made sure to line up the holes on both pieces so that the brads would be fit. I then glued the decorative corner pieces to the trunk and added the brads to all of the holes. Enamel dots would also be cute on the holes if you can’t find brads. After I had all the brads in place I glued the back decorative panel into the trunk.

Next, I folded the tabs on the inserts in a valley fold and added glue to the back of the tabs. Securing one tab at a time I lined up the edge of the tab with the top of the trunk and held it in place while the glue set. I was also careful to not glue the tab over the back of the brad. I repeat the process for the other side of the insert. With both tabs glued I fold the card flat to check that it will fold flat then repeat the process for the second insert.

With both inserts secure I glued the last flower and stem to the front of the trunk.  I then embellished my trunk with the additional flowers and two butterflies I fussy cut from the collection.

This card is so pretty and has several sentiments for the back of the card that are included in the file.

Thanks for stopping by today!
Brandie