Strawberry Carton Box Card Assembly Tutorial with Tya

Hi Lori Whitlock fans – its Tya today I am up on the blog to show you how to assemble the adorable new Strawberry Carton Box Card.


This is a little different than the box cards that Lori has previously came out with so I wanted to walk you through how to put this card together. Lets get started!

http://cdn6.bigcommerce.com/s-zlf3iiy2/products/4372/images/4711/LW_Box_Card_Strawberry_Carton__19979.1457875888.1280.1280.jpg?c=2


First off – open the file. It can be found here on the Silhouette Store or here on the Lori Whitlock site.  Here’s what it looks like after I have ungrouped the box base from the leaves and strawberries.


Next, just to make things easier – Lori has numbered the leaf layers to make sure you know how the layers go front to back on the inside of the box. I’ve numbered them even bigger so you can see better.

Here are the leaf layers ungrouped by the papers I used.


Just to note – there a little yellow circles on the cut file for the flower centers, but I used some glitter dot stickers on mine instead. 🙂

For the label I did a print and cut title using Lori’s LW Brush Font

Now that all the pieces are cut out, I assembled all the pieces. I added some brown ink to the edges of the cut outs for some added dimension.


Add adhesive to the leave layers as shown.


I then assembled the box.

I then started layering the leave sections into the center of the box. The first section is glued right to the front edge of the inside of the box.


Here is the box all assembled. It folds down nice a easy so you can send it to that special someone.

This was a really fun box to put together and now that I have shown you how easy it is to assemble, I hope I have inspired you to make a few of your own! Thanks for stopping by!


Easter Bunny Flip Card with Karin

Hi everyone!  Karin here today sharing a video tutorial for Lori’s adorable Flip Swing Card Easter Bunny. I dressed up the Easter bunny a bit to give him a cotton tail, pink ears and nose. These flip cards look complicated, but they’re not at all. They are super simple. Watch my video below to find out just how easy they are.

20160318-_MG_5114-Edit-2

Here is my tutorial video showing you how to bring the SVG file and pattern paper into Cricut Design Space and set everything up for cutting with your Cricut Explore.  Have a great day!


Baby Boy and Birthday Boy cards with Courtney

Hi cut file fans! I’m Courtney Lee from Court’s Crafts here with a couple cute boy cards for you!

First up I have this awesome ducky easel card. This was so much fun to make. I used Lori Whitlock’s Little Man collection for Echo Park paper for all my paper.

I added some small touches: a border sticker, twine bow, and a doily. Voila. This card is ready for my friend’s new baby boy! I replaced the sentiment with a sticker I had on hand. 🙂

Next up we have this shaped bird card. This cut is so versatile: boy or girl baby card, happy bird-day card, hello friend, congratulations, baby shower card.. really the list goes on. But I needed a little boy’s birthday card so I again grabbed Lori Whitlock’s Little Man collection for Echo Park paper and went to work! 🙂

This cut file is fast and simple. I just added a twine bow, some inking, and some faux stitching. Easy peasy and totally cute.

Supplies:

(Lori’s Store) Lori Whitlock’s A2 Bird Card

Lori Whitlock’s Little Man collection for Echo Park paper

24-Hour Craft Event at HSN!

Hello everyone!  Wednesday, March 16, HSN is having a 24-Hour Craft Event! I love these events because they are full of awesome deals on craft products and you can learn so much by just watching. Be sure to tune in. There will be great crafting products and demos on-air all day long, you don’t want to miss it!

The Today’s Special is the new Anna Griffin Fantastic Flips Card Making Kit with reusable Cutting Dies!  It is full of gorgeous Anna Griffin patterns and embellishments, enough to make 60 beautiful flip cards for all occasions!  Even better, it is being offered at a great discount!  I was fortunate to be able to preview and work with this fabulous kit, take a peek!

Tutorial:

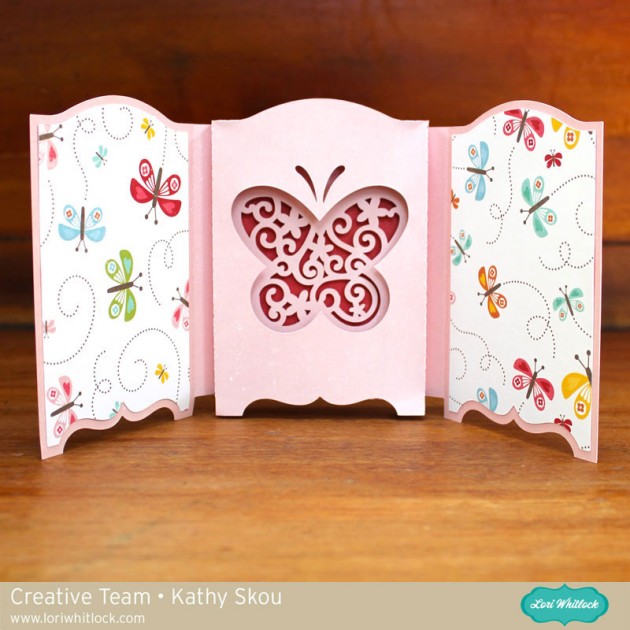
  1. I used my Big Shot and the dies in the kit to cut out the flourish, butterfly and ornamental bracket pieces.
  2. Fold the right side of the card base allowing the bracket shape to flip over.
  3. Fold the front of the card over to complete the card base.
  4. Embellish the card using adhesive to glue the pieces in place as shown in the finished card photos.

This project was a breeze to create with the beautiful pre-printed card base and sentiments. I love the gold foil details on the pieces. The gorgeous dies included in the kit made it easy and fun to customize the card with coordinating elements. I was able to cut the flourish, butterfly, and ornamental bracket piece using the dies and the Big Shot that I already own. This kit is so huge! I was amazed at how many gorgeous pieces are included. I will be able to make tons of cards with it!

Don’t miss out!  Check out this awesome kit today on HSN!  And be sure to tune in to the 24-Hour Craft Event. You’ll be so happy you did!

Lori

This is a sponsored post. I was given product to create a tutorial and write this blog post. But, all feelings expressed in this post are my own.

A2 Pop Up Cat Tree Card with Kathy

Hi Everyone!  It’s Kathy today with a quick assembly tutorial for the A2 Pop Up Cat Tree Card!  (available here in the Silhouette Store) This card is adorable, and really easy to put together.  This tutorial should also help you with the other Pop Up cards in Lori’s Shop, as the mechanics are basically the same!  Take a peek at my card…

I love the dimension of the pop up cards, it reminds me of those fun pop up books I had when I was little!  They really are pretty easy to assemble…

First, cut all of your pieces.  I like to line them up to make sure I have everything!

Next, I folded the card bases along the score lines.  Hint:  to best fold the pop up piece, start with the pop up strips before you fold the card in half.  This will eliminate any unintentional creases.

I then added the sky and grass pieces.

The next step is to adhere the pop up piece to the card base.  Make sure you do not add adhesive under the strips.  You want these to pop up.  The easiest way to get things centered is to first align the center creases of each layer, then smooth everything down.

It’s now time to add the decorative elements.  You want to make sure you only add adhesive to the lower section of the pop up strip.

When adding the cat and the tree,  make sure to align the bottom edge of each element with the bottom crease of the pop up strips.

The only things left are to add the clouds and stamp your sentiment!  That’s it for me today, thanks for stopping by to peek!  And don’t forget, all designs in Lori’s SVG Shop are 30% off this week!  Use code MAR2016 to get the discount.  It’s the perfect time to get those items on your wish list!