March Off the Page Challenge

Hi Everyone, it’s Kathy today with the Lori Whitlock/ Paper Issues  March Off the Page Challenge ! If you recall, an Off the Page project is simply a paper crafting project that is not a traditional scrapbook page. Each month I will be using files from Lori’s SVG shop, for my Off the Page projects over at Paper Issues, and we would love for you to play along too!  Easter is early this year, March 27th, so of course this month’s challenge is all about the bunny!  I’m looking for all of your paper projects with an Easter or Spring Theme!  Baskets, treat holders, shaped cards, home décor… anything Easter or Spring themed that is not a traditional scrapbook page will work! Of course we want you to use Lori Whitlock files for these projects! Here’s what I created as inspiration for the challenge, I used the March Kit of the Month which is available free to anyone who purchases $20 of product (in one transaction) in the Lori Whitlock SVG Shop  in the month of March.  Just add $20 worth of files in your cart and this kit will automatically be added to your purchase!

Here are some close-ups…

Easter Bunny Gift Box (in the Silhouette Store here)

Bunny Shaped Card (in Silhouette Store here)

Carrot Box (in Silhouette Store here)

Playing along with the challenge is easy! Post a picture of your project in the March Challenges Album in the comments of this project in the Paper Issues Friends and Fans Facebook Group by April 6th. You could win one of two gift certificates to the Paper Issues Store for playing along! I can’t wait to see what you create!   That’s it for me today, thanks for stopping by to peek!


Rolled Flower Tutorial with Corri

Hi everyone! Corri here today with a quick tutorial for the rolled flowers.  I love these flowers…they look great on everything!

Let’s get started…

Here’s how the flower looks when you take it off your mat.  I like to ink up the edges with some distress ink.

Next, hold the end of the spiral with a pair of tweezers.

Wrap the paper spiral around the tweezers until you have it all coiled around.

You can let the flower go now. It will uncoil slightly….apply hot glue to the center of the flower and press the spiral down on to the hot glue.  You could also use a quick dry glue but will have to hold the spiral in place while it dries.

You can use a paint brush to curl the petals.  Just roll the petals around the brush to give them a more realistic appearance.

There you have it!  Super simple and so fun to make!

You can find several different flower types rolled flowers in Lori’s SVG Shop.

Pop-Up Cards with Cathy

Hi everyone!  Cathy here with you today and I am sharing a couple of quick cards that are super fun for the recipient.  Lori has several new A2 pop up cards in her shop and in the online Silhouette Design Store.  They are super fun and easy to put together, and I love that Lori color codes her files…it just makes creating so much easier.

First up, I chose the A2 Pop-Up Dog/Dog House Card.  I used Lori’s Echo Park Little Man 6×6 paper pad for this adorable little card.  I used the Silhouette Sketch Pens on parts of the dog and the sun.  Just added that perfect finishing touch.  These cards fold flat for mailing and pop right back up as soon as your recipient opens them.

Next up, the A2 pop up Wedding Card.  So easy and amazing little details that Lori created with the little lapels that fold back on the tux. Way too cute!  I added a few lavender rhinestones, a bit of purple twine and embossed the cake.  Simple and elegant.

Thanks for joining us today, hoping you take time to create one of these fun pop up cards soon!

~Cathy 

Birthday Easel Card with Courtney

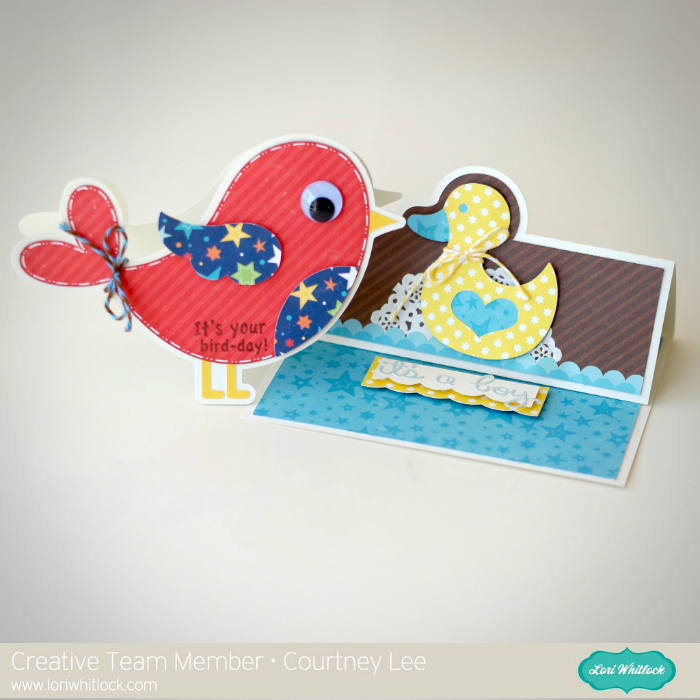
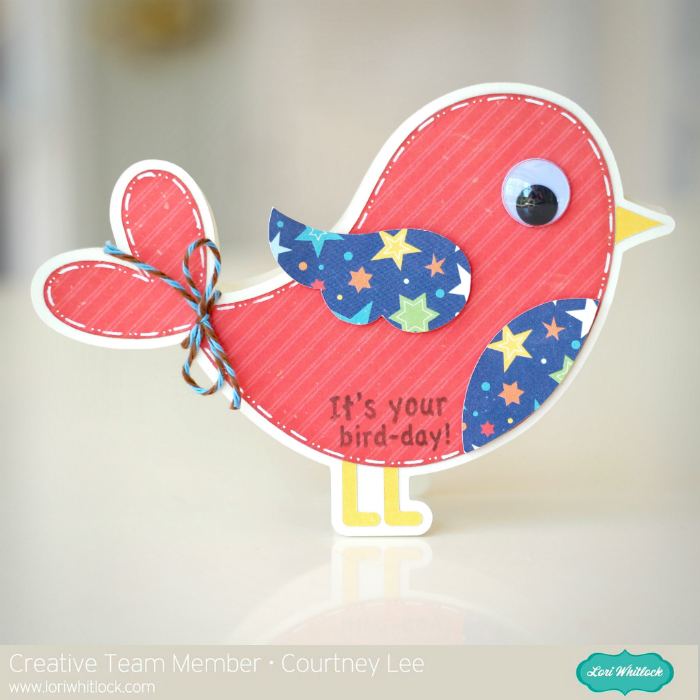
HELLO out there in bloggy world! This is Courtney Lee from Court’s Crafts with another super fun Lori Whitlock cut file example! Lori just came out with these easel cards a few weeks ago. My grandma’s 86th birthday just happened and I made this for her.

I grabbed the A2 Easel Birthday Cake file and Lori’s Jack and Jill – Jill Collection for Echo Park and went to work! 🙂 The colors of this collection are so bright and happy! The neutrals in the collection  meant that I didn’t even have to pull out other cardstock. 🙂 Love it. The first thing I did was to stitch around the outside of my frame on top. I loved the old fashioned nature of these prints and wanted to add to that feel.

I stamped my sentiment second. You don’t have to. The cut file comes with the Happy Birthday sentiment that can be cut out letter by letter. 🙂 Lori has you covered! I popped the sentiment piece up on the pennant base and then popped that whole thing up.

I LOVE dimension. I think it just adds so much to have that depth to a card. I popped the flame and you can see the layers popped here as well. This card comes together so easily!

I also added twine to the balloons to “anchor” them to the bottom of the card. I popped the balloons as well.

We always see easel cards when they are open but I wanted to show you the card closed as well to show you how pretty it is. I feel like not all cards are designed where they are attractive when they are closed as well as open. Here you can see that right when it is taken out of the envelope your recipient will be impressed!

As you can see this is a gorgeous card that can be made with masculine prints just as easily as girly ones. I’ll be pulling out this cut file again and again!

Link to the file in Lori’s Store

Link to the Silhouette Store

Telescoping Card Tutorial by Tya

Hi there – Tya here and I am up on the blog today to give you a tutorial on how to put together this amazing card. It is called a Telescoping Card and it is such a fun, interactive card that I know will be sure to impress! The card measures about 5 inches and would be great for a card, or scrapbook layout or mini album feature.

So the fun thing about this card is that it starts out looking like a normal, round shaped card. But with the help of a couple of mini brads – this card swings out and makes a 3 layered card. Isn’t it awesome!! Let me walk you through how I put this together.

Step 1-

Cut out your shapes. I used my Silhouette Cameo. The file I used is called a Circle Telescope Card.

Notice the little holes cut from the shapes- these are important so make sure they cut out all the way.

Step 2 –

Place the white cardstock onto the bases.

 Step 3-

Decorate the card fronts. I used Lori’s Little Man collection for Echo Park.


Step 4-

We will start building from the bottom up. Flip the middle section upside down and lay it on top of the bottom section. There a tiny holes that you simply line up, and place a mini brad in.

 Attach the brad and spin the middle section right side up.

Step 5-

Flip the top section upside down, and place on top of middle section. The middle section has a tiny hole on the top and the bottom. Add a mini brad to the top hole.

 Spin the card so the top section is facing the right way.

Here is the card all put together with the mini brads holding the sections together.

 And that’s all there is to it! I had a lot of  fun making this card and I know you will too! Hopefully I have inspired you to give this fun card a try! Thanks for stopping by today!