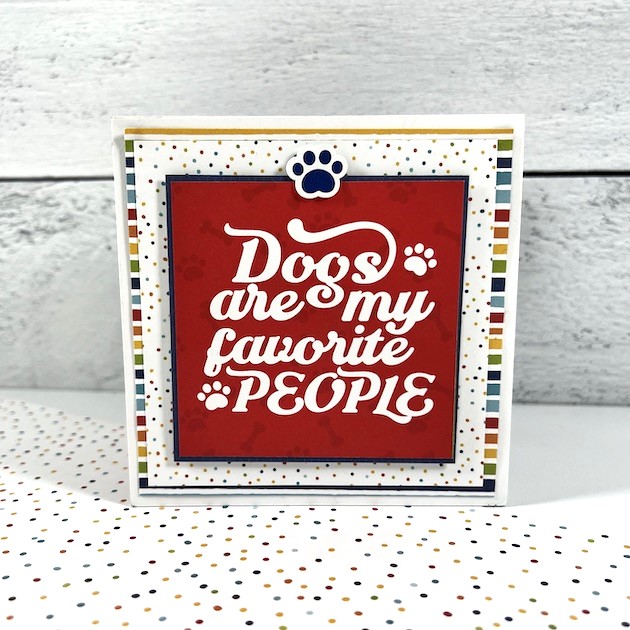
Have you ever seen a design that immediately made the creative side of your brain start sparking? That happened to me the minute I saw Lori’s cute birthday gumball machine (SVG, Silhouette) and I thought — shaker card! For some reason, the thought of buttons flying around in the middle of this card just made me happy! So here’s a quick tutorial on what I did …
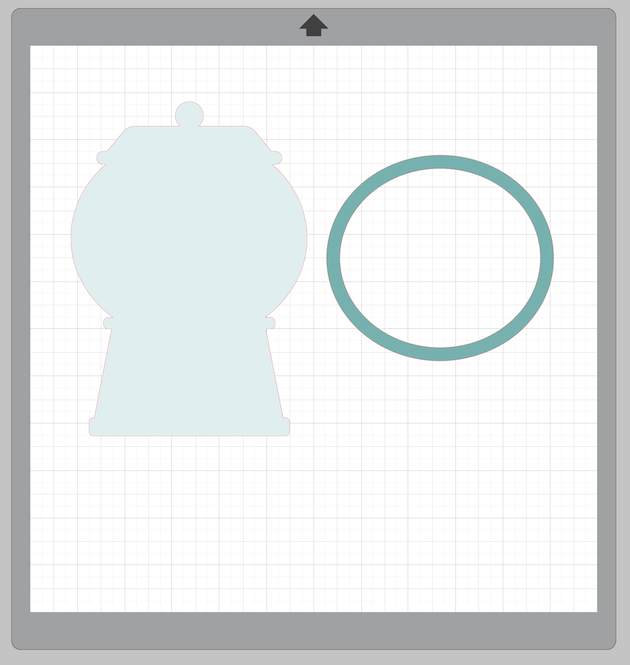
First, I cut out all of the pieces as they were in Lori’s file. Then, I used the shape tool to create an oval. I hovered the oval over the gumball machine to get the right size, and then I did an offset of the oval to create a frame.
Once I had my frame shape, I cut it out 5 times from white card stock, and once from the light blue dot paper (Echo Park, First Responders, Emergency Vehicles paper). The 5 layers of white card stock ovals will give the frame thickness and dimension so that the buttons can move freely underneath.
I layered the five card stock ovals, added small foam adhesive as shown, and traced the shape onto a piece of clear acetate. Clearly, you don’t need to be accurate about this because you’re going to use scissors to cut inside the lines in order for your acetate to sit within the border of the oval frame. I used a thin line of liquid glue to adhere the acetate to the top of my white oval frame.
I adhered the light blue dot oval over the acetate and then adhered everything together. I layered the folded white card base, then the plain white template placed the buttons on the template, then added the oval over the template/buttons. Finally, I added the red top and bottom pieces (also paper from the Echo Park First Responders collection) with more foam tape and finished the card with the sentiment and remaining cut file pieces. The stripe is just a piece of scrap cut to 1/4″ thick to add along the bottom if desired.
Inside, the finishing touch was a cute little phrase that comes with the cutting file.
Thanks for stopping by Lori’s blog today! I hope this card will inspire you to think outside the box and create something fun with Lori’s wonderful cutting files! Until next time, happy crafting my friends!
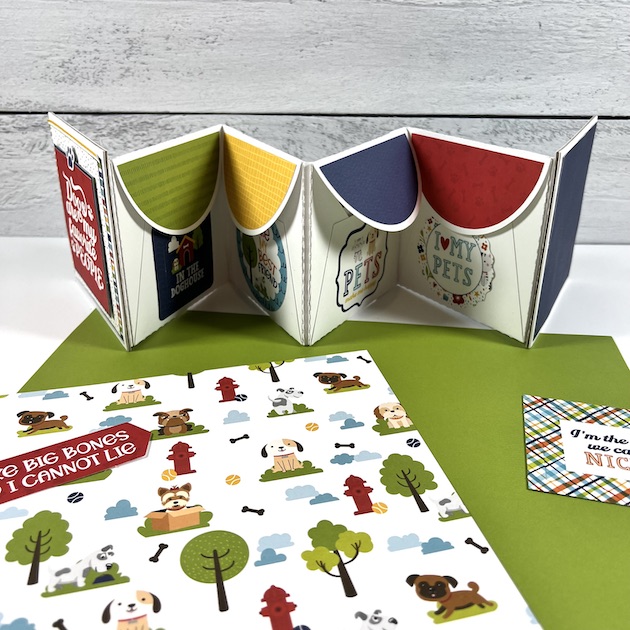
Hello friends! Traci here and today, I’m sharing a tutorial on how to make this fun envelope-style mini album! I love creating small scrapbooks so when I’m looking for a new idea, I know Lori will always have something awesome. For this project, I used her SVG cutting file called Silhouette, 4×4 Accordion Envelope Mini Album
I wanted this to have a dog theme so I chose the super cute Echo Park Pets Collection (also designed by Lori). I used the 6×6 paper pad, both sets of die-cut ephemera, and the 12×12 sticker sheet.
Here’s what this accordion-style mini looks like opened up. On one side there are envelopes where you can store photos and small memorabilia. On the back side, there are mats so you can add more pictures.
Here’s how I made it …
First, I cut out all of the pieces. There are 4 envelopes, 3 hinge pieces, 2 covers, and the pattern papers for embellishing. I used cardstock for everything except the cover pieces. I used chipboard for those.
Now that everything was cut, I created each envelope by folding the 2 sides in and the bottom piece up. I added
double-sided adhesive to the bottom portion to seal everything together, then adhered the colorful embellishment piece to the flap.
Next, I attached the 4 envelopes to each other using the 2.25″ x 4″ hinge pieces to create a row. Be sure to leave about 1/8″ in between the envelopes so that there’s room for the fold.
Now, it’s time to add the cover pieces to the first and last envelopes. Again, leave a little space in between for the pages to bend.
Once all of the album’s base pieces are adhered together … fold it, making sure to alternate the direction of each page to create the accordion shape. Now, it’s time to embellish!
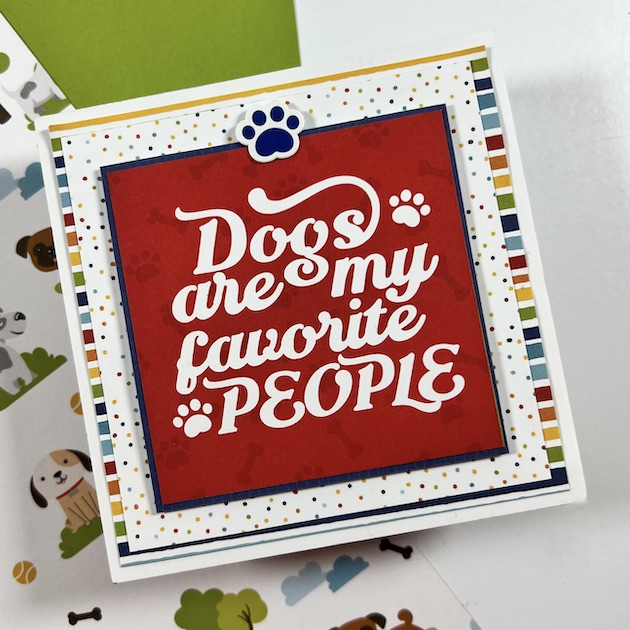
On the cover I layered the stripe, polka dot, navy blue print, and the 3×3 card on
top of each other. These are all from the 6×6 paper pad.
Inside for the envelope pages, I added cute stickers from the 12×12 sticker sheet and die cut
pieces from both packages of ephemera.
For the other side of the envelopes, I created photo mats for lots of cute puppy dog pictures. I added colorful pattern papers and more embellishments.
Lori has a great tutorial that shows you how to put everything together here:
This would make a great mini album for your pet’s photos or a sweet gift for
ANY pet parent. The Echo Park Pets Collection even has options for
cats, birds, hamsters, guinea pigs, lizards, fish, and rabbits!
Thanks for stopping by the blog today. I hope you’ll try this cutting file and wonderful paper line for your next project. Have a great day!
Hi guys! Traci here and today I have a really cute Valentine’s Day project to share with you! I made a card using one of Lori’s fun cutting files called Box Card Shopping Bag Valentine Dog (SVG, Silhouette). It’s a gift bag with a sweet dog, flowers, and hearts popping out the top. I changed up the colors so the pup looks like my son’s little furball, Tarot. I love the way it turned out and I love this file!
This adorable box card can sit out on a desk, shelf, counter, or side table for display during the holiday.
This 3 dimensional box card can be folded flat and added to an envelope for mailing, or … saved and stored as a thoughtful memento.
There is a little space in between the layers to slide a love note, a fun photo, a gift card, or money. There’s no bottom to the card, so you would need to add a little tape to keep it in place.
Here is what the cutting file looks like. You can make your dog any color you like!
Such a fun and simple project to create for someone you love. Valentine’s Day is right around the corner … time to get crafty with another one of Lori Whitlock’s wonderful cutting files!
Hey there friends! Traci here and today I’m sharing a project that is something we all use this time of year – gift tags! These are simple, so much fun to make, and add a sweet little handmade touch to your presents. They’re also a quick craft project if you’re short of time this holiday season.
I used Lori’s Essential Christmas Tag Bundle cutting file (SVG, Silhouette: Tree, Snowman, Gift, Snowflake) and it’s awesome! There are 12 designs to choose from and I love them all.
The Christmas tree tag might be my favorite. I added lots of enamel dots in a variety of sizes for the ornaments and included some yellow twine at the top.
The snowman is so handsome with his plaid scarf and top hat. You could use this one any time during the winter season … like for a birthday, thank you, get well, or thinking of you.
Tie these colorful tags to a gift bag, a bottle of wine, a basket of goodies, a wrapped box, or maybe a plant or poinsettia you’re giving someone.
You can also use these in your scrapbooking. Add them to a page for decoration or use the backside for journaling or as a photo mat for small pictures.
I chose a plain textured card stock for my tags but patterned papers would look great too. Add rhinestones, stickers, die cuts, or any embellishment. Have fun with these!
Thanks for stopping by and I hope you’ll visit Lori’s shop for more amazing craft ideas. Happy holidays!
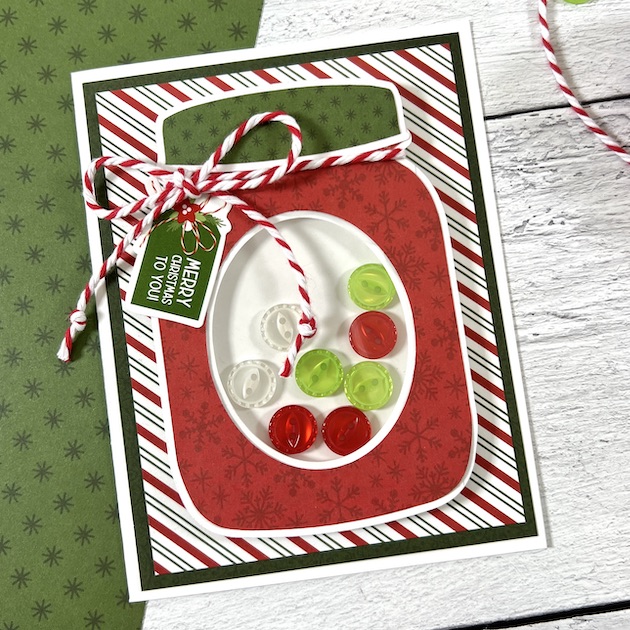
Hello everyone and Happy National Button Day! Traci here and yep … there’s actually a day that celebrates these little fasteners. I wanted to incorporate them into my project and I knew Lori would have something wonderful. I found a cutting file for an embellishment called Shaker Mason Jar and I turned it into a cute holiday card. Here’s a quick tutorial on how I made it …
For supplies, I used the Shaker Mason Jar cutting file (SVG, Silhouette) and Echo Park’s beautiful holiday collection called Magic of Christmas (also designed by Lori). I used the 6×6 paper, the 12×12 sticker sheet, white card stock, buttons and twine.
To create the A2 size card, I cut out a piece of white card stock measuring 8.5”x 5.5” and scored it at 4.25”.
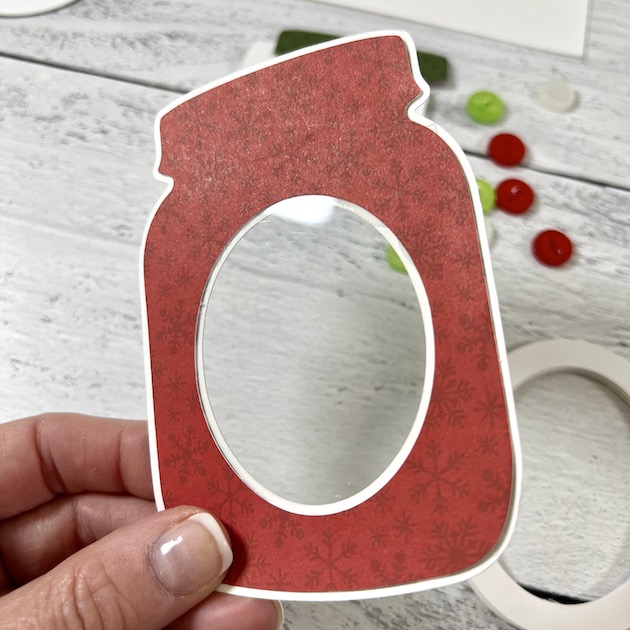
Then using the file and my Silhouette Cameo machine, I cut out all the other pieces. I chose the red snowflake print called Poinsettias & Pine for the jar and the green dot from the 3×4 journaling cards for the lid.
To make the shaker part, I cut out the ovals and glued them together until I had enough to make a frame thick enough to allow my buttons to move around.
I sandwiched a piece of 2.5” x 3.25” clear acetate in between my white jar base and the red inset piece I cut from the 6×6 paper.
I glued the oval frame to the back of the jar pieces, added my buttons, then glued the solid white oval piece on top to keep the buttons in.
Next, I took my white card base and layered 2 sheets of 6×6 paper in dark green and stripe on top and added the jar shaped shaker. I wrapped the lid with chunky red twine and included a cute sentiment sticker to finish it off. It’s the perfect card for someone special and I just love it!
Thanks for stopping by and I hope you’ll visit Lori’s shop for more amazing craft ideas!