Birthday Box Cards with Cathy

I have been busy this month making birthday cards for co workers and my go-to is always a box card from Lori….you simply can’t beat the WOW factor with these cards.  Everybody loves them and they make a nice keepsake to brighten up their desk too.  Also, a little secret…don’t let everyone know you make handmade cards….cause then everyone expects one…lol!  Just kidding!

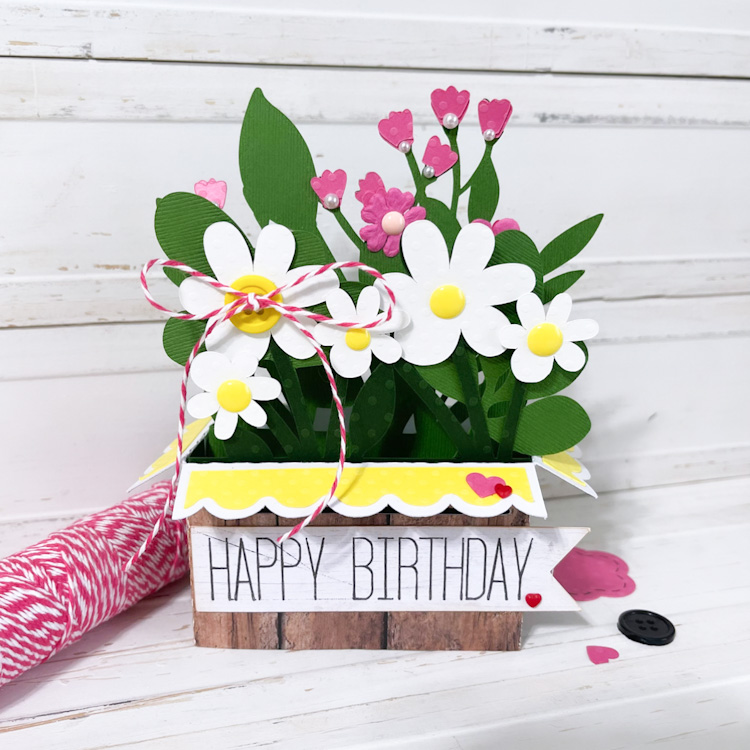
I love how this one turned out….Crate Flower Box Card (SVG, Silhouette) I left the flower off the front and added Happy Birthday Banner.  I also added lots of little details with pearls and the enamel dots.  So cute!

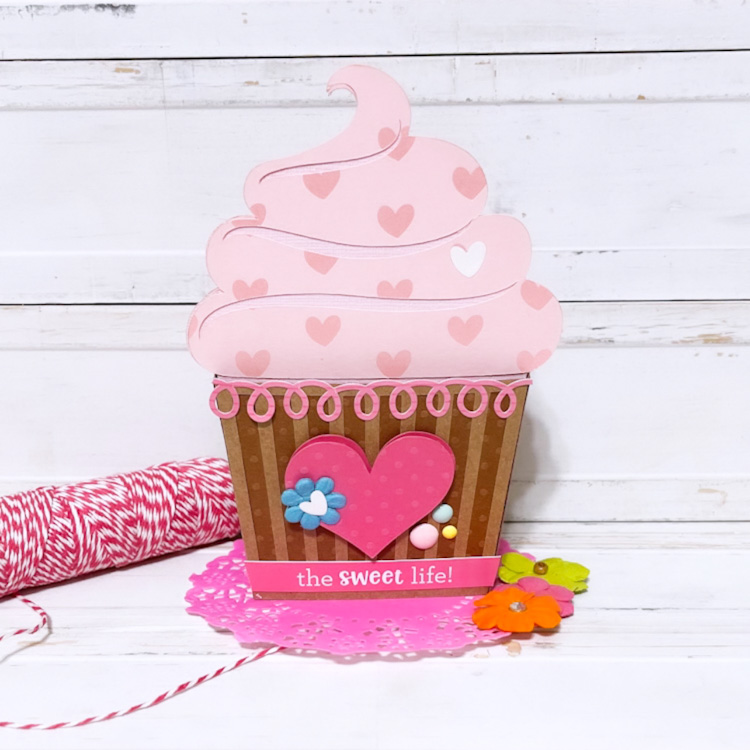
My next card is the Cupcake Box Card 2 (SVG, Silhouette).  I have made this card several times, it’s one of my favorites, you can’t go wrong with this darling design,

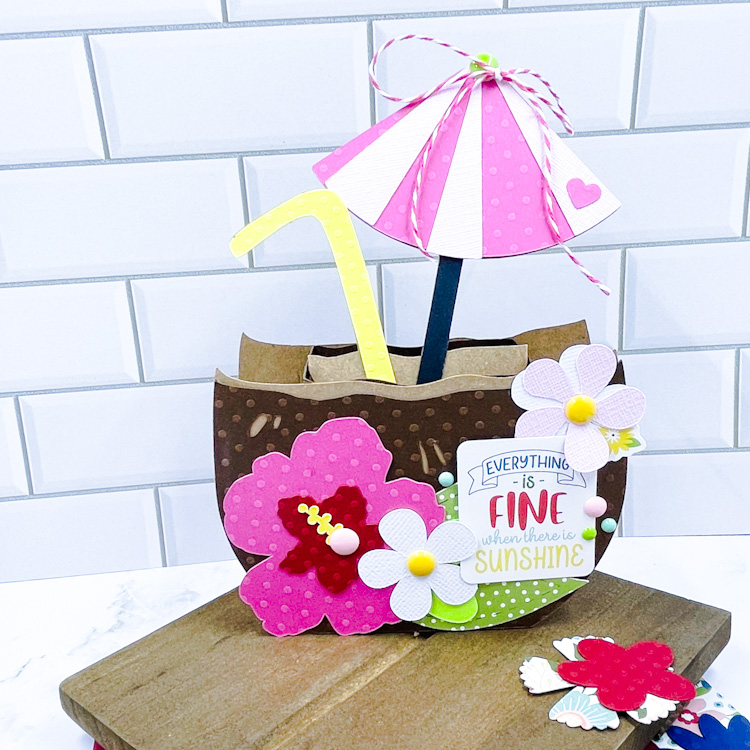
And last, I have another box card that is perfect for almost any celebration … the  Coconut Drink Box Card (SVG, Silhouette).


Make sure to check out all of the amazing box card designs in Lori’s Shop.  Also, for help assembling Lori’s shaped box cards, see this post.  I just love making these!  They fold flat for mailing too!  They become addictive and your coworkers get addicted too!

Thanks for joining us today!  ~Cathy

Bee Humble-Loving-Yourself Sign with Vinyl Layering

Hi!  Bees are all the trend right now, lots and lots of home décor out there featuring little bees.  I am happy to see this, as we all need to bring awareness on how important this little critters are to all of us.  My kitchen is all done in bees, lots of black and white with just a bit of yellow.  I love it.   I’m a paper girl but trying to expand my creativity…so I thought I’d show how simple this project using two colors of vinyl.

The file I used is Bee Humble Loving Yourself (SVG, Silhouette)

To start, you will need a wood plaque, two colors of vinyl and some transfer paper along with you die cutting machine.  First I sized my image 8 inches.  I did this because my wood plaque was 10×10.  I cut the words in black first and then the bee.

This is after you weed the black.

And this after you weed the yellow.

Next I cut around my bee, leaving the top and bottom straight to line up easier.  Cutting around him made it easier to center in the black circle of words.

Next, with some washi tape, I adhered the bee in the center and adhered the words to a flat smooth surface so that nothing would move when I applied the transfer paper.

I cut my transfer paper to 10×10 so that it was super easy to make sure it was straight on my 10×10 plaque.  Just the easiest way to keep things lined up for me.  Apply you transfer tape over both pieces now.

Both designs with lift right up with transfer paper.

Line up the edges of your transfer paper with the edges of your project and burnish the vinyl on….making sure to really burnish the tops of the letters really well.  Lift off you transfer paper slowly and you are done.  Easy Peasy!


I love how this turned out, it’s simple, cute and so very true….Bee Happy, Kind, Sweet, Humble Loving Yourself!  And don’t forget, there’s a sale happening in Lori’s SVG Shop through Saturday.  Get 30% off SVGs, Fonts, Pattern Fills and Commercial Licenses when you use code AUG2021 at checkout!

~Cathy

Home Sweet Home with Cathy

Hi everybody!  I can’t believe August is here already, Summer is flying by so quickly.  I have a fun project for you today, that you can create in no time.  I have a farmhouse theme in my townhouse, lots of black and white and to be quite honest I have an obsession with Rae Dunn products.  I just love all the things.

I got these little wood house shapes that are approximately 4 by 5 inches at the craft store and painted two white and one black.  Then I was just going to let them be, until I was looking through fonts here in the Silhouette Design Store and found this Thankful Font (SVG, Silhouette) I instantly knew this was font I wanted to use.  Perfect!  I just cut the words “Home Sweet Home” from black and white vinyl and applied to my little wooden houses.  So cute, I’m thrilled with how they came out!  I will be using this font for several more little projects I have spinning in my head.

A super fast project to go with the Summer that is flying by!  Thanks for stopping by today~Cathy


Farmhouse Box Cards with Cathy

Hi everyone!  I’m sharing a couple Farmhouse Cards with you today…they are just so cute.  I couldn’t resist making these.  You can get the whole farmhouse bundle here in Lori’s SVG Shop.  I love them all, it was hard to choose which one’s to make.  You can find the Milk Jug Box Card SVG here and the Flour Canister Box Card SVG here.  You can also find the Milk Jug Box Card here in Silhouette and the Flour Canister Box Card here in Silhouette.  These go together quickly and fold flat to mail.  I just love the vintage style of Lori’s Designs for this bundle of cards and it worked perfectly with her new collection for  Echo Park Farmer’s Market.

Thank you for stopping by today and please share your creations with us!  ~Cathy

A Pinwheel Bouquet

It’s time to start creating for the 4th of July…celebrate the country we love.  Lori has this amazing bundle available, you can find it here.  So many cute projects.  You can also find them individually in her store or in the Silhouette Design Store.  I played with the pinwheel design for this project.

As I said I am using the new Pinwheel (SVG, Silhouette) for my project.   You will need some double sided papers or card stock, brads to secure your pinwheel and paper straws or dowels to attach the pinwheels.


This is how the file looks when you open it, ungroup it and cut the two pieces for your pinwheel.  I was able to get both on one 12×12 with some trial and error.

Once your pinwheel is cut, layer the two pieces just as shown in the screenshot or the picture below.  Have your brad handy.

Just start bring the tip of each point to the middle, lining up the tiny holes that your machine cut for you.

Keep going all the way around, one by one, lining them up…..

Once you have them all lined up, insert your brad.  It takes a little patience to get all those little holes lined up.  I’ve made so many pinwheels in my life time that I’m used to this step…so I didn’t think about this until after, but it may be easier for you to secure it with a paper piercer as you pick it up.  That way each point will be secure and lined up, then just slide the brad in.  So adorable!  I cut three pinwheels, starting with the original size in the file, then sized it down 1.5 inches the next two times.

For the smallest pinwheel, I wanted to have it two colors, so I simply flipped one.  You will have one going clockwise and one going counter clockwise.  Notice the direction of both on the screenshot below.

Once I had all three cut and secured with a brad, I hot glued them onto paper straws and added to a mason jar.  I love this, it’s fun and a unique centerpiece for my 4th of July holiday cookout.  I can’t wait.

Thank you for joining us today! And don’t forget, all SVG files in the Lori Whitlock SVG Shop are 30% off through Saturday when you use code JUN2021 at checkout!

SHOP NOW