Hi there! Thanks for stopping by today. I am sharing an assembly tutorial for the 3D Lantern Bats (SVG, Silhouette) file. This cute lantern has several versions and makes a cute decoration for Halloween. For one lantern you will need two sheets of cardstock. I also used a few scrap pieces of cardstock to make some fall leaves for embellishment.
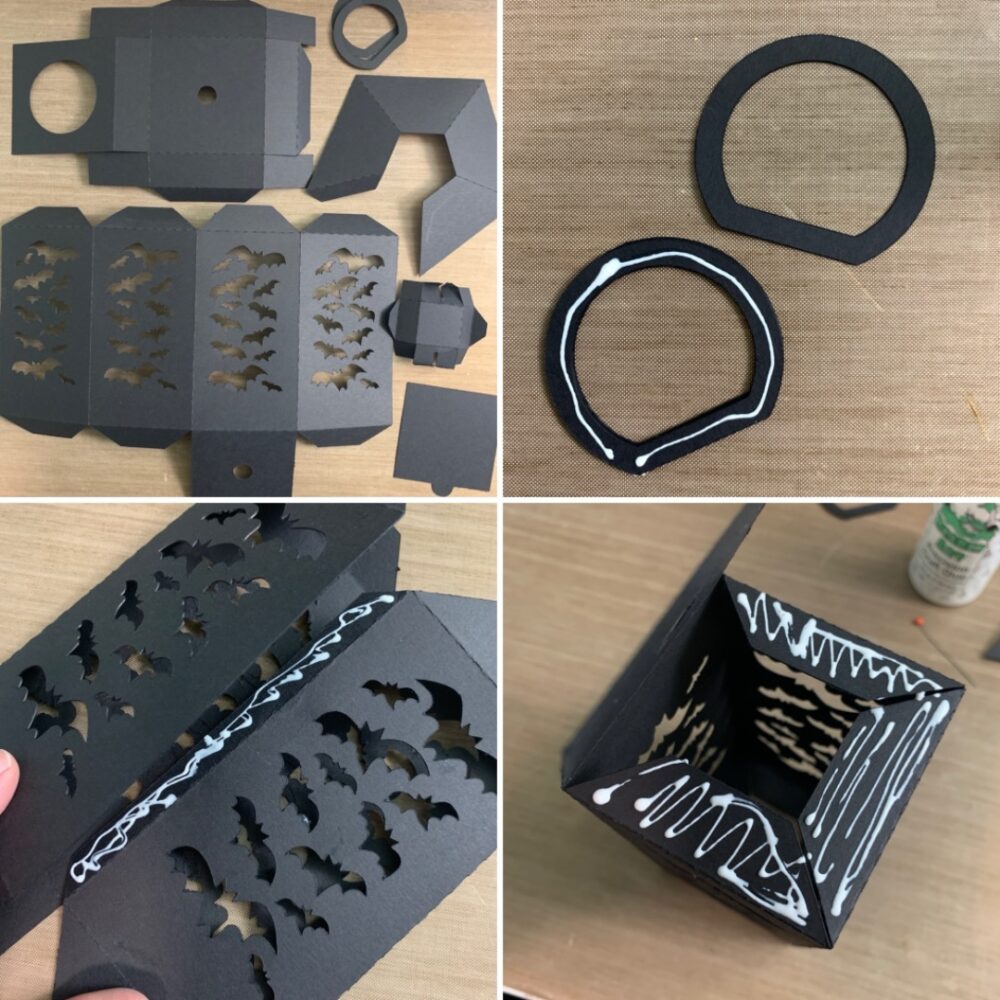
Once all my pieces were cut, I folded all of the score lines as mountain folds. I then glued all of the D ring shapes together. The lantern body is one piece with one long tab, I added glue to the tab and lined up the opposite edge of the lantern body to the tab. After the glue was set, I flipped the lantern over and added a generous amount of glue to all the bottom tab and folded over the base and applied even pressure while the glue set.
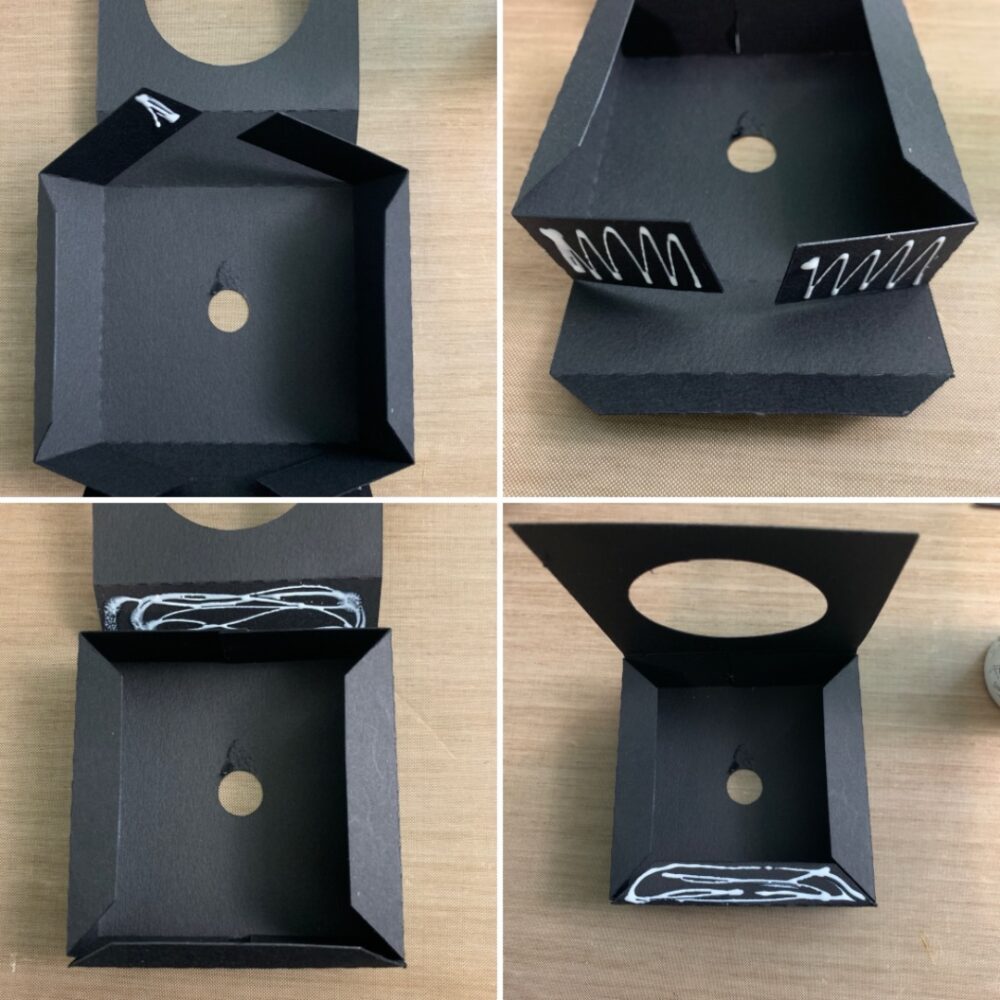
For the base I flipped the base piece over so that the top is on the bottom. I then glued the two longest tabs together. I then added glue to the other long rectangular tabs and folded up the side to secure. Back to the first side I glued I applied glue to the side of the base and held in place. For the flap with the large hole, I only applied glue to the opposite tab. This is to create a sleeve for a battery tea light.

I then slid the square with the small tab through the sleeve to cover the large hole in the bottom. I then flipped the base over and add a generous amount of glue to the bottom of the lantern body and secured the base. I used the two small holes to line up the body to the base.
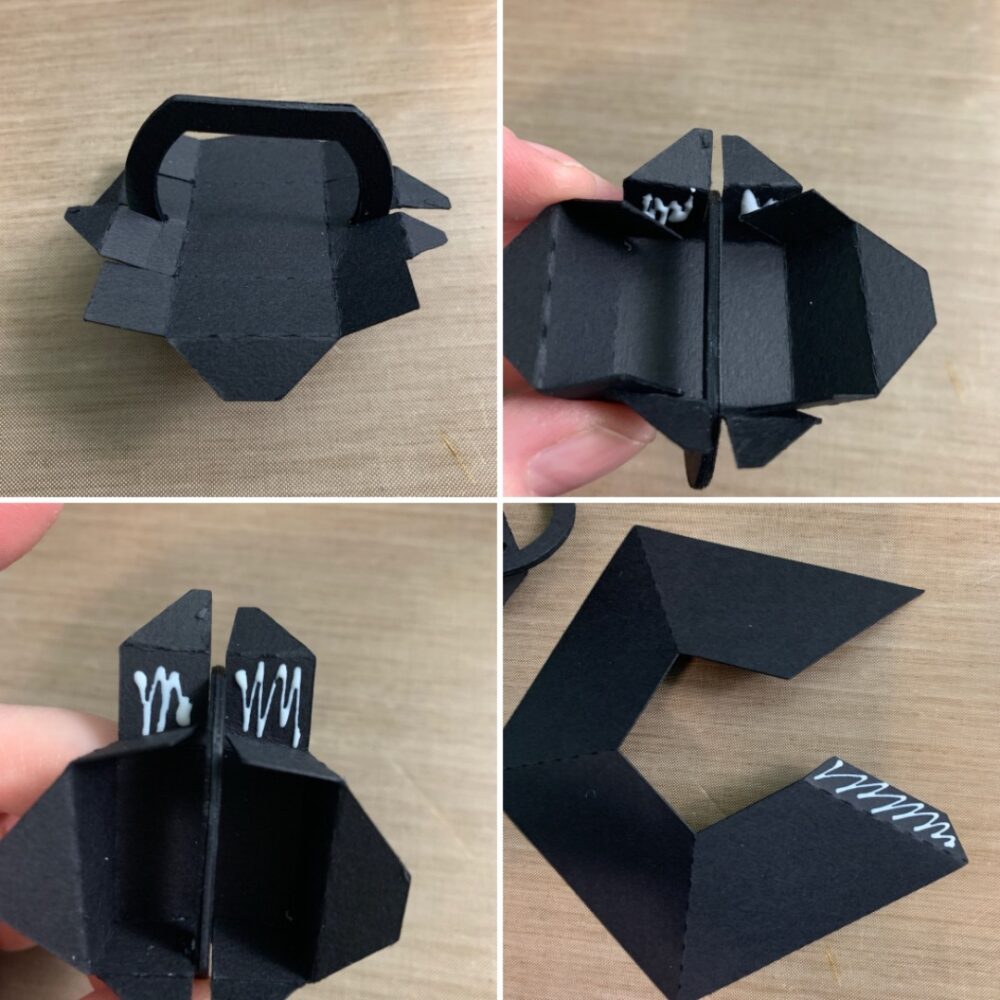
For the top small box for the lid the of the lantern I flipped it over and pushed all of the rectangle shaped tabs back into mountain folds (this helps keep them out of the way while I glue the box together). I added the D ring between the notches. I added glue to the square tabs and held in place while the glue set. I also glued the c shaped piece together by adding glue to just the tab.
Once the small box was dry and set, I pushed all the small tabs through the square in the roof of the lantern and added glue to the small tabs on the inside of the lantern roof. I then added glue to the tabs on the top of the lantern body and held the roof on with even pressure while the glue set.
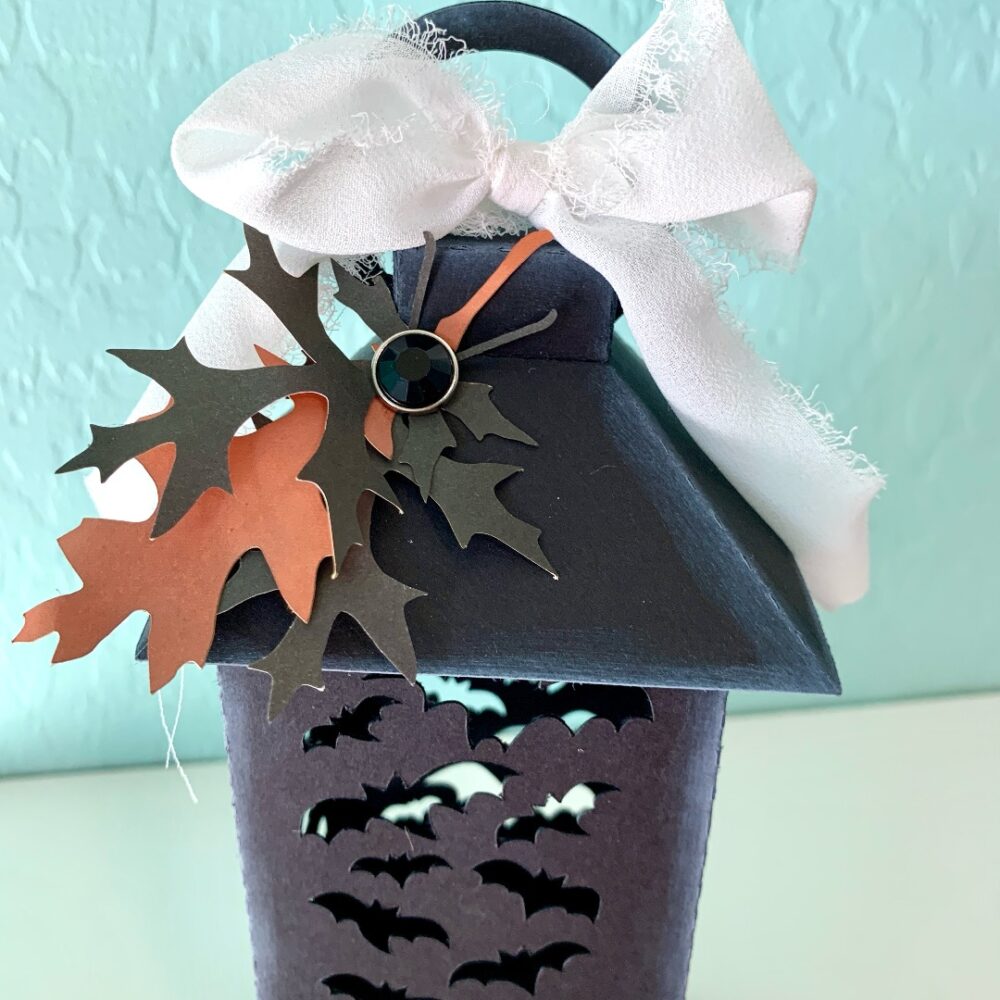
After the lantern was dry, I cut some oak leaves (
SVG,
Silhouette) and inked the edges of the lantern. I used some chiffon ribbon for a bow and glued on the oak leaves.
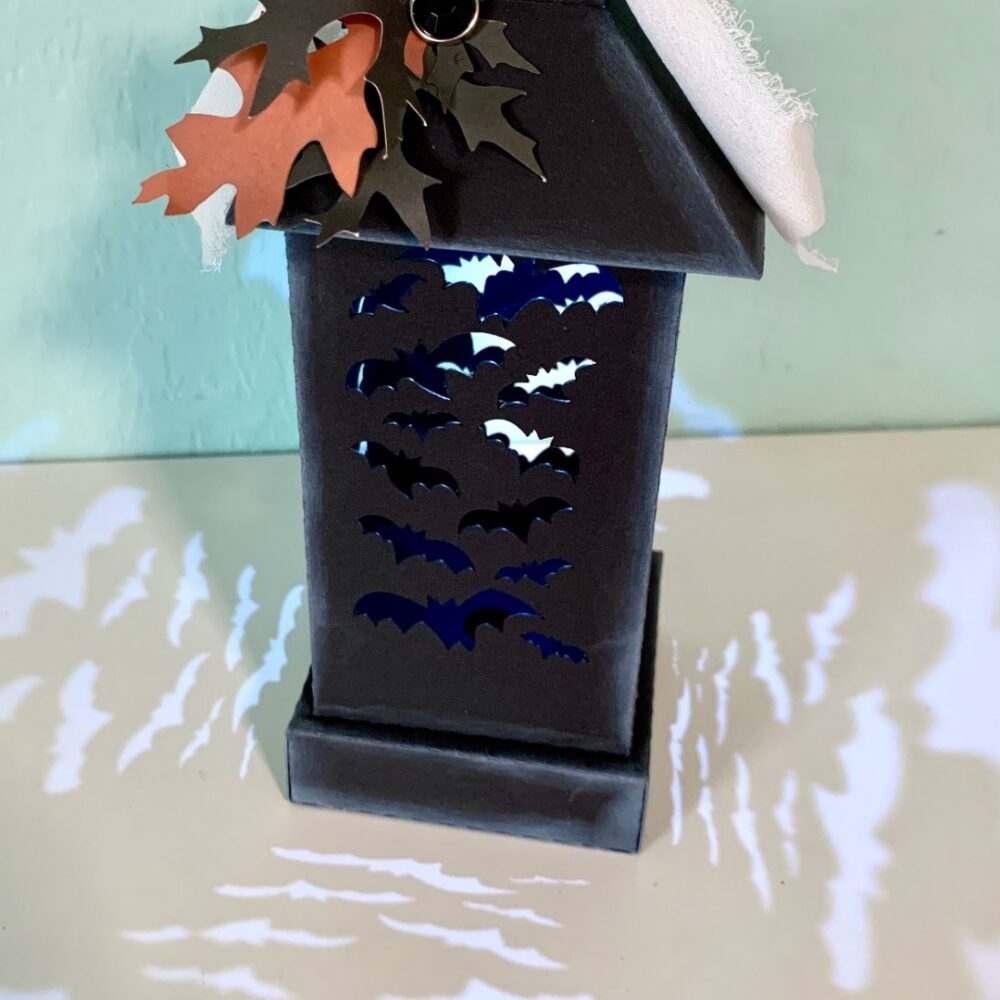
I had a little ballon light to my lantern to get the bats to cast on the walls and shelf.
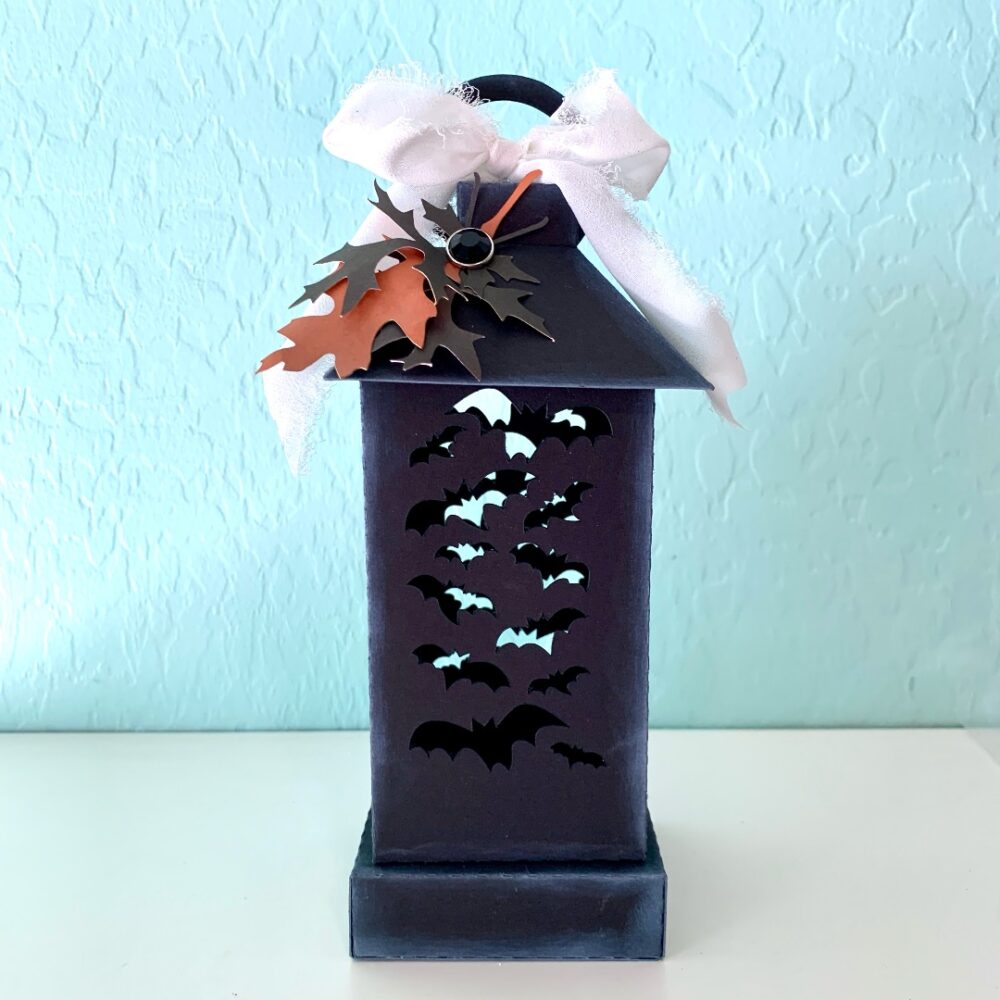
This would be a fun addition to a Halloween table or tiered tray display. Thats all for me today. Thanks again for being here.
Brandie

Is there a moderator, do you need your help changing my password?
Maybe I’m doing something wrong?
Please help.
Thank you.