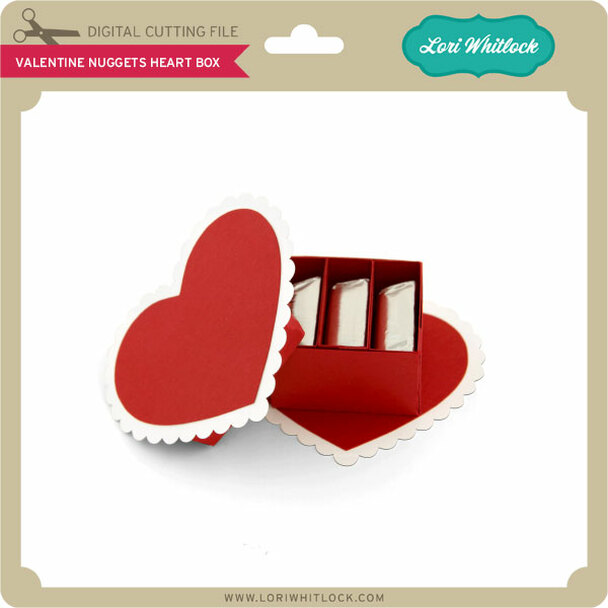
Hi there paper crafting friends! It’s Michelle Starcher, aka the Bookish Designer, hopping onto the blog to walk you through the steps to create Lori’s Valentine Nuggets Heart Box (SVG, Silhouette). This adorable little box holds three Hershey’s Nuggets and is perfect for spreading some love this Valentine’s Day.
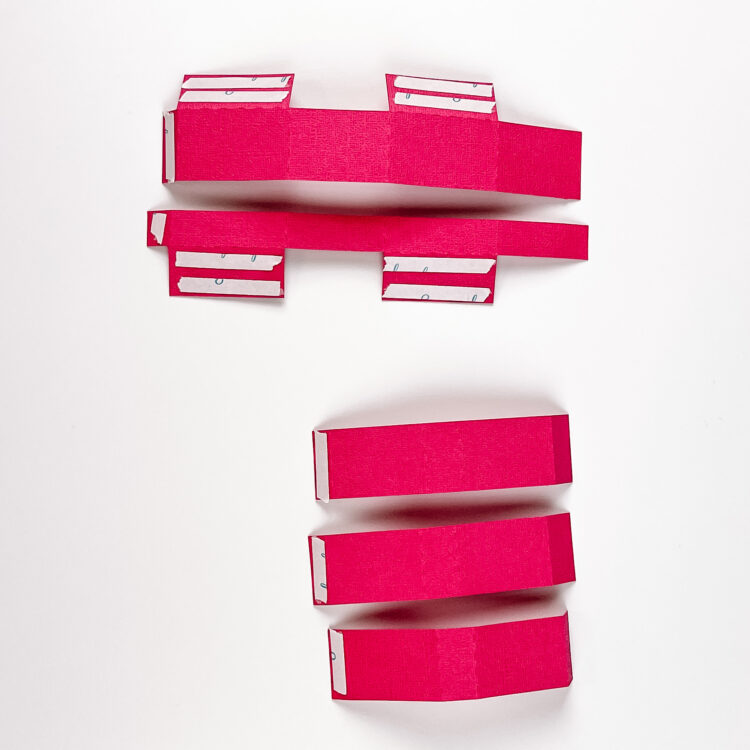
I used my Cricut Maker to cut the pieces for the Valentine Nuggets Heart Box. For this step, I had to ungroup all of the pieces and attach the score marks to the pieces that would be used to make the box. There are two pieces that make up the outer box and three for the individual nugget holders. Once I cut out all of the pieces, I folded along the score lines and added adhesive tape to the tabs.
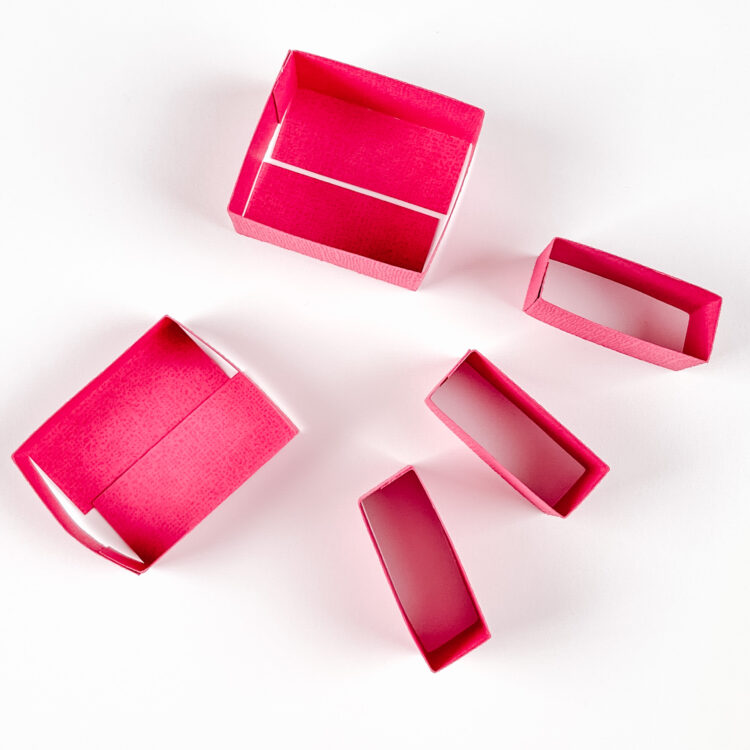
Next, I built the box, lid, and nugget holders using the adhesive tape to connect the tab with the other side of the paper strip to form a “box”. The bottom flaps of the box and lid do not connect to anything at this point.
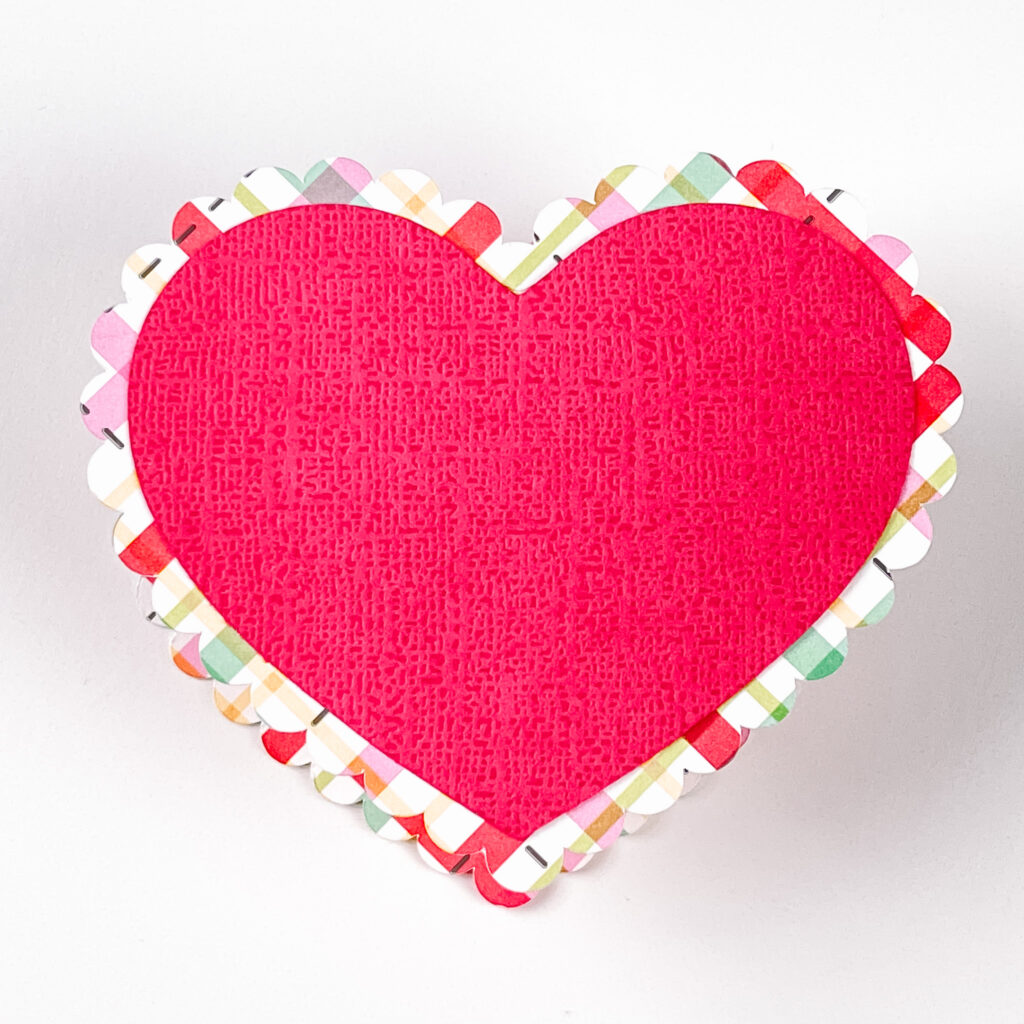
Attach the smaller hearts to the larger scalloped hearts. These will form the base for you box and lid. Attach the lid (shorter piece) to the back of one of the hearts. Small notches on the scalloped heart will help you to line up your lid in the appropriate place. Next, insert the box into the lid with the tabs/flaps on the outside. Then attach the other scalloped heart to the box using the adhesive on the tabs/flaps. Use can use the lid’s heart to help you align the top and bottom pieces. (Note: You want to attach the bottom tabs/flaps of the box to the side of the heart where you can see both hearts.)
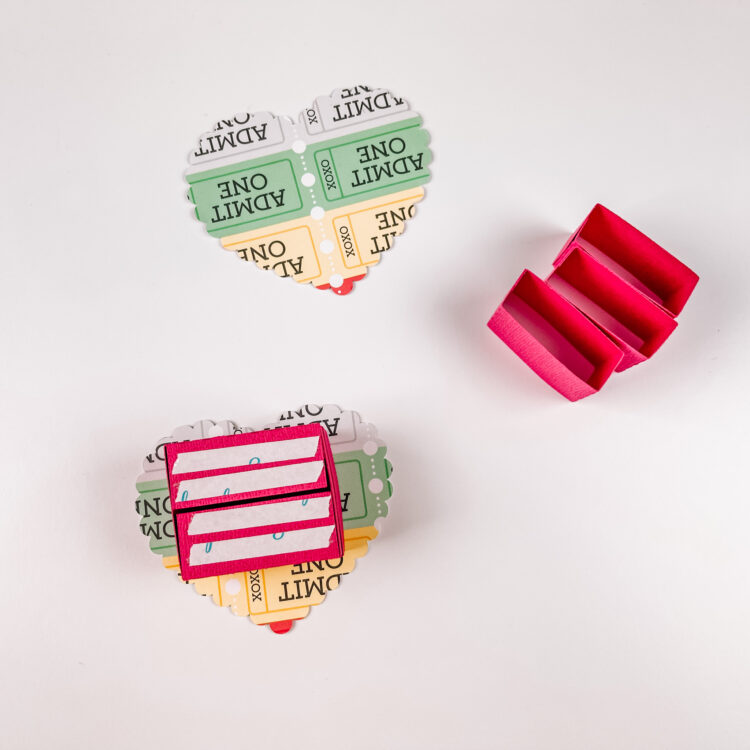
Finally, you need to insert the nugget holders into the box. You can use adhesive to connect all three nugget holders, but I just placed them inside the box without any adhesive.
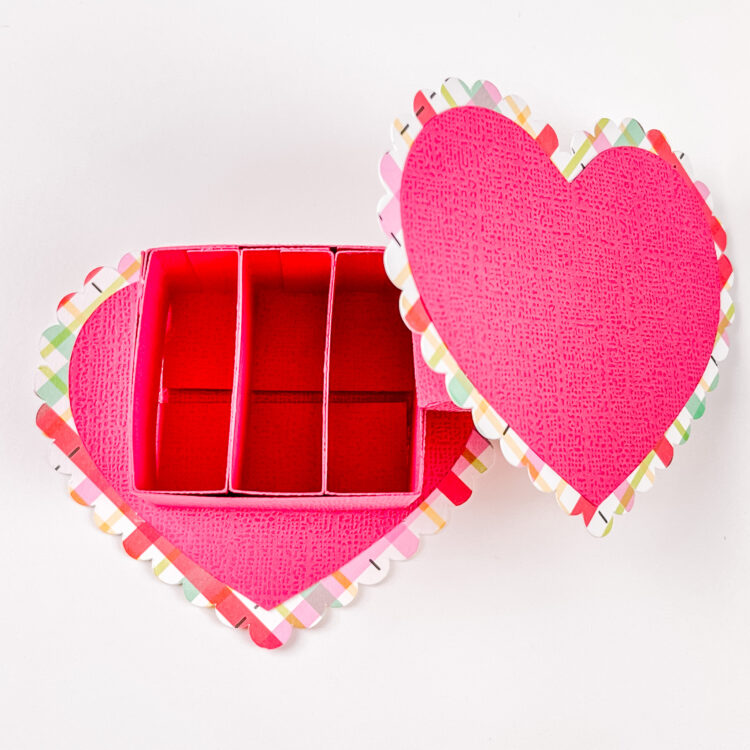
You can add stickers or other embellishments to the top of the box to give it a little more flair. Otherwise, it is ready to fill up with yummy chocolate nuggets. In addition the the Valentine Nuggets Heart Box, Lori has a couple of other Valentine’s Day heart boxes available that hold Hershey’s Kisses. Here are the links to all of the Valentine’s Heart Boxes.
Valentine Kisses Heart Box Small (In Silhouette Store here) Holds 4 Kisses
Valentine Kisses Heart Box Large (In Silhouette Store here) Holds 9 Kisses
Valentine Nuggets Heart Box (In Silhouette Store here) Holds 3 Nuggets
Until next time,
Michelle