Mini Mailbox Tutorial with Michelle

Happy New Year! Now that we’ve said goodbye to 2018, it’s time for me, Michelle, to start my 2019 Valentine crafts. Today I would like to share a tutorial for one of Lori’s Mini Mailboxes. It’s a classic! You can find the SVG files at the Silhouette Design Store, or at the Lori Whitlock SVG Shop.

Mini Paper Mailbox using I HEART Crafting by Lori Whitlock for Echo Park Paper

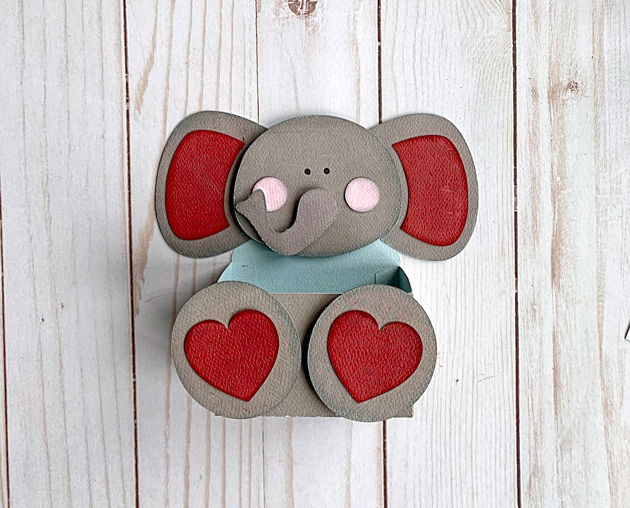
The file is adorable and so easy to put together. It would be great as a treat box or a fun place for children to leave little notes. It would be a fun snow day activity too. The possibilities are endless, so let’s get started!

Mini Mailbox Pieces cut from SVG Files

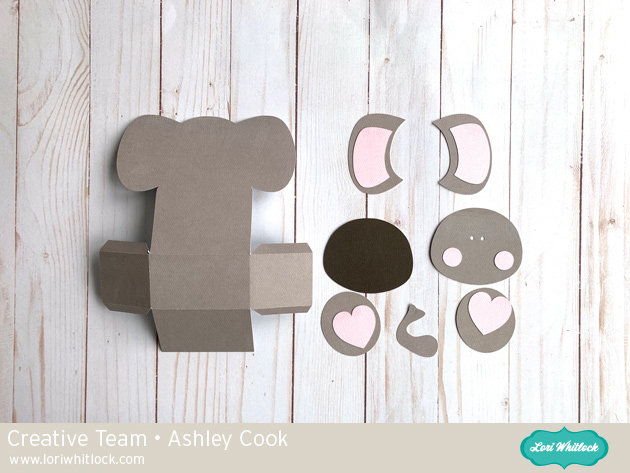
First, cut out your pieces. I used the Lori Whitlock I HEART CRAFTING line by Echo Park Paper. It’s not Valentine or Love themed paper, but the pinks and reds are perfect for both! Tip: It’s easier to glue down your embellishments while it is still flat. The paper will curve easier if you use a dry adhesive, like a tape runner or double sided tape for your embellishments. 

Photo Tutorial For Paper Mini Mailbox Assembly

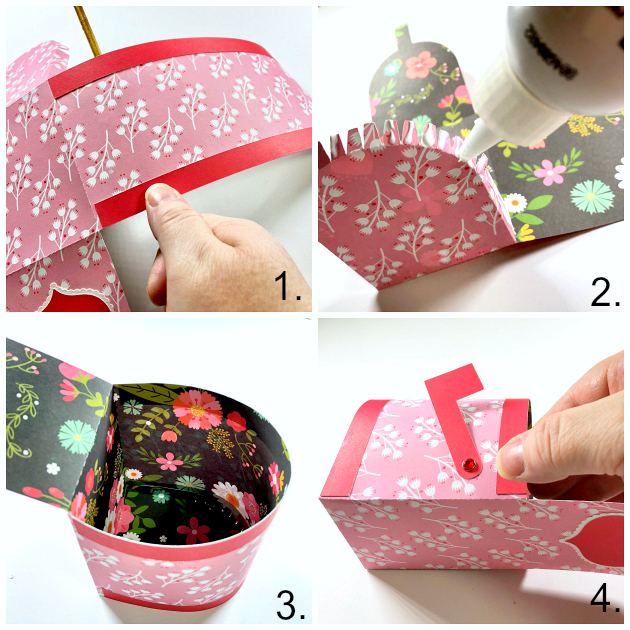
Here are the steps to assemble the mailbox:

  1. Using a kitchen skewer or dowel rod, gentle train the paper to curve as shown.
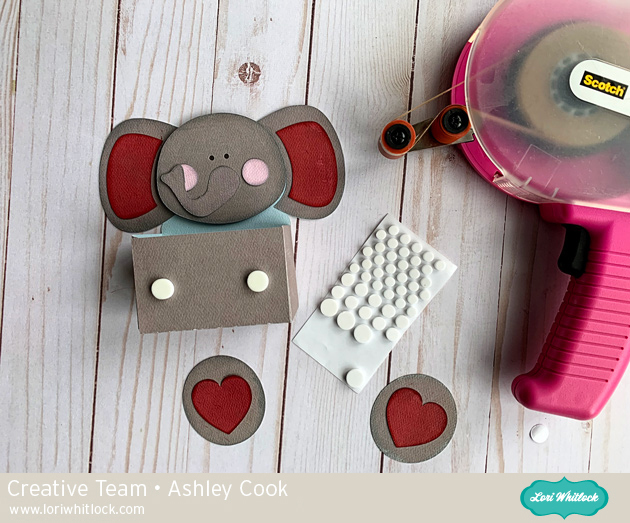
  2. Fold all glue tabs inwards and apply adhesive. I used a quick dry liquid glue.
  3. Turn the box on its end and place your hand inside to push down against the table. This will give you a flat surface to push against and make sure that the glue tabs are all attached to the inside.
  4. Attach the mailbox flag to the base with a brad. Tip: Using a brad will allow the flag to move, but if you don’t have any, it will still be cute! Try gluing a button for another fun look!

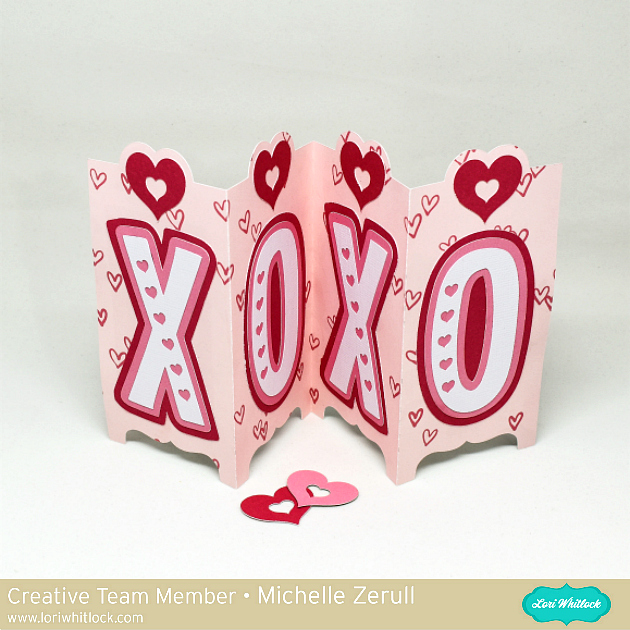
The cute little postage stamps shown in the photo are also from Lori’s SVG files. You can find them at the Lori Whitlock SVG Shop, or at the Silhouette Design Store. The other decorative elements I cut from some of Lori’s other various files.

Mini Paper Mailbox using SVG Files by Lori Whitlock for Cricut or Silhouette

The little pull tab at the top allows the mailbox to open easily. Especially for little fingers!

Mini Paper St Valentines Day Mailbox made with I HEART CRAFTING Papers by Lori Whitlock 630

Thanks for visiting today. Happy Crafting!

Love,

Michelle

Modifying Print and Cut Sentiments: A Silhouette Cameo Tutorial by Michelle

Hello Crafty Friends! Michelle here, to share a quick and easy tutorial for changing your print and cut sentiments. Have you seen all of the recent Valentine’s Day cards that Lori Whitlock has designed? With so many fun interactive styles, you can make a card for everyone. I’ll be sending cards to the people that I love, but I also want to give cards to the people that I like. Sending coworkers cards that say, “I Love You” would make everyone feel a little awkward, so I’m going to change the print and cut sentiments with my Silhouette Cameo.

Today, I’m going to change the sentiments in two pop up box cards. I made the Pop Up Box Card Valentine Whale from the Lori Whitlock SVG Shop. You can also purchase it from the Silhouette Design Store. I also made the Pop Up Box Card Valentine Waffle card from the Lori Whitlock SVG Shop and at the Silhouette Design Store. Both of these adorable designs contain sentiments that say, “love.” We are going to change that in three easy steps with my Silhouette Cameo.

1. Prepare the sentiments to be changed. Ungroup and move all of the design elements off of the mat and on to the grey area. Leave the two print and cut designs on the mat. I’m going to change both print elements at the same time so the fonts match. Ungroup the text from the box and delete the sentiment. Leave the rectangular box piece on the mat. Our new sentiment will fit inside.

2. Design your NEW sentiment. Create a text box by clicking on the left hand side. Type your new sentiment. You will need to resize your sentiment to fit the text box by using the text icon on the far right side. You can also change your font at this time too. Lori has a lot of great fonts to choose from. I changed my font to Jackie Font that I downloaded from the Lori Whitlock SVG Shop. You an also find it here at the Silhouette Design Store. Important: You need to fill the sentiment with black in order for it to print. You can do this by clicking on the new text and then click on the art palette icon the the right side menu. Technically, you can choose any color, but we are sticking with black for this project. Make sure your new text fits in the old text box piece.

3. Prepare your new sentiment for printing. Now that you have your new text in the old text box piece, you will need to make sure that it will print instead of cut. To do this click on the blue “send” tab on the top right. This screen will show you what cuts by placing read lines around it. Leave the red lines around the box, but remove the red lines from the sentiment by clicking the “No Cut” on the send screen. Now flip back to the “Design” tab. Here, you can group your sentiment and box so that you can move them around together. Set up your page to print as usual.

As you can see from the card, the original sentiment has now been replaced with, “I Like You a Waffle Lot,” instead of “I Love you a Waffle Lot.” It’s just as cute, and now I can give this card to anyone!

I love that all of Lori’s designs are so versatile. And so very, very cute! Thank you for visiting, and have a crafty day!

Michelle


Sweet Little Valentine Chocolate Box

Hello, Crafty Friends!! Mitsyana Wright here… and I’m ready to toss out my winter snowflakes for some heart filled skies because Valentine’s Day is around the corner and February is the month of love.  So what better way to celebrate than with sweet for your sweetie… or sweeties. I have 4 kiddos and a Hunny bunny that would love to receive this sweet little Valentine.For this romantic shabby chic heart box, I used Lori Whitlock’s Valentine Nuggets Heart Box.

You can find this cut file in Lori’s SVG Shop, hereOr in the Silhouette Storehere.

I started by downloading the file onto my computer and extracting the contents of the file.  I opened my Sizzix eclips software and loaded the file. I clicked the “Import” button to open the file into my software.

Once I opened up the file I grouped the images by like shapes and colors. (ex. all the red shapes together, all the scalloped hearts together) and moved them around to fit my virtual mat.

Then, I grouped my “like” items together so I could cut all the shapes of the same paper all at once. I used the gorgeous floral paper to cut the box panels and the basic heart shapes.

Then, I “hid” those box panels and basic hearts…

and die cut just the scalloped hearts from this beautiful fleur de lis paper. Once, the scalloped hearts were cut  I inked the edges using Walnut Stain Distress Ink.

To assemble the TOP box, I folded the panels along the dotted crease lines and folded each piece to form a rectangular shape. Then added glue to the small tab at the end and adhered it to the opposite end.  I pinched the ends together till the glue set and then added more glue to the bottom flaps directly to the bottom or “underside” of one of the scalloped hearts. If you look very closely at the cut, you’ll notice that there are tiny markers cut into it to mark where you need to adhere the boxes… so there’s no guessing where the center of the cut is and your box is properly aligned. I added glue to the box panels bottom flaps and adhered my box in between these markers.

For the Bottom box, I took the other scalloped heart and left it faced up and added glue to the remainder box’s bottom panels… but before attaching it I ran both basic heart shapes through my Xyron Sticker Maker and adhered one the hearts to the remaining scallop heart. Then I attached the remaining box over that.

For the inside panels of the box, the file has these separators. I just folded along the dotted lines and add glue to the small tab and attach to the opposite end so that it resembled a rectangle. Once the glue dried, I inserted all three into the bottom box.

Here is what both the bottom and top pieces should look like…

The top lid should fit snuggly over the bottom box.  I just simply added a sprig of leaves and flower buds onto the cover and topped with a single rose.

Here is my finished box…

This little Valentine treat box is absolutely darling!!

And these delicious Hershey’s Chocolate Nuggets fit perfectly!! But don’t let the name of the file fool you because…

hey, look… these Dove Chocolate hearts fit perfectly too!!

I’m sure you can fit lots of other goodies in here as well. So give it try!!  I love this cute treat box… makes my heart aflutter!!  I hope it makes yours too!!  Thanks for joining me today & I hope you enjoyed my project!!

~Mitsyana Wright