School Clipboard Card with Anita

Happy Monday Everyone:

Anita here with a quick and easy fun back to school card for your favorite student.  I just love how cute this is and how easy it was to put together.  The night before the first day of school I used to give my kids a card and a treat to wish them well in the coming school year.  This card would be perfect for that.  I used Lori’s cut file called School Clipboard Card and you can find it here in her store as well as here in the Silhouette store.  I used her awesome new Echo Park line called Celebrate Autumn and her Perfect Princess line as well.  That’s it for me today.  Be sure to check out Lori’s store for all your back to school and fall card and gift giving needs.

Hugs,

Anita

Welcome Sign featuring Vintage Sign Font with Ashley

Happy First Day of School for some of you out there today!  Two of my kids are headed to the first day–both in high school.  I also have a Freshman in college who will be starting in a couple of weeks.  I am featuring a sign today using the Vintage Sign Font found here in the Shop or in the Silhouette Store.  This font has great letters for signs as well as some special characters.

To find those special characters, you can see them in Silhouette Studio.  Or if you are using another program.  The special shapes are found on these keys: []|<>? (look next to P on the keyboard and next to M).

I used Oramask 813 purchased at Expressions Vinyl to make the stencil for the board. I also decided to get the Silhouette Roll Feeder since my sign is 5 feet tall.  I would highly recommend the roll feeder.  It kept the vinyl moving nice and straight.  One caution is that as you get to the end of the roll of vinyl, be careful that it doesn’t get stuck as it is moving in/out of the machine.

I used the alphabet and the leaf which can be found with keys [ ].   The board is common board–5′ tall and 9″ wide.  The tall board makes a great front porch statement!

Reindeer Petal Box Tutorial with Brigit

Hello everyone, I have a Silhouette Studio tutorial to share with you today on how I created this reindeer box. To make this I combined the Bunny Petal Box and Christmas Tag Reindeer svg files from Lori’s shop. You can also get both of these files here and here from the Silhouette Design Store.

I started with the box, ungrouped and did a release compound path to get rid of the bunny face.

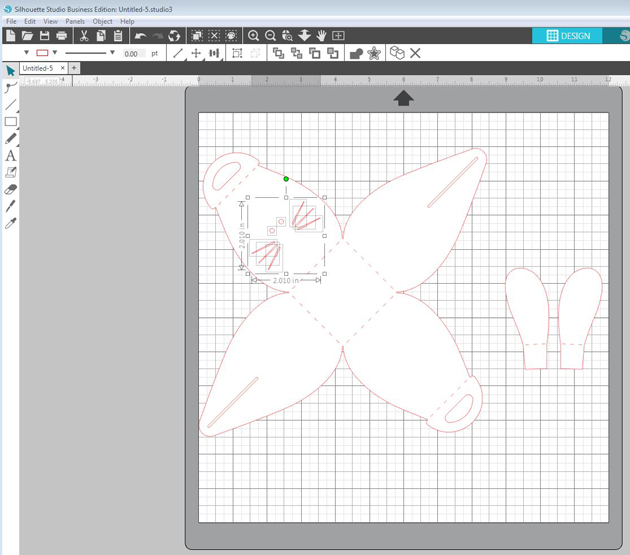
I grouped the box together again and rotated 45 degrees, added the tag and resized it to fit one of the box flaps.

I ungrouped the tag and separated the black layer and with the knife tool I cut off the antlers. I also cut off the ears from the brown and dark brown layer. (I always duplicate my piece first before I do any slicing just in case I mess up).

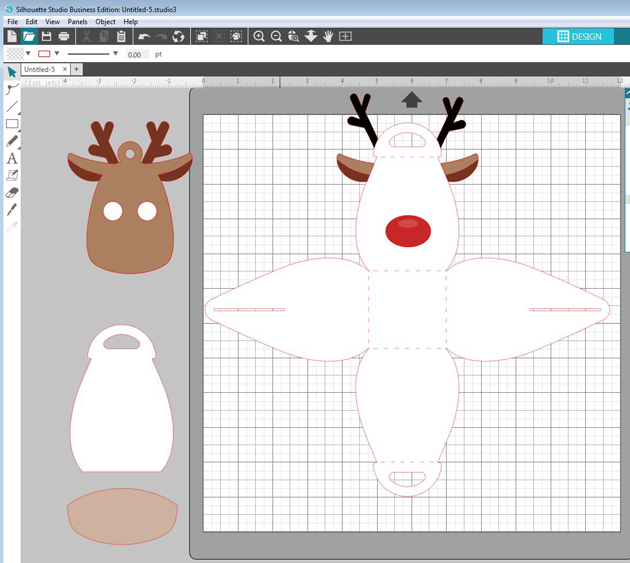
I duplicated the box and cut off one of the flaps with the handle and enlarged the deer’s muzzle from the tag placing it over the box flap and selected both and cropped.

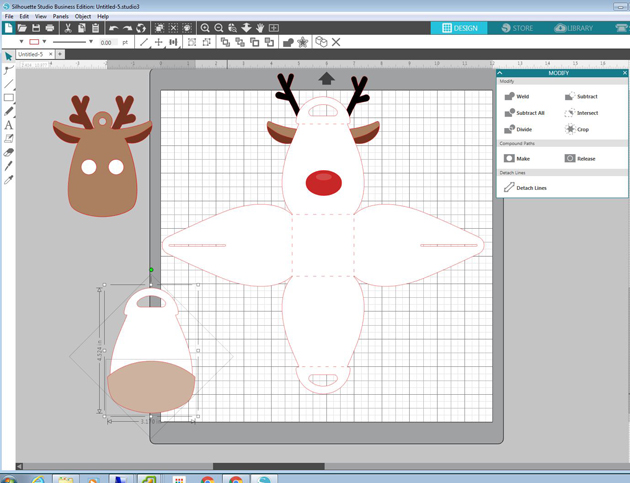
For the ear, I selected both pieces and subtracted under modify menu, I wanted the bottom part as a layer instead of the top so I could weld the top piece to the box, you will see that below.

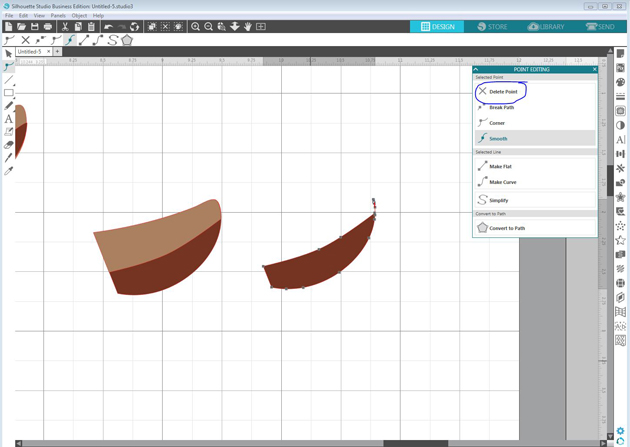
If you have little points left you can double-click on the piece and delete points.

Last I rotated the ears and welded them to the box as shown below. Now when I put the box together I just have to fold the ears out. I did make new solid score lines, I have the Silhouette Studio Business Edition and save my files as an svg so I can import them into Cricut Design Space and cut them out on my Cricut Maker.

It seems like a lot of steps but it really went together very quickly, makes a nice Christmas treat box!

Thanks for stopping by and have a wonderful day!

Blog – Pinterest – Instagram

Ooh La La Birthday Card with Anita


Happy Monday Everyone:

I have a dear friend who has a birthday coming up and she loves Paris so I made this sweet birthday card for her.  I used Lori’s file called Pop Up Box Card Eiffel Tower Birthday and you can find it here in her store and here in the Silhouette store.  It is so easy to put together and Lori has a a great tutorial for her pop up box cards here.

This showed the card folded flat.  It slips nicely into the envelope. Be sure to check out all the different Pop Up Box cards Lori has in her shop!

Hugs,

Anita

Father’s Day Tool Box Card Tutorial with Anita

Hi Everyone:

Now that we have celebrated Mom it is time to start thinking about the Dad!  I made this sweet card which was so easy to put together for my hubby.  I used the A2 Father’s Day Toolbox Card cut file which you can find here in Lori’s store and here in the Silhouette store.  I used two of Lori’s wonderful Echo Park lines, Wish Upon a Star and I’d Rather be Crafting.

Here are the cut out card pieces and the embellishments that I used from her Wish Upon a Star collection for the bolts on the front of the tool box.

You are going to want to fold your score lines.  Lori’s file includes holes for the brads.  I didn’t punch them out because I wanted to use the enamel dots instead.  You will have a nice pocket in the front to fit the tools when you are done.

I wanted a more plain design to show on the inside so I cut extra  inserts and glued them down.

Here are all the pieces ready to be glued into the pocket.  I popped three of them up to give the card some more dimension.

That’s it for me today.  Lori has lots of wonderful Father’s Day cards and gift boxes for all your celebrations.  This card came out really wonderful and I’m sure that one of the Dad’s in my life are going to love it.

Hugs,

Anita