

 So, so, cute!


 So, so, cute!

First of all I want to remind you of the sale on ALL Lori Whitlock products.

Sorry for the delay today, I had a few hiccups getting shapes loaded and wanted you to see all the beautiful new shapes Lori has created (these will be on sale too). I can’t wait to see what you make. Be sure to post them to Lori’s Facebook page we LOVE to see what you are working on! Because today’s freebie was late posting, it will run through Wednesday at noon.
Today only, this stamp set SVG file is FREE with ANY PURCHASE. Just add coupon code: STAMP at checkout and the cost will be deducted from your purchase.


Lori has so many fun new shapes. I wish my daughter was still little so we could make paper dolls and store them in her adorable Armoire box. Wouldn’t that be the cutest?
Here are some of Lori’s newest shapes added to the SVG shop and her Silhouette Portfolio! Thanks for stopping by… Lisa
Welcome! We are so excited to share with you our new Thursday Tutorials. We have had so many questions, we thought we would start a collection of answers and tips here. Today we have Corri sharing one of her perfected skills. Take it away Corri…
One of the most popular cards that I’ve done is this cupcake card I did last year.

I thought I would share a tutorial to show you all how to weld shapes to create your own shape card.
First, select a shape you would like to use to create your card. It’s best if the top of the shape is simple to allow for a clean weld and crease along the top.

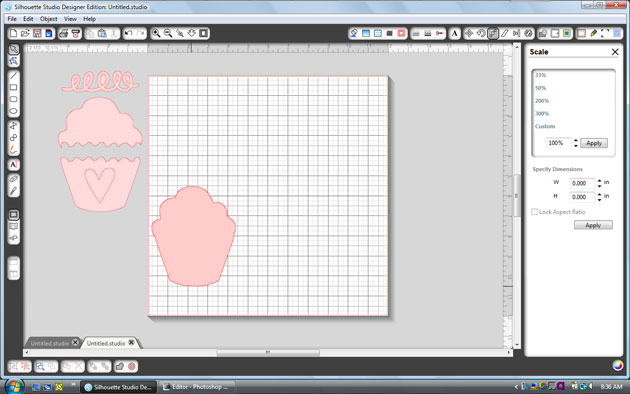
I used this cupcakes file to create my card. I resized the file to 11.75″h so that my completed card would be about 5″h.
Next, ungroup and delete the pieces you don’t need.

Drag the cupcake top and wrapper off the mat and position the cupcake base layer in the lower left corner of your mat.

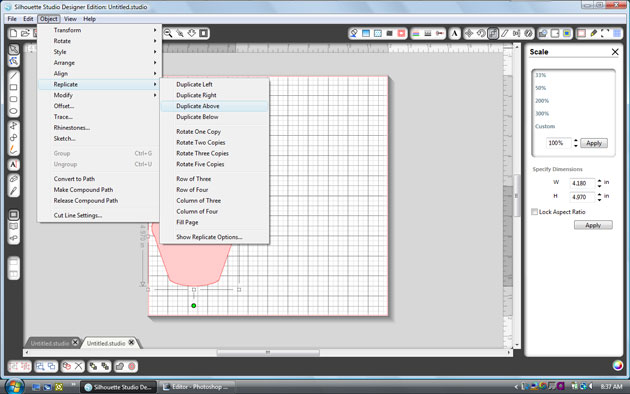
Click on the cupcake shape, then on the menus along the top of your screen select object, pull down to duplicate then select replicate above.

Now you have two identical shapes stacked on top of each other. Click on the top cupcake to select it.
Then go to object, transform, flip vertically.

While the top cupcake is still selected, use the arrow keys to move it down a little until the edges overlap slightly. Select both cupcake shapes (you can hold down the shift key to add the second shape to your selection) and then go back to the object menu. Pull down to select Modify and then Weld.

Now you have your card base….just fold and cut out the remaining layers and embellish.
For my card today, I used Echo Park All about a Boy. I left off the heart and cut a number 5 instead using Lori’s Happy Font instead.

Everyone loves cupcakes and you can personalize this cute card for any age depending on the the papers and embellishements you choose.


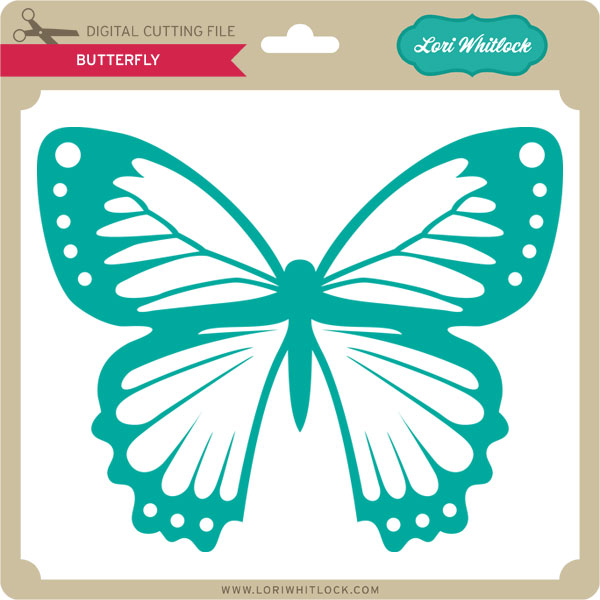
Welcome back to our Tuesday Freebie! I have been wishing for more warm weather and thought this was almost as good. I thought you might like some cheerfulness, too. Today only, this beautiful butterfly SVG file is FREE with ANY PURCHASE. Just add coupon code: BUTTRFLY at checkout and the cost will be deducted from your purchase.
Here are some of Lori’s newest shapes added to the SVG shop and her Silhouette Portfolio! Thanks for stopping by… Lisa
Lori has made some fabulous shapes that I can’t wait to share with you. You can grab these in Lori’s SVG shop or at the Silhouette Shop.