Gaming Remote Mini Album

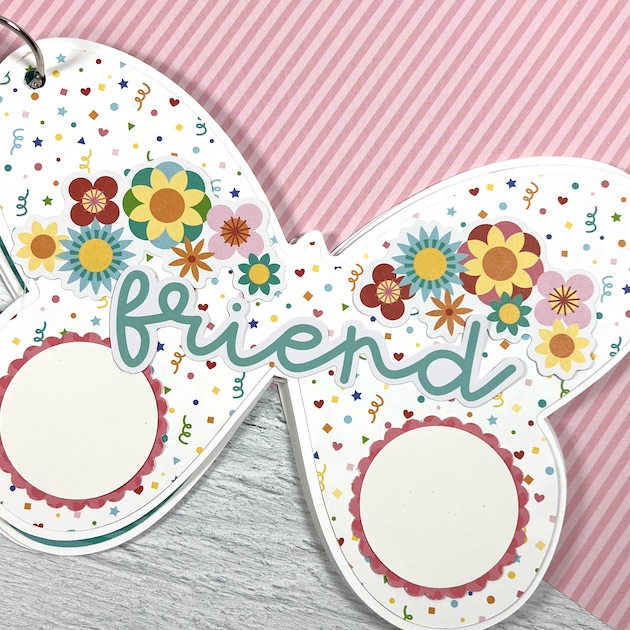
Hi crafty friends! I’m excited to be sharing my latest project tutorial!  I used Lori’s Pop Up Video Game Card to create a mini album in the shape of a gaming controller. This unique little scrapbook is perfect for photos of gaming with friends, a birthday party, or everyday pictures of your little gamer. 

Game Controller Shaped Scrapbook Mini Album

I started with the cutting file called 5×7 Pop Up Card Father’s Day Video Game (SVG, Silhouette).

5x7 Pop Up Card Father's Day Video Game

This card is so adorable! I only used the game controller part to create my album but I’ll definitely use the entire card file again sometime.  

Let’s take a look at some of the pages, then I’ll explain exactly how I made it.

Game Controller Shaped Scrapbook Album Page with polka dots and enamel dots

Game Controller Shaped Scrapbook Album Page with a television, stars, and a gingham paper

Game Controller Shaped Scrapbook Album Page with baseball hats and a geometric green paper

Game Controller Shaped Scrapbook Album Page with a polka dot paper and directional arrow buttons
Game Controller Shaped Scrapbook Album Page with 2 photo mats and enamel dots

It’s fun, right? Ok, now for the tutorial … 

1.  I brought the card into my Silhouette software and ungrouped all of the pieces.  

2.  I kept only the game controller and hit ungroup again so that I could separate the pieces.  

3. With the pieces separated, I duplicated the base shape to create a front and back cover.  Since I only wanted the game buttons on the front cover, I released the compound path. 

4. I deleted the buttons from one of the base shapes.  

5. Now I added a .25” binding hole to the corner and hit “make compound path”.  

6.  Once I had my front and back covers, I cut the colored buttons out and adhered everything together.

Game Controller Shaped Scrapbook Album sitting on a clear acrylic display stand

Now you have a fun mini album that looks great sitting out in a kids room, dad’s office, or a college student’s apartment. Lori has so many great SVG files and I hope you’ll give her 5×7 Pop Up Card Father’s Day Video Game a try.


5×5 Bug Book Album

Hi everyone!  I have a fun mini album to share with you created with Lori’s new Echo Park collection, Little Things Mean A Lot.  It’s a fun collection, full of bright colors and lots of attention to detail with fun little critters.  I thought it would be perfect to create a mini for a little guy that I know that will love to catch some bugs for the summer and his mama can add some pictures as they go.

I cut one cover, and then I cut four pieces to cover the inside and the outside of the cover.  Three base pages and then 12 squares to cover those and one spine cover.  You also need some twine or thread along with adhesive.

Here is all my pieces cut…lots and lot.  Then my inside pages put together.  Ink all the edges.  The bottom left corner is your cover pieces and the bottom right is just a bunch or borders of Lori’s that I cut to add to my pages for fun and detail.
Top right you can see the inside of my inside pages, top left is the inside of my cover and the bottom picture is the outside of the cover.
Next, just line up the holes of your three inside pages with the holes on the cover and tie them in with twine or string.  How cute it that spine on the cover!!!??!!

Then you get to just go to town embellishing and creating with the amazing collection.  I had so much fun.  I used enamel dots, ribbon, stickers, buttons and just had the best time creating this.  I know he and his mama will love it.  And how cute is that little bug catcher!?

You can find the album here in Lori’s Store or here in the Silhouette Store.

I hope you will give one of these mini’s a try!
~Cathy


2×2 Give Thanks Mini Album with Traci

Happy Thanksgiving! Traci here and I hope you all have a wonderful holiday filled with blessings and warm, happy moments. Today, I have a tiny scrapbook to share with you titled Give Thanks that would be so fun for those memories. And, it might be the “miniest” mini album I’ve ever made!

Look how small it is! 💕 I created it with one of Lori’s amazing cutting files called 2×2 Accordion Mini Album (SVG, Silhouette) and the Echo Park, I love Fall Collection also designed by Lori. 

First, let’s look at this little cutie, then I’ll explain exactly how I made it with a tutorial below. 

I just love that it looks like a miniature book. It has an orange and green scalloped spine, pretty pattern papers, and a Give Thanks title sticker on the cover from the 12×12 elements sheet.

Inside, there are 16 little scrapbook pages (8 double-sided). I added some fun shaped journaling spots and photo mats using a 2″ scallop circle punch and a 1.75″ circle punch by Marvy Uchida.

You could use each page in this album for photos, or … mix it up and add embellishments on some of them like I did. Above, I added the Harvest Blessings sticker from the sticker book.

The journaling spots are perfect for adding dates, names, locations, events, or … what you and your family are most grateful for this year. 

This project could be a cute little gift idea for after Thanksgiving. Make them for your guests with pictures from the holiday. Or … create this tiny album with ANY paper collection and it could be a fun Christmas present or stocking stuffer idea!

Now, for some instructions …


1.  I chose my papers and cut out the 8 pages, 2 inside covers, 2 outside covers, and three pieces for the spine. 


2.  Next, I folded the paper on the score lines for each of the pages and positioned them on my table with the 1/2″ tab on the left. 


3.  Then, I adhered each 1/2” tab to the back of the page before it until I had all 8 pages glued together. 


4.  The very first page still has a tab on the left side, so I adhered the inside front cover here. 


5.  The inside back cover has a tab on it, so I adhered this to the last page of the album.


6.  Once all of the pages are attached, I folded them into a little book and added the front and back covers.


7.
Finally, I adhered the 2 scallop accent pieces next to the spine on the
front and back, then used liquid adhesive to fold the orange spine around the
entire left side of the book.


There
is no need to adhere any of the pages back to back or to the spine. They stay nicely in their accordion shape once the spine piece goes on.
Once the book is complete … it’s time to decorate!


I hope you’ll try this fun project made with Lori’s 2×2 Accordion Mini Album cutting file and her fabulous I Love Fall Collection designed for Echo Park.

For a video tutorial of this album, please see Lori’s YouTube video here:


Have a great Thanksgiving and enjoy your day with family and friends! 🍂🦃🧡

Butterfly Mini Album Tutorial

Hey friends! Traci here and today, I have a new project for spring. Last Thursday was National Butterfly Day and I realized … I’ve never made a mini album in the shape of a butterfly! So, with the help of two amazing Lori Whitlock cutting files, I created a super cute little butterfly scrapbook. Take a look …


Butterfly Shaped Scrapbook Mini Album Tutorial


I chose the first cut file titled Butterfly Set (Silhouette) because it had the perfect wings, however it didn’t have the separate body piece that I needed. So I found a second file called Shaped Card Butterfly (Silhouette) & used them both!


Butterfly Shaped Scrapbook Mini Album with cut-outs


I loved the delicate patterned cut-outs in the wings and thought it would be pretty backed with some colorful papers. I also added a few gems for sparkle. 

Let’s take a quick look inside, then I’ll walk you through the steps of how I made it …


Butterfly shaped scrapbook album page with hearts, flowers, and a bird


I used the file to cut white card stock pages, then covered them in a mix of 12×12 pattern papers from Bella Blvd’s Birthday Bash and Bella Besties Hearts and Ombre. 


Butterfly shaped scrapbook album page with stripes, flowers, a cake, and cupcakes


I created photo mats for each page in varying shapes and sizes, then decorated with lots of cute die cuts.


Butterfly shaped scrapbook album page with flowers and confetti


On this page, I made two round photo mats by punching a 2.5″ scalloped circle out of a pattern paper, then a 1 3/4″ circle out of white card stock.


Butterfly shaped scrapbook album page with lots of pretty flowers


Ok, time for the tutorial. Here’s how I made the album with Lori’s awesome cut file …


Butterfly Shaped Scrapbook Album Tutorial


1. I duplicated the shape first so that I would have a front cover, back cover, and pages.


Butterfly Shaped Scrapbook Album Tutorial


2.  I wanted the pages and back cover to be a solid shape so next I highlighted my second butterfly and clicked release compound path — this separates all of the little inside shapes.


Butterfly Shaped Scrapbook Album Tutorial


3. I moved the base butterfly shape off the the left, and deleted the little bits and pieces that were left behind.


Butterfly Shaped Scrapbook Album Tutorial


4.  Next, I created an internal offset of the solid butterfly so that I would have a smaller shape to cut pattern paper layers. 

I cut the cover pieces once, and then cut 5 solid pieces to use as pages.  Finally, I cut various pattern papers out of the smaller butterfly. 


Butterfly Shaped Scrapbook Album Tutorial


I hope this helps you to create your own shaped mini album with Lori’s butterfly cut files. She has so many great ones to choose from! Hop on over to her shop today and have fun exploring. Happy crafting!


Blog * Shop * Facebook * Instagram * Pinterest

Baby Boy Layered Mini Album


Hi everyone!  I chose one of Lori’s older files today for a gift for a friend who has a new grandson.  This Layered Mini Album or here In Silhouette Online Design Store, has always been one of my favorite mini’s.  It’s just simply fabulous and like it says, full of layers!  I hope you enjoy looking at all the pages. I had so much fun creating this darling little mini!  All the little flaps fold up to add photos underneath and tags pull out to add photos there also!


Thank you for stopping by!