12 Days of Christmas Countdown

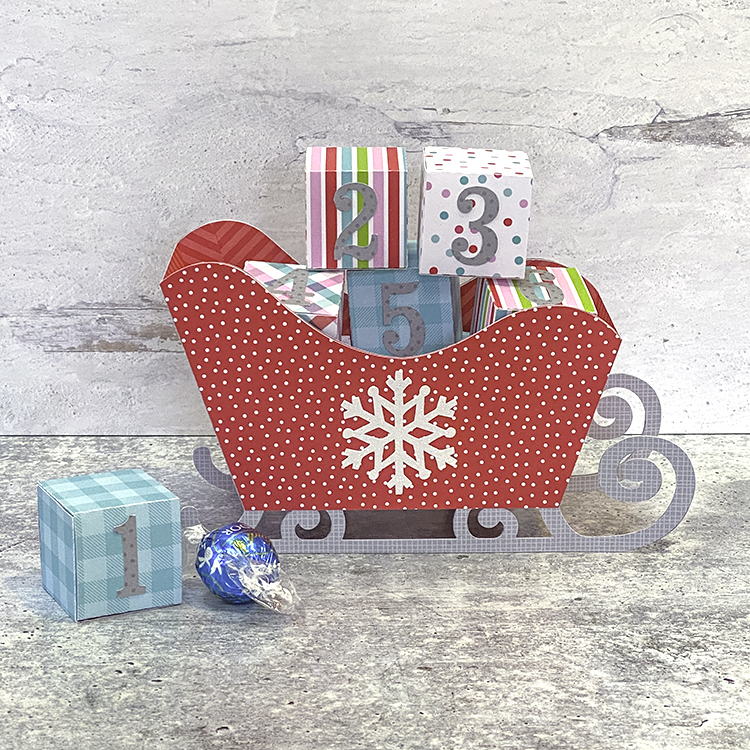
There are officially 12 days until Christmas!  If you didn’t get to make a complete Advent Calendar this year, you can still do a fun 12 Days countdown!  Lori has a new file coming to the shop this week… the 12 Days Countdown Advent Sleigh (SVG, Silhouette – Coming soon!)  This sleigh holds 12 little boxes (each a little less than 1.5″ square) big enough for a little treat.  Take a peek…

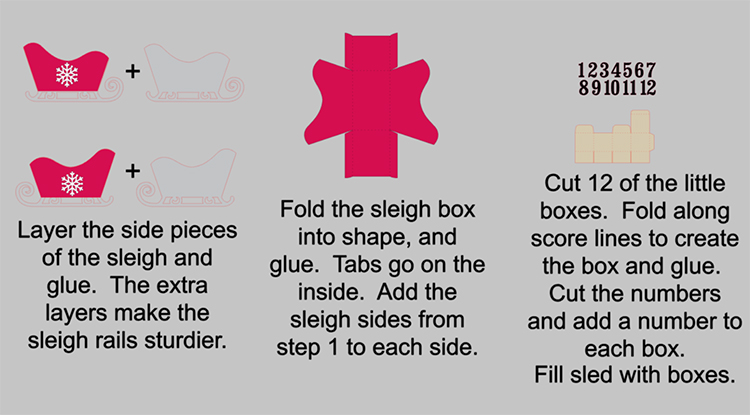
This file goes together really quickly.  Then you can spend your time filling the little boxes with something sweet!  I put together a quick tutorial below…

I hope you all have a very happy and healthy holiday season!

BLOG | INSTAGRAM


12 Days of Christmas – Day 8 & 3D Hot Cocoa Mug Tutorial

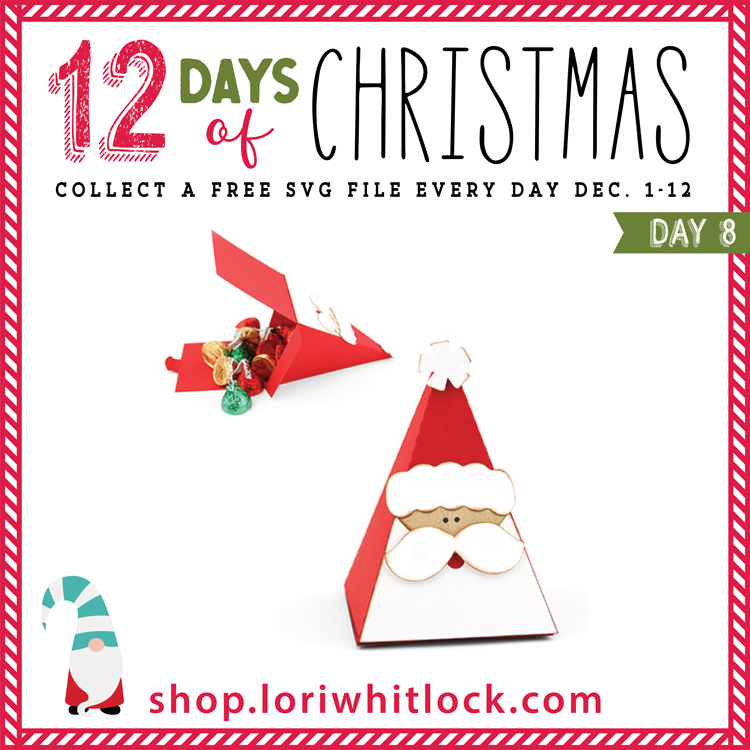
Welcome to Day 8 of our 12 Days of Christmas! Each day from December 1-12, there will be a free SVG file of the day, along with a special promotion!  For Day 8 we have this Santa Pyramid Box will be free today only, so don’t miss out!
 

In addition, today only, you can get 40% off all items under the 3D Category in my SVG shop!  Just use code 3D40 at checkout!
 

And check out this fun tutorial!

Hi Everyone!  Kathy here today with one of the cutest projects!  Lori has a bundle of 3D Hot Cocoa Mugs that are the perfect little holder for something sweet! They would make a great addition to a teacher or coach gift!  I made the new 3D Hot Cocoa Mug (SVG, Silhouette) take a peek…
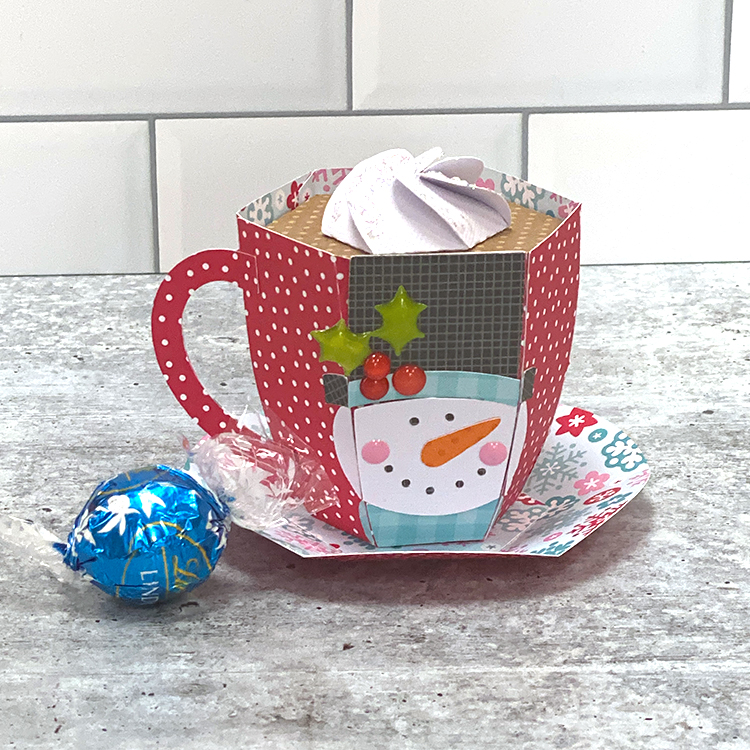
And lift up the cocoa lid to find a sweet treat!
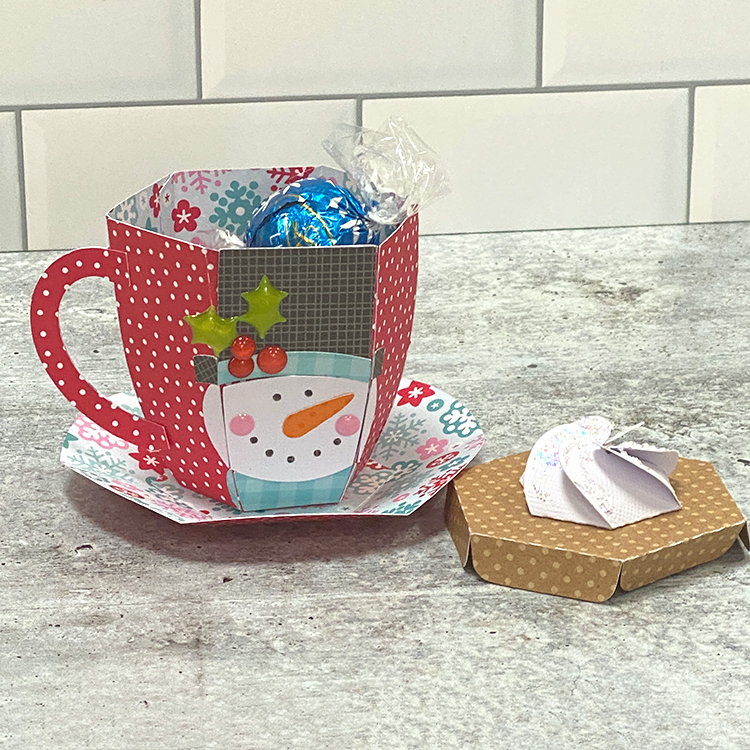
These little mugs are super easy to assemble, I put together some quick instructions below…

Start by cutting the pieces of the file (see above).  Lori always colorizes her files, which helps when making paper choices!  I pre-assembled the snowman face and hat pieces.  When you open the file in your cutting software, the pieces are grouped together as they go on the final project, so assembly is easy!


To assemble the mug, start by folding all the score lines on the main mug piece in the same direction.  Fold up the side panels, and glue together using the tabs.  Continue until the mug is formed.

Glue the 2 handle pieces together.  Do not add glue to the tabs on either end.

Fold the tabs of the handle out and glue to the side of the mug along one of the seams.

Next add the snowman face to the front of the mug.  Its easiest to start from the top and work your way to the bottom, lining up the sections.  The file comes with some holly for the hat, I swapped it out for some shaped sprinkles I had in my stash.

Add the small pieces to the adjacent panels to complete the snowman hat, head and scarf.

Fold the score lines of the saucer piece all in the same direction.  Join the 2 ends together using the tab.

To finish the saucer, add the hexagon piece in the center.

To make the whipped cream (I added stickles to mine for shine)  fold all the sides inward.  Over lap all of the side pieces so each side is over one side and under another.  The part that goes “over” is the larger end.

Once they are all folded like above, push down in the center and they will hold their shape like whipped cream

Glue the whipped cream to the center of the cocoa piece.  Insert the cocoa piece into the mug as a cover.

See?? Super easy.  You’ll have service for 12 before you know it!  That’s it for me today, thanks for stopping by to peek!

BLOG | INSTAGRAM


Stadium Box Card Tutorial

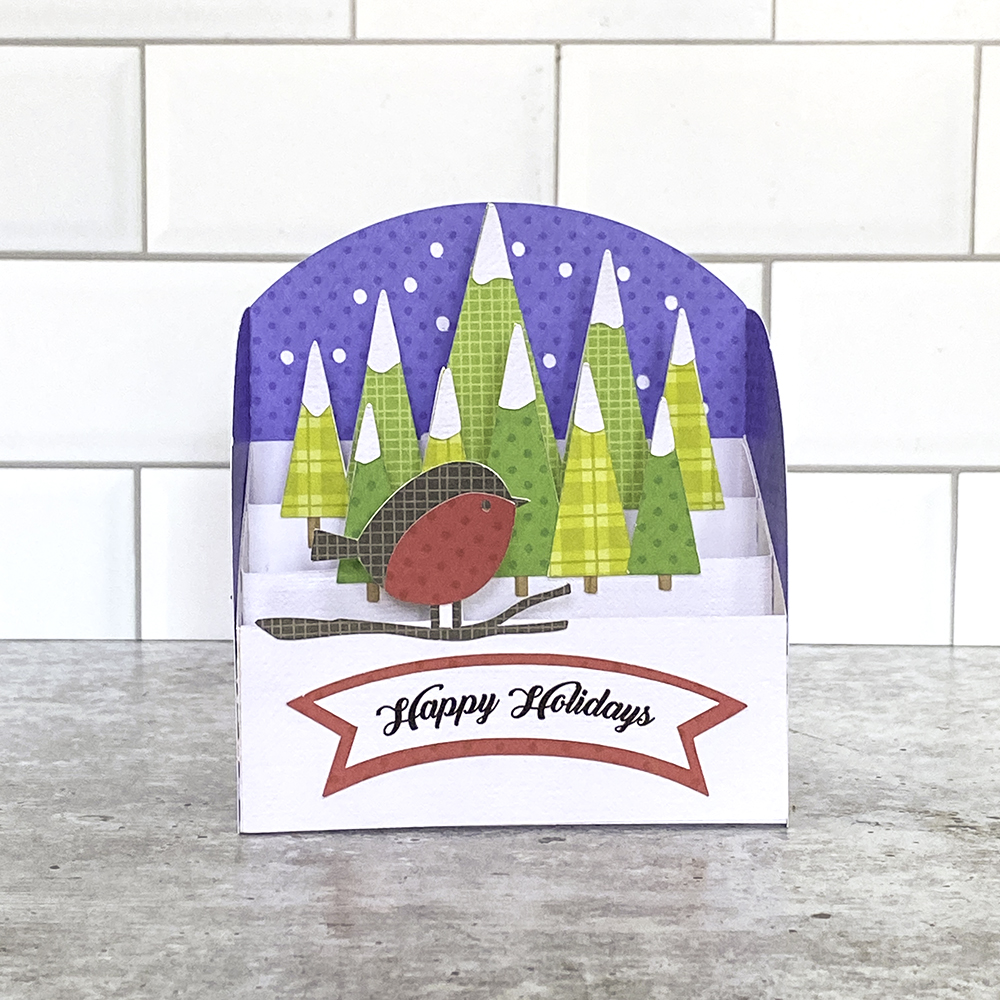
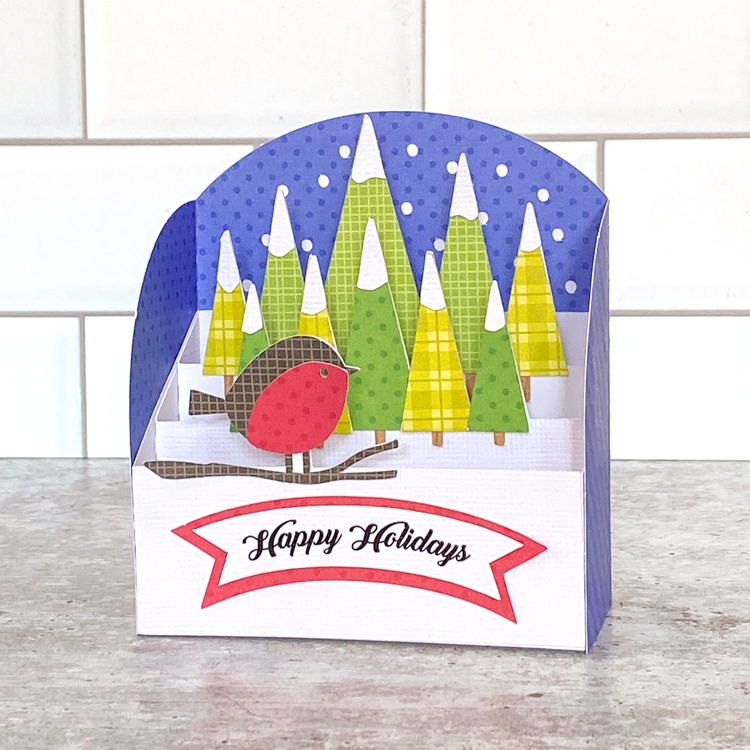
Hi Everyone!  It’s Kathy today with a fun new style of card from Lori, the Stadium Box Card.  These cards are very similar to a regular box card, but they have a nice wrap-around piece along with the inserts.  They fold flat for mailing (standard A2 Envelope) and they look so pretty on display! I’ve made a few, including this Stadium Box Card Winter Bird (SVG, Silhouette) As I mentioned they are very similar in their assembly to a regular box card, with a couple of small differences.  I’ve outlined the assembly below.

To start cut out all of your pieces.  I’ve pre-assembled some of them.  I added the trees to 2 of the inserts and the bird and branch to the 3rd.  I also created the sentiment using the Print and Cut Feature of my cutting machine.  If you ever need help with piece placement, I always find it helpful to reload the cutting file in my software.  Lori groups the pieces together as they go on the final project so it definitely helps when your trying to place that one last piece!

I started by adding the arched white piece to the back side of the blue piece.  When facing forward, the white looks like snow falling in the background of the card.

I then added the inserts to the card base.  I find this easier to do before I glue the “box” into shape,  I started with the backmost insert.  Align the tab of the insert along the slanted edge of the box side, and also the score line between the side and back of the card.  Don’t overlap the score line, just right to the edge.

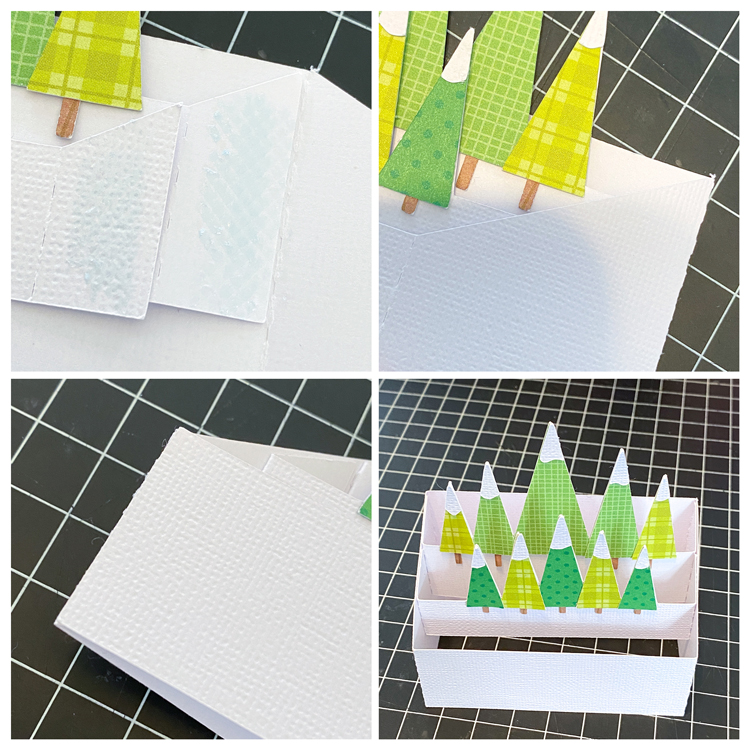
Add the second insert, aligning that tab along the slanted edge of the side as well, then right up next to the previous insert.  When flattened it should look like the bottom photo.

Once you have the left side glued, flatten out the two inserts, and add adhesive to the remaining two tabs on the inserts as shown in the first photo.

Fold the right side of the card base over, and press down to adhere the tabs to the side.  They should be aligned with the slanted edge of the side.

Finally add adhesive to the tab on the box base and press down.  Now when you open the box it should look like the bottom right photo.

Once you have the box in shape, add the bird insert directly to the front of the box on the outside.

Finally you want to add the wrap around piece.  I started by adding adhesive to the sides and back of my box.

To align the box perfectly in the wrap piece, I folded the box as shown in the bottom left photo, and then lined up the edges with the leftmost and bottom edges of the wrap.  Once I had that in place, I folded over the remaining flap of the wrap piece and pressed to adhere.


And done!  They really do go together quickly, and just look so cute!  That’s it for me today, thanks for stopping by to peek!

BLOG | INSTAGRAM
New Window Flip Cards!

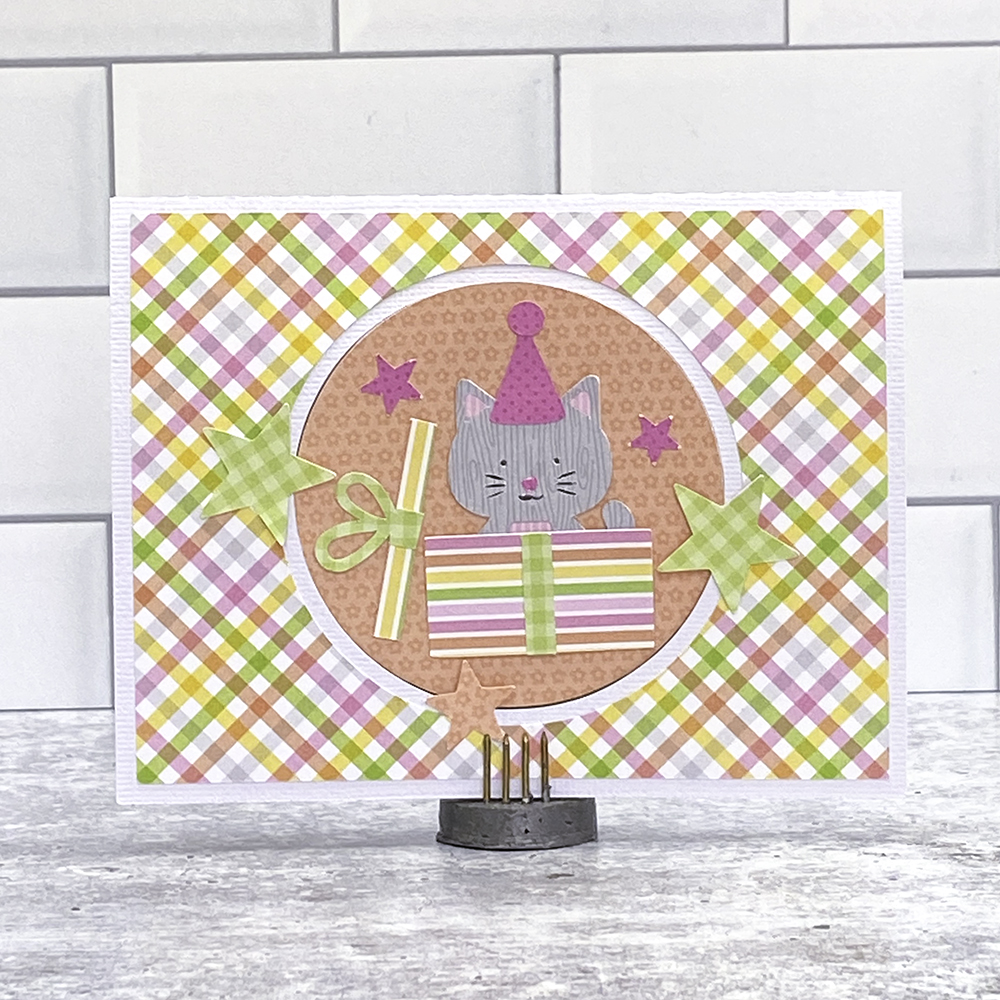
Hi Everyone!  I’m excited to bring you a new card that will be added to the shop this week!  It’s called a Window Flip Card and I made the new Window Flip Card Birthday Cat (SVG, Silhouette – coming this week).  Take a peek…  Here is the front of the card…

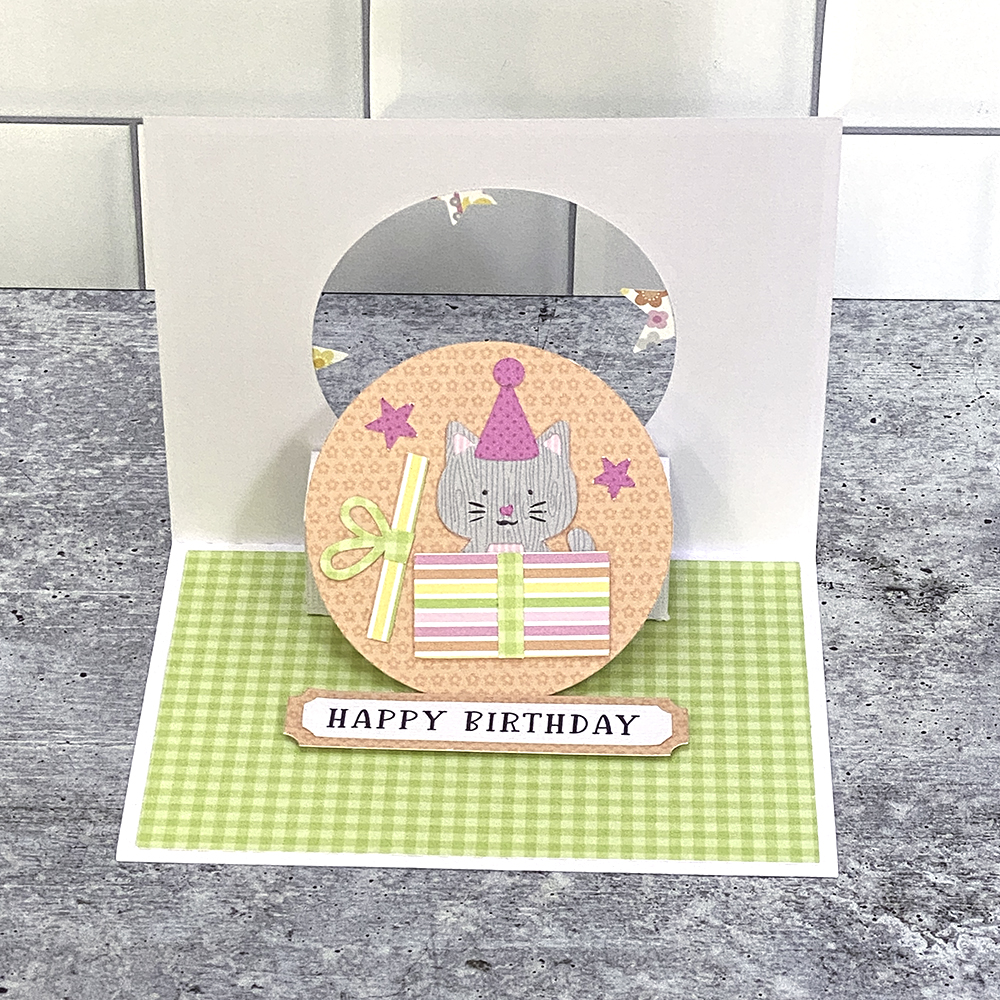
And when you open the card, ta-da! you get a cute little flip up!

These cards are pretty easy to assembly, I’ve put together a quick tutorial below…


In the upper left photo, you will see all the pieces of the card.  I pre-assembled the kitty and present, print and cut the sentiment and added the front cover panel and the inside panel.  If you ever need help with specific piece placement, you can always reload the file into your cutting software, Lori groups the pieces as they go in the final project.

Start with the piece with the 3 score lines.  Fold all the score lines in the same direction.  Cover one end section in adhesive.  Fold the whole piece in half… adhesive on the outside.  Attach this piece to the bottom half of the open card base.  It should be centered, and the piece with the adhesive should be facing down and closest to the fold in the card (see bottom left photo).  Once this is in place, add one strip of adhesive on the section closest to the card fold as shown bottom right photo.

Fold the card closed and press so that the top of the card is firmly attached to the folded section.  Now, when you open the card, you will have a squared tube inside the card.  Next, fold the small tab along the score line.  Cover the smaller side of the tab with adhesive (bottom left).  Adhere this small piece to the top of the squared tube, centering it.  You want the remaining tab to be sticking up furthest away from the fold. (bottom right)

Now when you close the card, fold the tab up and add adhesive (top right)  With the card still closed, add the circle with the cat, making sure it is centered and press down to adhere it to the tab.  Now when you open the card, the kitty circle will pop into the card.  I then added the sentiment strip so that it would prop up the kitty circle when the card is open.  I used foam tape to give it a little height.  Lastly close the card and add the stars.  Make sure there is no adhesive on the edges that overlap the circle.

There are lots MORE window flip cards coming to the shop later today/tomorrow, so be sure to check them all out!  That’s it for me today, thanks for stopping by!

BLOG | INSTAGRAM

Window Box Card Tutorial

Hi Everyone!  We are happy to be back on the blog after being down for a few days!  We appreciate your patience.

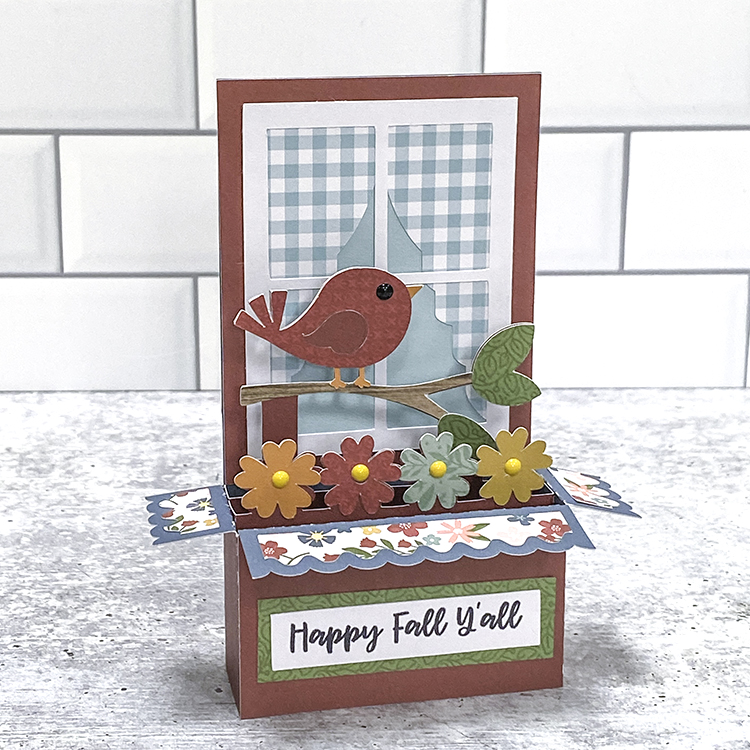
Today I have a tutorial showing how to assemble the new Box Card Window Files.  I made the new Box Card Fall Window Bird (SVG, Silhouette) using papers from Echo Park Paper’s Harvest Market Collection.  This is such a sweet card which could be used to welcome in fall or even wish someone a Happy Birthday just by changing out the sentiment.

To start I cut out the pieces of the card.  I layered the window pieces and glued, print and cut the sentiment, and added the layers to the inserts.  If you ever need help with specific piece placement in Lori’s cards… here is a great hint…  you can reload the file into your cutting software.  Lori groups the pieces together as they go in the final project so it’s easy to see how things are layered and pieced together.


Next I added the window to the inside back of the card base. (the outside of my card is maroon, the inside or b-side of the paper is navy)

The next steps cover adding the inserts.  I started with the bird insert since it goes furthest back.  I glued the insert tab to the side of the base, aligning the top of the insert base with the top score line on the side.

Next I added the flower insert.  I glued the tab to the side of the base, just beyond the tab of the first insert.  Leave a little space between the insert tabs so that the card will fold flat.  You want to make sure that the inserts are aligned together and to the bottom of the window.

Add adhesive to the remaining insert tabs, and to the tab on the base of the card.

Fold the base over, pressing down to make sure the edge of the base is secure and that the inserts are adhered to the inside of the card base.

Looking down inside the box part of the card, you can see that the inserts are perfectly aligned.  As a last step I added the sentiment to the front of the card base.  This card folds flat for mailing and fits into an A2 Envelope.  If you need one, Lori has a great set here.

And don’t forget, there is a sale happening now in the Lori Whitlock SVG Shop!  Get 30% Off all SVGs, Fonts, Pattern Fills and Commercial Licenses when you use code SEP2021 at checkout.  Don’t miss out, sale ends tomorrow!

Have a great day!

BLOG | INSTAGRAM