4th of July Firecracker with Anita

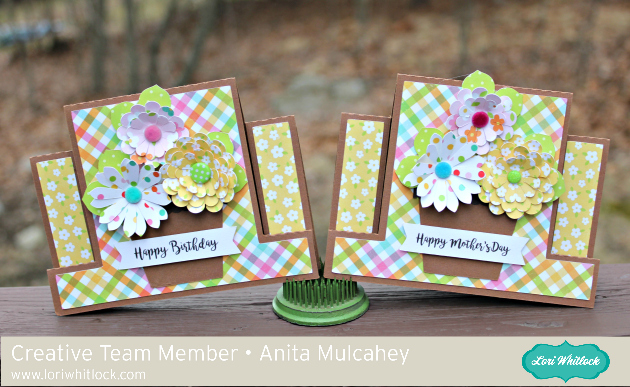
Anita here today with a tutorial on how to make Lori’s 3D Firecracker.  You can find this file in her SVG shop here and here in the Silhouette Store.  I also used some parts of the 5X7 Box Card July 4th to add to the embellishments of my project.  You can find that file  here in Lori’s store and here in the Silhouette Store.  I love to mix and match Lori’s Echo Park collections on my projects and used I Love Winter and Go See Explore.

Here are the materials that I used for my project.

The firecracker wick is perforated so that you can fold the wick into a small square and then put it through the hole.

Next you are going to fold the tabs back and glue them to the inside of the cover of the tube.

Here is what is looks like from the front.

Next, fold down the tabs on the cover piece and glue them to one of the circles.  One of the extra red circles gets glued to the inside of the top to hide the tabs and glue.

Here is a photo of the Stickles that I put on the edges of the wick.

Repeat the process for the tube body.  This photo shows the red circle inside and I love the finished look.

Here is a close up photo of the embellishments.  I used the 4th of July circle from the box card.

That’s it for me today.  This is so cute and you can fill it with candy or leave it empty and on your table for a holiday centerpiece.

Hugs,

Anita


Summer Pinwheel

Hi:

Anita here with a fun and really easy tutorial to make this giant pinwheel.  It is part of a whole set of goodies that I made for my nieces to have a lemonade stand.  I used Lori’s Echo Park Collections called Celebrate Spring and Celebrate Easter.  The cut file that I used for the pinwheel is called 3D Double Pinwheel and you can find it here in Lori’s store and here in the Silhouette Design store.

Here is what the cut file looks like when you it open it in the Silhouette program.  You have to ungroup it as the pinwheels will only fit one to a page.

Here are the supplies that I used for the pinwheel.  You will need a hole punch that can go through the paper straw and a brad that has a long enough shank to make it through all the layers.  I used one of Lori’s Echo park I Love Christmas Decorative Brads.  I placed the sides of the paper that I wanted to see most of  facing up.  Two sided papers work beautifully with this project as you can see some of the other side when it is put together.

I used a paper straw and punched a small hole near the top of the straw.  Paper straws come in many different colors and look so cute with the pinwheel!

The first step in putting together your pinwheel is to put the brad through the two center pieces of the pinwheel.

You put it all together by pulling gently on the center piece that has the hole in it and pushing the brad through the hole.  Keep going until you have all the holes connected through the center brad.  Then push the brad through the straw.  Depending on how thick your paper is and how long your brad shank is you may have to fuss with this a bit.  I pushed it through with the assistance of my Tim Holtz pick and then bent the shank pieces down with a knife.

You can only see one tab of the brad but they are both there just underneath one another.  Turn the pinwheel over and you should be able to separate the two pieces to fan them out and show a bit more of the paper designs.

Here is a close up of the pinwheel.

I used a whole lot of Lori’s files to create this set and just love that huge pinwheel.  Have a great day and hope you have a chance to make something pretty today.

Hugs,

Anita


Flower Pot Spring Cards

Anita here today with some lovely spring cards that Lori designed recently.  They are called A2 Center Step Card Flower Pot and you can find the cut files here in her store and here in the Silhouette Store.  This set comes with four different sentiments.  I made two and they are so easy to put together.  I used Lori Whitlock’s Celebrate Easter collection from Echo Park for this set.


Here are some close ups of the cards.  That’s it for me today.  Hope you have a chance to make something pretty today.

Hugs,

Anita

Happiness is Homemade Gift Box with Anita

Anita here with a quick and easy tutorial to put together Lori’s Matchbox Drawer Card-Cooking.  You can find this cut file here in Lori’s store and here in the Silhouette Design Store. It is such a cute box and you can fit many little treats in it. It would be a great thank you gift for a good deed done.

First, cut the pieces of the box.  I cut one extra rectangle because I wanted my box top to use the lovely Happiness is Homemade collection from Echo Park Paper.  I also used one of the die cut cardstock pieces from the matching Ephemera kit. I love to bake so this line was made for me.

This piece is for the main box.  Fold it along the score lines and glue it together.  It is easiest to glue the tabs in place first and then glue down the ends as you will see in the photos below.

Here the completed box.

Fold the outer wrap for the box on the score lines and glue the tab to the end of the strip.


These are the pieces for the card top.

To make the tab,  fold a 3″ piece of ribbon in half and glue it between the two layers of paper when you glue the inner piece inside the card.

You can see where I put the Die Cut from the Happiness is Homemade Echo Park Collection by Lori.  It’s so cute.

Here is a view of the slide for the box.

And here we have the completed pieces.  This box went together very quickly and Lori has so many different designs for many occasions to choose from.  Lastly, you will embellish your box with the cute baking tools that are part of this cut file.  Hope you have a chance to get creative today.

Hugs,

Anita

Snow, Sparkle and Shine Card with Anita

Anita here,  on this last Monday in January with an A2 Stacking Card Base Snowflake card (here in the Silhouette Store).  Isn’t it just so cute?    I used Lori’s Echo Park line called I Love Winter.  I love how sweet this collection is!    I used some of the  matching brads and a sticker from the collection to finish  my card.


I did not pop up my layers but you certainly could to give it some more depth and dimension.

That’s it for me today.  I hope that everyone has a great day and be sure to check out the A2 Stacking Base Card Snowflake as well as so many other wonderful designs when you visit Lori’s SVG Shop or the Silhouette Store.

Hugs,

Anita