I thought the No 10 Gnome Holiday card from Lori’s shop was so adorable and didn’t get a chance to use it for Christmas so I figured I use it for Valentine’s day.
Box Card Christmas Truck Tutorial with Brigit
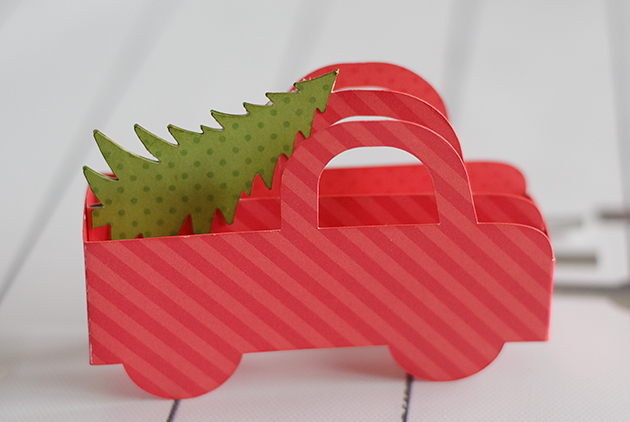
Here’s a tutorial of putting together this adorable Box Card Christmas Truck from Lori’s shop. I used Cricut Design Space and my Cricut Maker to cut this out but you can also get this file here at the Silhouette Design Store.
Here’s my finished truck, I added some snow to the tree and a Santa from Doodlebug’s Christmas Town mini icon sticker sheet. The patterned paper is Doodlebug’s ladybug and limeade dot-stripe petite prints.
I uploaded the truck into Design Space and ungrouped.
Selecting the truck piece with score lines I clicked the Attach button on the bottom right, this keeps the score lines and cut piece together when you cut. I did the same to the other piece with the score lines.
Select the JOY and Flatten, do the same to the Farm Fresh Christmas Trees sign, this is so you can print and then cut.
This is how the print and cut will look, you print this page out, place it on your mat and the machine will scan the black box and cut around each one.
Here are all the pieces cut out, I folded the scoreline pieces and inked the edges of the patterned pieces.
I put together the tree on the middle section first then glued and assembled the main truck piece. Then glued the middle piece flaps to the inside of the main truck. If you want you can use solid cardstock for these pieces to save on patterned paper since the pieces in the next steps below will cover both sides.
I glued down the door first, then the silver running board, the tires on top of that and last pop dotted the fenders. Next, I glued each finished side to the truck base. Last I added the Joy to the back and the lights to the front.

Pocket Shaped Bag by Brigit
I love anything denim so when I saw this pocket shaped bag from Lori’s shop I knew it was going to be my next project! You can get this bag also from the Silhouette Design Store here.
I wanted to add snowflakes so I used the ones from the Christmas snowflake border edge card, I just did a release compound path took the shapes and added them to the layer and did a make compound path and then I did a duplicate solid layer to cut out in white. You can get that card here in the Silhouette Design Store.
I also added the 3D poinsettia, you can get that here at the Silhouette Design Store. The stitching came out awesome, I love it!

Turkey Favor Box by Brigit
Hello there, now that Halloween is over I’m starting to plan for Thanksgiving. I thought this Turkey Favor Box from the November Kit of the Month from Lori’s shop would be perfect for the kiddies. It is also available as a stand-alone file in Lori’s Shop here.
You can get this box also at the Silhouette Design Store here. I used some of Doodlebug Design’s Petite Prints and a cute tag from Echo Park’s Celebrate Autumn chipboard phrases to piece it all together.

3D Witch Hat Tutorial with Brigit
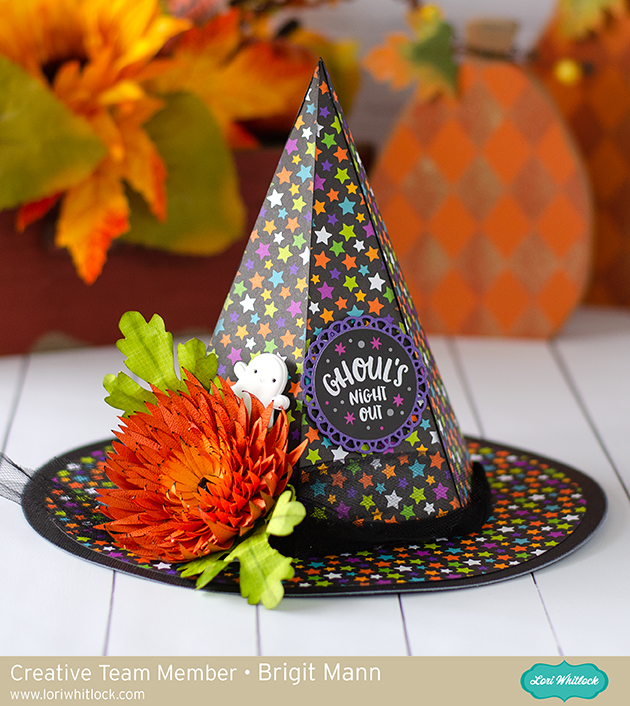
Hello there, today I’m sharing a tutorial on this 3D witch hat project. This hat can also be purchased from the Silhouette Design Store here and also as a set in the 3D Halloween Bundle from Lori’s shop.
 This is such a cute home decor piece to add to your Halloween collection, I really love how it came out.
The first thing I did was add all the pieces onto my mat in Silhouette Studio, this included the 3D Chrysanthemum Flower, (Silhouette Studio chrysanthemum). You will need 6 duplicates of the triangle layer and 2 duplicates of the hat top. I used patterned paper from Doodlebug Design’s Pumpkin Party I did a release compound path on the triangle layer and removed the circles. Tthis way I’d have solid pieces to show off the pretty star paper.
I resized the hat so I could fit one piece of the hat top with the hexagon bottom on one sheet, this saved me a black piece of cardstock, I also sized the flower so the orange color pieces would fit all on one sheet of cardstock.
I cut all my pieces out and inked the edges of the patterned paper, flowers and leaves.
I assembled the top of the hat first, this thing went together perfectly, I love Lori’s files!!
I then added the triangle layers onto the sides and glued down the circle patterned paper to the black circle rim.
For the leaves I bent them by hand and used ink to create some vein lines, I then sprayed them with some water and crinkled them by hand a little.
I used my McGill tool and mat and a paint brush to curve the flower petals up.
I Glued all the petals together and added a black jewel in the center.
To complete the look, I added some black tulle around the hat, glued the flower and leaves to the side and added the ghost clip and ghouls sticker from Doodlebug’s pumpkin party,


