Mason Canning Jar Patriotic Box by Brigit

Hello, since today is Memorial Day I made the Mason Canning Jar Patriotic Box ( svgsilhouette). This project is such a quick and easy one to put together I ended up making a couple of them filling them up with candies for the family cookout.

I used some of Doodlebug’s petite prints papers, added a couple of sequins and some red, white and blue twine.

Thanks for stopping by and have a wonderful day!

Spring Gift Box by Brigit

Hello, I have a spring gift box to share with you today using one of the boxes from the 2019 May kit of the Month. This kit is available for FREE with any $20 purchase during the month of May 2019. Simply add this item to your cart along with your purchase and enter coupon code MAY19KOTM. You can also get this file alone from both Lori’s shop and Silhouette Design Store, (svgsilhouette).

I used the 3d flower 45 (svgsilhouette) to embellish the front of the box. The paper is from Echo Park’s Spring Fling Collection, Easter Wishes coordinating solid papers and cardstock from Doodlebug. The stamped sentiment and little bug on the tag is also from the Spring Fling collection.

Thanks for stopping by and have a wonderful day!

A2 Shaped Card Kite Tutorial with Brigit

I have a quick tutorial to share today using the A2 Shaped Card Kite file (svgsilhouette) and a sentiment from the Spring Easter Card Bundle from Lori’s shop. I used my Cricut Maker and Design Space to cut this project out.

I uploaded both files and ungrouped all keeping just the hello friends sentiment I deleted all the other sentiments and their layers.

I placed the sentiment on the cloud where I wanted it and select both and flatten, this creates a print and cut. I also selected the card base and score lines and clicked attach to keep them together, I did the same for the envelope.

I cut out all my pieces using Echo Park’s Spring Fling paper collection and glued them all together.

Thanks for stopping by and have a wonderful day!

Blog – Pinterest – Instagram

Easter Treat Wraps by Brigit

Hi there, with Easter right around the corner I thought I’d make some of these adorable treat wraps for a quick and easy project. I had a couple of slim bags that I filled with some jelly beans, but these wraps can be used with any kind of treat.

The labels were print and cuts matted to a scalloped rectangle. The paper used, Echo Park’s Easter Wishes designed by Lori matches the cute little labels. You can get these wraps as a bundle at Lori’s shop here or individually. Here’s the three I used, Wrap Easter Egg, (svgsilhouette), Wrap Easter Chick, (svgsilhouette) and Wrap Easter Bunny, (svgsilhouette).

Thanks for stopping by and have a wonderful day!

Leprechaun Gable Box Tutorial with Brigit

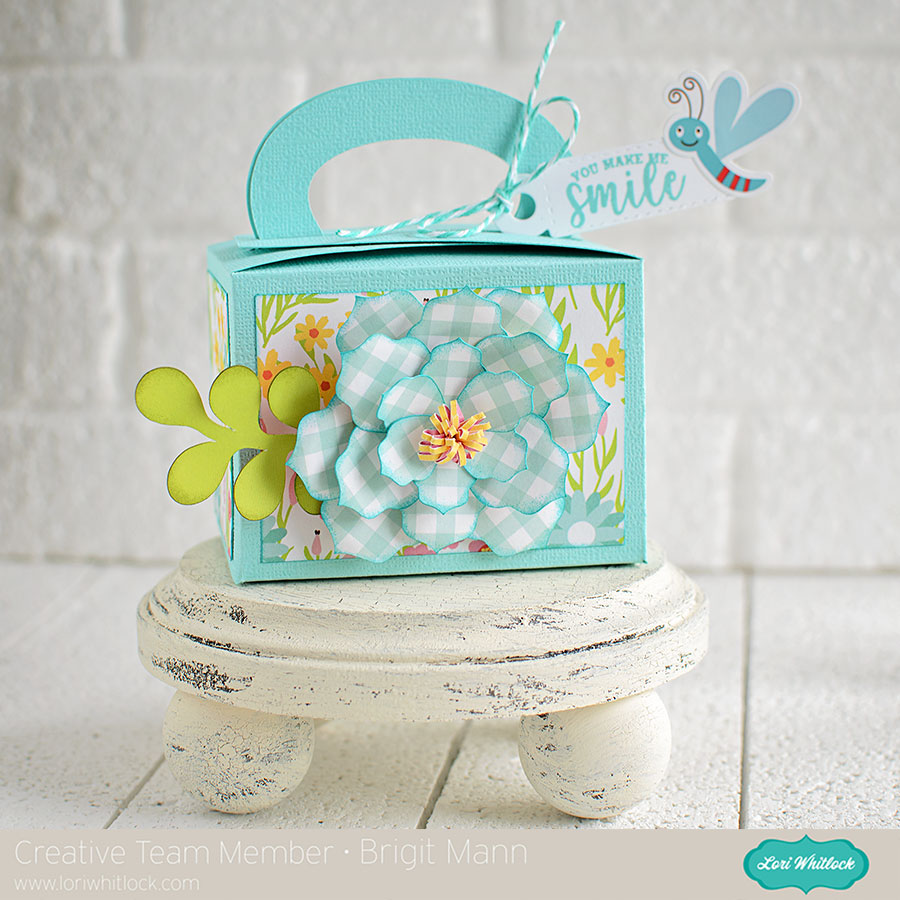
I love boxes or bags with cute little character faces on them and with St Patrick’s Day coming next month I thought I’d make a little leprechaun one.

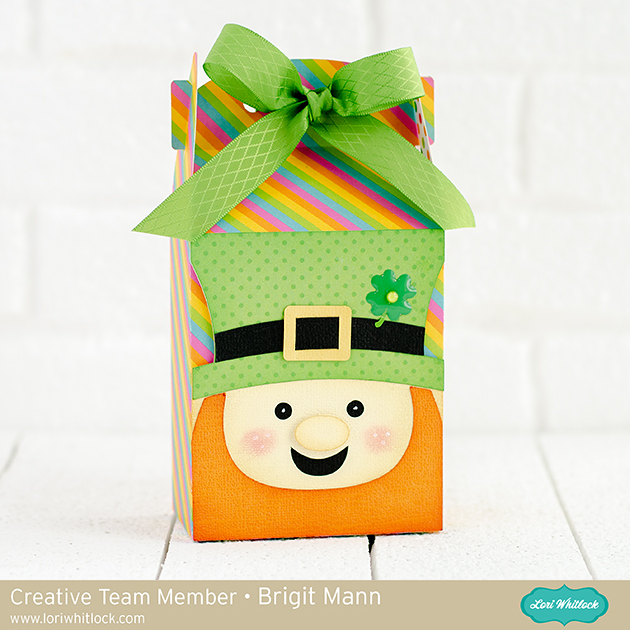
You can start with any bag or box, I chose the tall heart gable box (svgsilhouette) and did a ungroup to delete the heart.

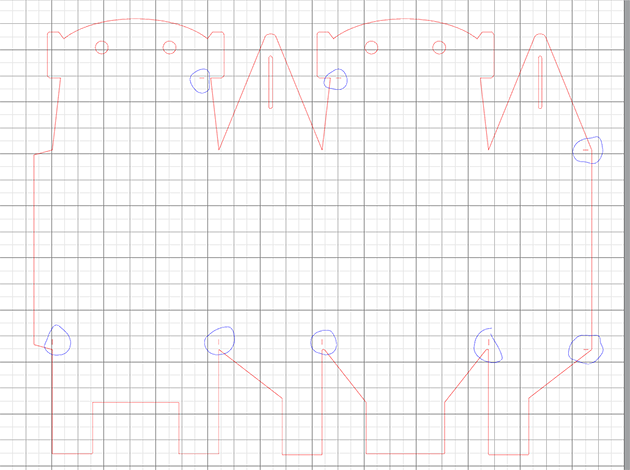
I like to do all my designing in Silhouette Studio and cut on my Cricut Maker since I have the Business Edition I can save my file as an svg and bring into Design Space to cut. I usually will change my score lines to solid lines so I can use the scoring wheel in Cricut. For this box I ungrouped all the score lines and deleted all but the lines I have circled then I selected one and dragged the handle, you can select all the ones going the same way and drag, just grab the center handle not the corner one.

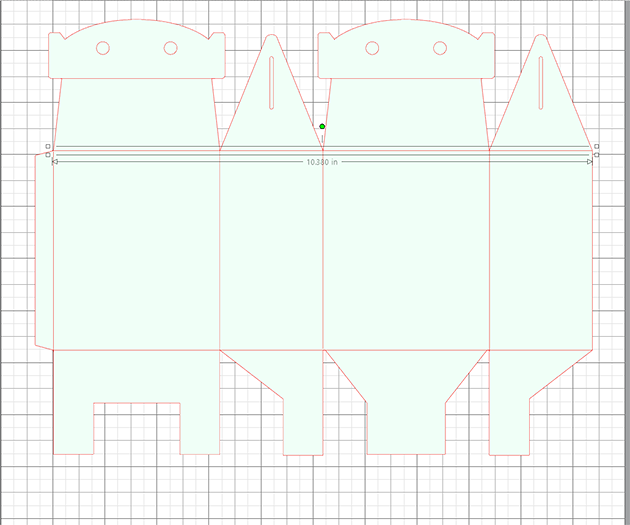
This is what they will look like, I also filled in the box makes it easier to see. I then selected all the lines right click and make compound path, and then selected both the lines and box and grouped. In Cricut Design Space I will change the lines to score and then attach the bag and lines together.

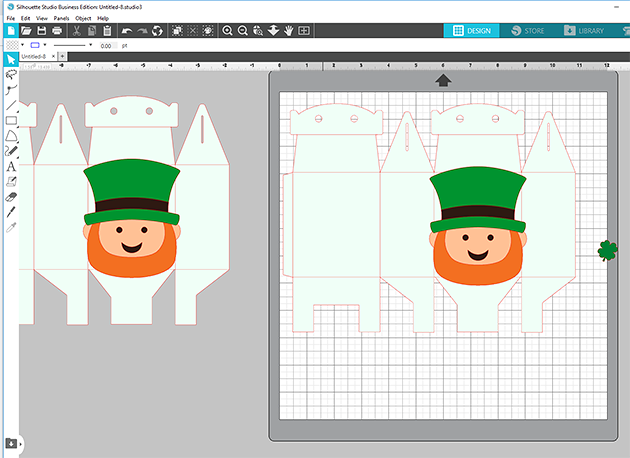
For the face, I used the bobblehead card leprechaun (svgsilhouette). I ungrouped and deleted all except for the leprechaun’s head, buckle and one shamrock which I didn’t end up using. I sized the head to the front of the box and then made a duplicate of them. (you won’t need the extra leprechaun head I just always make a copy in case I mess up)

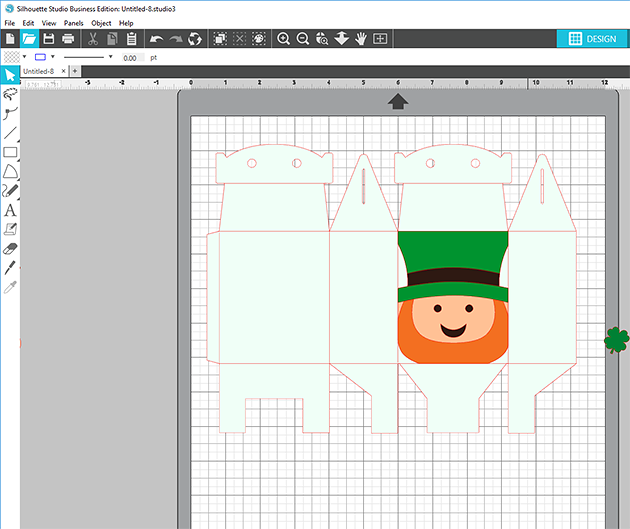
With the knife tool I cut down on the four lines on the front of the box trimming away the leprechaun. I delete the cut up box and trimmed pieces of the leprechaun and zoom in to see if I have to make adjustments.

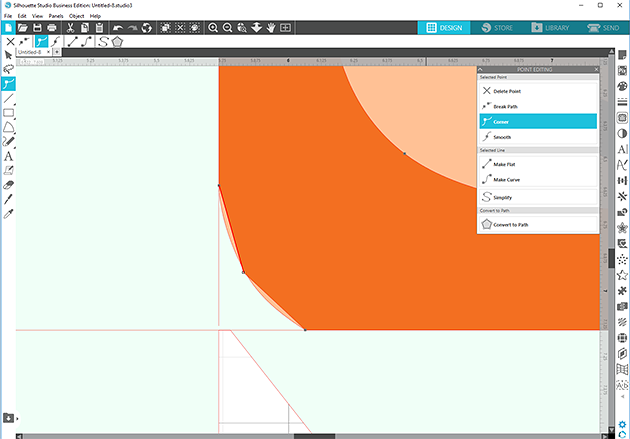
I want the beard to be square to the box so I double clicked it to bring up the point editing menu, selected each of the points and changed them to make flat, and pulled the center one to the corner to make it square.

This is what it will look like, do the same to the other side.

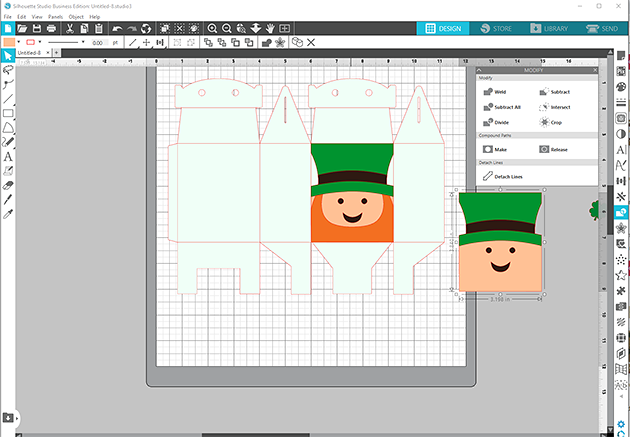
I wanted the face to be square also so I made a duplicate of the leprechaun and selected the beard and face and welded together, makes it much easier to line up.

Here’s my project ready to save as an svg, I did also make an internal offset of the face by .05 and releaseed the  compound path the eyes and mouth, I like having a solid piece for the background.

Thanks for stopping by and have a wonderful day!