A2 Tiered Box Card Tutorial

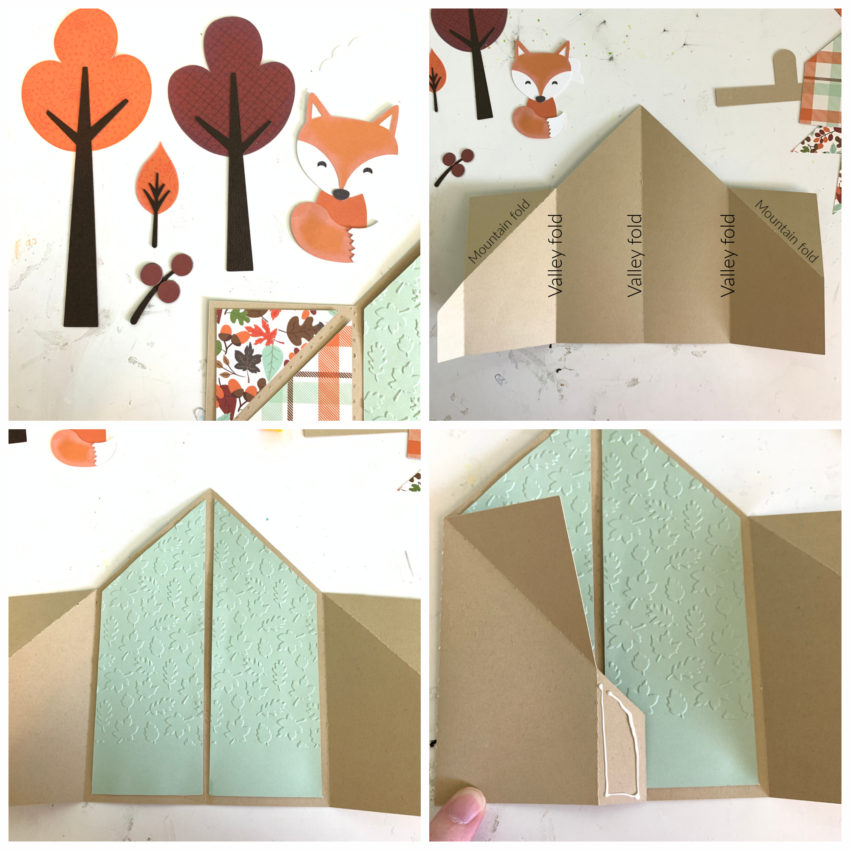
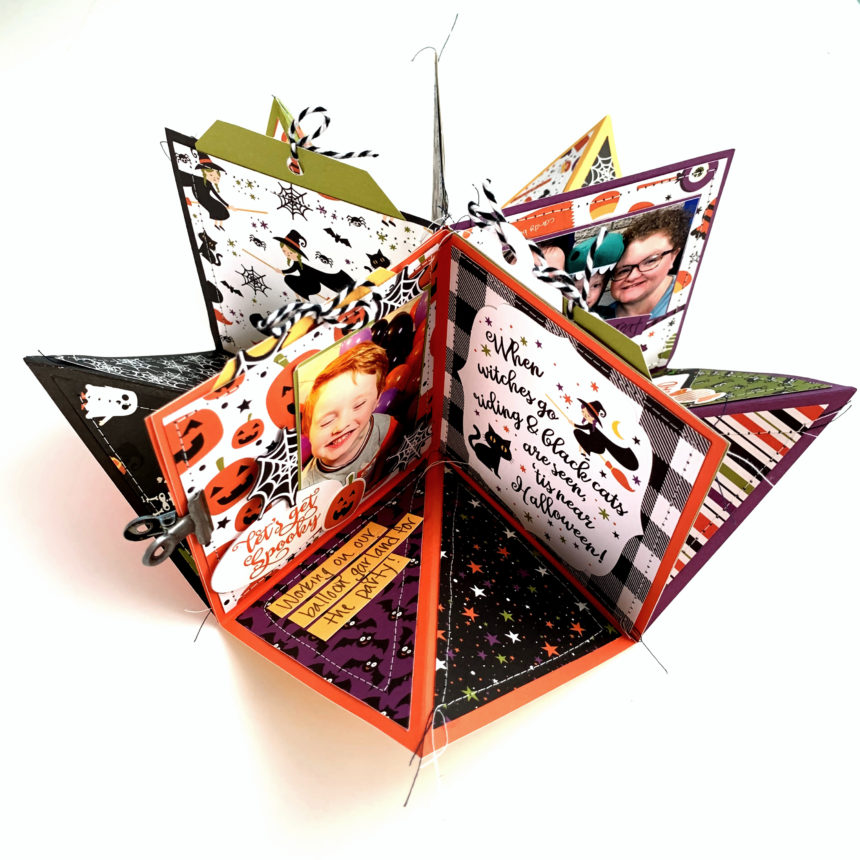
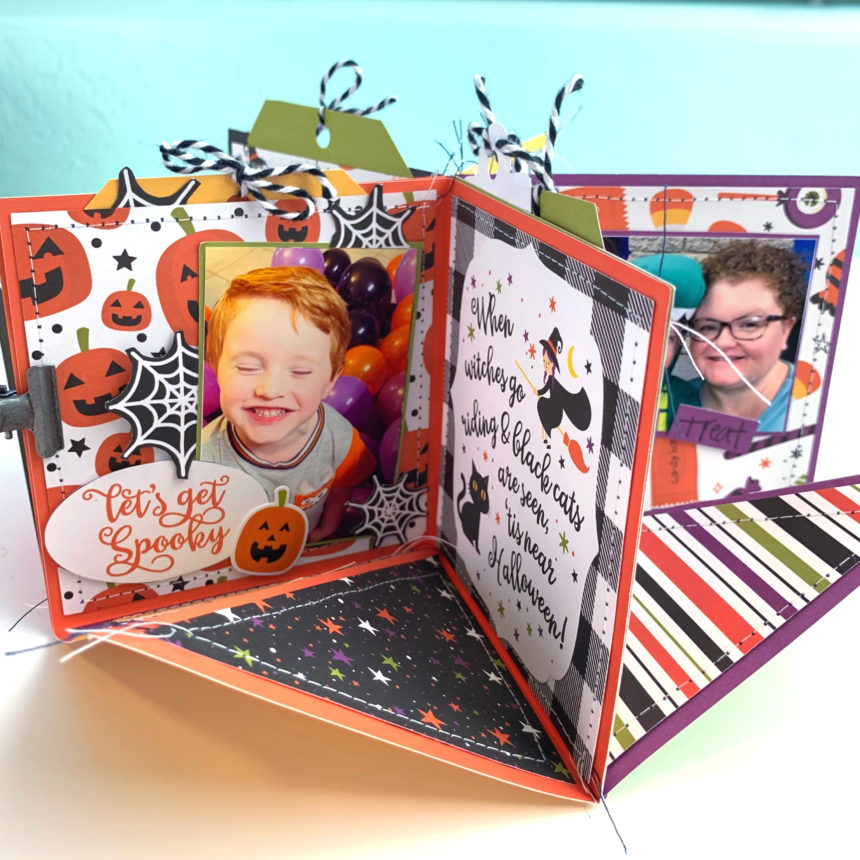
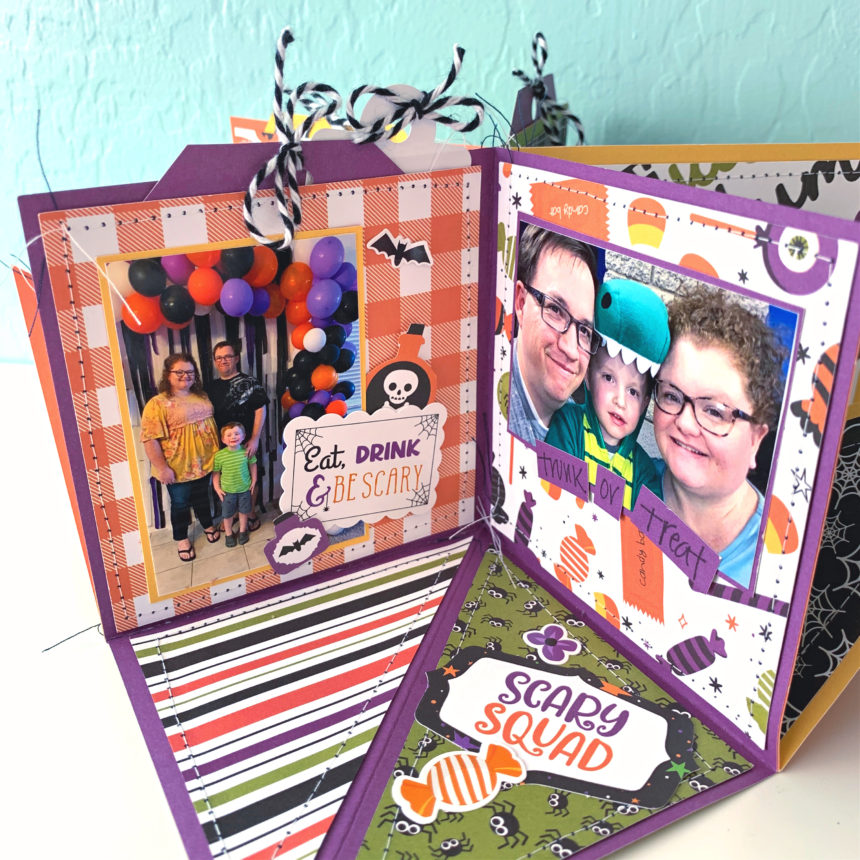
Hi there friends! Brandie here with a tutorial on the new A2 Tiered Box Cards. I made the A2 Tiered Bird Mountain (SVG, Silhouette). This snowy mountain card will make a perfect birthday card for my dad who loves the outdoors.

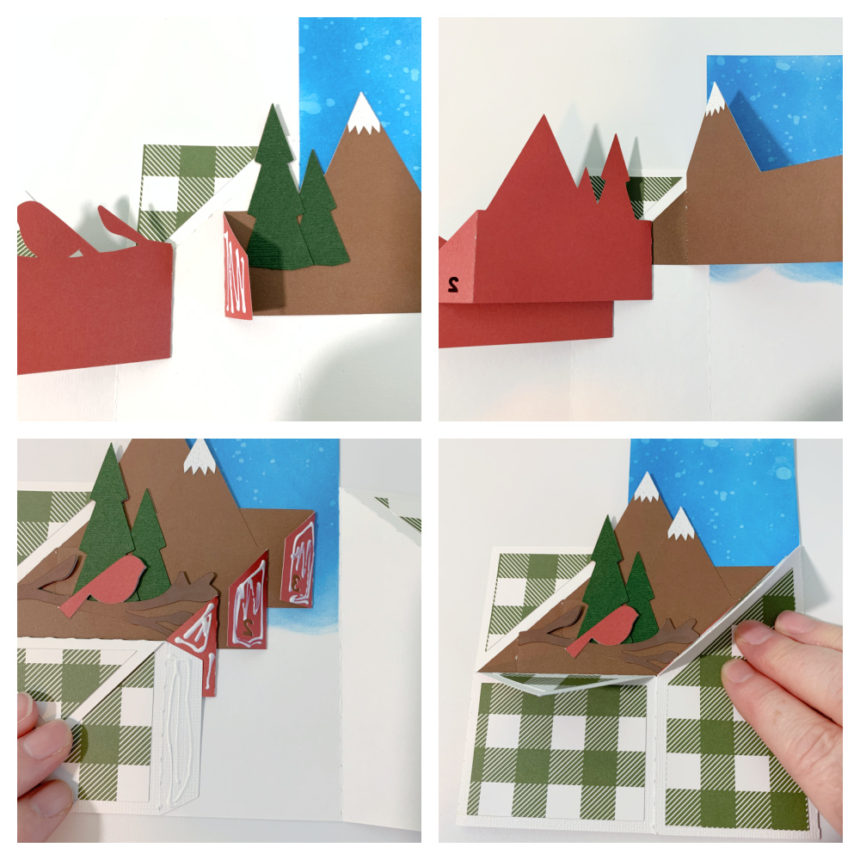
I cut the box card body out of white cardstock but wanted a blue snowy backdrop for the mountains. So I used some distress oxide inks on the tallest middle panels. I then made all of the folds on the score lines (see picture for fold diagram). Then I assembled the inserts. All of the inserts will have a valley fold on the tabs. I also applied the decorative panels to the outside of the box. Once I was ready to glue the inserts in I applied the glue to the outside of the tab(red side for me). Then lined up the front of the tab to the vertical score line and the diagonal score line of the box.

For the second the third insert I lined the tab up to the tab in front and the diagonal score line of the box. I then folded the tabs all in and applied glue to the backs of the inserts and the tab to close up the box (see picture below on how I applied the glue to avoid gluing the box tab to the inserts).

Now that the box is assembled I added the background mountain and the snowflakes.  The green plaid paper is from the My favorite Christmas collection by Echo park Paper Co.

And don’t forget, the New Year’s Sale is happening now in Lori’s SVG Shop.  Get 50% off All SVGs when you use code NEWYEAR at checkout!  Don’t wait, sale ends tomorrow!

Thanks for stopping by today and have a safe and happy New Year!

Brandie

12 Days of Christmas Day 7 & Hexagon Pop Up Card Christmas Tractor

Welcome to Day 7 of our 12 Days of Christmas! Each day from December 1-12, there will be a free SVG file of the day, along with a special promotion!  For Day 7 we have this Gift Card Tag Wreath File.  This file will be free today only, so don’t miss out!

In addition, as our special promotion, today only get 30% off all of the items in our Bundles Category!  Use code BUNDLES to take advantage of this great deal!


And check out this gorgeous card by Brandie!

Hi there friends! Popping in today with one of the new Hexagon Pop up cards. Lori has several versions in her shop and in the Silhouette store. I used the Christmas Tractor (SVG, Silhouette). Lori also has a great assembly tutorial that you can find here.

I used papers and stickers from the A Lumberjack Christmas collection by Echo Park Paper.

Thanks for stopping by today!

Brandie

Christmas Gnome Tags

Hi there friends! Brandie here with an idea for cute Christmas tags. Handmade Christmas tags make a cute addition to any gift and they are quick craft to help get you in the holiday crafting spirit.   I combined the Christmas Gnome Stickers (SVGSilhouette) which are print and cut…and the tag base from Christmas Tag Snowflakes (SVG, Silhouette) to make these fun tags. I also used a few papers and stickers from the A Lumberjack Christmas Collection by Echo Park Paper Co.

Here are some close-ups…

I hope you enjoy this holiday season and get to do a little crafting! Thanks for stopping by!

Brandie

Fox Tuxedo Box Card Tutorial

Hi there friends! Brandie here sharing an assembly tutorial for the Tuxedo Box Cards (SVG Bundle). I made the Tuxedo Box Card Fox (SVGSilhouette). I love this fun twist on the standard box card.

First assemble the decorative elements. Two trees, a fox, leaf, and berries. Then fold the card base on the score lines. Most of the score lines are valley folds. The two mountain folds are for the flaps. Next glue in the inside decorative panels. I ran my inside panels through a Fall leaf embossing folder. Once the panels are secure fold the left side over and add glue to the outside of the tab and fold right side over and press and hold until glue is set.

Then glue the outside decorative panels in place. Fold down the flaps and glue those panels in place. For the insert that the fox is glued on fold the tabs in and apply glue to the outside of the tabs.

While the card is laying flat slide the insert into the card base while holding the glue tab down lining it up to the center fold line. Press down on the card where the tabs are to help secure them. The tabs will be glued to the inside front of the card base. When the card is standing upright the inside tab forms a u shape. Glue the fox into place on the center of the tab. Then glue in the trees and cloud and decorate the front of the box with remaining elements.

I used papers and a couple of stickers from the My Favorite Fall collection by Echo Park Paper.

That’s it for me today! Thanks for stopping by.
Brandie

October Mini Album

Hi there crafty friends! We made it to October! Woohoo! Time for cooler weather, pumpkin everything, and spooky fun. The last few years I have created an October daily album for all the cute fun things I have done with my family. Since this year will be scaled back I wanted to create smaller version of an October daily. I used the Circular Pop Up Card (SVG, Silhouette) for a October mini album. (I used pictures from last year for an example.)

I used my sewing machine to stich around all of the cover panels. As I glued the cover panels on I left the tops open to create pockets for tags and extra pictures.

The papers, stickers, and embellishments are from the I Love Halloween collection by Echo Park Paper Co.

I hope you are able to enjoy this Fall season and get a little crafting done too. Thanks for stopping by.

Brandie