A Back to School Backpack

Hi everyone!  It’s that time of year, the kiddos are headed back to school and summer is coming to an end.  I love back to school time and even though my kids are raising their own families now, I still love to shop for school supplies.  There are always so many fun things, I just can’t resist!

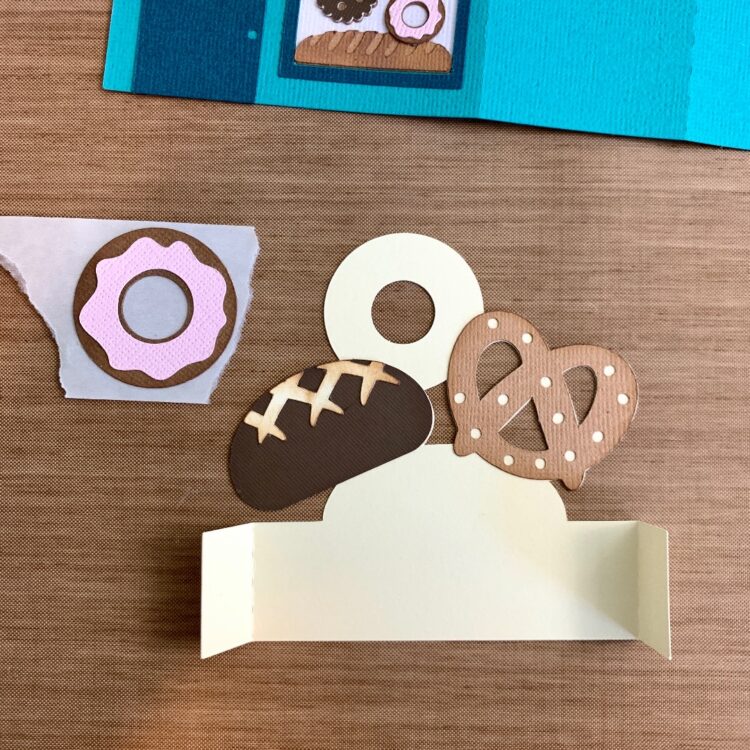
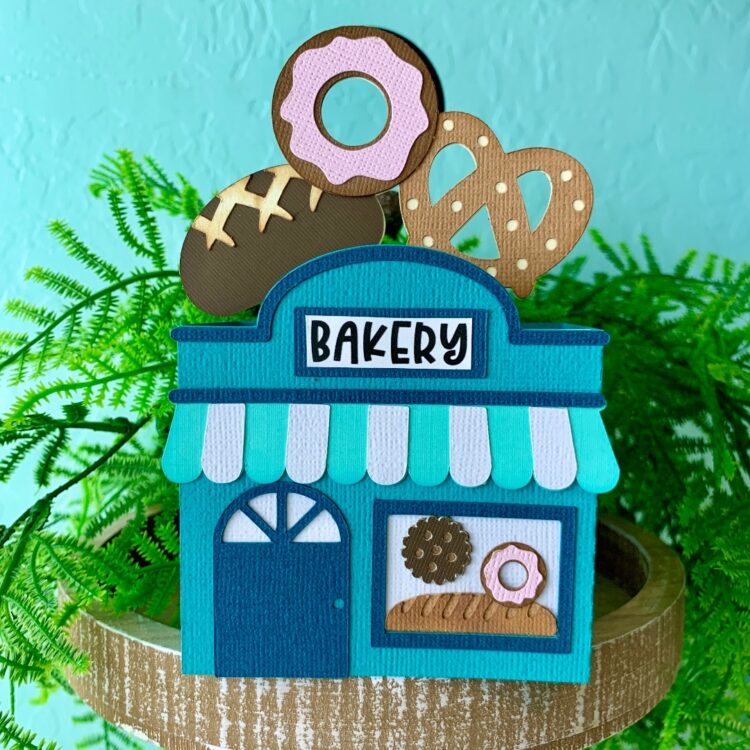
My grand kids all went back to school last week and one started Kindergarten, so I wanted to send her a fun little surprise in the mail.  She loves to get mail!  I created Lori’s Box Card Backpack School (SVG, Silhouette) for her.  Her backpack this year is covered in flamingos.  She loves them, so I tried to incorporate that into her card along with some fun tassels and beads like the one she has.  She loved this and also loved that it came with a little cash stuck inside.  Maybe that’s why she loves getting mail from Grandma.

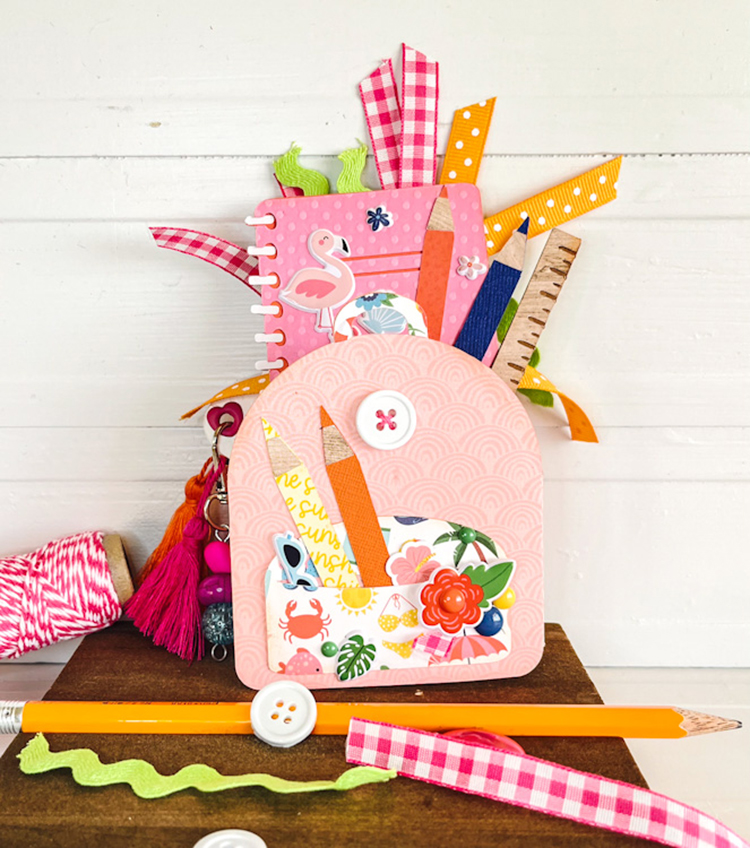
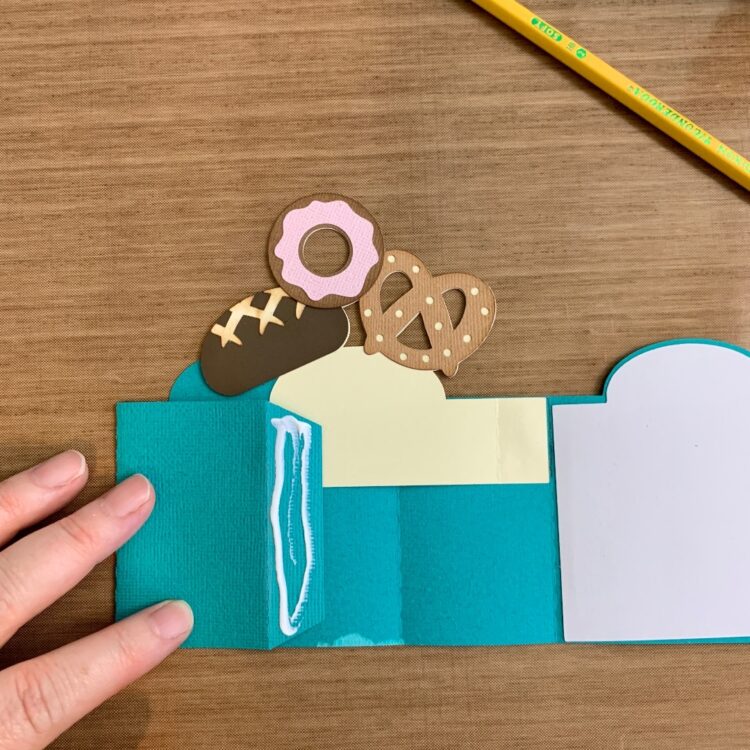
Here’s a little tip to share with you, I cut the spiral little tiny pieces out of vinyl.  It just seems for little tiny detail work, vinyl works well for me.

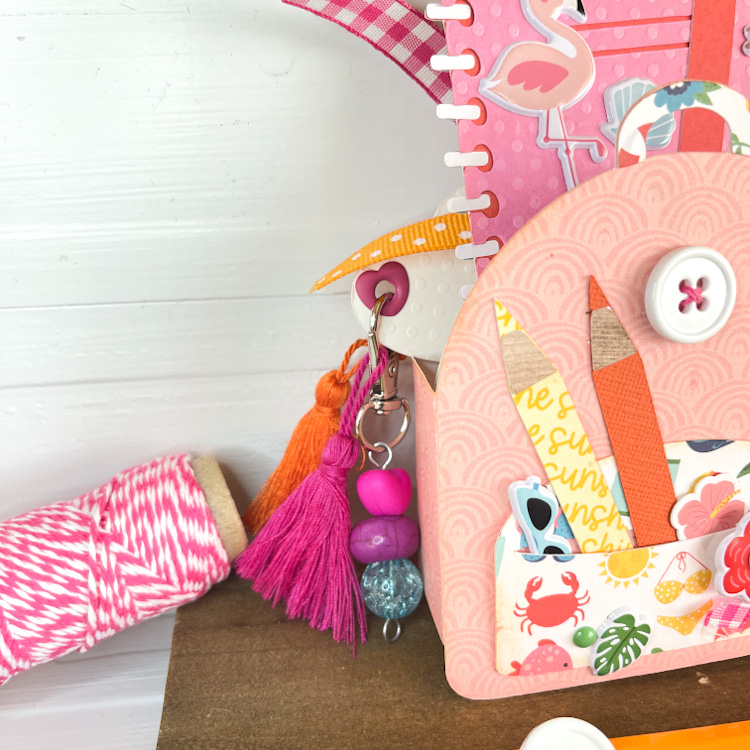
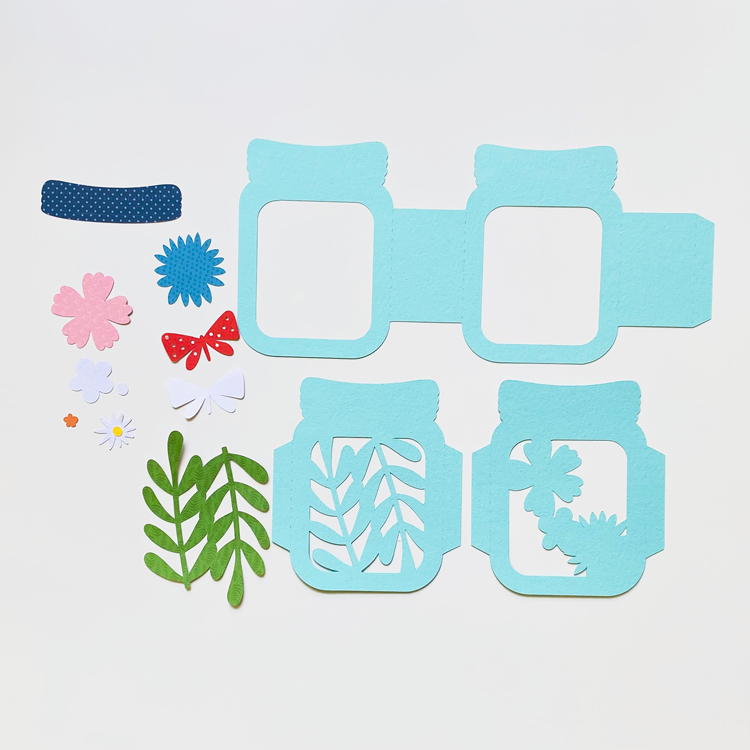
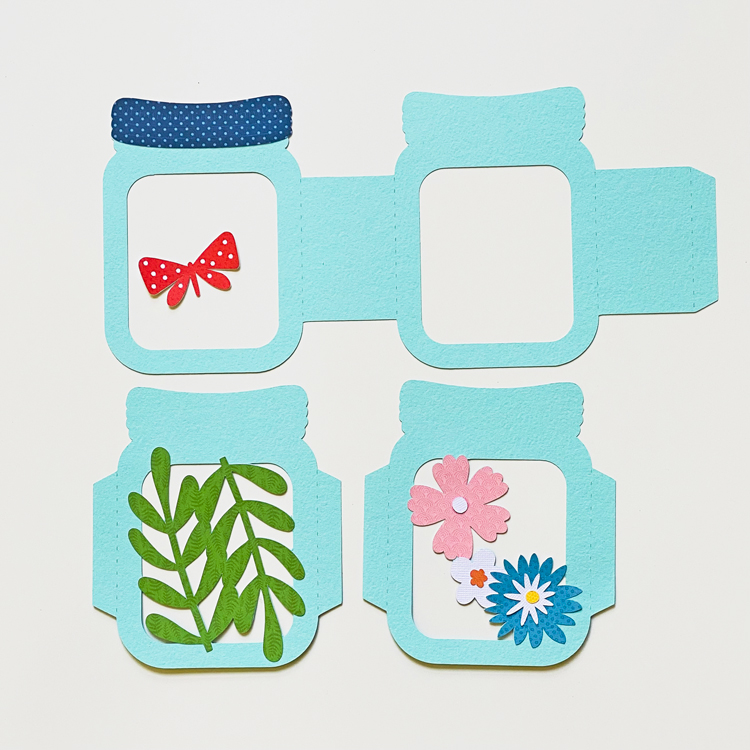
I used Lori’s Endless Summer Collection to create my project today.  It was just the perfect collection with all the little things to match her real backpack.

Thanks for stopping by

~Cathy


Bakery Box Card Assembly Tutorial

Hi friends! I’m stopping by today to share a tutorial for the Box Card Bakery (SVG, Silhouette). This card is so darling and would make a fun birthday, get well soon, thank you, or just because card.
I cut out all of pieces in various shades of cardstock and then inked around the edges of most of the pieces in matching colors to give them a little depth.  The bakery sentiment was done using the print and cut function of my machine.
This card does have several small images and for me the easiest way to assemble them is using a sticker maker. The adhesive is strong with no mess or glue seepage that can happen with wet glue.
First, I folded all of the score lines into mountain folds. Then glued the white panel on what will be the inside of the card. This panel is to cover the holes for the door and window.

I then assembled the bakery sign, and awning. Dry fit the white pieces before gluing into place. Each little piece has a correct place on the awning. The image cuts the stripes in the right order. If you are careful when taking them off of your mat and keeping them in order, you won’t have a hard time assembling them.  Or if you are like me and go willy-nilly pulling everything off the sticky mat it isn’t too hard to figure out the correct placement.

I attached the door and window frame first. Then added the awning, the top trim piece, then centered and the bakery sign. I also added the smallest bread loaf, donut, and cookie to the window display.

For the insert I added the pretzel and largest loaf first then added the donut.

Now it’s time to assemble the box card. Flip the card base over so that the inside is face down on the table. With the insert face up, valley fold the tabs, and add glue to the right tab only. Glue down on the card base. (I added the X to show where to glue.)

Line up the tab with the top of the card base and to the left of the score line.

For the left tab, valley fold the tab, and add glue. Then fold over the left side of the card base. (Aiming for the spot where I have drawn the X.)

Hold until the glue sets.

The box card is ready to be closed up. Add glue to the last tab on the left then fold the right side of the card over. making sure everything is lined up.

Now it is ready to be sent off to someone special. Thanks for stopping by today!

Brandie

Fish Tackle Box Card

Hello everyone! Marcia here today.  Well, summer is winding down here in Minnesota but the fish are still biting at the lake!  When I saw this Fishing Tackle Box Card with (SVGSilhouette) I knew it would be the perfect card for my fisherman. It was originally intended as a Father’s Day card, but by just changing the sentiment to “Have a Reel’y Great Birthday”, I have a great birthday card.

Lori has lots of Summer card ideas in her shop. Go check them all out and have some fun making your own cards!

Thanks so much for stopping by.
~Marcia

Gingerbread Man Christmas Present Box Card Tutorial

Hello everyone! Marcia here today. Since it is July and Lori just came out with some new Christmas box cards, I thought I would get a jump on making my Christmas cards. Do you start making Christmas projects in July? My mother-in-law loves gingerbread, so I thought the Gingerbread Man Christmas Present Box Card (SVG, Silhouette) would be perfect for her. There are similar new Christmas Present Box Cards with Santa, Reindeer, Snowman, etc…

Let me show you how easy these box cards are to make.

Step 1.  Decide on cardstock colors and/or pattern papers and cut out all pieces. I like to match the base cardstock as close as possible to the pattern paper I am using. The cut file comes with a tag and three different sentiments. You can use the print and cut feature of your machine to create the tag. Otherwise, a stamped sentiment works well too. Before assembling, I ink the edges of my papers to give the shapes dimension. Here I have the pieces roughly arranged in layers.

Step 2.  Adhere the Flower together, the Mug, and the Gingerbread Man. To get the eyes and mouth just perfect, save the negative piece and use it as a guide. You’ll never again have eyes too wide apart or a crooked smile ever again! Adhere the ribbon and bow paper pieces onto the card base.

Step 3.  Cut a piece of twine and attach to the tag. Using a sharp pick, poke holes in the bow using the dots as a guide. Thread the ends of the twine through so you can tie it off in a knot in the back of the bow. I secured the tag in place with foam tape. (Optionally, you could thread the twine through before adhering the bow front the the bow back.) Glue the side tab to the opposite side to form the card base. Using foam tape, add the flower to the front.

Step 4. Adhere the inserts into the card base placing the mug in front of the gingerbread man.

These cards do fold flat for mailing in a 5×7 envelope. Lori has lots of Christmas card ideas in her shop. Go check them all out and have some fun making your own cards!

Thanks so much for stopping by.
~Marcia

Flower Mason Jar

Hello crafty friends! Aimee here today with a tutorial on a beautiful new SVG file called Box Card Flower Filled Mason Jar (SVG, Silhouette). This box card is really stunning and is a bigger card that measures a tad over 7″ tall and 4″ wide. So, whoever you give this card to, they will most definitely want to put this on display! And like I said, I am here with a tutorial to help you assemble this little beauty!

To start off, you will want to pull your papers together and cut out the pieces. For the base of the card, I used an aqua blue cardstock. The flowers, vine, and butterfly are from the Endless Summer collection and the lid is from the Birthday Boy collection, both from Echo Park Paper.

Next you will want to adhere all of the flowers, vines, and lid to the base pieces. Set the butterfly aside until the box card is completely assembled.

Next step is to take a bone folder and run it along the perforated lines. The 2 middle jar layers should have the flaps folded upwards.

Now comes the assembly part. Flip the card base over so that the front cover (with the lid) is on the right side. Now you will want to adhere the right flap of the flower layer to the base of the card making sure to line up the tab with the perforated line of the main card base.

To check that you have lined up the tab of the flower layer, flip the front of the card base back to see that it is indeed lined up. See picture below.

Next you will adhere the vine layer to the base card making sure to line it up with both the base card and the flower layer.

And the last step is to apply glue to the 3 tabs on the left side of the pieces and adhere the box card together.

Now that the main pieces are adhered together, you can adhere the butterfly to the front and then add some embellishments! For the birthday sentiment, I took this Happy Birthday piece from the Box Card Envelope Birthday Cake Girl (Lori’s SVG, Silhouette). I can’t tell you how much I love this card! I will have to make myself one because it will be difficult to give it away.

That’s all from me today…hope you enjoy all of these fun new box card files!

Aimee