Baby Boy and Birthday Boy cards with Courtney

Hi cut file fans! I’m Courtney Lee from Court’s Crafts here with a couple cute boy cards for you!

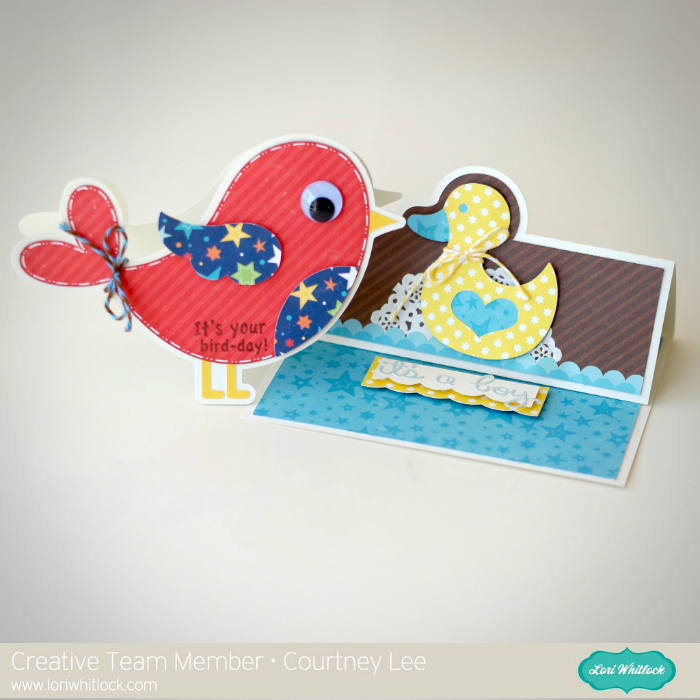
First up I have this awesome ducky easel card. This was so much fun to make. I used Lori Whitlock’s Little Man collection for Echo Park paper for all my paper.

I added some small touches: a border sticker, twine bow, and a doily. Voila. This card is ready for my friend’s new baby boy! I replaced the sentiment with a sticker I had on hand. 🙂

Next up we have this shaped bird card. This cut is so versatile: boy or girl baby card, happy bird-day card, hello friend, congratulations, baby shower card.. really the list goes on. But I needed a little boy’s birthday card so I again grabbed Lori Whitlock’s Little Man collection for Echo Park paper and went to work! 🙂

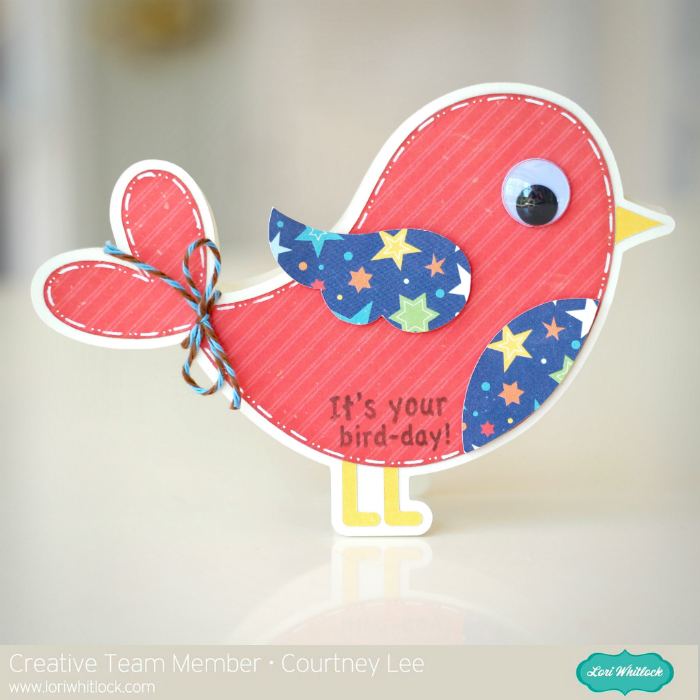
This cut file is fast and simple. I just added a twine bow, some inking, and some faux stitching. Easy peasy and totally cute.

Supplies:

(Lori’s Store) Lori Whitlock’s A2 Bird Card

Lori Whitlock’s Little Man collection for Echo Park paper

All Things Silhouette West Coast Edition!

You asked for it –You got it! Up until this point all of our All Things Silhouette Conferences have been east of the Mississippi!  And our West Coast friends have begged for a conference in California, and we aim to please!  Join us for our first West Coast All Things Silhouette Conference August 20 – 21, 2016 in beautiful Newport Beach CA (http://www.visitnewportbeach.com/) !!!

We have an all-star line-up of presenters already committed to joining us – with new names being added soon!  On the schedule so far, Me! ; Melissa Viscount of Silhouette School Blog;  Karley Hall and Kendall Ehat of Silhouette America; Lisa Potts of The Rhinestone World; Christine Schinagl of Cutting for Business;  Cindy Eckhoff and Mags Bonham!

This is going to be an amazing weekend of learning, inspiration and fun!  You do not want to miss this event!  Sign up here:  http://terrijohnsoncreates.com/all-things-silhouette-california-august-20-21-2016/

I hope to see you there!

Lori

Easter Egg Shaped Box with Corri

Hi everyone!  Corri here today sharing a quick assembly tutuorial for Lori’s new Easter Egg Shaped Box.   This is such a great box and it’s very deep so it could hold a lot of candy!

When you cut the file these are the pieces you’ll have.


I cut the pieces for the top of the box in pink and the bottom in the floral.

First fold in all the glue tabs on the long pieces (sides) of the top and bottom of the box.

Apply glue to the glue tab on the end of the long panel and glue ends together.  Do this for the top and the bottom of the box.  It will look round at this point.

Next, insert one of the egg shaped pieces inside the base of the box.  Form the sides around the liner to create the egg shape.  Apply glue under the glue tabs and glue in place.  This part doesn’t have to be super neat since the next step will hide any excess glue that bleeds out from the edges of the tabs.  Repeat this step with the lid.

Finally, glue the cover panel for both the top and bottom in place to hide the glue tabs and give your box a finished appearance. I cut a piece of acetate by hand to fit behind the egg shaped window before applying the lid cover panel.  I like to apply the glue, put the panel in place and then press down from the inside to help adhere all the way to the edges.

Now you can embellish your box with stickers or additional die cuts.  

Check out the shop for more fun Easter treat containers.

24-Hour Craft Event at HSN!

Hello everyone!  Wednesday, March 16, HSN is having a 24-Hour Craft Event! I love these events because they are full of awesome deals on craft products and you can learn so much by just watching. Be sure to tune in. There will be great crafting products and demos on-air all day long, you don’t want to miss it!

The Today’s Special is the new Anna Griffin Fantastic Flips Card Making Kit with reusable Cutting Dies!  It is full of gorgeous Anna Griffin patterns and embellishments, enough to make 60 beautiful flip cards for all occasions!  Even better, it is being offered at a great discount!  I was fortunate to be able to preview and work with this fabulous kit, take a peek!

Tutorial:

  1. I used my Big Shot and the dies in the kit to cut out the flourish, butterfly and ornamental bracket pieces.
  2. Fold the right side of the card base allowing the bracket shape to flip over.
  3. Fold the front of the card over to complete the card base.
  4. Embellish the card using adhesive to glue the pieces in place as shown in the finished card photos.

This project was a breeze to create with the beautiful pre-printed card base and sentiments. I love the gold foil details on the pieces. The gorgeous dies included in the kit made it easy and fun to customize the card with coordinating elements. I was able to cut the flourish, butterfly, and ornamental bracket piece using the dies and the Big Shot that I already own. This kit is so huge! I was amazed at how many gorgeous pieces are included. I will be able to make tons of cards with it!

Don’t miss out!  Check out this awesome kit today on HSN!  And be sure to tune in to the 24-Hour Craft Event. You’ll be so happy you did!

Lori

This is a sponsored post. I was given product to create a tutorial and write this blog post. But, all feelings expressed in this post are my own.