Double Slider Birthday Card Tutorial

Hello friends, Marcia here today. I have a fun interactive double slider card  tutorial for you today. These are super fun to make as well as receive. There are lots of double slider card designs in the store. I made the Birthday Dog card (SVG, Silhouette) which I thought would appeal to the one year old who received it.

When the “PULL” tab is pulled, the dog’s birthday hat lifts off his head revealing the Happy Birthday sentiment. So cute!

Let me show you how to make one yourself.

1.  Choose your cardstock or pattern papers and cut out all the pieces. I used the Silhouette print and cut feature to print “Happy Birthday” and “PULL” before cutting out these pieces. Assemble the dog, backing the eyes and nose with the black circle, then add the white head and body over the top of the base dog. Top with the dog ears and front paws. Finally add the collar and the heart tag.

2.  Cut 2 of the Pull tabs. Only one needs to have the printed PULL on it. These will be glued together to make the tab stronger. I also printed two white inserts to allow me to sign the inside of the card since the pattern paper is quite busy. Adhere one of the white inserts to the right inside portion of the card.

3.  You will need to cut a strip of plastic packaging and insert it into the two slits as shown on the inside front of the card.

4.  Use a piece of double sided tape to adhere the two ends together. The pull tab is attached to the other side of the double sided tape. Make sure the PULL text faces the front of the card. The plastic strip should be loose enough to slide easily. Test the mechanism.

The front of the card now has a sliding plastic strip between the two slits.

5.  To keep the pull tab from wobbling, add foam tape strips on both sides. Mount the white insert to hide the sliding mechanism using more foam tape.

6.  Attach the Happy Birthday sentiment to a strip of stiff clear plastic. With the pull tab pulled all the way out, use double sided tape to attach the hat with the sentiment to the top of the sliding strip. Mount the dog over the top using foam tape. Test the mechanism again to make sure it doesn’t catch on anything.

7.  Add the cut out stars to the front of the card.

If you get stuck along the way, there is also a YouTube tutorial here.

Check out all the other Double slider cards in the store. Thanks so much for stopping by.

~Marcia

3D Witch Hat

Hello everyone, I have another Halloween décor project to share today! I used the new 3D Witch Hat 3 (Silhouette, SVG) and the Witch Boots (Silhouette, SVG) to create this decorative piece.

Such a fun and easy project to put together, would also look great on a tiered tray, I sized mine a little smaller so it would fit on mine.

Here’s a closer look, I added one of Lori’s 3D Flowers (Silhouette, SVG). I used paper and embellishments from Echo Park’s Halloween Magic Collection, the project was cut out on my Silhouette Cameo 4.

Thanks for stopping by and have a wonderful day!

Tuesday New SVGs & a Free File!

ALL WEEK, this SVG file is FREE with any $1.99 purchase!

Hi Everyone! We have a FREE file with purchase all this week! Simply add this Pumpkin Peek A Boo Box file to your shopping cart along with ANY $1.99+ purchase from the SVG Shop and this file is yours FREE. Be sure to use Coupon Code: JACKOLANTERN (case sensitive) at checkout. This offer is good through next Sunday.

(Your cart must reach at least $4.98 before the coupon will be applied and then $2.99 will be subtracted from your total at checkout. The files will be available for immediate download after you pay for your order by visiting MY ACCOUNT>COMPLETED ORDERS>ORDER DETAILS inside of your account. Only one discount code per order allowed.)

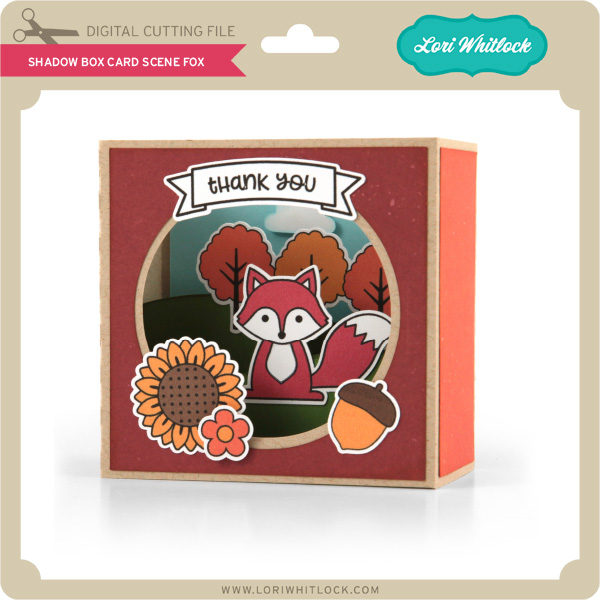
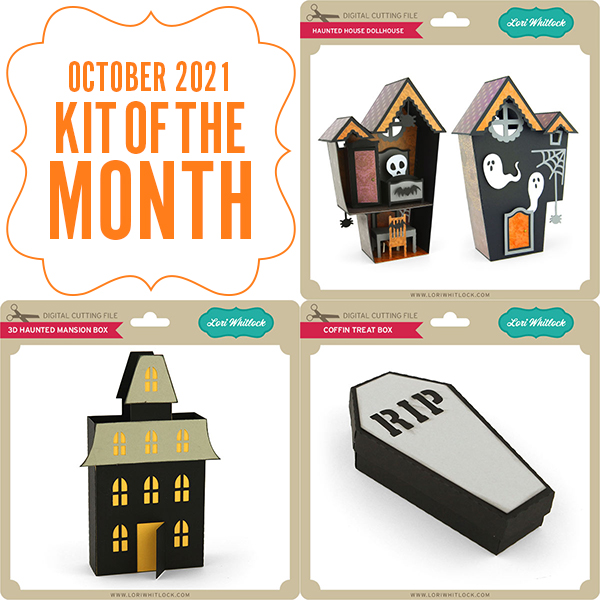
In addition, don’t forget about this special ! You can get this Free Kit of the Month with any $20 purchase (Purchase must be in one transaction.) Simply add the 2021 October Kit of the Month to your shopping cart along with ANY $20.00+ purchase from the SVG Shop and this file is yours FREE. Be sure to use Coupon Code: OCT21KOTM (case sensitive) at checkout. This offer is good through October 31, 2021.

(Your cart must reach at least $27.95 before the coupon will be applied and then $7.95 will be subtracted from your total at checkout. The files will be available for immediate download after you pay for your order by visiting MY ACCOUNT>COMPLETED ORDERS>ORDER DETAILS inside of your account. Only one discount code per order allowed.)
 

Check out the new SVG files releasing this week!  Just like always, the NEW SVG files will be ON SALE 25% OFF through the weekend in the SVG Shop! These downloads include SVG files that may be used with Cricut Explore, Silhouette (Designer Edition upgrade required), Eclips, Brother Scan and Cut, and any other software that will open SVG files. No coupon code necessary, the newly released files are all discounted in the shop! Be sure to go get them while they are on SALE this week.

This week I have a new Side Step Card C.  We also have the new Fun in the Park Collection from Doodlebug Design, and files from Bella Blvd. and Pebbles in My Pocket.

CLICK HERE TO GO TO NEW FILES

Thanks for visiting the blog today! Please let us know if you need any help with your files. We want to make sure everyone is happy with their purchase. Have a great week! SHOP HERE

Spooky Eats Menu Cards

Hi there paper crafting friends!  It’s Michelle Starcher, aka the Bookish Designer, popping in on the blog to share the menu cards I made using Lori’s I love Halloween collection by Echo Park Paper CoLori has a wide selection of cards available in her shop.  This week, I used the Halloween Center Step cards to make menu cards for an upcoming Halloween Party. I used all four of the center step cards available in the Fall Halloween Project Bundle (SVG).  You can find the four cards individually in the Silhouette Design Store (Witch’s Hat, Haunted House, Jack ‘O Lantern, and Ghost).

Although the center step cards are cute as cards, I just knew they would make perfect menu cards to let guests know what they were eating.  I cut and assembled the files, but I didn’t use the sentiments.  Instead, I printed the names of my dishes into white cardstock and trimmed them with my paper trimmer.  I used a 24 point font (Cake Batter), which was the perfect size for the menu cards.  I inked the edges for a little extra texture.

If you’ve read any of my other posts, you know I am a big fan of foam tape.  I used foam tape to adhere the focal shape to the cards and embellished the cards using stickers from the I Love Halloween collection.  In addition, I used foam tape to adhere the menu labels to the cards.

If you are looking for super cute menu cards for all your holiday parties, I suggest you check out Lori’s collection of center step cards.  They make great cards and adorable labels for all your menu items.

Until next time,

Michelle

//z-na.amazon-adsystem.com/widgets/onejs?MarketPlace=US&adInstanceId=7998607c-41e0-46a5-9a17-c3447412360f&storeId=loriwhit03-20

50% Off SVGs Ends at Midnight — Don’t Miss Out!

The Fall Flash Sale in the Lori Whitlock SVG shop ends at midnight!  Get 50% Off All SVGs, Fonts, Pattern Fills and Commercial Licenses when you use code FALLFIFTY at checkout!  Don’t miss out!

Get a head start on your holiday crafting!

Advent Calendar Christmas Tree Gifts
Christmas Advent

SHOP NOW!

** Only one discount code per order allowed. These downloads include SVG files that may be used with Cricut Explore, Silhouette (Designer Edition upgrade required), Eclips, Brother Scan and Cut, and any other software that will open SVG files.

Have a great day!